2021 PEUGEOT BOXER tow
[x] Cancel search: towPage 38 of 212
36
Ease of use and comfort
Electric vehicles
To heat the passenger compartment, you
must use the control panel located next to the
steering wheel.
For more information, refer to the Heating
(Electric) section.
Air conditioning
The air conditioning mode is only operational
when the engine is running.
The air blower must be set to at least 1.
►
Press button
1 to activate/deactivate the
air conditioning system (confirmed by the LED
coming on/going out).
Temperature
► Turn knob 2 to select a position between blue
(cold) and red (warm).
Air flow
► Set control 3 to the desired position to obtain
the necessary air flow for your comfort.
If the air flow control is in
position 0 (system deactivated), thermal
comfort is no longer managed. A slight flow of
air can still be felt, due to the forward
movement of the vehicle.
Air distribution
The distribution of incoming air is directed by
turning the control towards:
the side vents and central vents,
the side vents, central vents and
footwells,
the footwells,
the windscreen, footwells and side
windows,
the windscreen and side windows.
Air intake/Air recirculation
The intake of exterior air prevents the formation
of mist on the windscreen and side windows.
Recirculating the interior air isolates the
passenger compartment from exterior odours
and fumes.
Used simultaneously with the air conditioning
switched on and the setting for the blown air
strength (from 1 to 4), recirculation makes it
possible to achieve the desired ambient air
comfort for both hot and cold settings.
Return to exterior air intake as soon as possible
to avoid deterioration of the air quality and the
formation of mist.
► Put the control in this position to
activate interior air recirculation.
► Put the control in this position to
restore exterior air intake.
Mono-zone automatic air
conditioning
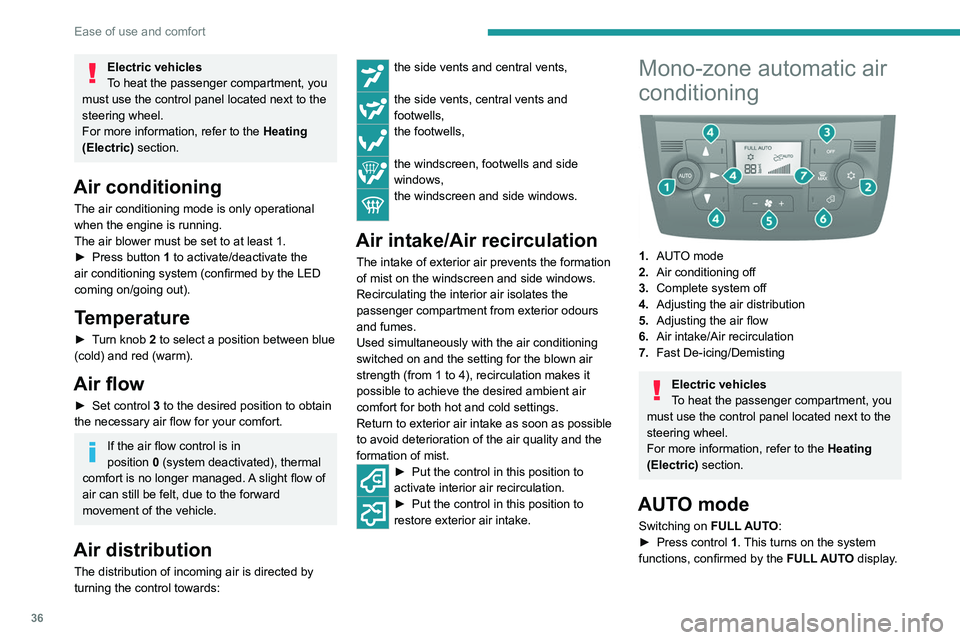
1. AUTO mode
2. Air conditioning off
3. Complete system off
4. Adjusting the air distribution
5. Adjusting the air flow
6. Air intake/Air recirculation
7. Fast De-icing/Demisting
Electric vehicles
To heat the passenger compartment, you
must use the control panel located next to the
steering wheel.
For more information, refer to the Heating
(Electric) section.
AUTO mode
Switching on FULL AUTO:
► Press control 1. This turns on the system
functions, confirmed by the FULL AUTO display.
Page 39 of 212

37
Ease of use and comfort
3This is the normal operating mode for the
automatic air conditioning system.
–
Using the moving ring surrounding the
AUTO
control, adjust the comfort temperature to be
reached according to a scale between: •
HI (High up to ≈32) and
•
LO (Low until ≈16).
The system manages the air distribution, flow
and intake to ensure the comfort equivalent
to the graduation displayed and sufficient air
recirculation in the passenger compartment.
Customisable AUTO mode
In AUTO mode, some settings can be changed:
distribution, air flow, air conditioning and air
intake/recirculation.
The display changes from FULL AUTO to
AUTO.
►
T
o return to fully automatic operation, press
button 1 again. The control panel display
changes from AUTO to
FULL AUTO.
If after manual adjustments, the system cannot
maintain the selected graduation, this will flash
and AUTO will then go out. Press control 1 to
return to the automatic settings.
Air conditioning off
► Press button 2 to switch off the air
conditioning functions. The snowflake goes out
on the display.
Complete switch-off
► Press button 3 to switch off the system. The
LED and the display go out.
Temperature
The scale is between:
– a rise in interior air temperature HI (High),
which heats up to a maximum graduation of 32,
–
a cooling of interior air temperature LO (Low),
which decreases to a graduation
of 16.
Air distribution
► Press one of the buttons 4 to direct the air
flow towards:
the windscreen and front side window
vents (demisting - defrosting windows),
the central and side vents (chest and
face),
the diffusers of the front and rear zones
(footwells).
Combining buttons makes it possible to refine
the air distribution.
Air flow
► Press one of the buttons 5 to increase or
decrease the air flow.
Air intake/Air recirculation
The intake of exterior air prevents the formation
of mist on the windscreen and side windows.
Recirculating the interior air isolates the
passenger compartment from exterior odours
and fumes.
This function allows hot or cold air to be delivered selectively and more quickly.
Return to exterior air intake as soon as possible
to avoid deterioration of the air quality and the
formation of mist.
►
Press button
6 to activate interior air
recirculation. The indicator lamp comes on.
Pressing this button again restores exterior air
intake. The indicator lamp goes off.
Pressing button 1 also restores exterior
air intake. Returning to this position
allows the air in the passenger compartment
to be renewed and demisting. Pressing button
1
again restores the FULL AUTO function.
Heating (Electric)
A thermostatic control panel is used to heat
the passenger compartment, in addition to the
standard controls located on the central console.
The control panel is located next to the steering
wheel, below the MODE control panel.
Page 41 of 212
39
Ease of use and comfort
3Additional rear ventilation
This system is complementary
to the standard passenger
compartment ventilation
equipment.
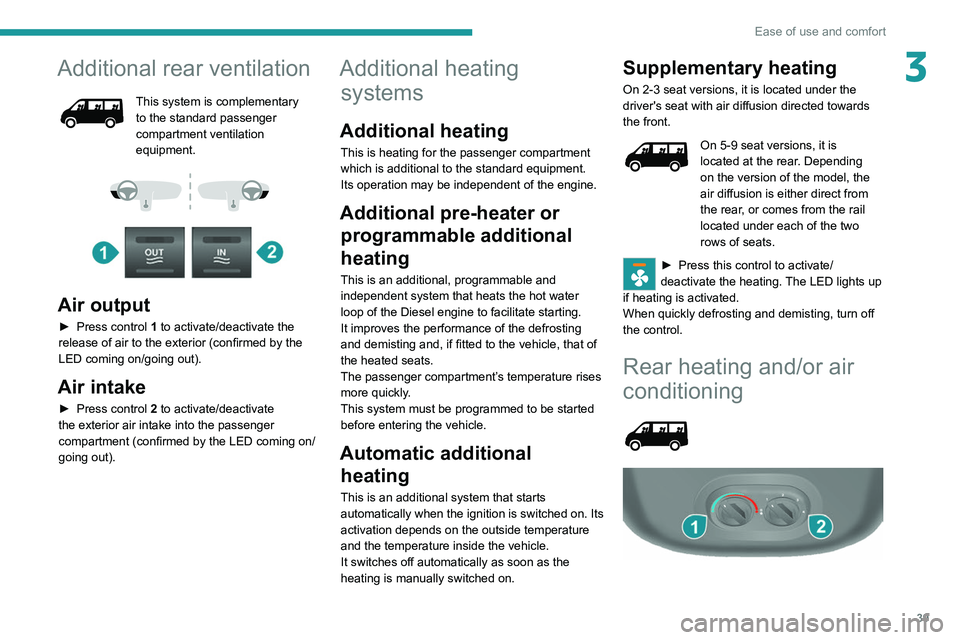
Air output
► Press control 1 to activate/deactivate the
release of air to the exterior (confirmed by the
LED coming on/going out).
Air intake
► Press control 2 to activate/deactivate
the exterior air intake into the passenger
compartment (confirmed by the LED coming on/
going out).
Additional heating systems
Additional heating
This is heating for the passenger compartment
which is additional to the standard equipment.
Its operation may be independent of the engine.
Additional pre-heater or
programmable additional
heating
This is an additional, programmable and
independent system that heats the hot water
loop of the Diesel engine to facilitate starting.
It improves the performance of the defrosting
and demisting and, if fitted to the vehicle, that of
the heated seats.
The passenger compartment’s temperature rises
more quickly.
This system must be programmed to be started
before entering the vehicle.
Automatic additional heating
This is an additional system that starts
automatically when the ignition is switched on. Its
activation depends on the outside temperature
and the temperature inside the vehicle.
It switches off automatically as soon as the
heating is manually switched on.
Supplementary heating
On 2-3 seat versions, it is located under the
driver's seat with air diffusion directed towards
the front.
On 5-9 seat versions, it is
located at the rear. Depending
on the version of the model, the
air diffusion is either direct from
the rear, or comes from the rail
located under each of the two
rows of seats.
► Press this control to activate/
deactivate the heating. The LED lights up
if heating is activated.
When quickly defrosting and demisting, turn off
the control.
Rear heating and/or air
conditioning
Page 45 of 212
43
Ease of use and comfort
3With Stop & Start, when the rear screen
demisting is switched on, the STOP
mode is not available.
Cab layout
Make sure you do not leave any item in
the passenger compartment which could
act like a magnifying glass under the effect of
the sun's rays and cause a fire - risk of fire or
damage to interior surfaces!
Sun visor
► To avoid glare from ahead, fold the sun visor
down.
Pockets are provided
in the sun visors for storing
toll cards, tickets, etc.
Central storage
compartment
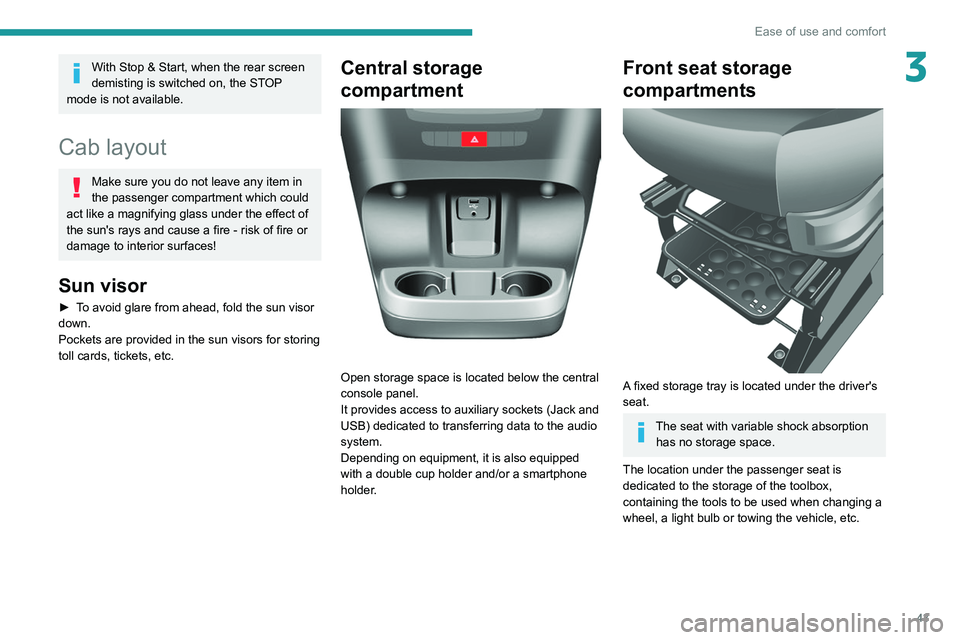
Open storage space is located below the central
console panel.
It provides access to auxiliary sockets (Jack and
USB) dedicated to transferring data to the audio
system.
Depending on equipment, it is also equipped
with a double cup holder and/or a smartphone
holder.
Front seat storage
compartments
A fixed storage tray is located under the driver's
seat.
The seat with variable shock absorption has no storage space.
The location under the passenger seat is
dedicated to the storage of the toolbox,
containing the tools to be used when changing a
wheel, a light bulb or towing the vehicle, etc.
Page 49 of 212
47
Ease of use and comfort
3Rear fittings
Stowing rings
Stowing rings are installed on the floor to fix and
secure loads: 8, for vehicles of L1 and L2 length;
10, for vehicles of L3 and L4 length.
Two additional rings are installed on the partition
behind the cab.
Maximum load: 500 kg.
As a safety precaution in case of sharp braking, you are advised to place heavy
objects as far forwards towards the cab as
possible.
Support for stowing rail
Supports for securing a stowing rail are available
above the trims, on each side of the vehicle.
Maximum load: 200 kg.
Side trim
The interior sections of the side walls are fitted
with loading protection trims.
12 volt socket
Maximum power: 180 W.
The connection of an electrical device not approved by PEUGEOT, such as a
USB charger, may adversely affect the
operation of vehicle electrical systems,
causing faults such as poor radio reception or
interference with displays in the screens.
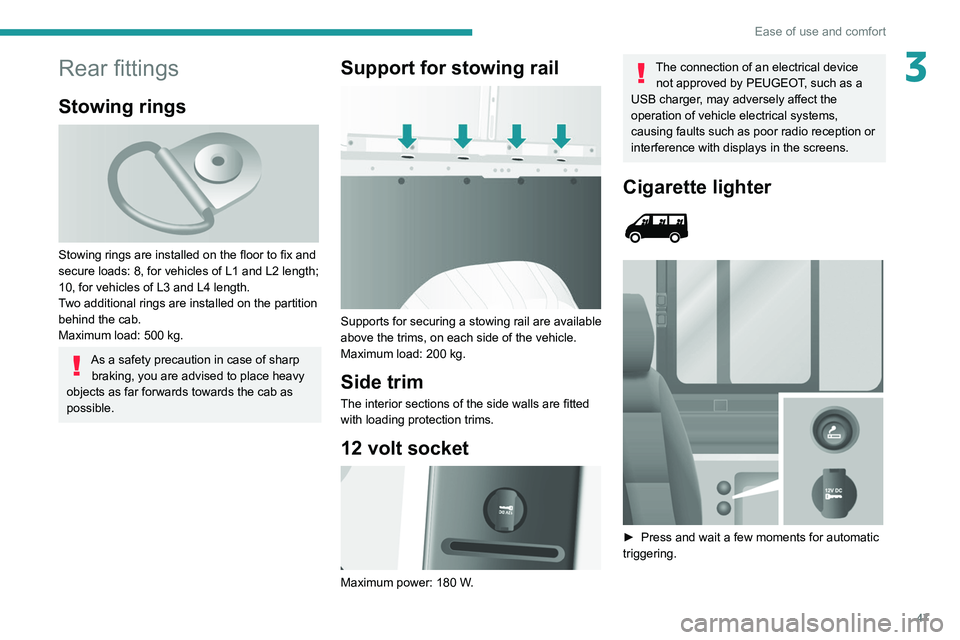
Cigarette lighter
► Press and wait a few moments for automatic
triggering.
Page 51 of 212
49
Ease of use and comfort
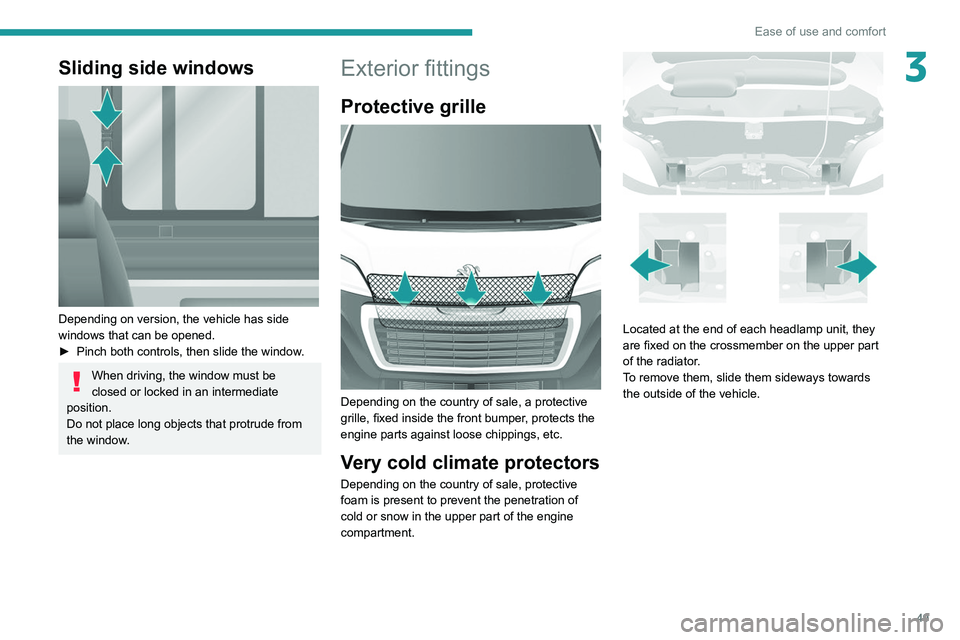
3Sliding side windows
Depending on version, the vehicle has side
windows that can be opened.
►
Pinch both controls, then slide the window
.
When driving, the window must be
closed or locked in an intermediate
position.
Do not place long objects that protrude from
the window.
Exterior fittings
Protective grille
Depending on the country of sale, a protective
grille, fixed inside the front bumper, protects the
engine parts against loose chippings, etc.
Very cold climate protectors
Depending on the country of sale, protective
foam is present to prevent the penetration of
cold or snow in the upper part of the engine
compartment.
Located at the end of each headlamp unit, they
are fixed on the crossmember on the upper part
of the radiator.
To remove them, slide them sideways towards
the outside of the vehicle.
Page 53 of 212
51
Lighting and visibility
4Lighting control stalk
In some weather conditions (e.g. low
temperature or humidity), the presence
of misting on the internal surface of the glass
of the headlamps and rear lamps is normal; it
disappears after the lamps have been on for a
few minutes.
Travelling abroad
If planning to use your vehicle in a
country that drives on the other side of the
road, the dipped beam headlamps must be
adjusted to avoid dazzling oncoming drivers.
Consult a PEUGEOT dealer or a qualified
workshop.
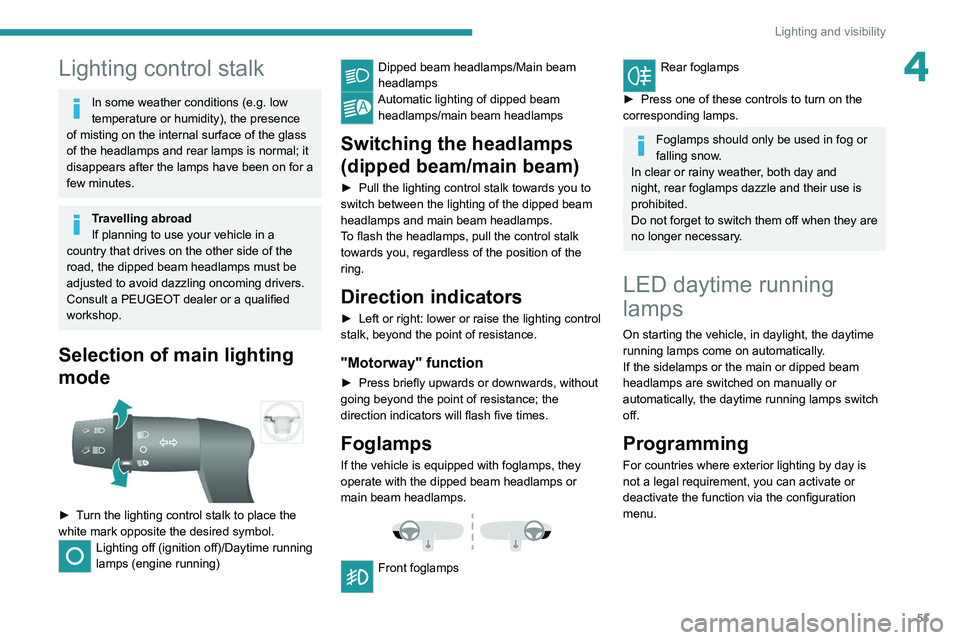
Selection of main lighting
mode
► Turn the lighting control stalk to place the
white mark opposite the desired symbol.
Lighting off (ignition off)/Daytime running
lamps (engine running)
Dipped beam headlamps/Main beam
headlamps
Automatic lighting of dipped beam headlamps/main beam headlamps
Switching the headlamps
(dipped beam/main beam)
► Pull the lighting control stalk towards you to
switch between the lighting of the dipped beam
headlamps and main beam headlamps.
T
o flash the headlamps, pull the control stalk
towards you, regardless of the position of the
ring.
Direction indicators
► Left or right: lower or raise the lighting control
stalk, beyond the point of resistance.
"Motorway" function
► Press briefly upwards or downwards, without
going beyond the point of resistance; the
direction indicators will flash five times.
Foglamps
If the vehicle is equipped with foglamps, they
operate with the dipped beam headlamps or
main beam headlamps.
Front foglamps
Rear foglamps
►
Press one of these controls to turn on the
corresponding lamps.
Foglamps should only be used in fog or
falling snow.
In clear or rainy weather, both day and
night, rear foglamps dazzle and their use is
prohibited.
Do not forget to switch them off when they are
no longer necessary.
LED daytime running
lamps
On starting the vehicle, in daylight, the daytime
running lamps come on automatically.
If the sidelamps or the main or dipped beam
headlamps are switched on manually or
automatically, the daytime running lamps switch
off.
Programming
For countries where exterior lighting by day is
not a legal requirement, you can activate or
deactivate the function via the configuration
menu.
Page 54 of 212
52
Lighting and visibility
Automatic illumination of headlamps
If your vehicle is fitted with this function, the
dipped beam headlamps are switched on
automatically if the light is poor.
In fog or snow, the sunshine sensor may
detect sufficient light. In this case, the
lighting will not come on automatically. If
necessary, you must switch on the dipped
beam headlamps manually.
They are switched off when the light returns
to a sufficient level.
Do not cover the sunshine sensor at the top
centre of the windscreen.
You can adjust the sensitivity of the sunshine sensor.
For more information on Vehicle
configuration , refer to the corresponding
section.
Activation
► Turn the ring to this position.
The lamps go out automatically when the ignition
is switched off.
Guide-me-home lighting
If your vehicle is equipped: when you leave your
vehicle, the dipped beam headlamps remain on
for the selected period of time (e.g. leaving a car
park).
With the ignition off or the
key in the STOP position
► Within 2 minutes of switching off the engine,
turn the ignition key to the ST OP position or
remove the key.
►
Pull the lighting control stalk towards the
steering wheel.
This indicator lamp lights up on the
dashboard.
Each action on the lighting control stalk, pulled
towards the steering wheel, extends the
guide-me-home lighting by 30 seconds up to
approximately 3 minutes. Once this time has
elapsed, the lamps go out automatically.
Deactivate this control by holding the control
stalk pulled towards the steering wheel for more
than 2 seconds.
Automatic headlamp dipping
System which automatically switches the main
beam headlamps on according to the brightness
and driving conditions, using a camera located at
the top of the windscreen.
This system is a driving aid.
The driver remains responsible for
the vehicle's lighting, its correct use for the
prevailing conditions of light, visibility and
traffic, as well as for observation of driving
and vehicle regulations.
Activation
► Turn the lighting control stalk ring to
this position.
► Set the function by pressing the
MODE button: select "ON" in the
"Automatic main beam" menu.
For more information on Vehicle
configuration , refer to the corresponding
section.
►
Flash the headlamps (going beyond the point
of resistance) to activate the function.