2021 PEUGEOT BOXER door lock
[x] Cancel search: door lockPage 4 of 212

2
Contents
■
Overview
■
Eco-driving
1InstrumentsInstrument panel 8
Warning and indicator lamps 9
Indicators 13
Vehicle configuration (MODE) 15
Touch screen audio and multimedia system 21
Setting the date and time 21
Trip computer 22
Trip computer 22
2AccessKey 23
Remote control 23
Front doors 26
Sliding side door 26
Rear doors 27
Alarm 27
Electric windows 28
3Ease of use and comfortFront seats 30
Front bench seat 31
Rear seats 32
Rear bench seat 32
Steering wheel adjustment 33
Mirrors 34
Heating and Ventilation 35
Heating/Manual air conditioning 35
Automatic air conditioning 36
Heating (Electric) 37
Additional heating systems 39
Rear heating/air conditioning 39
Additional programmable heating 40
Front demist - defrost 42
Rear screen de-icing 42
Cab layout 43
Rear fittings 47
Exterior fittings 49
4Lighting and visibilityLighting control stalk 51
Direction indicators 51
LED daytime running lamps 51
Automatic headlamp dipping 52
Headlamp beam height adjustment 54
Wiper control stalk 54
Changing a wiper blade 55
5SafetyGeneral safety recommendations 56
Hazard warning lamps 56
Horn 56
Pedestrian horn (Electric) 57
Electronic stability control (ESC) 57
Seat belts 60
Airbags 62
Child seats 63
Deactivating the front passenger airbag 65
ISOFIX seats 66
Child lock 68
6DrivingDriving recommendations 69
Starting-switching off the engine 72
Battery standby system 73
Parking brake 74
Gearbox 74
Drive selector (Electric) 75
Gear shift indicator 75
Stop & Start 76
Hill start assist 77
Tyre under-inflation detection 78
Pneumatic suspension 79
Driving and manoeuvring aids - General
recommendations
80
Road signs recognition 82
Speed limiter 83
Cruise control - Specific recommendations 85
Cruise control 85
Lane departure warning system 86
Blind spot monitoring with trailer detection 89
Active Safety Brake with Collision Risk Alert and
Intelligent emergency braking assistance
90
Rear parking sensors 93
Reversing camera 94
7Practical informationFuel 96
Compatibility of fuels 97
Charging system (Electric) 97
Charging the traction battery (Electric) 101
Snow chains 103
Towing a trailer 104
Towbar with quickly detachable towball 104
Roof-mounted carrying system 107
Bonnet 107
Page 12 of 212
10
Instruments
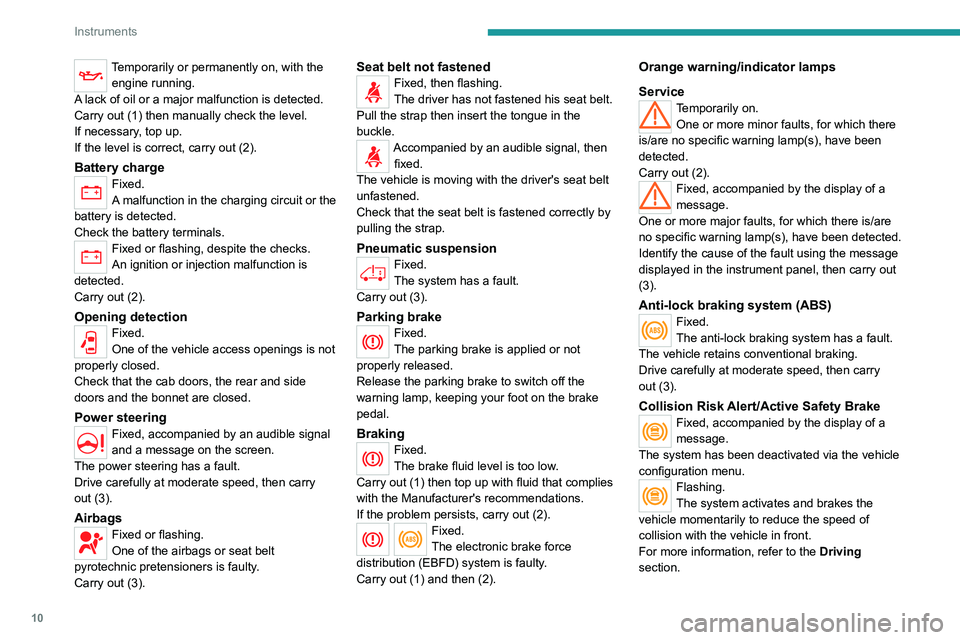
Temporarily or permanently on, with the engine running.
A lack of oil or a major malfunction is detected.
Carry out (1) then manually check the level.
If necessary, top up.
If the level is correct, carry out (2).
Battery chargeFixed.
A malfunction in the charging circuit or the
battery is detected.
Check the battery terminals.
Fixed or flashing, despite the checks.
An ignition or injection malfunction is
detected.
Carry out (2).
Opening detectionFixed.
One of the vehicle access openings is not
properly closed.
Check that the cab doors, the rear and side
doors and the bonnet are closed.
Power steering
Fixed, accompanied by an audible signal
and a message on the screen.
The power steering has a fault.
Drive carefully at moderate speed, then carry
out (3).
AirbagsFixed or flashing.
One of the airbags or seat belt
pyrotechnic pretensioners is faulty.
Carry out (3).
Seat belt not fastenedFixed, then flashing.
The driver has not fastened his seat belt.
Pull the strap then insert the tongue in the
buckle.
Accompanied by an audible signal, then fixed.
The vehicle is moving with the driver's seat belt
unfastened.
Check that the seat belt is fastened correctly by
pulling the strap.
Pneumatic suspensionFixed.
The system has a fault.
Carry out (3).
Parking brakeFixed.
The parking brake is applied or not
properly released.
Release the parking brake to switch off the
warning lamp, keeping your foot on the brake
pedal.
BrakingFixed.
The brake fluid level is too low.
Carry out (1) then top up with fluid that complies
with the Manufacturer's recommendations.
If the problem persists, carry out (2).
Fixed.
The electronic brake force
distribution
(EBFD) system is faulty.
Carry out (1) and then (2).
Orange warning/indicator lamps
Service
Temporarily on. One or more minor faults, for which there
is/are no specific warning lamp(s), have been
detected.
Carry out (2).
Fixed, accompanied by the display of a
message.
One or more major faults, for which there is/are
no specific warning lamp(s), have been detected.
Identify the cause of the fault using the message
displayed in the instrument panel, then carry out
(3).
Anti-lock braking system (ABS)Fixed.
The anti-lock braking system has a fault.
The vehicle retains conventional braking.
Drive carefully at moderate speed, then carry
out (3).
Collision Risk Alert/Active Safety BrakeFixed, accompanied by the display of a
message.
The system has been deactivated via the vehicle
configuration menu.
Flashing.
The system activates and brakes the
vehicle momentarily to reduce the speed of
collision with the vehicle in front.
For more information, refer to the Driving
section.
Page 19 of 212
17
Instruments
1
Menu...
Press... Sub-menu...Press... Select...Validate
and exitAllows you to...
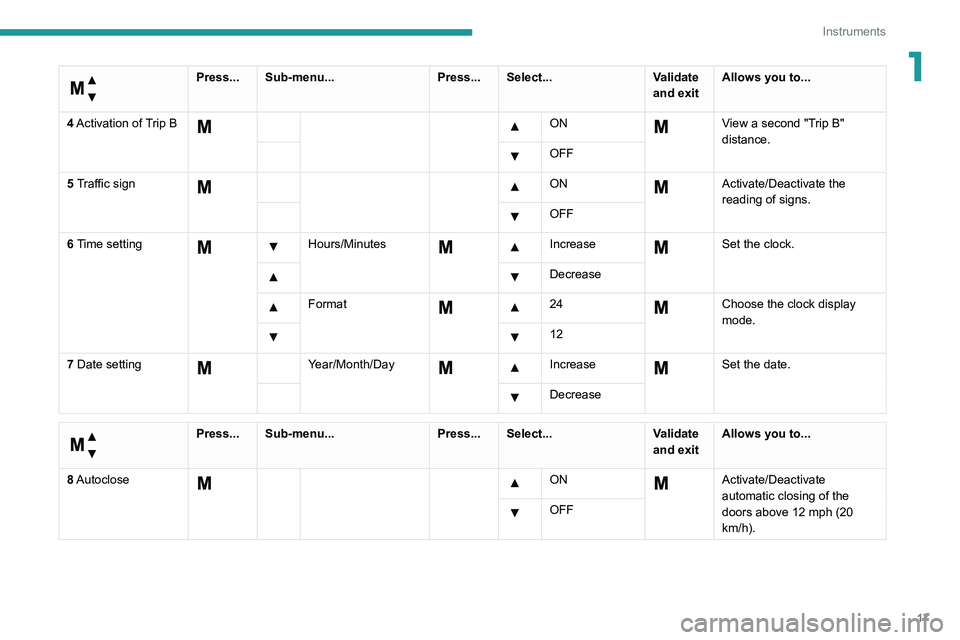
4 Activation of Trip B
ON View a second "Trip B"
distance.
OFF
5 Traffic sign
ON Activate/Deactivate the
reading of signs.
OFF
6 Time setting
Hours/Minutes Increase Set the clock.
Decrease
Format 24Choose the clock display
mode.
12
7 Date setting
Year/Month/Day Increase Set the date.
Decrease
Menu…
Press... Sub-menu... Press... Select...Validate
and exitAllows you to...
8 Autoclose
ON Activate/Deactivate
automatic closing of the
doors above 12 mph (20
km/h).
OFF
Page 23 of 212

21
Instruments
1Touch screen audio and telematics system
This audio system control panel, located in the
centre of the dashboard, gives access to menus
in order to customise some equipment.
The corresponding information is displayed in
the touch screen.
It is available in 9 languages: German, English,
Spanish, French, Italian, Dutch, Polish,
Portuguese and Turkish.
For safety reasons, some menus are only
accessible with the ignition off.
Provides access to the “Settings” menu.
Allows you to scroll up in a menu or
increase a value.
Allows you to scroll down in a menu or decrease a value.
"Settings" menu
1. "Display"
2. "Voice commands"
3. “Clock and Date”
4. "Safety/Assistance"
5. “Lights”
6. “Doors & locking”
7. "Audio"
8. "Telephone/Bluetooth"
9. “Radio setting”
10. "Restore Settings" to return to the
manufacturer’s default settings.
11 . “Delete pers. data“ to delete all your
personal data, related to the Bluetooth
equipment, in the audio system.
For more information on audio,
telephone, radio and navigation, refer to
the corresponding sections.
The settings in sub-menus 4, 5 and 6
vary depending on the equipment
installed on the vehicle.
From the "Display" sub-menu, it is possible to:
–
select "Languages" and choose one of the
languages mentioned above,
–
select "Unit of measurement" and set the
consumption (mpg, l/100 km), distances (miles,
km) and temperature (°F
, °C), –
select "T
rip B display" to activate or deactivate
trip B of the trip computer (On, Off).
From the "Safety/Assistance" sub-menu, it is
possible to:
–
select "Parkview Camera", then "Reversing
camera" to activate or deactivate its use (On,
Off),
–
select “Parkview Camera", then "Camera
delay" to activate or deactivate the maintaining
of the display for 10 seconds or up to 1
1 mph (18
km/h) (On, Off),
–
select "T
raffic Sign" to activate or deactivate
its use (On, Off),
–
select "Passenger airbag" to activate or
deactivate its use (On, Off).
From the "Lights" sub-menu, it is possible to:
–
select "Daytime running lamps" to activate or
deactivate their use (On, Off),
–
select "Auto. main beam headlamps" to
activate or deactivate its use (On, Off),
–
select "Headlamp sensor" to adjust its
sensitivity (1, 2, 3).
From the "Doors & locking" sub-menu, it is
possible to:
–
select "Autoclose" to activate or deactivate its
use (On, Off).
Setting the date and time
Using the MODE control panel
► Press the “MODE” button.
Page 25 of 212
23
Access
2Key
This locks and unlocks the vehicle's doors,
opens and closes the fuel filler cap, as well as
switching the engine on and off.
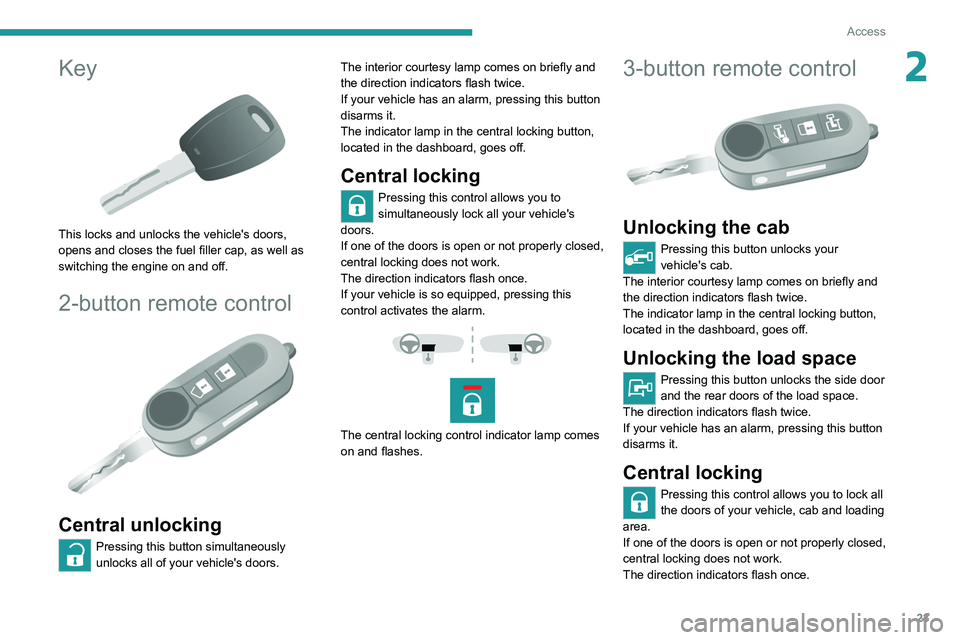
2-button remote control
Central unlocking
Pressing this button simultaneously
unlocks all of your vehicle's doors. The interior courtesy lamp comes on briefly and
the direction indicators flash twice.
If your vehicle has an alarm, pressing this button
disarms it.
The indicator lamp in the central locking button,
located in the dashboard, goes off.
Central locking
Pressing this control allows you to
simultaneously lock all your vehicle's
doors.
If one of the doors is open or not properly closed,
central locking does not work.
The direction indicators flash once.
If your vehicle is so equipped, pressing this
control activates the alarm.
The central locking control indicator lamp comes
on and flashes.
3-button remote control
Unlocking the cab
Pressing this button unlocks your
vehicle's cab.
The interior courtesy lamp comes on briefly and
the direction indicators flash twice.
The indicator lamp in the central locking button,
located in the dashboard, goes off.
Unlocking the load space
Pressing this button unlocks the side door
and the rear doors of the load space.
The direction indicators flash twice.
If your vehicle has an alarm, pressing this button
disarms it.
Central locking
Pressing this control allows you to lock all
the doors of your vehicle, cab and loading
area.
If one of the doors is open or not properly closed,
central locking does not work.
The direction indicators flash once.
Page 26 of 212
24
Access
If your vehicle is so equipped, pressing this
control activates the alarm.
The central locking control indicator lamp comes
on and flashes.
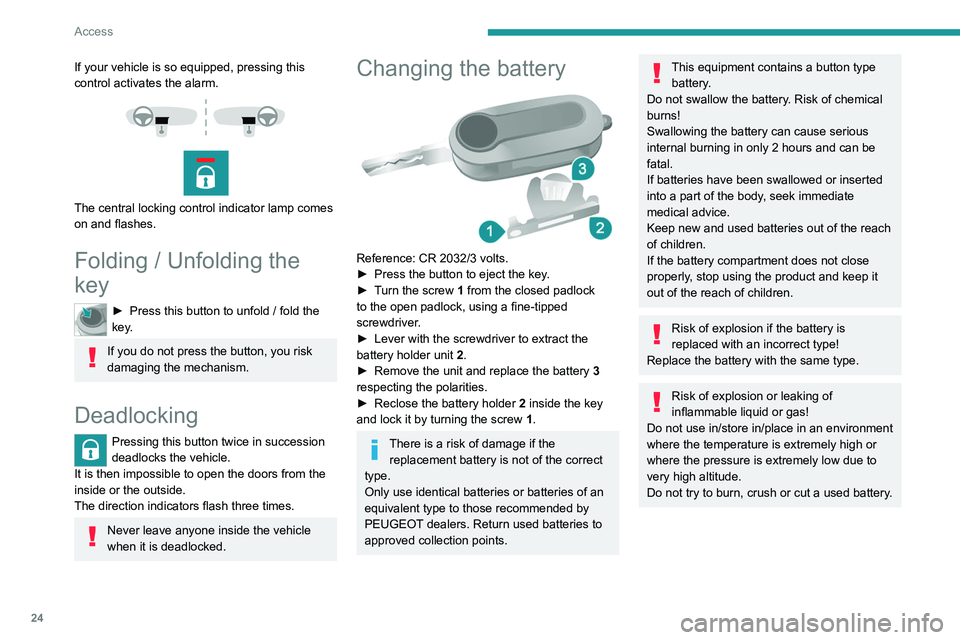
Folding / Unfolding the
key
► Press this button to unfold / fold the
key .
If you do not press the button, you risk
damaging the mechanism.
Deadlocking
Pressing this button twice in succession
deadlocks the vehicle.
It is then impossible to open the doors from the
inside or the outside.
The direction indicators flash three times.
Never leave anyone inside the vehicle
when it is deadlocked.
Changing the battery
Reference: CR 2032/3 volts.
► Press the button to eject the key .
►
T
urn the screw 1 from the closed padlock
to the open padlock, using a fine-tipped
screwdriver.
►
Lever with the screwdriver to extract the
battery holder unit
2
.
►
Remove the unit and replace the battery 3
respecting the polarities.
►
Reclose the battery holder 2
inside the key
and lock it by turning the screw 1.
There is a risk of damage if the
replacement battery is not of the correct
type.
Only use identical batteries or batteries of an
equivalent type to those recommended by
PEUGEOT dealers. Return used batteries to
approved collection points.
This equipment contains a button type battery.
Do not swallow the battery. Risk of chemical
burns!
Swallowing the battery can cause serious
internal burning in only 2 hours and can be
fatal.
If batteries have been swallowed or inserted
into a part of the body, seek immediate
medical advice.
Keep new and used batteries out of the reach
of children.
If the battery compartment does not close
properly, stop using the product and keep it
out of the reach of children.
Risk of explosion if the battery is
replaced with an incorrect type!
Replace the battery with the same type.
Risk of explosion or leaking of
inflammable liquid or gas!
Do not use in/store in/place in an environment
where the temperature is extremely high or
where the pressure is extremely low due to
very high altitude.
Do not try to burn, crush or cut a used battery.
Page 27 of 212
25
Access
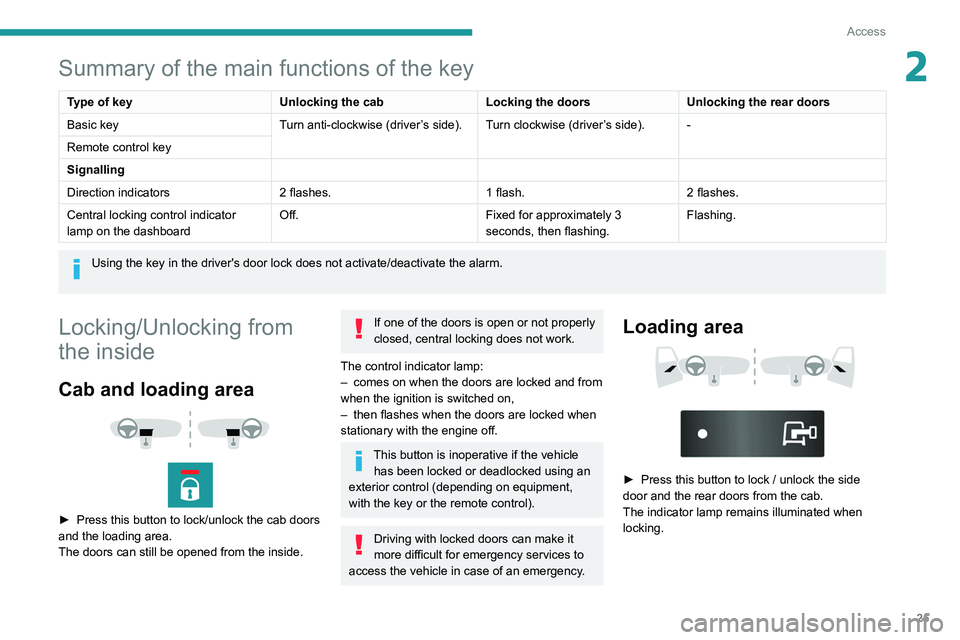
2Summary of the main functions of the key
Type of keyUnlocking the cabLocking the doorsUnlocking the rear doors
Basic key Turn anti-clockwise (driver’s side). Turn clockwise (driver’s side). -
Remote control key
Signalling
Direction indicators 2 flashes.1 flash.2 flashes.
Central locking control indicator
lamp on the dashboard Off.
Fixed for approximately 3
seconds, then flashing.Flashing.
Using the key in the driver's door lock does not activate/deactivate the alarm.
Locking/Unlocking from
the inside
Cab and loading area
► Press this button to lock/unlock the cab doors
and the loading area.
The doors can still be opened from the inside.
If one of the doors is open or not properly
closed, central locking does not work.
The control indicator lamp:
–
comes on when the doors are locked and from
when the ignition is switched on,
–
then flashes when the doors are locked when
stationary with the engine off.
This button is inoperative if the vehicle has been locked or deadlocked using an
exterior control (depending on equipment,
with the key or the remote control).
Driving with locked doors can make it
more difficult for emergency services to
access the vehicle in case of an emergency.
Loading area
► Press this button to lock / unlock the side
door and the rear doors from the cab.
The indicator lamp remains illuminated when
locking.
Page 28 of 212
26
Access
Anti-intrusion security
When the vehicle is started, the system locks the
cab and load space doors automatically when
you reach approximately 12 mph (20 km/h).
If none of the doors is opened during the journey,
the locking remains active.
Activation/deactivation of the function
This function can be set using the MODE
button: select "ON" or "OFF" in the
"Autoclose" menu.
For more information on Vehicle
configuration (MODE) , refer to the
corresponding section.
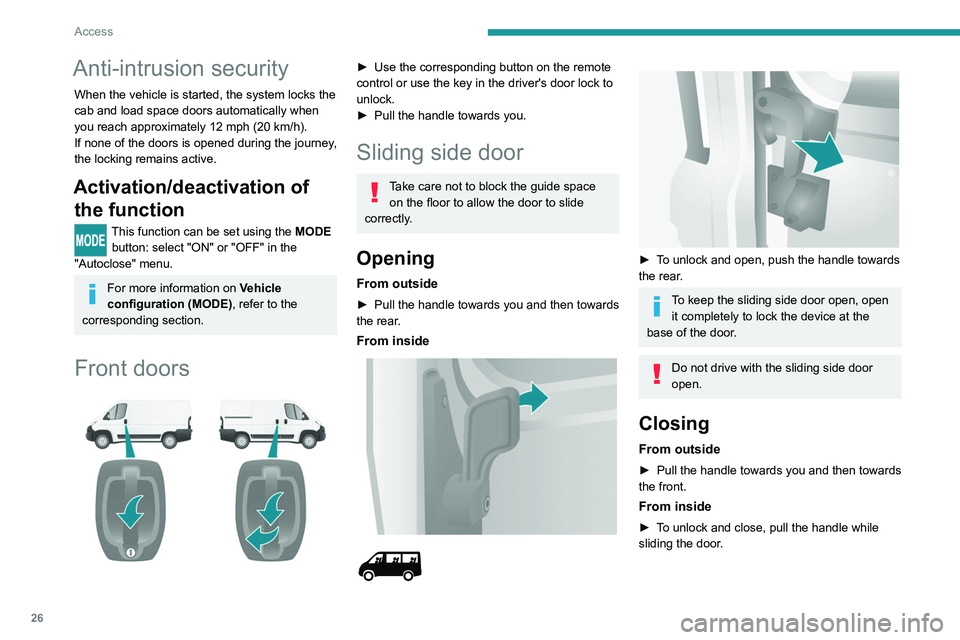
Front doors
► Use the corresponding button on the remote
control or use the key in the driver's door lock to
unlock.
►
Pull the handle towards you.
Sliding side door
Take care not to block the guide space on the floor to allow the door to slide
correctly.
Opening
From outside
► Pull the handle towards you and then towards
the rear .
From inside
► To unlock and open, push the handle towards
the rear.
To keep the sliding side door open, open it completely to lock the device at the
base of the door.
Do not drive with the sliding side door
open.
Closing
From outside
► Pull the handle towards you and then towards
the front.
From inside
► To unlock and close, pull the handle while
sliding the door.