2021 PEUGEOT BOXER inflation pressure
[x] Cancel search: inflation pressurePage 80 of 212

78
Driving
Operation
With the brake pedal and clutch pedal pressed,
from the time you release the brake pedal,
without using the parking brake, you have
approximately 2 seconds to move off before the
vehicle starts to roll back.
During the moving off phase, the function is
deactivated automatically, gradually releasing
the braking pressure. During this phase, you
may hear the typical mechanical brake release
noise, signalling the imminent movement of the
vehicle.
Do not leave the vehicle while it is being
held temporarily by hill start assist.
If you need to get out of the vehicle with
the engine running, apply the parking brake
manually then ensure that the parking brake
indicator lamp is on. Hill start assist is deactivated in the following
situations:
–
when the clutch pedal is released,
–
when the parking brake is applied,
–
when the engine is switched off,
–
if the engine stalls.
Malfunction
In the event of a malfunction, this warning
lamp lights up on the instrument panel,
accompanied by the display of a message and
an audible signal.
Have it checked by a PEUGEOT dealer or a
qualified workshop.
Tyre under-inflation detection
System which automatically checks the
pressures of the tyres while driving.
The system continuously monitors the pressures
of the four tyres, as soon as the vehicle is
moving.
A pressure sensor is located in the valve of each
tyre (except the spare wheel).
The system triggers an alert as soon as it
detects a drop in the inflation pressure of one or
more tyres.
The under-inflation detection system
does not replace the need for vigilance
on the part of the driver.
This system does not avoid the need to
regularly check the tyre pressures (including
the spare wheel) as well as before a long
journey.
Driving with under-inflated tyres, particularly
in adverse conditions (heavy load, high
speed, long journey):
–
worsens road-holding,
–
lengthens braking distances,
–
causes premature wear of the tyres,
–
increases energy consumption.
The inflation pressures defined for the vehicle can be found on the tyre pressure
label.
Tyre pressures should be checked when the
tyres are "cold" (vehicle stopped for 1 hour or
after a journey of less than 6 miles (10 km) at
moderate speeds). Otherwise, add 0.3 bar to
the pressures shown on the label.
For more information on Identification
markings, including the tyre pressure label,
refer to the corresponding section.
The tyre pressure measurement unit can be configured via the MODE button: in the
"Tyre pressure" menu, select "psi/bar/kPa".
For more information on Vehicle configuration
(MODE), refer to the corresponding section.
Page 81 of 212

79
Driving
6Under-inflation alert
This is signalled by the fixed illumination of this warning lamp, accompanied by an
audible signal and, depending on equipment, the
display of a message.
If a fault is detected in just one of the tyres, the
symbol or message displayed, depending on
equipment, will identify it.
►
Reduce speed immediately
, avoid excessive
steering movements and avoid sudden braking.
►
Stop the vehicle as soon as it is safe to do
so.
The loss of pressure detected may not always cause visible deformation of the
tyre.
Do not rely on just a visual check.
►
Using a compressor
, such as the one in
the temporary puncture repair kit, check the
pressures of all four tyres when cold.
►
If it is not possible to carry out this check
immediately
, drive carefully at reduced speed.
►
In the event of a puncture, use the
temporary puncture repair kit or the spare wheel
(depending on equipment).
Driving too slowly may not ensure
optimum monitoring.
The alert is not immediately triggered in the
event of a sudden loss of pressure or tyre
blow-out. This is because analysis of the
values read by the wheel's speed sensors
can take several minutes.
The alert may be delayed at speeds below
25 mph (40 km/h), or when adopting a sporty
driving mode.
The alert is kept active until the tyre/tyres
concerned is/are reinflated, repaired or
replaced.
Malfunction
The flashing and then fixed illumination of this warning lamp, accompanied by the
illumination of the service warning lamp, and
depending on equipment, the display of a
message, indicates a fault with the system.
In this case, the tyre pressures are no longer
monitored.
This alert is also displayed if at least one wheel is not equipped with a sensor.
Contact a PEUGEOT dealer or a qualified
workshop to have the system checked or,
following a puncture, to have a tyre refitted to the
original rim, equipped with a sensor.
Pneumatic suspension
If the vehicle is equipped with pneumatic
suspension, it is possible to change the height
of the rear sill, in order to facilitate loading or
unloading.
There is a normal sill level, as well as 3 higher
levels (from +1 to +3) and 3 lower levels (from
-1 to -3). Each level reached is displayed on the
instrument panel display screen.
Page 115 of 212

11 3
Practical information
7Manual gearbox
The gearbox does not require any maintenance (no oil change).
Brake pads
Brake wear depends on the style of
driving, particularly in the case of vehicles
used in town, over short distances. It may be
necessary to have the condition of the brakes
checked, even between vehicle services.
Unless there is a leak in the circuit, a drop in the
brake fluid level indicates that the brake pads
are worn.
If this warning lamp comes on, have the
brake pads checked by a PEUGEOT
dealer or a qualified workshop.
After washing the vehicle, moisture, or in wintry conditions, ice can form on the
brake discs and pads: braking efficiency may
be reduced. Gently dab the brakes to dry and
defrost them.
Brake disc wear
For information on checking brake disc
wear, contact a PEUGEOT dealer or a
qualified workshop.
Manual parking brake
If you notice excessive brake lever travel
or decreased effectiveness, the parking brake must be adjusted, even between two
services.
This system must be checked by a PEUGEOT
dealer or a qualified workshop.
Diesel fuel filter
The Diesel fuel filter is located in the engine
compartment near the brake fluid reservoir.
If this warning lamp comes on, bleed the
filter.
You can also bleed it regularly at each engine oil
change.
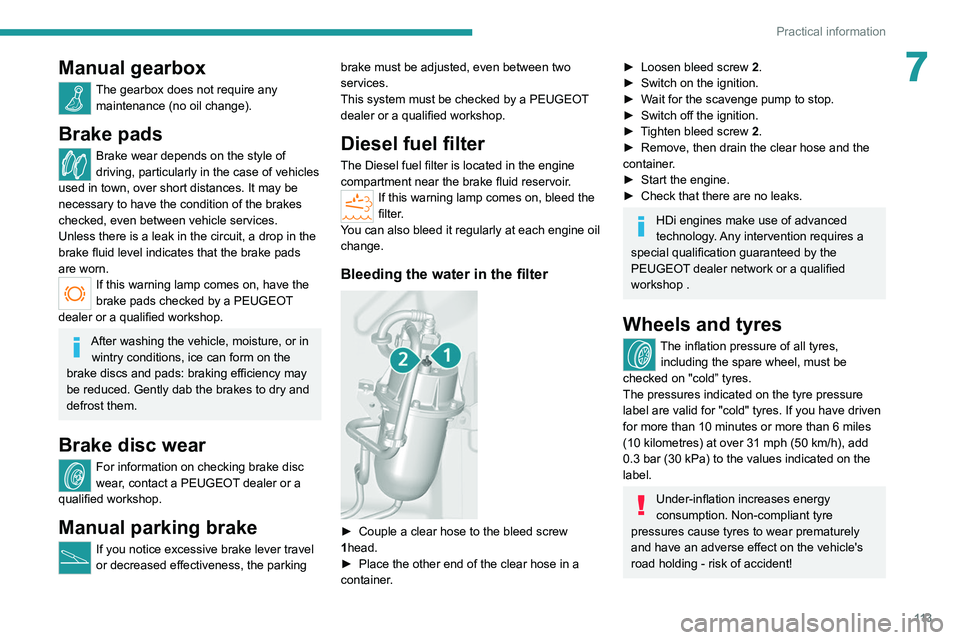
Bleeding the water in the filter
► Couple a clear hose to the bleed screw
1 head.
►
Place the other end of the clear hose in a
container
.
► Loosen bleed screw 2 .
► Switch on the ignition.
►
W
ait for the scavenge pump to stop.
►
Switch off the ignition.
►
T
ighten bleed screw 2.
►
Remove, then drain the clear hose and the
container
.
►
Start the engine.
►
Check that there are no leaks.
HDi engines make use of advanced
technology. Any intervention requires a
special qualification guaranteed by the
PEUGEOT
dealer network or a qualified
workshop .
Wheels and tyres
The inflation pressure of all tyres, including the spare wheel, must be
checked on "cold” tyres.
The pressures indicated on the tyre pressure
label are valid for "cold" tyres. If you have driven
for more than 10 minutes or more than 6 miles
(10 kilometres) at over 31 mph (50
km/h), add
0.3 bar (30 kPa) to the values indicated on the
label.
Under-inflation increases energy
consumption. Non-compliant tyre
pressures cause tyres to wear prematurely
and have an adverse effect on the vehicle's
road holding - risk of accident!
Page 120 of 212

11 8
In the event of a breakdown
Temporary puncture repair kit
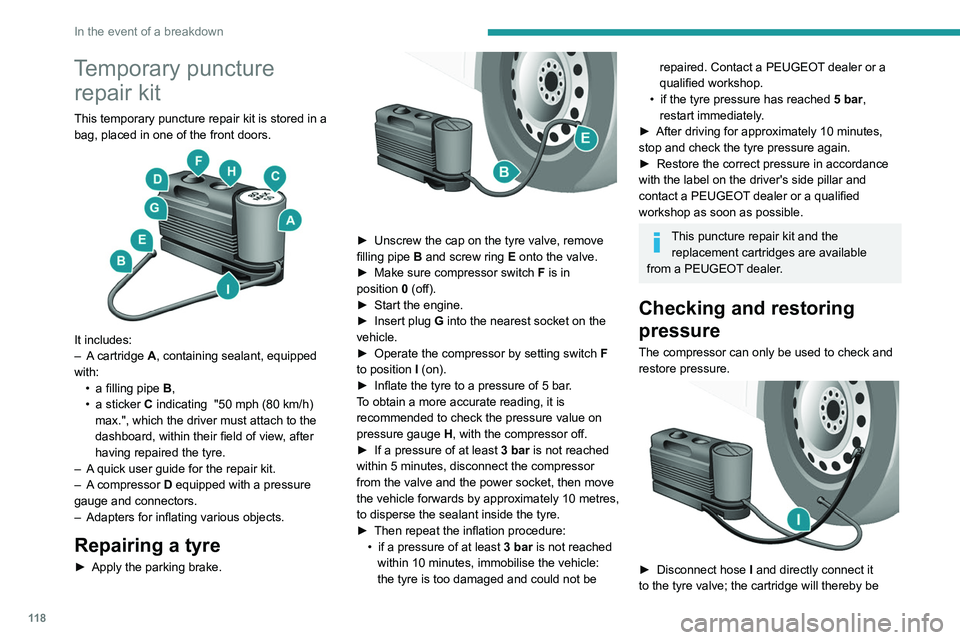
This temporary puncture repair kit is stored in a
bag, placed in one of the front doors.
It includes:
–
A cartridge A, containing sealant, equipped
with: •
a filling pipe B
,
•
a sticker
C indicating "50 mph (80 km/h)
max.", which the driver must attach to the
dashboard, within their field of view, after
having repaired the tyre.
–
A
quick user guide for the repair kit.
–
A
compressor D equipped with a pressure
gauge and connectors.
–
Adapters for inflating various objects.
Repairing a tyre
► Apply the parking brake.
► Unscrew the cap on the tyre valve, remove
filling pipe B and screw ring E onto the valve.
►
Make sure compressor switch F
is in
position
0
(off).
►
Start the engine.
►
Insert plug
G into the nearest socket on the
vehicle.
►
Operate the compressor by setting switch F
to position I (on).
►
Inflate the tyre to a pressure of 5 bar
.
To obtain a more accurate reading, it is
recommended to check the pressure value on
pressure gauge H, with the compressor off.
►
If a pressure
of at least 3 bar is not reached
within 5 minutes, disconnect the compressor
from the valve and the power socket, then move
the vehicle forwards by approximately 10 metres,
to disperse the sealant inside the tyre.
►
Then repeat the inflation procedure:
•
if a pressure of at least
3 bar is not reached
within 10 minutes, immobilise the vehicle:
the tyre is too damaged and could not be
repaired. Contact a PEUGEOT dealer or a
qualified workshop.
•
if the tyre pressure has reached 5 bar
,
restart immediately.
►
After driving for approximately 10 minutes,
stop and check the tyre pressure again.
►
Restore the correct pressure in accordance
with the label on the driver's side pillar and
contact a PEUGEOT
dealer or a qualified
workshop as soon as possible.
This puncture repair kit and the replacement cartridges are available
from a PEUGEOT dealer.
Checking and restoring
pressure
The compressor can only be used to check and
restore pressure.
► Disconnect hose I and directly connect it
to the tyre valve; the cartridge will thereby be
Page 126 of 212

124
In the event of a breakdown
► Tighten initially using wheelbrace D and bar
B.
►
Lower the vehicle using wheelbrace D
and
bar B, then remove the jack.
►
T
ighten the bolts again using wheelbrace D
and bar B.
Have the tightening of the bolts and the
pressure of the spare wheel checked by
the Manufacturer's dealer network or a
qualified workshop without delay.
Have the punctured wheel repaired and
refitted on the vehicle as soon as possible.
Vehicle fitted with a tyre under-
inflation detection system
The spare wheel is not fitted with a pressure
sensor. Tyre under-inflation detection will not
work on this tyre. An alert may be issued by
the system.
Check the tyre pressures and reinitialise the
system.
For more information on Tyre under-inflation
detection, refer to the corresponding section.
5 - Storing the wheel to be
repaired
You must reposition the wheel to be repaired or
the spare wheel under the vehicle to lock the
winch system.
Check that it is securely fastened in its
compartment under the floor.
Improper wheel positioning can compromise
safety.
►
Reposition the wheel at the rear of the
vehicle.
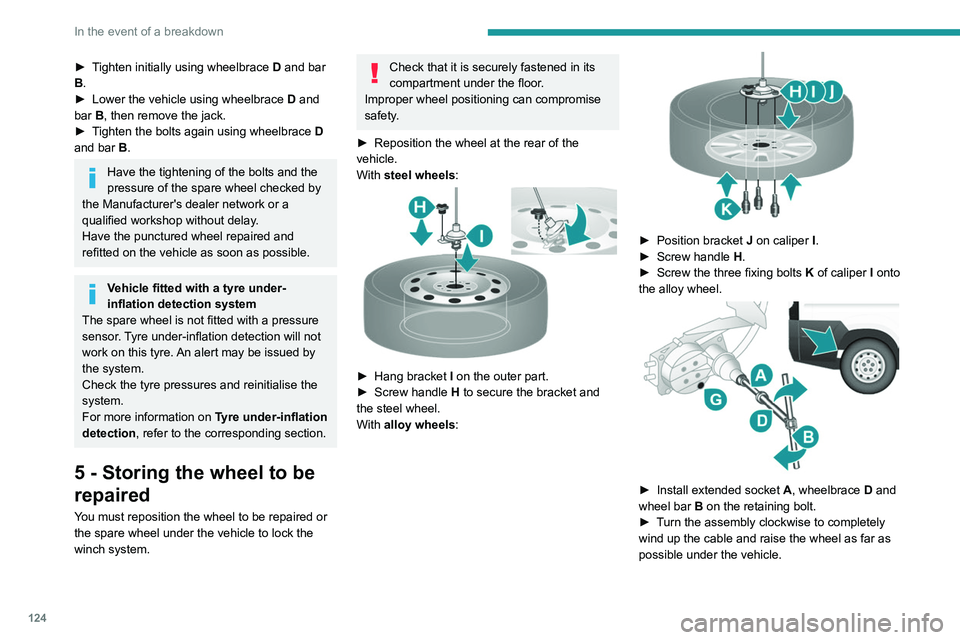
With
steel wheels:
► Hang bracket I on the outer part.
► Screw handle H
to secure the bracket and
the steel wheel.
With alloy wheels:
► Position bracket J on caliper I .
► Screw handle H
.
►
Screw the three fixing bolts
K
of caliper I onto
the alloy wheel.
► Install extended socket A , wheelbrace D and
wheel bar B on the retaining bolt.
►
T
urn the assembly clockwise to completely
wind up the cable and raise the wheel as far as
possible under the vehicle.