Page 98 of 244

5-16
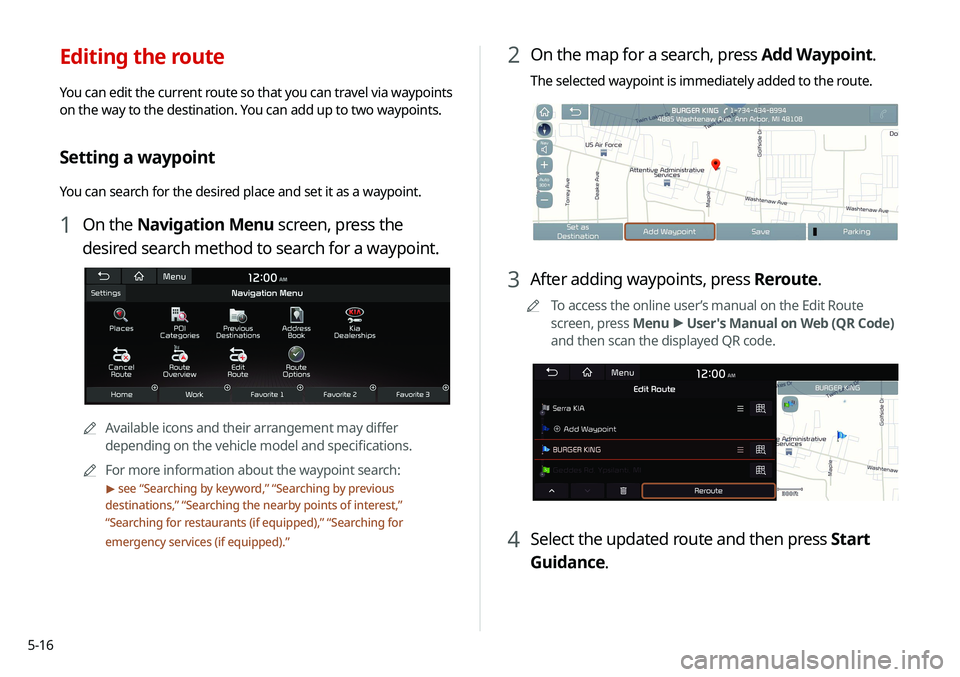
2 On the map for a search, press Add Waypoint.
The selected waypoint is immediately added to the route.
3 After adding waypoints, press Reroute.
A
A
To access the online user’s manual on the Edit Route
screen, press Menu >
User's Manual on Web (QR Code)
and then scan the displayed QR code.
4 Select the updated route and then press Start
Guidance.
Editing the route
You can edit the current route so that you can travel via waypoints
on the way to the destination. You can add up to two waypoints.
Setting a waypoint
You can search for the desired place and set it as a waypoint.
1 On the Navigation Menu screen, press the
desired search method to search for a waypoint.
A
A
Available icons and their arrangement may differ
depending on the vehicle model and specifications.
A
A
For more information about the waypoint search:
> see “Searching by keyword,” “Searching by previous
destinations,” “Searching the nearby points of interest,”
“ Searching for restaurants (if equipped),” “Searching for
emergency services (if equipped).”
Page 101 of 244
5-19
3 Select the search criteria and press Recalculate.
A
A
To access the online user’s manual on the Route Options
screen, press Menu >
User's Manual on Web (QR Code)
and then scan the displayed QR code.
A
A
Available options may differ depending on the vehicle
model and specifications.
Changing the route search criteria
You can change the route search criteria to resume routing.
1 On the Navigation Menu screen, press Route
Options.
2 Select the desired route from the searched ones
and press Route Avoid Options.
Page 102 of 244

5-20
Searching for restaurants (if equipped)
1 On the Navigation Menu screen, press
Restaurants.
AAAvailable icons and their arrangement may differ
depending on the vehicle model and specifications.
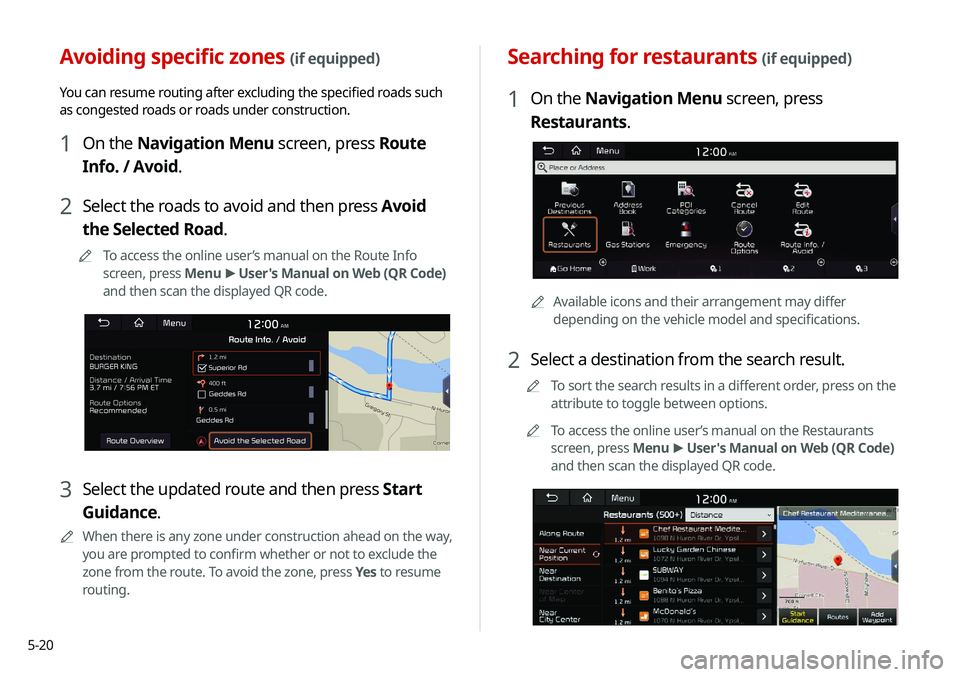
2 Select a destination from the search result.
A
A
To sort the search results in a different order, press on the
attribute to toggle between options.
A
A
To access the online user’s manual on the Restaurants
screen, press Menu >
User's Manual on Web (QR Code)
and then scan the displayed QR code.
Avoiding specific zones (if equipped)
You can resume routing after excluding the specified roads such
as congested roads or roads under construction.
1 On the Navigation Menu screen, press Route
Info. / Avoid.
2 Select the roads to avoid and then press Avoid
the Selected Road.
A
A
To access the online user’s manual on the Route Info
screen, press Menu >
User's Manual on Web (QR Code)
and then scan the displayed QR code.
3 Select the updated route and then press Start
Guidance.
A
A
When there is any zone under construction ahead on the way,
you are prompted to confirm whether or not to exclude the
zone from the route. To avoid the zone, press Yes to resume
routing.
Page 103 of 244
5-21
2 Select the type of emergency service.
A
A
Use the location information at the bottom of the screen,
if necessary to contact the desired emergency service.
A
A
To access the online user’s manual on the Emergency
screen, press Menu >
User's Manual on Web (QR Code)
and then scan the displayed QR code.
3 Select a destination from the search result.
A
A
To sort the search results in a different order, press on the
attribute to toggle between options.
4 Check the location of the destination and then
press Start Guidance.
3 Check the location of the destination and then
press Start Guidance.
Searching for emergency services
(if equipped)
1 On the Navigation Menu screen, press
Emergency.
AAAvailable icons and their arrangement may differ
depending on the vehicle model and specifications.
Page 104 of 244
5-22
2 On the Address Book screen, press My Places.
A
A
To access the online user’s manual on the Address Book
screen, press Menu >
User's Manual on Web (QR Code)
and then scan the displayed QR code.
3 Press Add.
4 Press Places and enter a keyword for a search.
A
A
You can also search for the place by using other methods.
> See “Various ways to find routes.”
Using the address book
After registering the current location or frequently visited places,
you can easily set any of them as a destination.
Registering a searched place as a
favorite place
You can search and register the desired place.
1 On the Navigation Menu screen, press Address
Book.
AA
Available icons and their arrangement may differ
depending on the vehicle model and specifications.
Page 106 of 244

5-24
Setting a registered favorite place as a
destination
You can set any in the address book of the navigation system as a
destination.
1 On the Navigation Menu screen, press Address
Book.
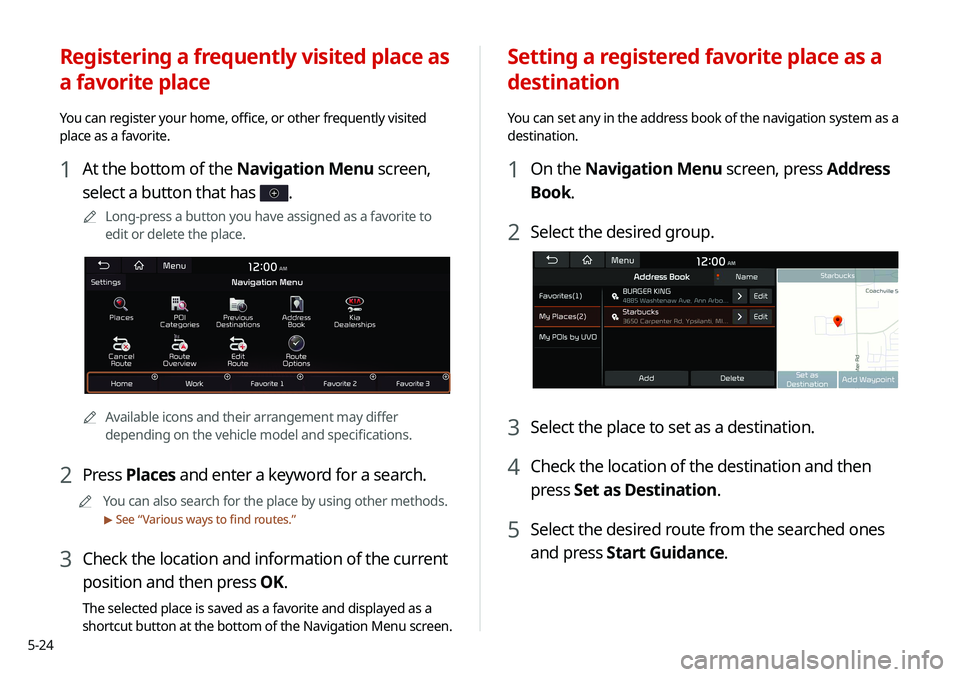
2 Select the desired group.
3 Select the place to set as a destination.
4 Check the location of the destination and then
press Set as Destination.
5 Select the desired route from the searched ones
and press Start Guidance.
Registering a frequently visited place as
a favorite place
You can register your home, office, or other frequently visited
place as a favorite.
1 At the bottom of the Navigation Menu screen,
select a button that has
.
A
A
Long-press a button you have assigned as a favorite to
edit or delete the place.
AAAvailable icons and their arrangement may differ
depending on the vehicle model and specifications.
2 Press Places and enter a keyword for a search.
A
A
You can also search for the place by using other methods.
> See “Various ways to find routes.”
3 Check the location and information of the current
position and then press OK.
The selected place is saved as a favorite and displayed as a
shortcut button at the bottom of the Navigation Menu screen.
Page 109 of 244
5-27
Searching for EV (Electric
Vehicle) charging stations
(if equipped)
You can search nearby charging stations.
1 On the Navigation Menu screen, press EV
Charging Stations.
AAWhen the station data is received in real time, the menu
name changes to "Real-time Stations."
2 Select a destination from the search result.
A
A
To categorize the searched items, select a category.
A
A
To sort the search results in a different order, press on the
attribute to toggle between options.
A
A
To access the online user’s manual on the Gas Stations
screen, press Menu >
User's Manual on Web (QR Code)
and then scan the displayed QR code.
3 Check the location of the destination and then
press Set as Destination.
4 Select the desired route from the searched ones
and press Start Guidance.
Page 110 of 244

5-28
END USER LICENSE
AGREEMENT
PLEASE READ THIS END USER LICENSE AGREEMENT ("EULA")
CAREFULLY BEFORE USING THE NAVIGATION SYSTEM.
This is a license agreement between you and Hyundai MnSoft,
INC. including its affiliates ("COMPANY") regarding a copy of the
COMPANY navigable map database together with associated
software, media and explanatory printed documentation
published by COMPANY (jointly the "Product"). The Product is
provided for your personal, internal use only and not for resale.
It is protected by copyright and is subject to the following terms
which are agreed to by you, on the one hand, and COMPANY
and its licensors (and their licensors and suppliers) (collectively,
"Licensors") on the other hand.
By using the Product, you accept and agree to all terms and
conditions in this End User License Agreement ("EULA"). IF
YOU DO NOT AGREE TO THE TERMS OF THIS EULA, YOU MUST
PROMPTLY EXIT THE PRODUCT OPERATION PROGRAM AND DO
NOT USE OR ACCESS TO THE PRODUCT. YOU AGREE THAT YOUR
RIGHTS UNDER THIS EULA MAY BE TERMINATED AUTOMATICALLY
WITHOUT NOTICE IF YOU FAIL TO COMPLY WITH ANY TERM(S) OF
THIS EULA.
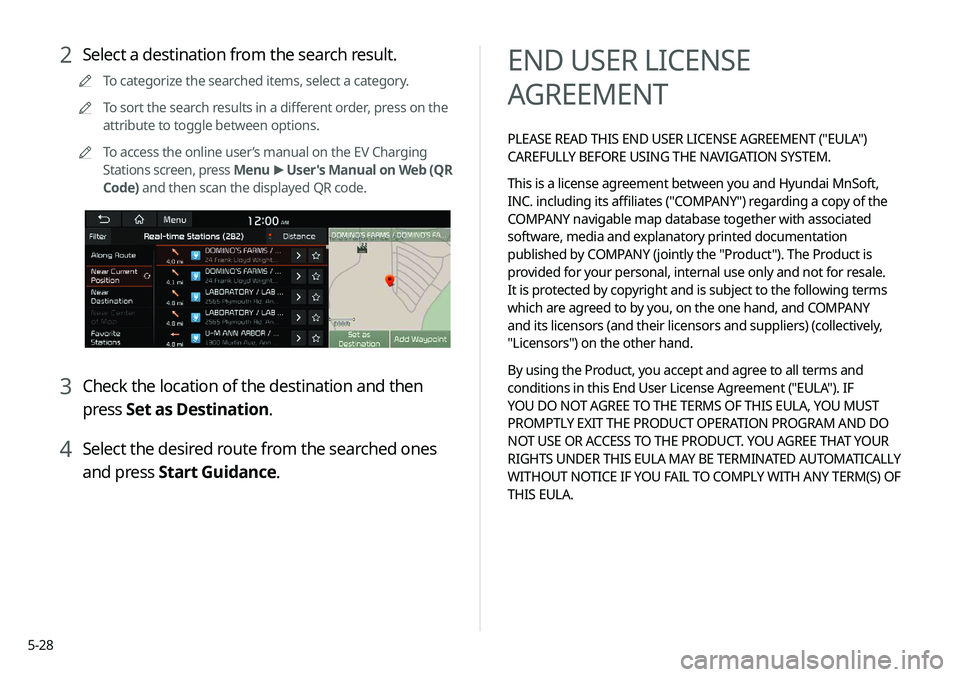
2 Select a destination from the search result.
A
A
To categorize the searched items, select a category.
A
A
To sort the search results in a different order, press on the
attribute to toggle between options.
A
A
To access the online user’s manual on the EV Charging
Stations screen, press Menu >
User's Manual on Web (QR
Code) and then scan the displayed QR code.
3 Check the location of the destination and then
press Set as Destination.
4 Select the desired route from the searched ones
and press Start Guidance.