2021 ALFA ROMEO STELVIO brakes
[x] Cancel search: brakesPage 3 of 280
1
Dear Customer,
We would like to congratulate and thank you for the purchase of your Alfa Romeo.
We have written this Owner’s Manual to help you get to know all of the features of your vehicle and use it in the best possible way. Please take the
necessary time to familiarize yourself with all the dynamic features of your vehicle.
Here you will find important information and warnings regarding the use of your vehicle, and how to achieve the best performance from the tech-
nical features of your Alfa Romeo.
You are advised to read through the Owner’s Manual before taking it on the road for the first time. It is important to become familiar with the
controls of your vehicle, especially with sections concerning the brakes, handling, transmission, and vehicle behavior on different road surfaces.
This Owner’s Manual also provides a description of special features and tips, as well as essential information for the safe driving, care, and main -
tenance of your Alfa Romeo over time.
It is supplemented by Warranty Information, and customer-oriented documents. Within this information, you will find a description of the services
that Alfa Romeo offers to its customers, the vehicle's warranty coverage, and the details of the terms and conditions for maintaining its validity.
We are sure that these will help you to get in touch with and appreciate both your new vehicle and the service provided by the people at Alfa Romeo.
For questions or comments pertaining to your vehicle, please contact:
Alfa Romeo Customer Care Center:
P.O. Box 21–8004 Auburn Hills, MI
48321–8004
Phone: 1-844-Alfa-USA
(1-844-253-2872)
Alfa Romeo Customer Care (Canada):
P.O. Box 1621
Windsor, Ontario N9A 4H6
Phone: 1-877-230-0563 (English)
Phone: 1-877-515-9112 (French)
21_GU_OM_EN_USC_t.book Page 1
Page 6 of 280
4
VEHICLE CHANGES / ALTERATIONS
Accessories Purchased By The Owner
If you decide to install electrical accessories that require a permanent electrical supply (e.g. radio, satellite anti-theft system, etc.) or accessories
that in any case drain the electrical supply after purchasing the vehicle, contact an authorized dealer. Dealer personnel will check whether the
vehicles's electrical system is able to withstand the load required or whether it needs to be integrated with a more powerful battery.
NOTE:
Use caution when adding additional spoilers, alloy wheel rims, or non-standard wheel hubs: they could reduce the ventilation of the brakes and
affect efficiency under sharp and repeated braking, or on long descents. Make sure that nothing obstructs the pedal (mats, etc.).
FCA US LLC shall not be liable for damage caused by the installation of accessories either not supplied or recommended by FCA US LLC and/or not
installed in compliance with the provided instructions.
Installing Electrical/Electronic Devices
FCA US LLC authorizes the installation of transceivers provided that installation is carried out at a specialized center, in compliance with manufac-
turer's specifications.
NOTE:
Local authorities may not allow the vehicle on the road if devices that modify the features of the vehicle have been installed. This also may void
the warranty in relation to faults caused by the change either directly or indirectly related to it.
FCA US LLC shall not be liable for damage caused by the installation of accessories either not supplied or recommended by FCA US LLC and/or not
installed in compliance with the provided instructions.
WARNING!
Any change or alteration of the vehicle might seriously affect its safety and road handling, thus causing accidents, in which the occupants could
even be fatally injured.
21_GU_OM_EN_USC_t.book Page 4
Page 14 of 280

12
JUMP STARTING .................................... 201
Remote Battery Connection Posts......202
Jump Starting Procedure.....................203
Bump Starting ..................................204
ENGINE OVERHEATING ......................... 204 MANUAL PARK RELEASE ...................... 205TOWING A DISABLED VEHICLE ............. 205
Four-Wheel Drive (AWD) Models .........206
TOW EYES .............................................. 206
ENHANCED ACCIDENT RESPONSE
SYSTEM (EARS) ..................................... 207EVENT DATA RECORDER (EDR) ............ 207
SERVICING AND MAINTENANCE
SCHEDULED SERVICING ....................... 208
Periodic Checks ...................................208
Heavy Usage Of The Vehicle ...............208
Maintenance Plan (2.0L Engine) ........209
Maintenance Plan (2.9L Engine) ........212
ENGINE COMPARTMENT....................... 214
Checking Levels — 2.0L Engine .......... 214
Checking Levels — 2.9L Engine .......... 215
Engine Oil ............................................. 215
Engine Coolant Fluid............................216
Washer Fluid For Windshield/
Headlights ............................................ 217 Brake Fluid ...........................................217
Automatic Transmission Activation
System Oil ............................................ 217 Useful Advice For Extending The Life Of
Your Battery..........................................217 Battery ..................................................217
Pressure Washing ................................ 218
BATTERY RECHARGING ......................... 218
Important Notes .................................. 218
VEHICLE MAINTENANCE ........................ 219
Engine Oil ............................................. 219
Engine Oil Filter ................................... 220
Engine Air Cleaner Filter ..................... 220
Air Conditioning System
Maintenance........................................ 220 Lubricating Moving Parts Of The
Bodywork ............................................. 220 Windshield Wiper................................. 221
Exhaust System ................................... 222
Cooling System .................................... 223
Braking System.................................... 224
Automatic Transmission ..................... 225
Replacing The Battery ......................... 225
Fuses .................................................... 225
Bulb Replacement ............................... 229
TIRES ...................................................... 233
Tire Safety Information .................... 233
Tires — General Information .............. 239
Spare Tires — If Equipped .................. 244
Wheel And Wheel Trim Care ............ 245
Tire Types ............................................. 246
Tire Chains and Traction Devices ....... 247
Tire Rotation Recommendations........ 247
DEPARTMENT OF TRANSPORTATION
UNIFORM TIRE QUALITY GRADES ......... 248
Treadwear ............................................ 248
Traction Grades ................................... 248
Temperature Grades ........................... 248
STORING THE VEHICLE ......................... 249 BODYWORK ........................................... 249
Protection Against Atmospheric
Agents .................................................. 249 Corrosion Warranty ............................. 250
Preserving The Bodywork .................. 250
INTERIORS ............................................. 251
Seats And Fabric Parts ....................... 251
Leather Seats ...................................... 251
Plastic And Coated Parts .................... 251
Alcantara Parts — If Equipped ............ 251
Genuine Leather Parts........................ 251
Carbon Fiber Parts .............................. 252
TECHNICAL SPECIFICATIONS
VEHICLE IDENTIFICATION
NUMBER (VIN) ....................................... 253
Vehicle Identification Number............ 253
Vehicle Identification Number
(VIN) Plate ............................................ 253
ENGINE .................................................. 254
POWER SUPPLY ..................................... 255 TRANSMISSION ..................................... 255BRAKES.................................................. 255
SUSPENSION ......................................... 256
STEERING .............................................. 256
DIMENSIONS ......................................... 257
Luggage Compartment Volume ......... 259
WEIGHTS ................................................ 259
21_GU_OM_EN_USC_t.book Page 12
Page 78 of 280
GETTING TO KNOW YOUR INSTRUMENT PANEL
76
required. However, the conventional brake
system will continue to operate normally if the
brake indicator light is not on.
If the ABS light is on, the brake system should
be serviced as soon as possible to restore the
benefits of Anti-Lock Brakes. If the ABS light
does not turn on when the ignition is placed in
the ON/RUN position, have the light inspected
by an authorized dealer.
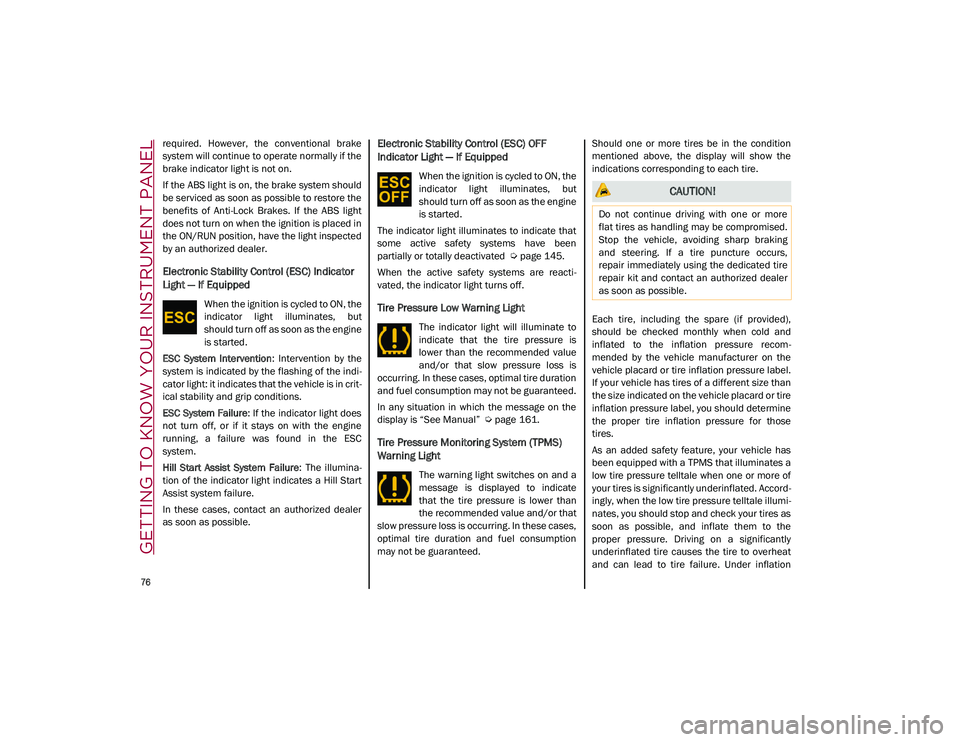
Electronic Stability Control (ESC) Indicator
Light — If Equipped
When the ignition is cycled to ON, the
indicator light illuminates, but
should turn off as soon as the engine
is started.
ESC System Intervention : Intervention by the
system is indicated by the flashing of the indi -
cator light: it indicates that the vehicle is in crit -
ical stability and grip conditions.
ESC System Failure : If the indicator light does
not turn off, or if it stays on with the engine
running, a failure was found in the ESC
system.
Hill Start Assist System Failure : The illumina-
tion of the indicator light indicates a Hill Start
Assist system failure.
In these cases, contact an authorized dealer
as soon as possible.
Electronic Stability Control (ESC) OFF
Indicator Light — If Equipped
When the ignition is cycled to ON, the
indicator light illuminates, but
should turn off as soon as the engine
is started.
The indicator light illuminates to indicate that
some active safety systems have been
partially or totally deactivated
Ú
page 145.
When the active safety systems are reacti -
vated, the indicator light turns off.
Tire Pressure Low Warning Light
The indicator light will illuminate to
indicate that the tire pressure is
lower than the recommended value
and/or that slow pressure loss is
occurring. In these cases, optimal tire duration
and fuel consumption may not be guaranteed.
In any situation in which the message on the
display is “See Manual”
Ú
page 161.
Tire Pressure Monitoring System (TPMS)
Warning Light
The warning light switches on and a
message is displayed to indicate
that the tire pressure is lower than
the recommended value and/or that
slow pressure loss is occurring. In these cases,
optimal tire duration and fuel consumption
may not be guaranteed. Should one or more tires be in the condition
mentioned above, the display will show the
indications corresponding to each tire.
Each tire, including the spare (if provided),
should be checked monthly when cold and
inflated to the inflation pressure recom
-
mended by the vehicle manufacturer on the
vehicle placard or tire inflation pressure label.
If your vehicle has tires of a different size than
the size indicated on the vehicle placard or tire
inflation pressure label, you should determine
the proper tire inflation pressure for those
tires.
As an added safety feature, your vehicle has
been equipped with a TPMS that illuminates a
low tire pressure telltale when one or more of
your tires is significantly underinflated. Accord -
ingly, when the low tire pressure telltale illumi -
nates, you should stop and check your tires as
soon as possible, and inflate them to the
proper pressure. Driving on a significantly
underinflated tire causes the tire to overheat
and can lead to tire failure. Under inflation
CAUTION!
Do not continue driving with one or more
flat tires as handling may be compromised.
Stop the vehicle, avoiding sharp braking
and steering. If a tire puncture occurs,
repair immediately using the dedicated tire
repair kit and contact an authorized dealer
as soon as possible.
21_GU_OM_EN_USC_t.book Page 76
Page 98 of 280
STARTING AND OPERATING
96
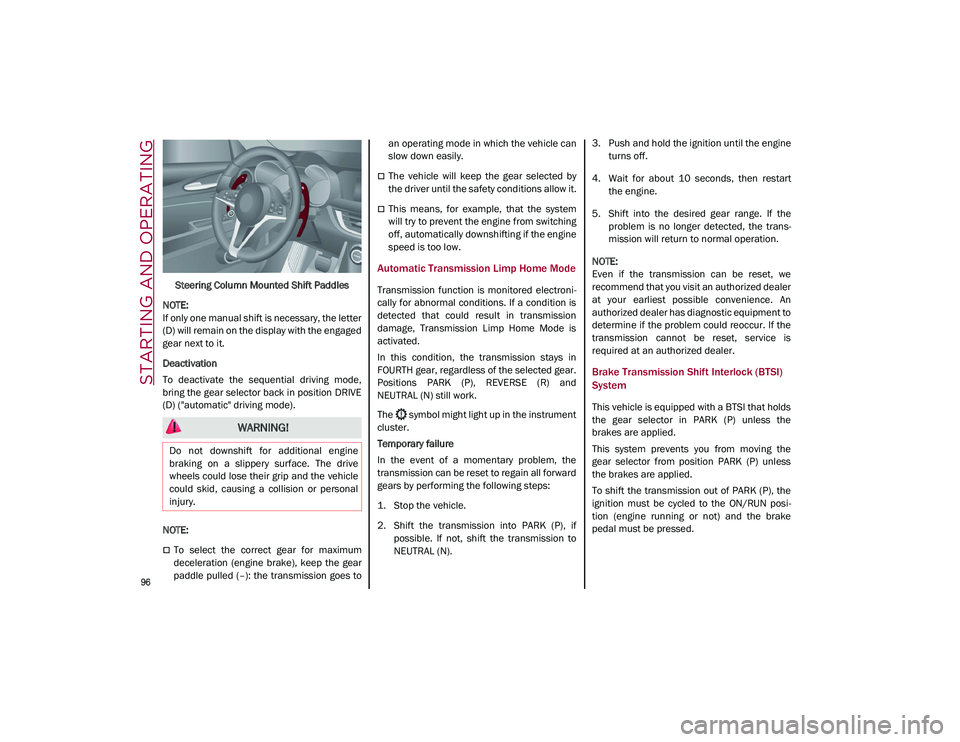
Steering Column Mounted Shift Paddles
NOTE:
If only one manual shift is necessary, the letter
(D) will remain on the display with the engaged
gear next to it.
Deactivation
To deactivate the sequential driving mode,
bring the gear selector back in position DRIVE
(D) ("automatic" driving mode).
NOTE:
To select the correct gear for maximum
deceleration (engine brake), keep the gear
paddle pulled (–): the transmission goes to an operating mode in which the vehicle can
slow down easily.
The vehicle will keep the gear selected by
the driver until the safety conditions allow it.
This means, for example, that the system
will try to prevent the engine from switching
off, automatically downshifting if the engine
speed is too low.
Automatic Transmission Limp Home Mode
Transmission function is monitored electroni
-
cally for abnormal conditions. If a condition is
detected that could result in transmission
damage, Transmission Limp Home Mode is
activated.
In this condition, the transmission stays in
FOURTH gear, regardless of the selected gear.
Positions PARK (P), REVERSE (R) and
NEUTRAL (N) still work.
The symbol might light up in the instrument
cluster.
Temporary failure
In the event of a momentary problem, the
transmission can be reset to regain all forward
gears by performing the following steps:
1. Stop the vehicle.
2. Shift the transmission into PARK (P), if possible. If not, shift the transmission to
NEUTRAL (N). 3. Push and hold the ignition until the engine
turns off.
4. Wait for about 10 seconds, then restart the engine.
5. Shift into the desired gear range. If the problem is no longer detected, the trans -
mission will return to normal operation.
NOTE:
Even if the transmission can be reset, we
recommend that you visit an authorized dealer
at your earliest possible convenience. An
authorized dealer has diagnostic equipment to
determine if the problem could reoccur. If the
transmission cannot be reset, service is
required at an authorized dealer.
Brake Transmission Shift Interlock (BTSI)
System
This vehicle is equipped with a BTSI that holds
the gear selector in PARK (P) unless the
brakes are applied.
This system prevents you from moving the
gear selector from position PARK (P) unless
the brakes are applied.
To shift the transmission out of PARK (P), the
ignition must be cycled to the ON/RUN posi -
tion (engine running or not) and the brake
pedal must be pressed.
WARNING!
Do not downshift for additional engine
braking on a slippery surface. The drive
wheels could lose their grip and the vehicle
could skid, causing a collision or personal
injury.
21_GU_OM_EN_USC_t.book Page 96
Page 102 of 280
STARTING AND OPERATING
100
ESC and ASR systems: intervention thresholds
aimed at ensuring maximum safety in low-grip
driving conditions. It is advisable to select
“Advanced Efficiency” mode in the presence
of low-grip road surfaces.
Engine and transmission: standard response.
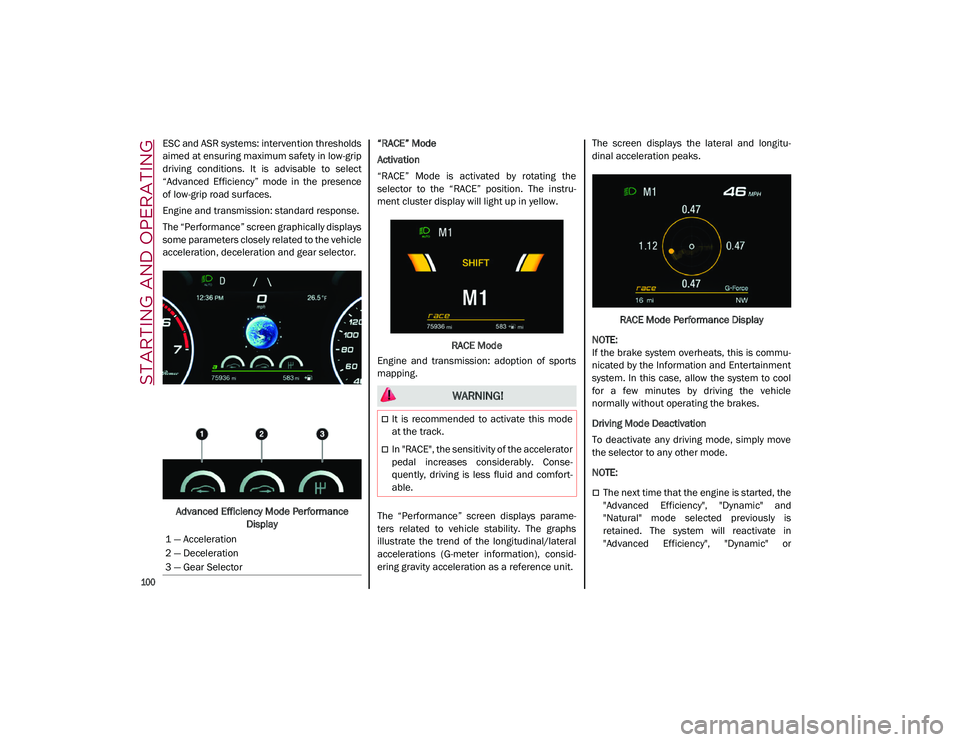
The “Performance” screen graphically displays
some parameters closely related to the vehicle
acceleration, deceleration and gear selector.Advanced Efficiency Mode Performance Display “RACE” Mode
Activation
“RACE” Mode is activated by rotating the
selector to the “RACE” position. The instru-
ment cluster display will light up in yellow.
RACE Mode
Engine and transmission: adoption of sports
mapping.
The “Performance” screen displays parame -
ters related to vehicle stability. The graphs
illustrate the trend of the longitudinal/lateral
accelerations (G-meter information), consid -
ering gravity acceleration as a reference unit. The screen displays the lateral and longitu
-
dinal acceleration peaks.
RACE Mode Performance Display
NOTE:
If the brake system overheats, this is commu -
nicated by the Information and Entertainment
system. In this case, allow the system to cool
for a few minutes by driving the vehicle
normally without operating the brakes.
Driving Mode Deactivation
To deactivate any driving mode, simply move
the selector to any other mode.
NOTE:
The next time that the engine is started, the
"Advanced Efficiency", "Dynamic" and
"Natural" mode selected previously is
retained. The system will reactivate in
"Advanced Efficiency", "Dynamic" or
1 — Acceleration
2 — Deceleration
3 — Gear Selector
WARNING!
It is recommended to activate this mode
at the track.
In "RACE", the sensitivity of the accelerator
pedal increases considerably. Conse
-
quently, driving is less fluid and comfort -
able.
21_GU_OM_EN_USC_t.book Page 100
Page 110 of 280
STARTING AND OPERATING
108
Activating Adaptive Cruise Control (ACC)
The minimum set speed for the ACC system is
19 mph (30 km/h) and the maximum is110 mph (180 km/h).
The system cannot be activated:
When pressing the brake pedal.
When the brakes are overheated.
When the Electric Park Brake has been
operated.
When either PARK, REVERSE or NEUTRAL is
engaged.
When the engine RPM is above a maximum
threshold.
When the vehicle speed is not within the
operational speed range.
When the Electronic Stability Control (ESC)
(or Anti-Lock Brake System (ABS) or other
stability control systems) are operating or
have just operated.
When the ESC system is off.
When the Forward Collision Warning system
(if equipped) is braking automatically.
In the event of a system failure.
When the engine is off.
In case of obstruction of the radar sensor (in
this case the bumper area where it is
located must be cleaned).
If the system is set, the conditions described
above also cause a cancellation or deactiva -
tion of the system. These situations may vary
according to the conditions.
NOTE:
The system will not be deactivated when
speeds higher than those set are reached by
pressing the accelerator pedal above
110 mph (180 km/h). In these situations, the system may not work correctly and it is recom -
mended to deactivate it.
To Activate/Deactivate
The system has four operating states:
Enabled (speed not set)
Activated (speed set)
Paused
Deactivated To Activate
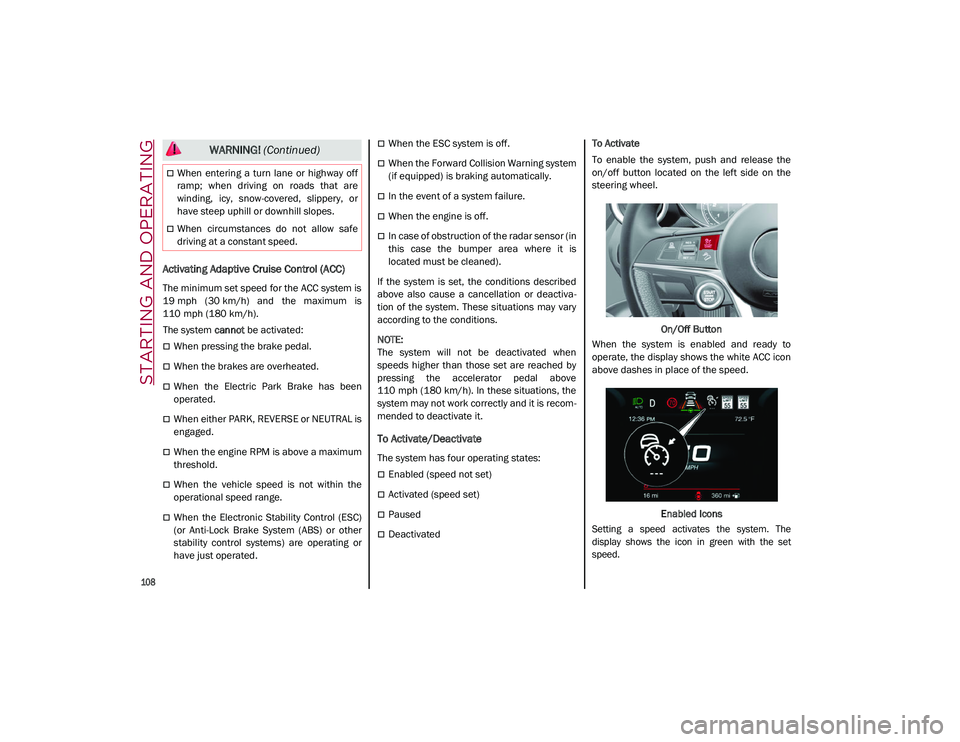
To enable the system, push and release the
on/off button located on the left side on the
steering wheel.
On/Off Button
When the system is enabled and ready to
operate, the display shows the white ACC icon
above dashes in place of the speed.
Enabled Icons
Setting a speed activates the system. The
display shows the icon in green with the set
speed.
When entering a turn lane or highway off
ramp; when driving on roads that are
winding, icy, snow-covered, slippery, or
have steep uphill or downhill slopes.
When circumstances do not allow safe
driving at a constant speed.
WARNING! (Continued)
21_GU_OM_EN_USC_t.book Page 108
Page 111 of 280
109
To Pause/Deactivate
With the feature enabled (speed not set), push
the on/off button to disable.
With the feature active (speed set), push the
on/off button to pause. The display will show
the icon in white with the speed in brackets. To
deactivate the feature, push the on/off button
a second time.
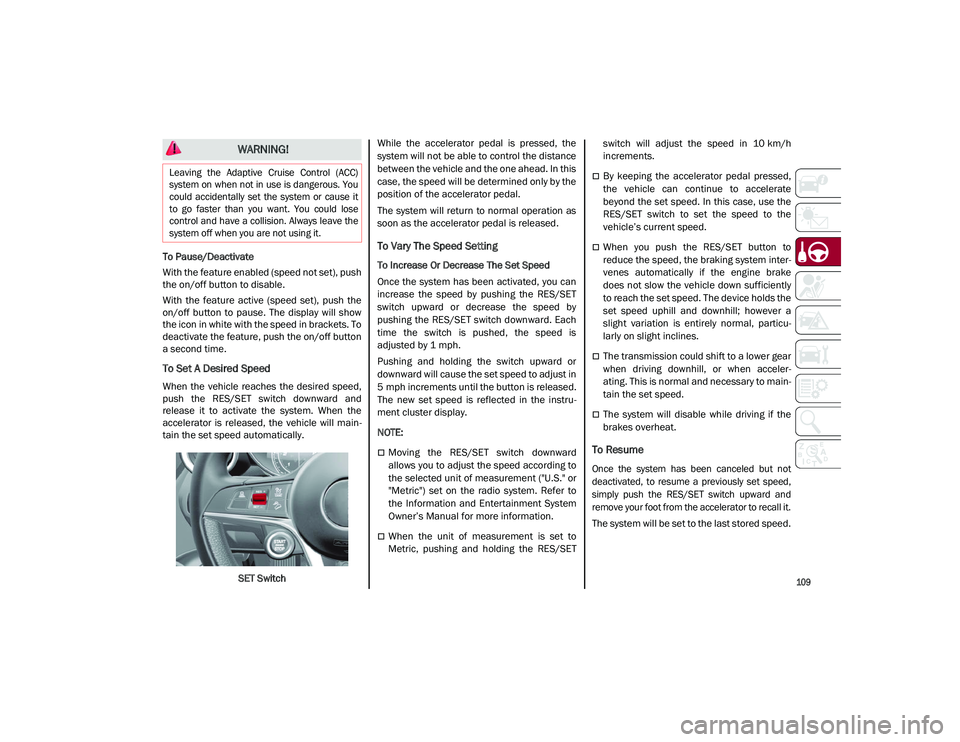
To Set A Desired Speed
When the vehicle reaches the desired speed,
push the RES/SET switch downward and
release it to activate the system. When the
accelerator is released, the vehicle will main-
tain the set speed automatically.
SET Switch While the accelerator pedal is pressed, the
system will not be able to control the distance
between the vehicle and the one ahead. In this
case, the speed will be determined only by the
position of the accelerator pedal.
The system will return to normal operation as
soon as the accelerator pedal is released.
To Vary The Speed Setting
To Increase Or Decrease The Set Speed
Once the system has been activated, you can
increase the speed by pushing the RES/SET
switch upward or decrease the speed by
pushing the RES/SET switch downward. Each
time the switch is pushed, the speed is
adjusted by 1 mph.
Pushing and holding the switch upward or
downward will cause the set speed to adjust in
5 mph increments until the button is released.
The new set speed is reflected in the instru
-
ment cluster display.
NOTE:
Moving the RES/SET switch downward
allows you to adjust the speed according to
the selected unit of measurement ("U.S." or
"Metric") set on the radio system. Refer to
the Information and Entertainment System
Owner’s Manual for more information.
When the unit of measurement is set to
Metric, pushing and holding the RES/SET switch will adjust the speed in 10 km/h
increments.
By keeping the accelerator pedal pressed,
the vehicle can continue to accelerate
beyond the set speed. In this case, use the
RES/SET switch to set the speed to the
vehicle’s current speed.
When you push the RES/SET button to
reduce the speed, the braking system inter
-
venes automatically if the engine brake
does not slow the vehicle down sufficiently
to reach the set speed. The device holds the
set speed uphill and downhill; however a
slight variation is entirely normal, particu -
larly on slight inclines.
The transmission could shift to a lower gear
when driving downhill, or when acceler -
ating. This is normal and necessary to main -
tain the set speed.
The system will disable while driving if the
brakes overheat.
To Resume
Once the system has been canceled but not
deactivated, to resume a previously set speed,
simply push the RES/SET switch upward and
remove your foot from the accelerator to recall it.
The system will be set to the last stored speed.
WARNING!
Leaving the Adaptive Cruise Control (ACC)
system on when not in use is dangerous. You
could accidentally set the system or cause it
to go faster than you want. You could lose
control and have a collision. Always leave the
system off when you are not using it.
21_GU_OM_EN_USC_t.book Page 109