Page 228 of 280

SERVICING AND MAINTENANCE
226
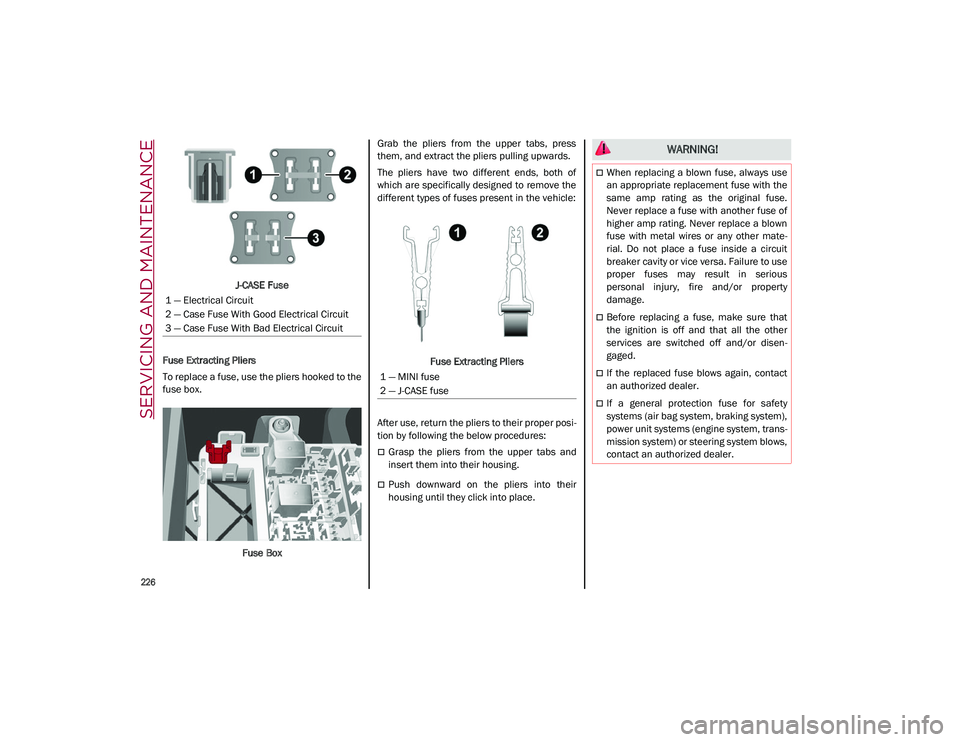
J-CASE Fuse
Fuse Extracting Pliers
To replace a fuse, use the pliers hooked to the
fuse box.
Fuse Box Grab the pliers from the upper tabs, press
them, and extract the pliers pulling upwards.
The pliers have two different ends, both of
which are specifically designed to remove the
different types of fuses present in the vehicle:
Fuse Extracting Pliers
After use, return the pliers to their proper posi -
tion by following the below procedures:
Grasp the pliers from the upper tabs and
insert them into their housing.
Push downward on the pliers into their
housing until they click into place.
1 — Electrical Circuit
2 — Case Fuse With Good Electrical Circuit
3 — Case Fuse With Bad Electrical Circuit
1 — MINI fuse
2 — J-CASE fuse
WARNING!
When replacing a blown fuse, always use
an appropriate replacement fuse with the
same amp rating as the original fuse.
Never replace a fuse with another fuse of
higher amp rating. Never replace a blown
fuse with metal wires or any other mate
-
rial. Do not place a fuse inside a circuit
breaker cavity or vice versa. Failure to use
proper fuses may result in serious
personal injury, fire and/or property
damage.
Before replacing a fuse, make sure that
the ignition is off and that all the other
services are switched off and/or disen -
gaged.
If the replaced fuse blows again, contact
an authorized dealer.
If a general protection fuse for safety
systems (air bag system, braking system),
power unit systems (engine system, trans -
mission system) or steering system blows,
contact an authorized dealer.
21_GU_OM_EN_USC_t.book Page 226
Page 229 of 280

227
Fuse Location
The fuses, which can be replaced by the user,
are grouped in two boxes below the passenger
side foot board and inside the luggage
compartment.
Control Unit Under Passenger Side
Footboard
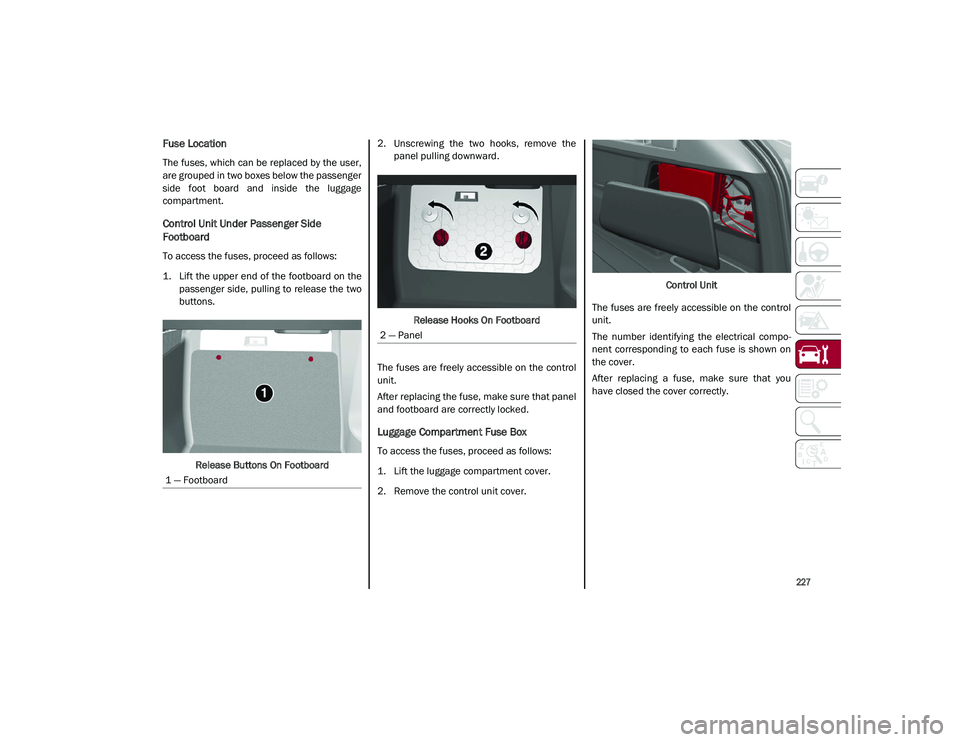
To access the fuses, proceed as follows:
1. Lift the upper end of the footboard on thepassenger side, pulling to release the two
buttons.
Release Buttons On Footboard 2. Unscrewing the two hooks, remove the
panel pulling downward.
Release Hooks On Footboard
The fuses are freely accessible on the control
unit.
After replacing the fuse, make sure that panel
and footboard are correctly locked.
Luggage Compartment Fuse Box
To access the fuses, proceed as follows:
1. Lift the luggage compartment cover.
2. Remove the control unit cover. Control Unit
The fuses are freely accessible on the control
unit.
The number identifying the electrical compo -
nent corresponding to each fuse is shown on
the cover.
After replacing a fuse, make sure that you
have closed the cover correctly.
1 — Footboard
2 — Panel
21_GU_OM_EN_USC_t.book Page 227
Page 231 of 280

229
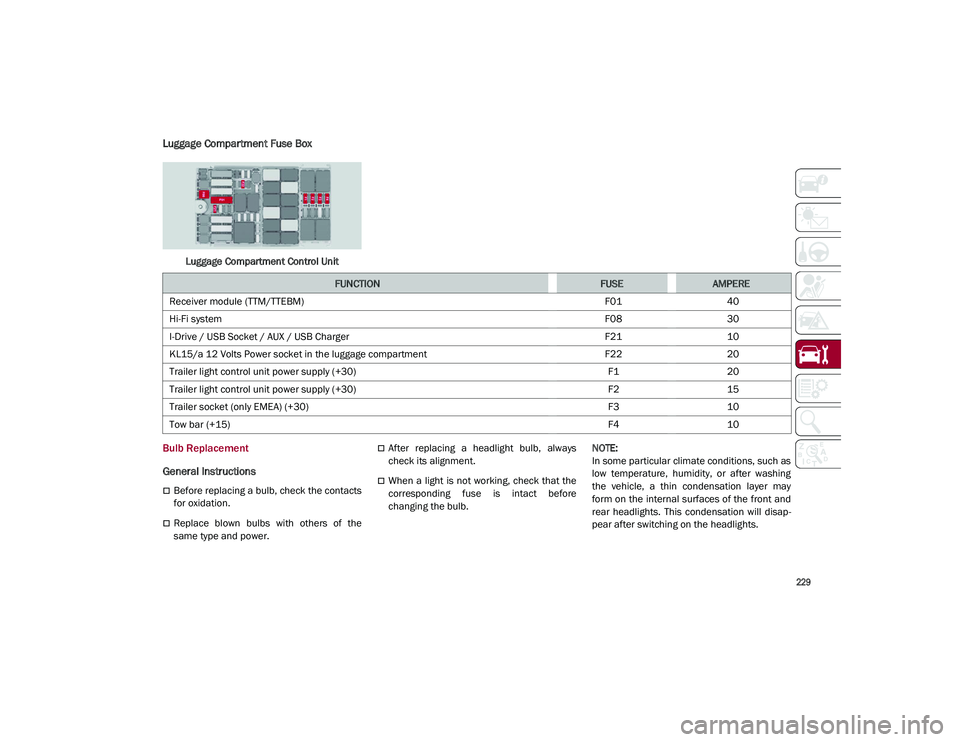
Luggage Compartment Fuse Box
Luggage Compartment Control Unit
Bulb Replacement
General Instructions
Before replacing a bulb, check the contacts
for oxidation.
Replace blown bulbs with others of the
same type and power.
After replacing a headlight bulb, always
check its alignment.
When a light is not working, check that the
corresponding fuse is intact before
changing the bulb.
NOTE:
In some particular climate conditions, such as
low temperature, humidity, or after washing
the vehicle, a thin condensation layer may
form on the internal surfaces of the front and
rear headlights. This condensation will disap
-
pear after switching on the headlights.
FUNCTIONFUSEAMPERE
Receiver module (TTM/TTEBM) F0140
Hi-Fi system F0830
I-Drive / USB Socket / AUX / USB Charger F2110
KL15/a 12 Volts Power socket in the luggage compartment F2220
Trailer light control unit power supply (+30) F120
Trailer light control unit power supply (+30) F215
Trailer socket (only EMEA) (+30) F310
Tow bar (+15) F410
21_GU_OM_EN_USC_t.book Page 229