2021 ALFA ROMEO STELVIO warning light
[x] Cancel search: warning lightPage 93 of 280
91
(Continued)
Disengaging The EPB Manually
In order to manually release the parking brake,
the ignition should be in the ACC mode. Press
the brake pedal, and then push the switch on
the center console briefly.
Noise may be heard from the rear of the
vehicle, and a slight movement of the brake
pedal may be detected during disengagement.
After disengaging the EPB, the BRAKE warning
light on the instrument cluster display and the
light on the switch will turn off.
If the BRAKE warning light on the instrument
cluster display remains on with the EPB disen-
gaged, this indicates a fault: in this case,
contact an authorized dealer.
NOTE:
Always engage the EPB when parking the
vehicle to prevent injury or damage caused
by the unexpected movement of the vehicle.
Never use gear position PARK (P) instead of
the EPB.
Electric Park Brake (EPB) Operating Modes
The EPB may operate as follows:
“Dynamic Operating Mode”: this mode is
activated by pulling the switch repeatedly
while driving.
“Static Engagement and Release Mode”:
with the vehicle stationary, the EPB can be
activated by pulling the switch on the center
console once. Push the switch and the
brake pedal at the same time to disengage
the brake.
“Drive Away Release” — if equipped: the
EPB will automatically disengage with the
driver side seat belt fastened and the detec
-
tion of an action performed by the driver to move the vehicle (DRIVE [D] or REVERSE
[R]). This feature can be turned on or off in
the Information and Entertainment System.
NOTE:
If the car is equipped with carbon-ceramic
brake discs, it is necessary to fasten the seat
belts or turn off the EPB before starting to
avoid damages to the ceramic brake discs.
“Safe Hold”: if the vehicle speed is lower
than 1.9 mph (3 km/h), the gear selector is
not in PARK (P) position and the driver's
intention of leaving the vehicle is detected,
the EPB will automatically engage to hold
the vehicle in safety conditions.
“Auto Park Brake”: if the vehicle speed is
below 1.9 mph (3 km/h), the EPB will auto -
matically engage when the gear selector is
in PARK (P) position. The light on the switch
located on the center console switches on
together with the BRAKE warning light on
the instrument cluster display when the
parking brake is engaged and applied to the
wheels. Each automatic parking brake
engagement can be canceled by pushing
the switch on the center console and at the
same time moving the gear selector for the
transmission to position PARK (P).
Safe Hold
Safe Hold is a safety function that automati -
cally engages the EPB in the event of a
dangerous condition for the vehicle.
WARNING!
Never leave children alone in a vehicle, or
with access to an unlocked vehicle.
Allowing children to be in a vehicle unat -
tended is dangerous for a number of
reasons. A child or others could be seri -
ously or fatally injured. Children should be
warned not to touch the parking brake,
brake pedal or the gear selector.
Do not leave the key fob in or near the
vehicle or in a location accessible to chil -
dren. A child could operate power
windows, other controls, or move the
vehicle.
Be sure the parking brake is fully disen -
gaged before driving; failure to do so can
lead to brake failure and a collision.
Always fully apply the parking brake when
leaving your vehicle, or it may roll and
cause damage or injury.
WARNING! (Continued)
21_GU_OM_EN_USC_t.book Page 91
Page 98 of 280
STARTING AND OPERATING
96
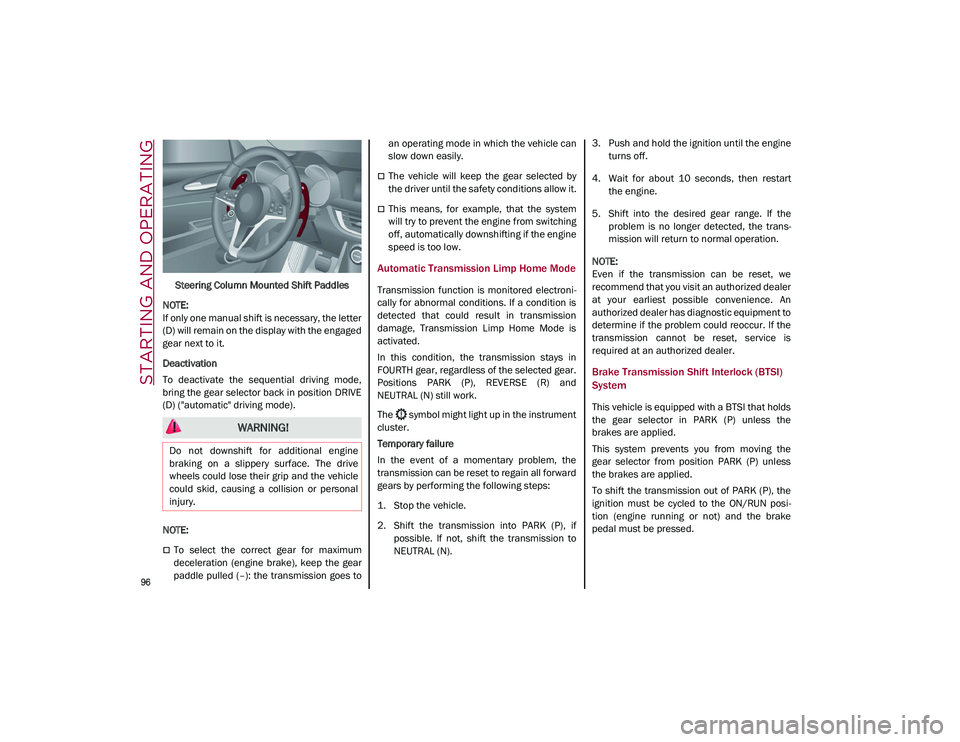
Steering Column Mounted Shift Paddles
NOTE:
If only one manual shift is necessary, the letter
(D) will remain on the display with the engaged
gear next to it.
Deactivation
To deactivate the sequential driving mode,
bring the gear selector back in position DRIVE
(D) ("automatic" driving mode).
NOTE:
To select the correct gear for maximum
deceleration (engine brake), keep the gear
paddle pulled (–): the transmission goes to an operating mode in which the vehicle can
slow down easily.
The vehicle will keep the gear selected by
the driver until the safety conditions allow it.
This means, for example, that the system
will try to prevent the engine from switching
off, automatically downshifting if the engine
speed is too low.
Automatic Transmission Limp Home Mode
Transmission function is monitored electroni
-
cally for abnormal conditions. If a condition is
detected that could result in transmission
damage, Transmission Limp Home Mode is
activated.
In this condition, the transmission stays in
FOURTH gear, regardless of the selected gear.
Positions PARK (P), REVERSE (R) and
NEUTRAL (N) still work.
The symbol might light up in the instrument
cluster.
Temporary failure
In the event of a momentary problem, the
transmission can be reset to regain all forward
gears by performing the following steps:
1. Stop the vehicle.
2. Shift the transmission into PARK (P), if possible. If not, shift the transmission to
NEUTRAL (N). 3. Push and hold the ignition until the engine
turns off.
4. Wait for about 10 seconds, then restart the engine.
5. Shift into the desired gear range. If the problem is no longer detected, the trans -
mission will return to normal operation.
NOTE:
Even if the transmission can be reset, we
recommend that you visit an authorized dealer
at your earliest possible convenience. An
authorized dealer has diagnostic equipment to
determine if the problem could reoccur. If the
transmission cannot be reset, service is
required at an authorized dealer.
Brake Transmission Shift Interlock (BTSI)
System
This vehicle is equipped with a BTSI that holds
the gear selector in PARK (P) unless the
brakes are applied.
This system prevents you from moving the
gear selector from position PARK (P) unless
the brakes are applied.
To shift the transmission out of PARK (P), the
ignition must be cycled to the ON/RUN posi -
tion (engine running or not) and the brake
pedal must be pressed.
WARNING!
Do not downshift for additional engine
braking on a slippery surface. The drive
wheels could lose their grip and the vehicle
could skid, causing a collision or personal
injury.
21_GU_OM_EN_USC_t.book Page 96
Page 101 of 280
99
Activation
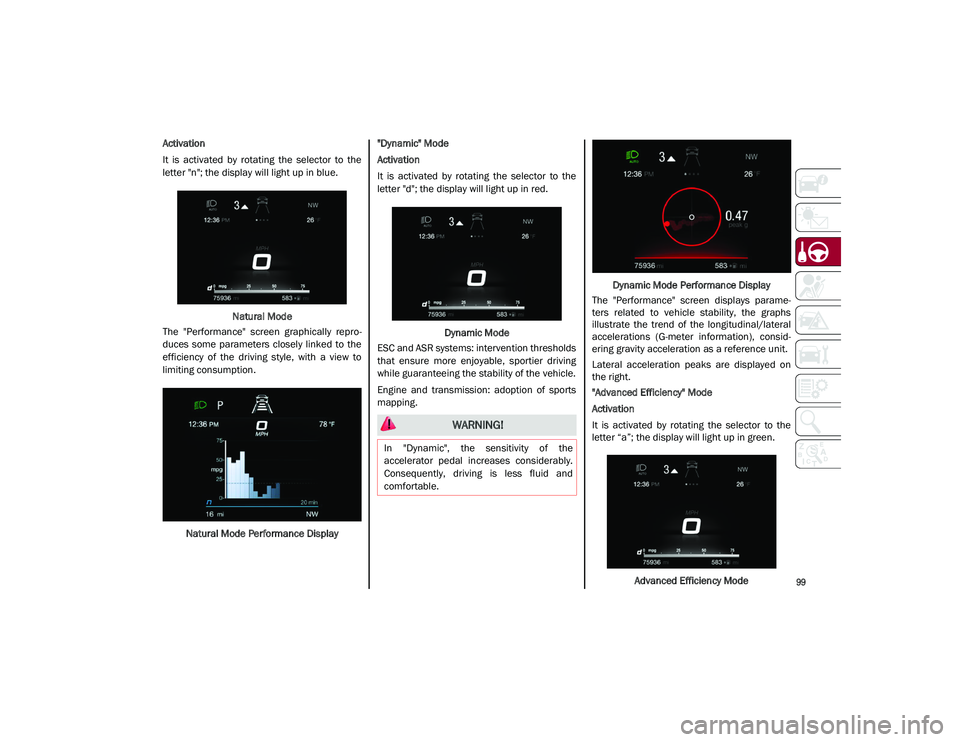
It is activated by rotating the selector to the
letter "n"; the display will light up in blue.Natural Mode
The "Performance" screen graphically repro -
duces some parameters closely linked to the
efficiency of the driving style, with a view to
limiting consumption.
Natural Mode Performance Display "Dynamic" Mode
Activation
It is activated by rotating the selector to the
letter "d"; the display will light up in red.
Dynamic Mode
ESC and ASR systems: intervention thresholds
that ensure more enjoyable, sportier driving
while guaranteeing the stability of the vehicle.
Engine and transmission: adoption of sports
mapping. Dynamic Mode Performance Display
The "Performance" screen displays parame -
ters related to vehicle stability, the graphs
illustrate the trend of the longitudinal/lateral
accelerations (G-meter information), consid -
ering gravity acceleration as a reference unit.
Lateral acceleration peaks are displayed on
the right.
"Advanced Efficiency" Mode
Activation
It is activated by rotating the selector to the
letter “a”; the display will light up in green.
Advanced Efficiency Mode
WARNING!
In "Dynamic", the sensitivity of the
accelerator pedal increases considerably.
Consequently, driving is less fluid and
comfortable.
21_GU_OM_EN_USC_t.book Page 99
Page 102 of 280
STARTING AND OPERATING
100
ESC and ASR systems: intervention thresholds
aimed at ensuring maximum safety in low-grip
driving conditions. It is advisable to select
“Advanced Efficiency” mode in the presence
of low-grip road surfaces.
Engine and transmission: standard response.
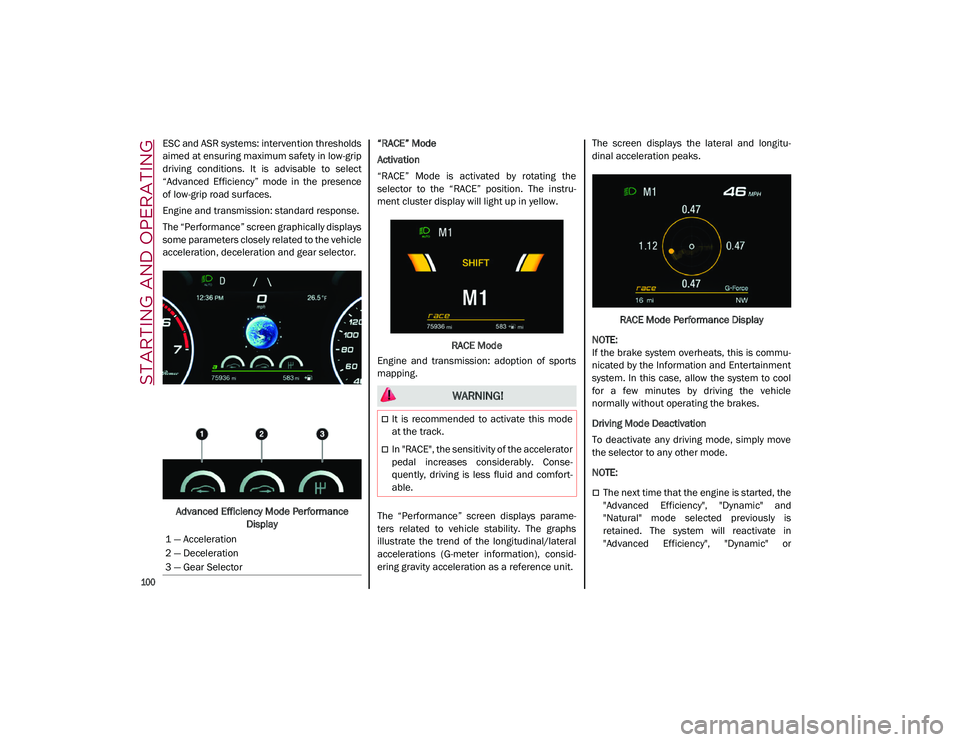
The “Performance” screen graphically displays
some parameters closely related to the vehicle
acceleration, deceleration and gear selector.Advanced Efficiency Mode Performance Display “RACE” Mode
Activation
“RACE” Mode is activated by rotating the
selector to the “RACE” position. The instru-
ment cluster display will light up in yellow.
RACE Mode
Engine and transmission: adoption of sports
mapping.
The “Performance” screen displays parame -
ters related to vehicle stability. The graphs
illustrate the trend of the longitudinal/lateral
accelerations (G-meter information), consid -
ering gravity acceleration as a reference unit. The screen displays the lateral and longitu
-
dinal acceleration peaks.
RACE Mode Performance Display
NOTE:
If the brake system overheats, this is commu -
nicated by the Information and Entertainment
system. In this case, allow the system to cool
for a few minutes by driving the vehicle
normally without operating the brakes.
Driving Mode Deactivation
To deactivate any driving mode, simply move
the selector to any other mode.
NOTE:
The next time that the engine is started, the
"Advanced Efficiency", "Dynamic" and
"Natural" mode selected previously is
retained. The system will reactivate in
"Advanced Efficiency", "Dynamic" or
1 — Acceleration
2 — Deceleration
3 — Gear Selector
WARNING!
It is recommended to activate this mode
at the track.
In "RACE", the sensitivity of the accelerator
pedal increases considerably. Conse
-
quently, driving is less fluid and comfort -
able.
21_GU_OM_EN_USC_t.book Page 100
Page 107 of 280
105
To Activate
To activate the Cruise Control System, push
the on/off button located on the left side of the
steering wheel.
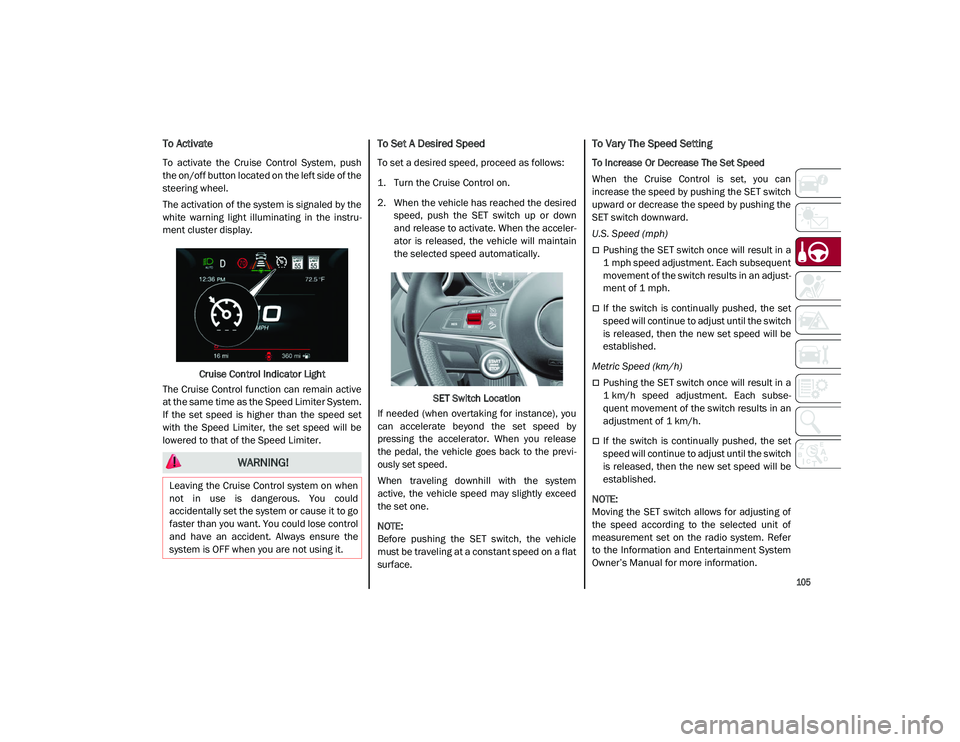
The activation of the system is signaled by the
white warning light illuminating in the instru-
ment cluster display.
Cruise Control Indicator Light
The Cruise Control function can remain active
at the same time as the Speed Limiter System.
If the set speed is higher than the speed set
with the Speed Limiter, the set speed will be
lowered to that of the Speed Limiter.
To Set A Desired Speed
To set a desired speed, proceed as follows:
1. Turn the Cruise Control on.
2. When the vehicle has reached the desired speed, push the SET switch up or down
and release to activate. When the acceler -
ator is released, the vehicle will maintain
the selected speed automatically.
SET Switch Location
If needed (when overtaking for instance), you
can accelerate beyond the set speed by
pressing the accelerator. When you release
the pedal, the vehicle goes back to the previ -
ously set speed.
When traveling downhill with the system
active, the vehicle speed may slightly exceed
the set one.
NOTE:
Before pushing the SET switch, the vehicle
must be traveling at a constant speed on a flat
surface.
To Vary The Speed Setting
To Increase Or Decrease The Set Speed
When the Cruise Control is set, you can
increase the speed by pushing the SET switch
upward or decrease the speed by pushing the
SET switch downward.
U.S. Speed (mph)
Pushing the SET switch once will result in a
1 mph speed adjustment. Each subsequent
movement of the switch results in an adjust -
ment of 1 mph.
If the switch is continually pushed, the set
speed will continue to adjust until the switch
is released, then the new set speed will be
established.
Metric Speed (km/h)
Pushing the SET switch once will result in a
1 km/h speed adjustment. Each subse -
quent movement of the switch results in an
adjustment of 1 km/h.
If the switch is continually pushed, the set
speed will continue to adjust until the switch
is released, then the new set speed will be
established.
NOTE:
Moving the SET switch allows for adjusting of
the speed according to the selected unit of
measurement set on the radio system. Refer
to the Information and Entertainment System
Owner’s Manual for more information.
WARNING!
Leaving the Cruise Control system on when
not in use is dangerous. You could
accidentally set the system or cause it to go
faster than you want. You could lose control
and have an accident. Always ensure the
system is OFF when you are not using it.
21_GU_OM_EN_USC_t.book Page 105
Page 108 of 280
STARTING AND OPERATING
106
To Accelerate For Passing
Press the accelerator as you would normally.
When the pedal is released, the vehicle will
return to the set speed.
Using Cruise Control On Hills
The transmission may downshift on hills to
maintain the vehicle set speed.
NOTE:
The Cruise Control system maintains speed up
and down hills. A slight speed change on
moderate hills is normal.
On steep hills, a greater speed loss or gain
may occur so it may be preferable to drive
without Cruise Control.
To Resume Speed
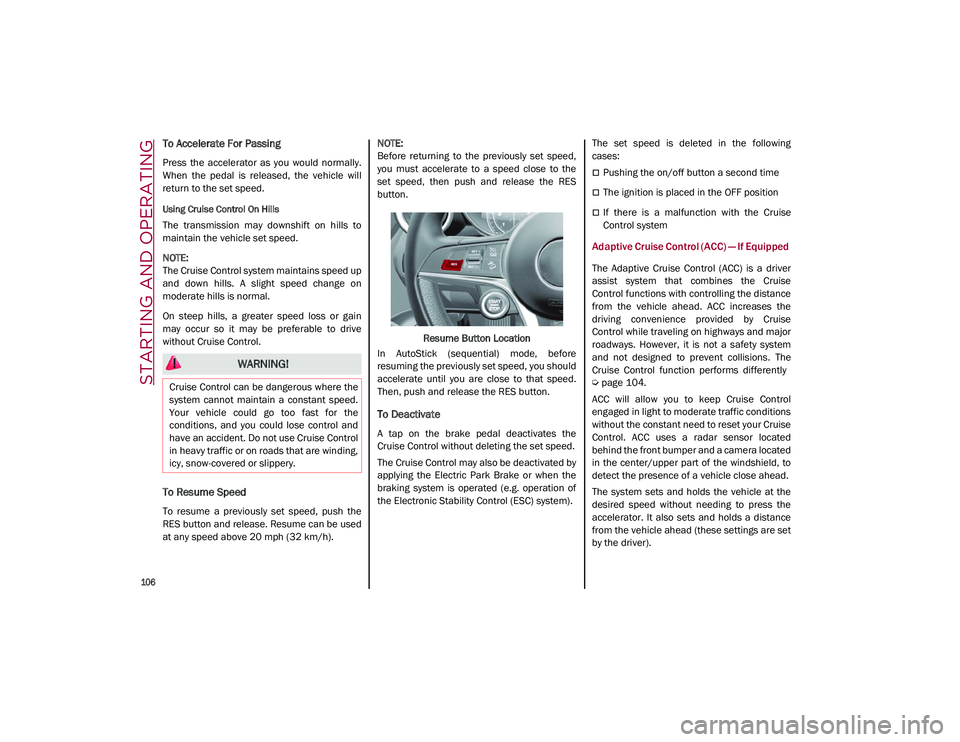
To resume a previously set speed, push the
RES button and release. Resume can be used
at any speed above 20 mph (32 km/h).
NOTE:
Before returning to the previously set speed,
you must accelerate to a speed close to the
set speed, then push and release the RES
button.
Resume Button Location
In AutoStick (sequential) mode, before
resuming the previously set speed, you should
accelerate until you are close to that speed.
Then, push and release the RES button.
To Deactivate
A tap on the brake pedal deactivates the
Cruise Control without deleting the set speed.
The Cruise Control may also be deactivated by
applying the Electric Park Brake or when the
braking system is operated (e.g. operation of
the Electronic Stability Control (ESC) system). The set speed is deleted in the following
cases:
Pushing the on/off button a second time
The ignition is placed in the OFF position
If there is a malfunction with the Cruise
Control system
Adaptive Cruise Control (ACC) — If Equipped
The Adaptive Cruise Control (ACC) is a driver
assist system that combines the Cruise
Control functions with controlling the distance
from the vehicle ahead. ACC increases the
driving convenience provided by Cruise
Control while traveling on highways and major
roadways. However, it is not a safety system
and not designed to prevent collisions. The
Cruise Control function performs differently
Ú
page 104.
ACC will allow you to keep Cruise Control
engaged in light to moderate traffic conditions
without the constant need to reset your Cruise
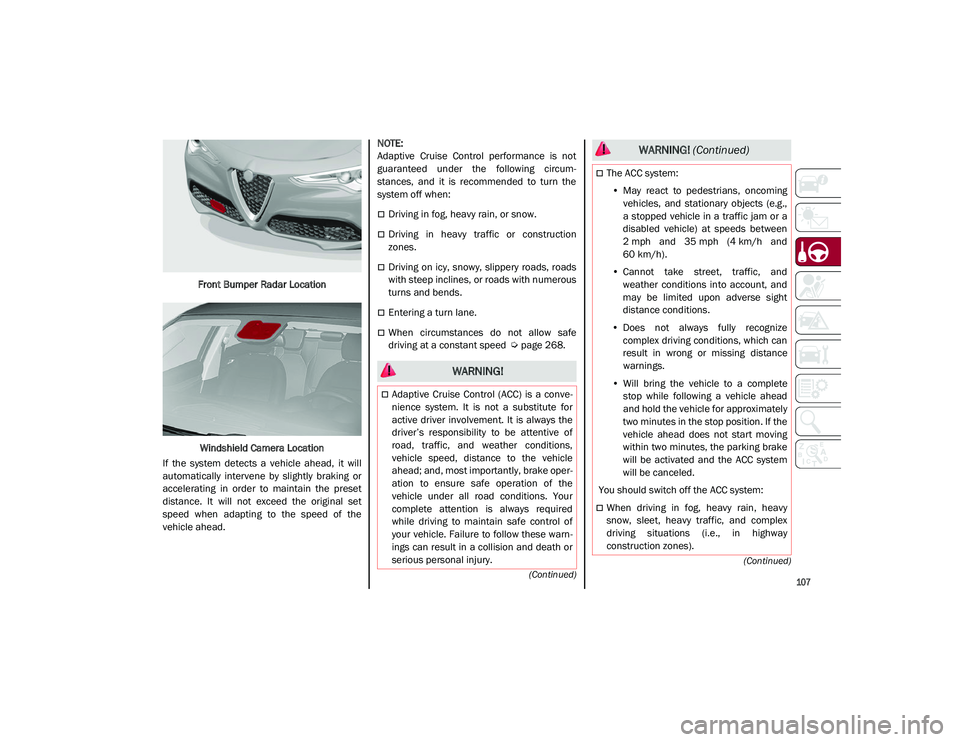
Control. ACC uses a radar sensor located
behind the front bumper and a camera located
in the center/upper part of the windshield, to
detect the presence of a vehicle close ahead.
The system sets and holds the vehicle at the
desired speed without needing to press the
accelerator. It also sets and holds a distance
from the vehicle ahead (these settings are set
by the driver).
WARNING!
Cruise Control can be dangerous where the
system cannot maintain a constant speed.
Your vehicle could go too fast for the
conditions, and you could lose control and
have an accident. Do not use Cruise Control
in heavy traffic or on roads that are winding,
icy, snow-covered or slippery.
21_GU_OM_EN_USC_t.book Page 106
Page 109 of 280
107
(Continued)
(Continued)
Front Bumper Radar Location
Windshield Camera Location
If the system detects a vehicle ahead, it will
automatically intervene by slightly braking or
accelerating in order to maintain the preset
distance. It will not exceed the original set
speed when adapting to the speed of the
vehicle ahead.
NOTE:
Adaptive Cruise Control performance is not
guaranteed under the following circum
-
stances, and it is recommended to turn the
system off when:
Driving in fog, heavy rain, or snow.
Driving in heavy traffic or construction
zones.
Driving on icy, snowy, slippery roads, roads
with steep inclines, or roads with numerous
turns and bends.
Entering a turn lane.
When circumstances do not allow safe
driving at a constant speed
Ú
page 268.
WARNING!
Adaptive Cruise Control (ACC) is a conve -
nience system. It is not a substitute for
active driver involvement. It is always the
driver’s responsibility to be attentive of
road, traffic, and weather conditions,
vehicle speed, distance to the vehicle
ahead; and, most importantly, brake oper -
ation to ensure safe operation of the
vehicle under all road conditions. Your
complete attention is always required
while driving to maintain safe control of
your vehicle. Failure to follow these warn -
ings can result in a collision and death or
serious personal injury.
The ACC system:
• May react to pedestrians, oncoming
vehicles, and stationary objects (e.g.,
a stopped vehicle in a traffic jam or a
disabled vehicle) at speeds between
2 mph and 35 mph (4 km/h and
60 km/h).
• Cannot take street, traffic, and
weather conditions into account, and
may be limited upon adverse sight
distance conditions.
• Does not always fully recognize
complex driving conditions, which can
result in wrong or missing distance
warnings.
• Will bring the vehicle to a complete
stop while following a vehicle ahead
and hold the vehicle for approximately
two minutes in the stop position. If the
vehicle ahead does not start moving
within two minutes, the parking brake
will be activated and the ACC s
ystem
will be canceled.
You should switch off the ACC system:
When driving in fog, heavy rain, heavy
snow, sleet, heavy traffic, and complex
driving situations (i.e., in highway
construction zones).
WARNING! (Continued)
21_GU_OM_EN_USC_t.book Page 107
Page 111 of 280
109
To Pause/Deactivate
With the feature enabled (speed not set), push
the on/off button to disable.
With the feature active (speed set), push the
on/off button to pause. The display will show
the icon in white with the speed in brackets. To
deactivate the feature, push the on/off button
a second time.
To Set A Desired Speed
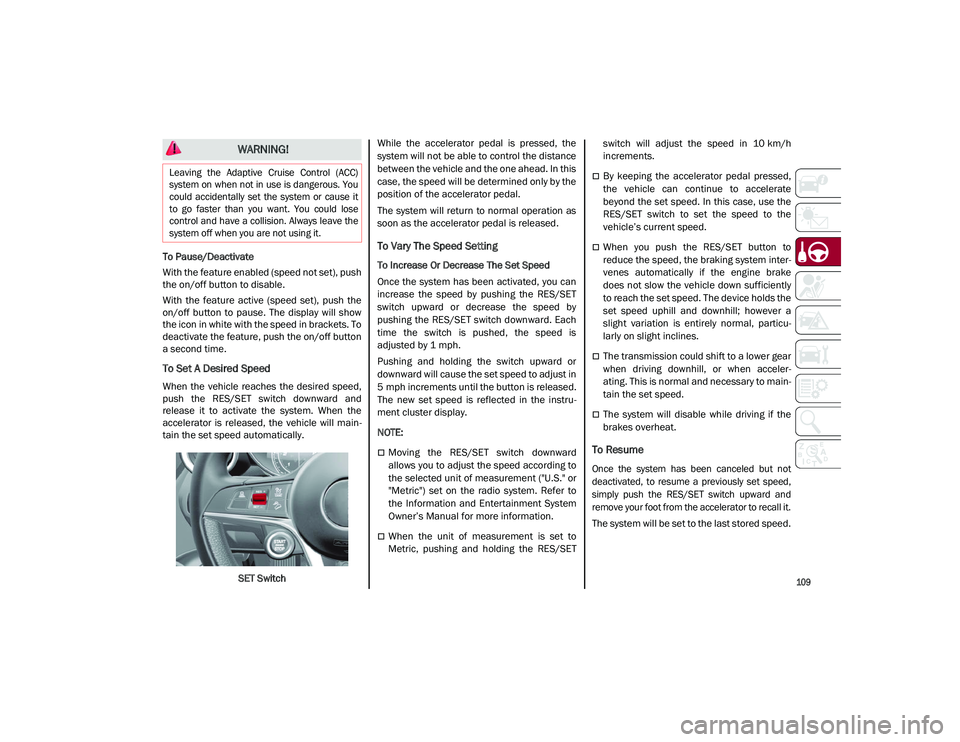
When the vehicle reaches the desired speed,
push the RES/SET switch downward and
release it to activate the system. When the
accelerator is released, the vehicle will main-
tain the set speed automatically.
SET Switch While the accelerator pedal is pressed, the
system will not be able to control the distance
between the vehicle and the one ahead. In this
case, the speed will be determined only by the
position of the accelerator pedal.
The system will return to normal operation as
soon as the accelerator pedal is released.
To Vary The Speed Setting
To Increase Or Decrease The Set Speed
Once the system has been activated, you can
increase the speed by pushing the RES/SET
switch upward or decrease the speed by
pushing the RES/SET switch downward. Each
time the switch is pushed, the speed is
adjusted by 1 mph.
Pushing and holding the switch upward or
downward will cause the set speed to adjust in
5 mph increments until the button is released.
The new set speed is reflected in the instru
-
ment cluster display.
NOTE:
Moving the RES/SET switch downward
allows you to adjust the speed according to
the selected unit of measurement ("U.S." or
"Metric") set on the radio system. Refer to
the Information and Entertainment System
Owner’s Manual for more information.
When the unit of measurement is set to
Metric, pushing and holding the RES/SET switch will adjust the speed in 10 km/h
increments.
By keeping the accelerator pedal pressed,
the vehicle can continue to accelerate
beyond the set speed. In this case, use the
RES/SET switch to set the speed to the
vehicle’s current speed.
When you push the RES/SET button to
reduce the speed, the braking system inter
-
venes automatically if the engine brake
does not slow the vehicle down sufficiently
to reach the set speed. The device holds the
set speed uphill and downhill; however a
slight variation is entirely normal, particu -
larly on slight inclines.
The transmission could shift to a lower gear
when driving downhill, or when acceler -
ating. This is normal and necessary to main -
tain the set speed.
The system will disable while driving if the
brakes overheat.
To Resume
Once the system has been canceled but not
deactivated, to resume a previously set speed,
simply push the RES/SET switch upward and
remove your foot from the accelerator to recall it.
The system will be set to the last stored speed.
WARNING!
Leaving the Adaptive Cruise Control (ACC)
system on when not in use is dangerous. You
could accidentally set the system or cause it
to go faster than you want. You could lose
control and have a collision. Always leave the
system off when you are not using it.
21_GU_OM_EN_USC_t.book Page 109