2021 ALFA ROMEO STELVIO automatic transmission
[x] Cancel search: automatic transmissionPage 111 of 280
109
To Pause/Deactivate
With the feature enabled (speed not set), push
the on/off button to disable.
With the feature active (speed set), push the
on/off button to pause. The display will show
the icon in white with the speed in brackets. To
deactivate the feature, push the on/off button
a second time.
To Set A Desired Speed
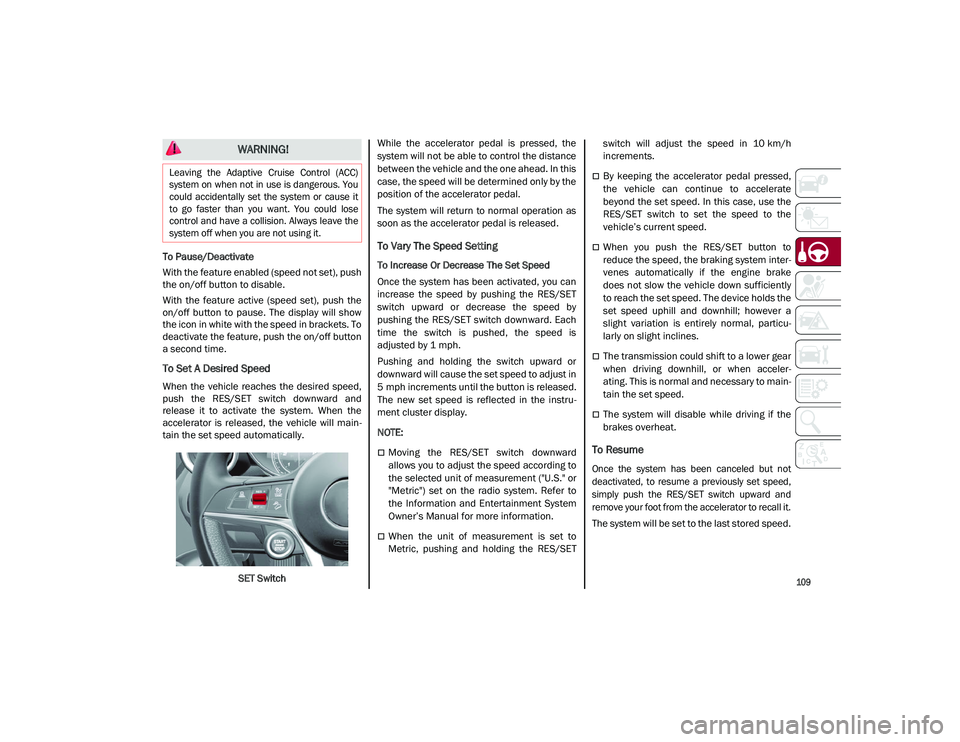
When the vehicle reaches the desired speed,
push the RES/SET switch downward and
release it to activate the system. When the
accelerator is released, the vehicle will main-
tain the set speed automatically.
SET Switch While the accelerator pedal is pressed, the
system will not be able to control the distance
between the vehicle and the one ahead. In this
case, the speed will be determined only by the
position of the accelerator pedal.
The system will return to normal operation as
soon as the accelerator pedal is released.
To Vary The Speed Setting
To Increase Or Decrease The Set Speed
Once the system has been activated, you can
increase the speed by pushing the RES/SET
switch upward or decrease the speed by
pushing the RES/SET switch downward. Each
time the switch is pushed, the speed is
adjusted by 1 mph.
Pushing and holding the switch upward or
downward will cause the set speed to adjust in
5 mph increments until the button is released.
The new set speed is reflected in the instru
-
ment cluster display.
NOTE:
Moving the RES/SET switch downward
allows you to adjust the speed according to
the selected unit of measurement ("U.S." or
"Metric") set on the radio system. Refer to
the Information and Entertainment System
Owner’s Manual for more information.
When the unit of measurement is set to
Metric, pushing and holding the RES/SET switch will adjust the speed in 10 km/h
increments.
By keeping the accelerator pedal pressed,
the vehicle can continue to accelerate
beyond the set speed. In this case, use the
RES/SET switch to set the speed to the
vehicle’s current speed.
When you push the RES/SET button to
reduce the speed, the braking system inter
-
venes automatically if the engine brake
does not slow the vehicle down sufficiently
to reach the set speed. The device holds the
set speed uphill and downhill; however a
slight variation is entirely normal, particu -
larly on slight inclines.
The transmission could shift to a lower gear
when driving downhill, or when acceler -
ating. This is normal and necessary to main -
tain the set speed.
The system will disable while driving if the
brakes overheat.
To Resume
Once the system has been canceled but not
deactivated, to resume a previously set speed,
simply push the RES/SET switch upward and
remove your foot from the accelerator to recall it.
The system will be set to the last stored speed.
WARNING!
Leaving the Adaptive Cruise Control (ACC)
system on when not in use is dangerous. You
could accidentally set the system or cause it
to go faster than you want. You could lose
control and have a collision. Always leave the
system off when you are not using it.
21_GU_OM_EN_USC_t.book Page 109
Page 143 of 280
141
Towing Tips
Before setting out on a trip, practice turning,
stopping, and backing up the trailer in an area
located away from heavy traffic.
Automatic Transmission
Select the DRIVE range when towing. The
transmission controls include a drive strategy
to avoid frequent shifting when towing.
However, if frequent shifting does occur while
in DRIVE, you can use the AutoStick shift
control to manually select a lower gear.
NOTE:
Using a lower gear while operating the vehicle
under heavy loading conditions will improve
performance and extend transmission life by
reducing excessive shifting and heat build-up.
This action will also provide better engine
braking.
Cruise Control — If Equipped
Do not use on hilly terrain or with heavy
loads.
When using the Cruise Control, if you expe-
rience speed drops greater than 10 mph
(16 km/h), disengage until you can get back
to cruising speed.
Use Cruise Control in flat terrain and with
light loads to maximize fuel efficiency.
Installing The Receiver
To properly install the receiver, follow the
directions below:
1. Retrieve the receiver from the luggage compartment.
2. Push the receiver into the trailer hitch, and secure by inserting the locking pin into the
trailer hitch.
3. Insert the safety split ring into the hole on the locking pin.
NOTE:
Ensure that the locking pin is removed from
the trailer hitch before installing the receiver.
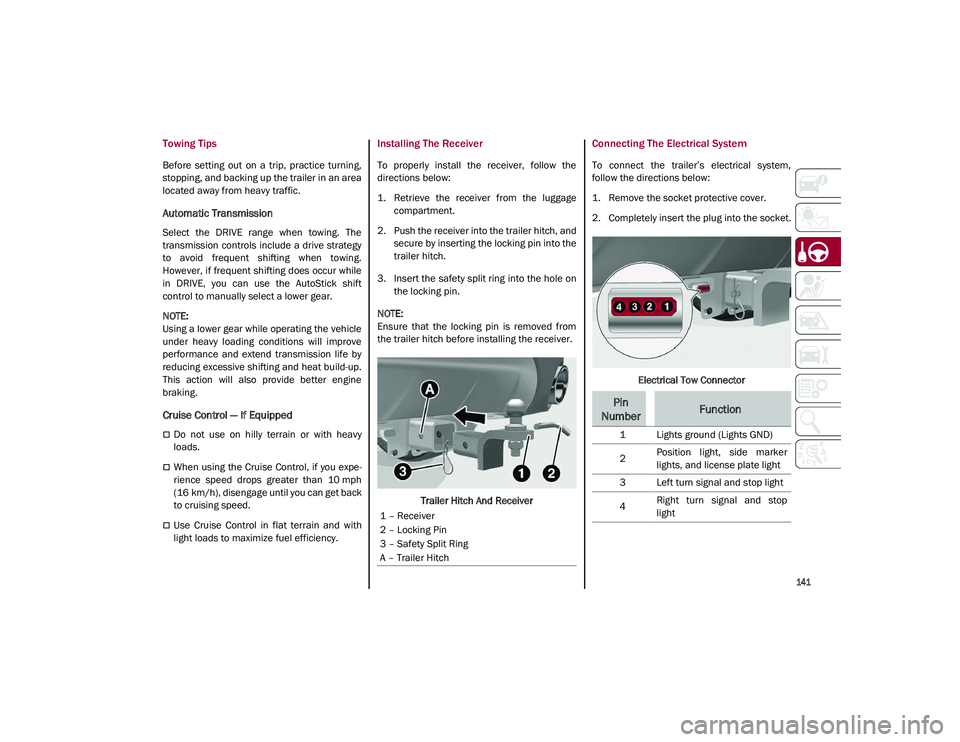
Trailer Hitch And Receiver
Connecting The Electrical System
To connect the trailer’s electrical system,
follow the directions below:
1. Remove the socket protective cover.
2. Completely insert the plug into the socket.
Electrical Tow Connector
1 – Receiver
2 – Locking Pin
3 – Safety Split Ring
A – Trailer Hitch
Pin
NumberFunction
1 Lights ground (Lights GND)
2 Position light, side marker
lights, and license plate light
3 Left turn signal and stop light
4 Right turn signal and stop
light
21_GU_OM_EN_USC_t.book Page 141
Page 150 of 280
SAFETY
148
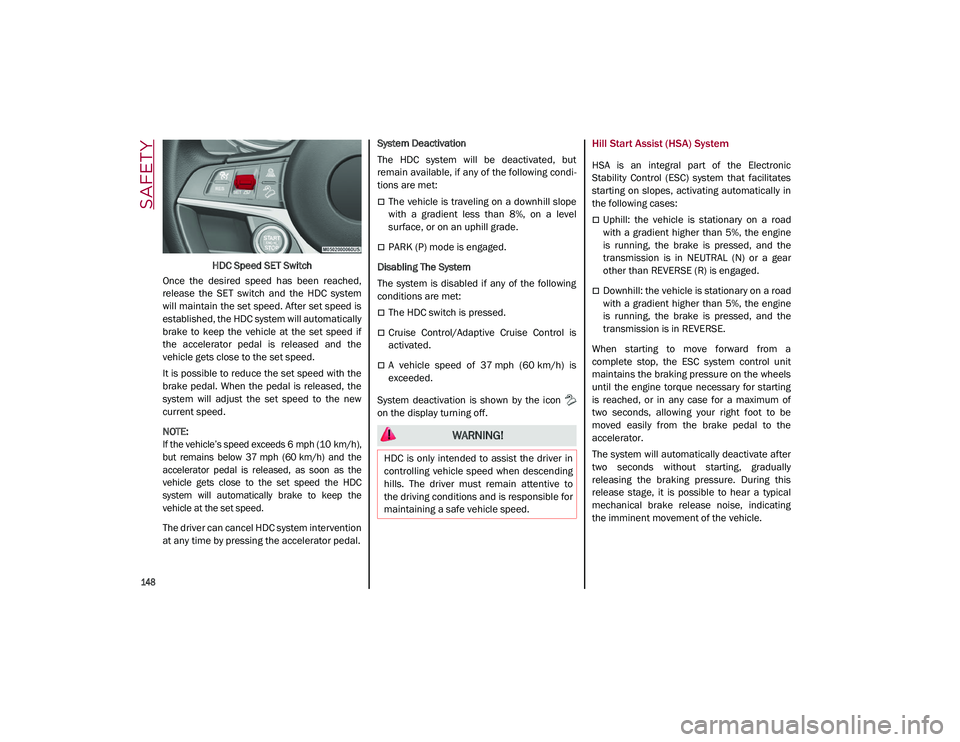
HDC Speed SET Switch
Once the desired speed has been reached,
release the SET switch and the HDC system
will maintain the set speed. After set speed is
established, the HDC system will automatically
brake to keep the vehicle at the set speed if
the accelerator pedal is released and the
vehicle gets close to the set speed.
It is possible to reduce the set speed with the
brake pedal. When the pedal is released, the
system will adjust the set speed to the new
current speed.
NOTE:
If the vehicle’s speed exceeds 6 mph (10 km/h),
but remains below 37 mph (60 km/h) and the
accelerator pedal is released, as soon as the
vehicle gets close to the set speed the HDC
system will automatically brake to keep the
vehicle at the set speed.
The driver can cancel HDC system intervention
at any time by pressing the accelerator pedal. System Deactivation
The HDC system will be deactivated, but
remain available, if any of the following condi
-
tions are met:
The vehicle is traveling on a downhill slope
with a gradient less than 8%, on a level
surface, or on an uphill grade.
PARK (P) mode is engaged.
Disabling The System
The system is disabled if any of the following
conditions are met:
The HDC switch is pressed.
Cruise Control/Adaptive Cruise Control is
activated.
A vehicle speed of 37 mph (60 km/h) is
exceeded.
System deactivation is shown by the icon
on the display turning off.
Hill Start Assist (HSA) System
HSA is an integral part of the Electronic
Stability Control (ESC) system that facilitates
starting on slopes, activating automatically in
the following cases:
Uphill: the vehicle is stationary on a road
with a gradient higher than 5%, the engine
is running, the brake is pressed, and the
transmission is in NEUTRAL (N) or a gear
other than REVERSE (R) is engaged.
Downhill: the vehicle is stationary on a road
with a gradient higher than 5%, the engine
is running, the brake is pressed, and the
transmission is in REVERSE.
When starting to move forward from a
complete stop, the ESC system control unit
maintains the braking pressure on the wheels
until the engine torque necessary for starting
is reached, or in any case for a maximum of
two seconds, allowing your right foot to be
moved easily from the brake pedal to the
accelerator.
The system will automatically deactivate after
two seconds without starting, gradually
releasing the braking pressure. During this
release stage, it is possible to hear a typical
mechanical brake release noise, indicating
the imminent movement of the vehicle.
WARNING!
HDC is only intended to assist the driver in
controlling vehicle speed when descending
hills. The driver must remain attentive to
the driving conditions and is responsible for
maintaining a safe vehicle speed.
21_GU_OM_EN_USC_t.book Page 148
Page 177 of 280
175
If A Deployment Occurs
The front air bags are designed to deflate
immediately after deployment.
NOTE:
Front and/or side air bags will not deploy in all
collisions. This does not mean something is
wrong with the air bag system.
If you do have a collision which deploys the air
bags, any or all of the following may occur:
The air bag material may sometimes cause
abrasions and/or skin reddening to the
occupants as the air bags deploy and
unfold. The abrasions are similar to friction
rope burns or those you might get sliding
along a carpet or gymnasium floor. They are
not caused by contact with chemicals. They
are not permanent and normally heal
quickly. However, if you haven’t healed
significantly within a few days, or if you have
any blistering, see your doctor immediately.
As the air bags deflate, you may see some
smoke-like particles. The particles are a
normal by-product of the process that
generates the non-toxic gas used for air bag
inflation. These airborne particles may irri-
tate the skin, eyes, nose, or throat. If you
have skin or eye irritation, rinse the area
with cool water. For nose or throat irritation,
move to fresh air. If the irritation continues,
see your doctor. If these particles settle on
your clothing, follow the garment manufac -
turer’s instructions for cleaning. Do not drive your vehicle after the air bags
have deployed. If you are involved in another
collision, the air bags will not be in place to
protect you.
NOTE:
Air bag covers may not be obvious in the
interior trim, but they will open during air
bag deployment.
After any collision, the vehicle should be
taken to an authorized dealer immediately.
Enhanced Accident Response System
In the event of an impact, if the communica
-
tion network remains intact, and the power
remains intact, depending on the nature of the
event, the Occupant Restraint Controller (ORC)
will determine whether to have the Enhanced
Accident Response System perform the
following functions:
Cut off fuel to the engine (if equipped)
Cut off battery power to the electric motor (if
equipped)
Flash hazard lights as long as the battery
has power
Turn on the interior lights, which remain on
as long as the battery has power or for
15 minutes from the intervention of the
Enhanced Accident Response System
Unlock the power door locks
Your vehicle may also be designed to perform
any of these other functions in response to the
Enhanced Accident Response System:
Turn off the Fuel Filter Heater, Turn off the
HVAC Blower Motor, Close the HVAC Circula -
tion Door
Cut off battery power to the:
• Engine
• Electric Motor (if equipped)
• Electric power steering
• Brake booster
• Electric park brake
• Automatic transmission gear selector
• Horn
• Front wiper
• Headlamp washer pump
WARNING!
Deployed air bags and seat belt
pretensioners cannot protect you in another
collision. Have the air bags, seat belt
pretensioners, and the seat belt retractor
assemblies replaced by an authorized
dealer immediately. Also, have the
Occupant Restraint Controller System
serviced as well.
21_GU_OM_EN_USC_t.book Page 175
Page 206 of 280
IN CASE OF EMERGENCY
204
4. Disconnect the positive (+) end of thejumper cable from the positive (+) post of
the vehicle with the discharged battery.
If frequent jump starting is required to start
your vehicle, you should have the battery and
charging system inspected at an authorized
dealer.
Bump Starting
Never jump start the engine by pushing,
towing or coasting downhill.
NOTE:
You cannot start a vehicle with an automatic
transmission by pushing it.
ENGINE OVERHEATING
If your vehicle is overheating, it will need to be
serviced at an authorized dealer.
Engine overheating may occur in situations
such as (but not limited to) extreme environ -
mental temperatures or frequent engine
stops/starts. If the engine becomes over -heated, the Engine Temperature Warning
Light in the instrument cluster will illuminate
along with a dedicated message
Ú
page 79.
In any of the following situations, you can
reduce the potential for overheating by taking
the appropriate action.
On the highways — slow down.
In city traffic — while stopped, place the
transmission in NEUTRAL, but do not
increase engine idle speed.
NOTE:
There are steps that you can take to slow down
an impending overheat condition:
If your Air Conditioner (A/C) is on, turn it off.
The A/C system adds heat to the engine
cooling system and turning the A/C off can
help remove this heat.
You can also turn the temperature control
to maximum heat, the mode control to floor
and the blower control to high. This allows
the heater core to act as a supplement to
the radiator and aids in removing heat from
the engine cooling system.
NOTE:
If the cooling fan does not operate while the
engine is running, the engine temperature
will increase. Stop the engine and contact
an authorized dealer.
If the engine continues to overheat or
frequently overheats, have the cooling
system inspected. The engine could be seri
-
ously damaged unless repairs are made.
Contact an authorized dealer.
CAUTION!
Accessories plugged into the vehicle power
outlets draw power from the vehicle’s
battery, even when not in use (i.e., cellular
phones, etc.). Eventually, if plugged in long
enough without engine operation, the
vehicle’s battery will discharge sufficiently
to degrade battery life and/or prevent the
engine from starting.
WARNING!
You or others can be badly burned by hot
engine coolant (antifreeze) or steam from
your radiator. If you see or hear steam
coming from under the hood, do not open
the hood until the radiator has had time to
cool. Never try to open a cooling system
pressure cap when the radiator or coolant
bottle is hot.
CAUTION!
Driving with a hot cooling system could
damage your vehicle. If temperature gauge
reads “H”, pull over and stop the vehicle.
Idle the vehicle with the air conditioner
turned off until the pointer drops back into
the normal range. If the pointer remains on
the “H”, turn the engine off immediately,
and call for service.
21_GU_OM_EN_USC_t.book Page 204
Page 219 of 280
217
Washer Fluid For Windshield/Headlights
The windshield and headlight (if equipped)
washer fluid reservoir is equipped with a tele-
scopic filler neck.
If the level is too low, remove reservoir cap and
lift the filler neck. Then, add the fluid
described
Ú
page 263. After filling the reser -
voir, lower the filler neck and install the reser -
voir cap until you hear it click.
NOTE:
The headlight washers are activated every 10
activations of the windshield washer.
note:
The headlight washing system will not work if
the liquid level is low (situation indicated by
the symbol on the instrument cluster display
Ú
page 69). The windshield washer will keep
working.
On vehicles equipped with headlight washers,
there is a reference notch on the dipstick:
ONLY the windshield/rear window washer
operates with the level below this reference.
Brake Fluid
Check that the fluid is at the maximum level. If
the fluid level in the tank is low, contact an
authorized dealer to have the system checked.
Automatic Transmission Activation System
Oil
The transmission control oil level should only
be checked at an authorized dealer.
Useful Advice For Extending The Life Of
Your Battery
To avoid draining your battery and make it last
longer, observe the following instructions:
When you park the vehicle, ensure that the
doors and liftgate are closed properly to
prevent any lights from remaining on inside
the passenger's compartment.
Do not keep accessories (e.g. radio, hazard
warning lights, etc.) switched on for a long
time when the engine is not running.
Before performing any operation on the
electrical system, disconnect the negative
battery cable.
If you wish to install electrical accessories
after purchasing the vehicle that require
permanent electrical supply (e.g. alarm, etc.),
or accessories which influence the electrical
supply requirements, contact an authorized
dealer, who’s qualified staff will evaluate the
overall electrical consumption.
NOTE:
After the battery is disconnected, the steering
must be initialized. The warning light on the
instrument cluster display switches on to indi
-
cate this. To carry out this procedure, simply
turn the steering wheel all the way from one
end to the other, and then turn it back to the
central position.Battery
The battery does not require the electrolyte to
be topped up with distilled water. A periodic
check carried out at an authorized dealer,
however, is necessary to check efficiency.
Follow the battery manufacturer's instructions
for maintenance.
CAUTION!
If the charge level remains under 50% for a
long time, the battery may be damaged by
sulfation, reducing its capacity and
efficiency during the vehicle start. The
battery is also more prone to the risk of
freezing (at temperatures as high as 14°F
(-10°C).
21_GU_OM_EN_USC_t.book Page 217
Page 227 of 280
225
Automatic Transmission
Use only a transmission oil with the character-
istics indicated
Ú
page 263.
Special Additives
Do not use any type of additive with the auto -
matic transmission oil. The automatic trans -
mission oil is a product designed specially for this vehicle and its performance may be
compromised through the use of further addi
-
tives.
Frequency of Oil Changes
In normal vehicle operating conditions, it is not
necessary to change the transmission oil.
Replacing The Battery
If necessary, replace the battery with another
battery with the same specifications. It is
advised to contact an authorized dealer for
replacement.
Follow the battery manufacturer's instructions
for maintenance.
Fuses
General Information
The fuses protect electrical systems against
excessive current.
When a device does not work, you must check
the electrical circuit inside of the fuse for a
break/melt.
Also, please be aware that using power outlets
for extended periods of time with the engine
off may result in vehicle battery discharge.
Blade Fuses
To avoid contamination from foreign
matter or moisture, use only new brake
fluid or fluid that has been in a tightly
closed container. Keep the master
cylinder reservoir cap secured at all times.
Brake fluid in a open container absorbs
moisture from the air resulting in a lower
boiling point. This may cause it to boil
unexpectedly during hard or prolonged
braking, resulting in sudden brake failure.
This could result in a collision.
Overfilling the brake fluid reservoir can
result in spilling brake fluid on hot engine
parts, causing the brake fluid to catch fire.
Brake fluid can also damage painted and
vinyl surfaces, care should be taken to
avoid its contact with these surfaces.
Do not allow petroleum-based fluid to
contaminate the brake fluid. Brake seal
components could be damaged, causing
partial or complete brake failure. This
could result in a collision.
WARNING! (Continued)
CAUTION!
Do not use chemical flushes in your
transmission as the chemicals can damage
your transmission components. Such
damage is not covered by the New Vehicle
Limited Warranty.
CAUTION!
If a transmission fluid leak occurs, visit an
authorized dealer immediately. Severe
transmission damage may occur. An
authorized dealer has the proper tools to
adjust the fluid level accurately.
1 — Electrical Circuit
2 — Blade Fuse With Good Electrical Circuit
3 — Blade Fuse With Bad Electrical Circuit
21_GU_OM_EN_USC_t.book Page 225
Page 264 of 280

TECHNICAL SPECIFICATIONS
262
FLUID CAPACITIES
2.0L Engine
USMetric
Fuel tank 16.9 Gallons64 Liters
Fuel tank reserve 2.5 Gallons9.6 Liters
Engine cooling system 2.3 Gallons8.8 Liters
Intercooler cooling system 1.4 Gallons5.25 Liters
Engine oil sump and filter 5.5 Quarts5.2 Liters
Hydraulic brake circuit 0.9 Quarts0.9 Liters
Windshield washer fluid reservoir 1.1 Gallons4.1 Liters
Automatic transmission 9.8 Quarts9.3 Liters
RDU 230-LSD differential 0.9 Quarts0.9 Liters
RDU 210-eLSD differential (if equipped) 1.4 Quarts1.3 Liters
RDU 210/215-LSD differential 1.1 Quarts1.1 Liters
AWD System FAD transfer case 0.5 Quarts0.5 Liters
AWD System Transfer Case 0.7 Quarts0.7 Liters
2.9L Engine
USMetric
Fuel tank 16.9 Gallons64 Liters
Fuel tank reserve 2.5 Gallons9.6 Liters
Engine cooling system 2.95 Gallons11.2 Liters
Intercooler cooling system 1.5 Gallons5.75 Liters
Engine oil sump and filter 7.2 Quarts7 Liters
Hydraulic brake circuit 0.9 Quarts0.9 Liters
21_GU_OM_EN_USC_t.book Page 262