Page 153 of 198

9-40
9
TIPService the air filters more frequently when
operating in wet or dusty environments. Whenever air filter maintenance is performed:
check the air inlet for obstructions and the
air filter case for dirt and foreign matter.
check the air filter case check hoses for dirt
or water and clean as necessary.
check the air filter case joints and the rub-
ber joints to and from the throttle body for
proper fit and sealing.
tighten all fittings securely to avoid the pos-
sibility of unfiltered air entering the engine.NOTICEECB02270Never operate the engine with the air filter
element removed. Doing so would allow
unfiltered air to enter, causing rapid en-
gine wear and possible engine damage. Additionally, the fuel injection system
would be affected, re
sulting in poor engine
performance and possible overheating.
Clean the primary air filter as follows. 1. Remove the air filter case cover by turn- ing the air filter case cover lock counter-
clockwise.TIPMake sure that the match mark on the cover
lock is aligned with the open match mark on
the air filter case cover.
UB5J7BE0.book Page 40 Tuesday, June 18, 2019 10:07 AM
Page 154 of 198
9-41
9
2. Remove the foam air filter.3. Remove the foam air filter element from
the air filter frame.1. Air filter case cover lock
2. Air filter case cover
3. Match mark
1
2
3
1. Foam air filter
1
UB5J7BE0.book Page 41 Tuesday, June 18, 2019 10:07 AM
Page 155 of 198
9-42
9
4. Wash the foam material gently but thor-oughly in parts cleaning solvent.
WARNING! Using gasoline or other flammable solvents to clean the air fil-
ter element can cause a fire or explo-
sion, which could lead to serious
injury.
[EWB03360]
5. Squeeze out the excess solvent. NOTICE: Do not twist the foam materi-
al when squeezing it.
[ECB02970]
6. Wash the foam material in warm soapy water to remove remaining solvent, then
rinse thoroughly with plain warm water.
7. Squeeze out the excess water. NOTICE:
Do not twist the foam material when
squeezing it.
[ECB02970]
8. Allow the foam air filt er to dry thoroughly.
Inspect for wear and tear and replace if
damaged or heavily worn.
1. Foam air filter element
2. Air filter frame
1
2
UB5J7BE0.book Page 42 Tuesday, June 18, 2019 10:07 AM
Page 156 of 198
9-43
9
9. Thoroughly apply Yamalube foam air filteroil (or other quality liquid foam air filter—
do not use a spray-type product) to the
foam material. The foam air filter element
should be wet but not dripping.
10. Pull the foam air filter element over its frame.
11. Install the air filter.
12. Install the air filter case cover and lock it
into place by turning the air filter case
cover lock clockwise.
TIPMake sure that the match mark on the cover
lock is aligned with the close match mark on
the air filter case cover. EBU35130Cleaning the air filter case check hosesThere is a check hose on each side of the air
filter case. If dust or water collects in a check
hose, empty the hose and clean the air filter
element and air filter case.1. Match mark
1
UB5J7BE0.book Page 43 Tuesday, June 18, 2019 10:07 AM
Page 157 of 198
9-44
9
EBU35141Cleaning the spark arrester
WARNING
EWB03370Hot exhaust system may cause burns. To
avoid burns or fires, make sure that the en-
gine is stopped and the exhaust system is
cool before cleaning the spark arrester. Do
not start the engine while cleaning the ex-
haust system. 1. Remove the tailpipe cover by removingthe tailpipe cover bolts.
1. Air filter case check hose
1
1
1. Tailpipe cover
2. Tailpipe cover bolt
1
2
2
UB5J7BE0.book Page 44 Tuesday, June 18, 2019 10:07 AM
Page 158 of 198
9-45
9
2. Remove the tailpipe bolts.
3. Remove the tailpipe by pulling it out ofthe muffler, and then remove the gasket.
4. Tap the tailpipe lightly, and then use a wire brush to remove any carbon depos-
its from the spark arrester portion of the
tailpipe and inside of the tailpipe housing. 5. Install the gasket, and then insert the tail-
pipe into the muffler and align the bolt
holes.
6. Install the tailpipe bolts and tighten them
to the specified torque.
7. Install the tailpipe cover.1. Tailpipe bolt
1
1
1. Gasket
2. Spark arrester
3. TailpipeTightening torque:
Tailpipe bolt:10 N·m (1.0 kgf·m, 7.4 lb·ft)
2
1
3
UB5J7BE0.book Page 45 Tuesday, June 18, 2019 10:07 AM
Page 159 of 198

9-46
9
8. Install the tailpipe cover bolts and tightenthem to the specified torque.EBU32460Valve clearanceThe correct valve clearance changes with
use, resulting in improper fuel/air supply or
engine noise. To preven t this, the valve clear-
ance must be adjusted regularly. This adjust-
ment however, should be left to a
professional Yamaha service technician.EBU32470BrakesReplacement of brake components requires
professional knowledge. Brake service
should be performed by a Yamaha dealer.
WARNING
EWB02572Operating with improperly serviced or ad-
justed brakes could lead to a loss in brak-
ing ability and an accident. EBU35150Checking the front and rear brake padsCheck each brake pad for damage and mea-
sure the lining thickness. If a brake pad is
damaged or if the lining thickness is less than
1.0 mm (0.04 in), have a Yamaha dealer re-
place the brake pads as a set.
The wheels need to be removed to check the
brake pads. (See page s 9-56, 9-58 for wheel
removal and installation procedures.)
Tightening torque: Tailpipe cover bolt:8 N·m (0.8 kgf·m, 5.9 lb·ft)
UB5J7BE0.book Page 46 Tuesday, June 18, 2019 10:07 AM
Page 160 of 198
9-47
9
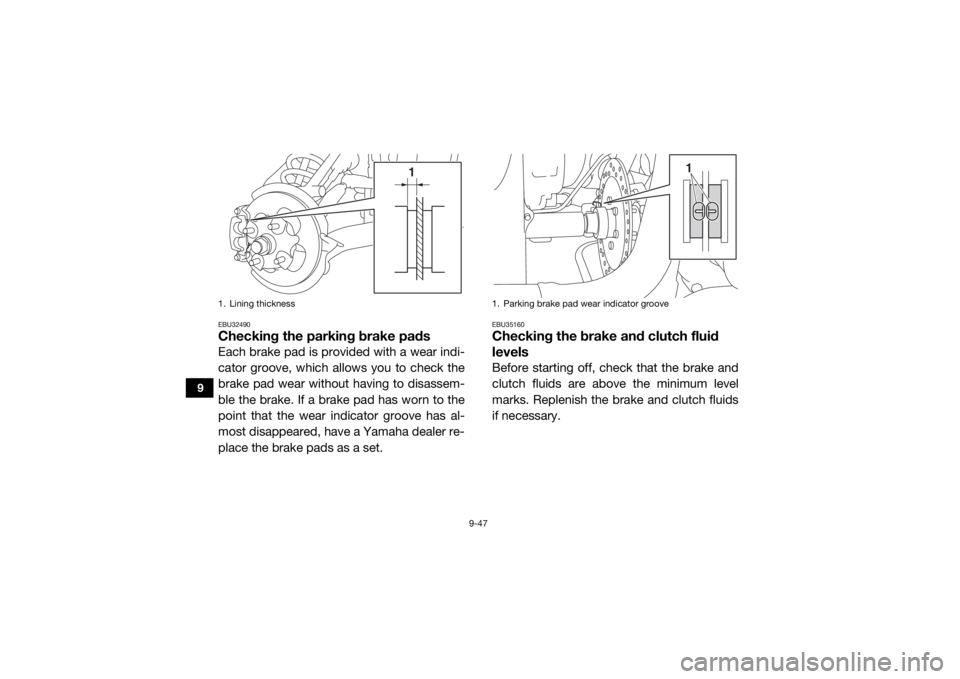
EBU32490Checking the parking brake padsEach brake pad is provided with a wear indi-
cator groove, which allows you to check the
brake pad wear without having to disassem-
ble the brake. If a brake pad has worn to the
point that the wear indicator groove has al-
most disappeared, have a Yamaha dealer re-
place the brake pads as a set.
EBU35160Checking the brake and clutch fluid
levelsBefore starting off, check that the brake and
clutch fluids are above the minimum level
marks. Replenish the brake and clutch fluids
if necessary.
1. Lining thickness
1
1. Parking brake pad wear indicator groove
1
UB5J7BE0.book Page 47 Tuesday, June 18, 2019 10:07 AM