Page 185 of 314

1877-2. Panoramic view monitor
7
Peripheral monitoring system
Each time the guide line switch-
ing button is selected, the mode
will change as follows:
Distance guide line
Only the distance guide lines
are displayed.
Projected course line
Projected course lines will be
added to the distance guide
lines.
In addition to screen switching
by operating the camera switch,
automatic display mode is avail-
able. In this mode, the screen is
switched automatically in
response to vehicle speed.
Each time is selected, automatic display mode is
enabled/disabled.
In automatic mode, the monitor
will automatically display images
in the following situations:
Vehicles with an automatic
transmission: When the shift
lever is shifted to “N” or “D”
position.
Vehicles with a manual trans-
mission: When the shift lever
is in a position other than “R”
and the vehicle starts moving.
When vehicle speed is
reduced to approximately 6
mph (10 km/h) or less.
Switching the guide line
mode
Automatic display mode
Page 186 of 314

1887-2. Panoramic view monitor
Side views
Automatic display button
Select to turn automatic display mode on/off. The indicator on the button
illuminates during autom atic display mode. (P.189)
Front distance guide line (red)
Show distance in front of the vehicle.
• Display points approximately 1 .6 ft. (0.5 m) from the edge of the bumper.
Vehicle width lines (blue)
Shows guide lines of the vehicle’ s width including the outside rear view mir-
rors.
Front tire contact line (blue)
Shows guide lines of where the f ront tire touches the ground.
Intuitive parking assist*
When a sensor detects an obstacle, the direction of and the app roximate
distance to the obsta cle are displayed and the buzzer sounds.
*: If equipped
Checking the sides of the vehicle
The image from the both side cameras is displayed and
assists the driver to check conditions on the sides of the
vehicle or to confirm the safety of narrow roads.
To display the Side views screen, press the camera switch
repeatedly when the shift lever is in a position other than “R”
with the vehicle moving approximately 7 mph (12 km/h) or
less.
Screen display
A
B
C
D
E
Page 187 of 314

1897-2. Panoramic view monitor
7
Peripheral monitoring system
●Pressing the camera switch changes the screen to the panoramic view &
wide front view screen or previous ly displayed screen, such as the naviga-
tion screen.
●For details about the intuitive parking assist, refer to the “O WNER’S MAN-
UAL”.
In addition to screen switching
by operating the camera switch,
automatic display mode is avail-
able. In this mode, the screen is
switched automatically in
response to vehicle speed.
Each time is selected,
automatic display mode is
enabled/disabled.
In automatic display mode, the
monitor will automatically dis-
play images in the following situ-
ations:
Vehicles with an automatic
transmission: When the shift
lever is shifted to “N” or “D”
position.
Vehicles with a manual trans-
mission: When the shift lever
is in a position other than “R”
and the vehicle starts moving.
When vehicle speed is reduced to approximately 6
mph (10 km/h) or less.
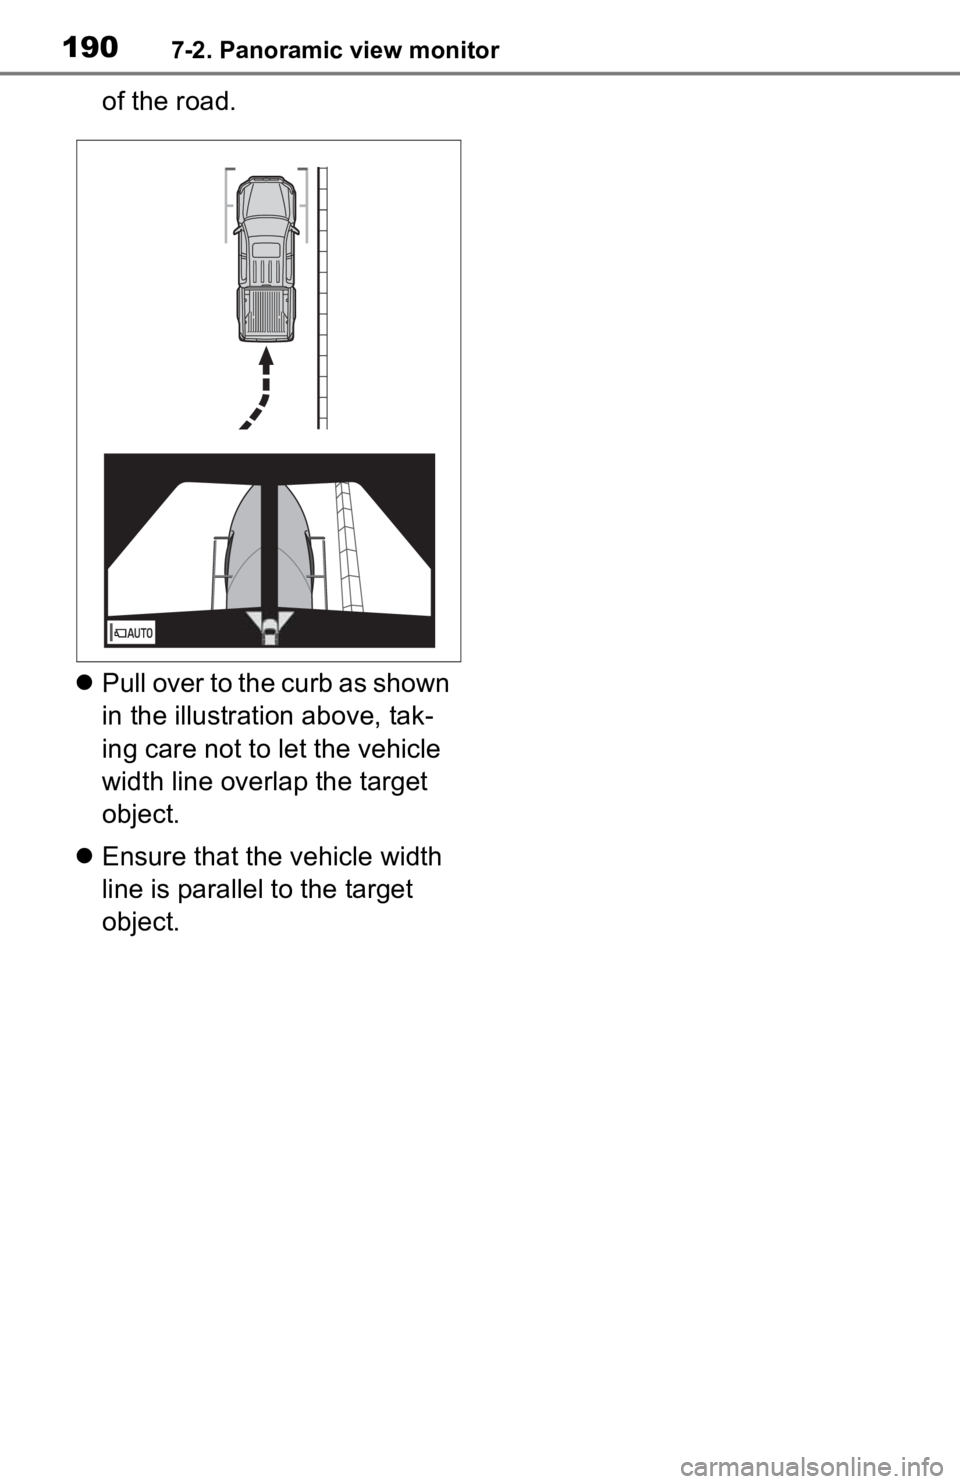
Check the positions and dis-
tance between the vehicle
width line and a target object
such as the obstacle or curb
WARNING
●When a sensor indicator on the in tuitive parking assist display illumi-
nates in red or a buzzer sounds continuously, be sure to check the area
around the vehicle immediately a nd do not proceed any further until
safety has been ensured, otherwise an unexpected accident may o ccur.
●As the intuitive parking assist display is displayed over the c amera view,
it may be difficult to see the intuitive parking assist display depending on
the color and brightness of the surrounding area.
Automatic display mode
Using the vehicle width
lines
Page 188 of 314
1907-2. Panoramic view monitor
of the road.
Pull over to the curb as shown
in the illustration above, tak-
ing care not to let the vehicle
width line overlap the target
object.
Ensure that the vehicle width
line is parallel to the target
object.
Page 189 of 314
1917-2. Panoramic view monitor
7
Peripheral monitoring system
Each time the display mode switching button is selected, the mode
will change as follows:
Panoramic view & rear view
Wide rear view
Display mode switching button
Select to switches between panora mic view & rear view display and wide
rear view display.
Guide line switching button
Select to switch the guide line mode. ( P.192)
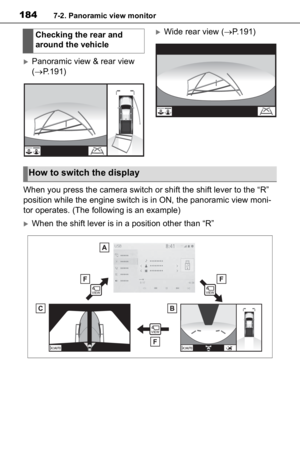
Checking the rear and around the vehicle
The panoramic view & rear view and the wide rear view
screen provide support when checking the areas of behind
the vehicle and around the vehicle while backing up, for
example while parking.
The screens will be displayed when the shift lever is in the
“R” position.
Screen display
A
B
Page 190 of 314

1927-2. Panoramic view monitor
Intuitive parking assist*
When a sensor detects an obstacle, the direction of and the app roximate
distance to the obsta cle are displayed and the buzzer sounds.
*: If equipped
●The monitor is cancelled when the shift lever is shifted into any position
other than the “R” position.
●For details about the intuitive parking assist, refer to the “O WNER’S MAN-
UAL”.
Each time the guide line switching button is selected, the mode will
change as follows:
Projected course line
Projected course lines are displayed which move in accordance w ith
the operation of the steering wheel.
Parking assist guide line
The steering wheel return points (parking assist guide lines) are dis-
played. This mode is recommended for those who are comfortable
with parking the vehicle without the aid of the estimated cours e lines.
WARNING
●When a sensor indicator on the intuitive parking assist display illumi-
nates in red or a buzzer sounds continuously, be sure to check the area
around the vehicle immediately a nd do not proceed any further until
safety has been ensured, otherwise an unexpected accident may o ccur.
●As the intuitive parking assist display is displayed over the c amera view,
it may be difficult to see the intuitive parking assist display depending on
the color and brightness of the surrounding area.
Guide lines displayed on the screen
C
Page 191 of 314

1937-2. Panoramic view monitor
7
Peripheral monitoring system
Distance guide line
Only distance guide line is dis played. This mode is recommended for
those who are comfortable with parking the vehicle without the aid of
the guide lines.
Front distance guide line (blue)
Shows distance in front of the vehicle.
• Display points approximately 3 ft. (1 m) from the edge of the bumper.
Vehicle center line (blue)
The line indicates the estimated vehicle center on the ground.
Rear vehicle width extension guide lines
Displays a guide path when the vehicle is being backed straight up.
Projected reverse course line (yellow)
Shows an estimated course when the steering wheel is turned.
Rear distance guide line
Shows the distance behind the vehicle when the steering wheel i s turned.
• The guide lines move in conjunc tion with the estimated course lines.
• The guide lines display points approximately 1.5 ft. (0.5 m) (red) and
approximately 3 ft. (1 m) (yello w) from the center of the edge of the
bumper.
Rear distance guide line (blue)
A
B
C
D
E
F
Page 192 of 314

1947-2. Panoramic view monitor
Shows the distance behind the vehicle.
• Displays a point approximately 1.5 ft. (0.5 m) (red/blue) from the edge of
the bumper.
Parking assist guide line (blue)
Shows the path of the smallest turn possible behind the vehicle .
When parking in a space which
is in the reverse direction to the
space described in the proce-
dure below, the steering direc-
tions will be reversed.
1Shift the shift lever to the “R”
position.
2 Turn the steering wheel so
that the estimated course lines are within the parking
space, and back up slowly.
Parking space
Projected reverse course
lines
WARNING
●Depending on the circumstances of the vehicle (number of passen
gers,
amount of luggage, etc.), the position of the guide lines displ ayed on the
screen may change. Be sure to check visually around the vehicle before
proceeding.
●If the steering wheel is straight and the vehicle width guide l ines and the
estimated course lines are not in alignment, have the vehicle i nspected
by your Toyota dealer.
●Do not use the system if the display is incorrect due to an une ven (hilly)
road or a non-straight (curvy) road.
G
Parking
Using the projected
reverse course line
A
B