Page 289 of 553

STARTING AND OPERATING287
Stationary Objects And Vehicles
ACC does not react to stationary objects and
stationary vehicles. For example, ACC will not
react in situations where the vehicle you are
following exits your lane and the vehicle ahead
is stopped in your lane. Always be attentive and
ready to apply the brakes if necessary.
Stationary Object And Stationary Vehicle Example
General Information
The following regulatory statement applies to all
Radio Frequency (RF) devices equipped in this
vehicle:
This device complies with Part 15 of the FCC
Rules and with Innovation, Science and
Economic Development Canada license-exempt
RSS standard(s). Operation is subject to the
following two conditions:
1. This device may not cause harmful interfer
-
ence, and
2. This device must accept any interference received, including interference that may
cause undesired operation.
Le présent appareil est conforme aux CNR
d`Innovation, Science and Economic Develop -
ment applicables aux appareils radio exempts
de licence. L'exploitation est autorisée aux deux
conditions suivantes:
1. l'appareil ne doit pas produire de brouil -
lage, et
2. l'utilisateur de l'appareil doit accepter tout brouillage radioélectrique subi, même si le
brouillage est susceptible d'en comprom -
ettre le fonctionnement.
La operación de este equipo está sujeta a las
siguientes dos condiciones:
1. es posible que este equipo o dispositivo no cause interferencia perjudicial y
2. este equipo o dispositivo debe aceptar cual -
quier interferencia, incluyendo la que
pueda causar su operación no deseada. NOTE:
Changes or modifications not expressly
approved by the party responsible for compli
-
ance could void the user’s authority to operate
the equipment.
Normal (Fixed Speed) Cruise Control Mode
In addition to Adaptive Cruise Control mode, a
Normal (Fixed Speed) Cruise Control mode is
available for cruising at fixed speeds. The
Normal (Fixed Speed) Cruise Control mode is
designed to maintain a set cruising speed
without requiring the driver to operate the accel -
erator. Speed Control can only be operated if
the vehicle speed is above 20 mph (32 km/h).
To change between the different control modes,
push the Adaptive Cruise Control (ACC) on/off
button which turns the ACC on and the Normal
(Fixed Speed) Cruise Control off. Pushing of the
Normal (Fixed Speed) Cruise Control on/off
button will result in turning on (changing to) the
Normal (Fixed Speed) Cruise Control mode.
5
20_DJD2_OM_EN_USC_t.book Page 287
Page 290 of 553

288STARTING AND OPERATING
To Set A Desired Speed
Turn the Normal (Fixed Speed) Cruise
Control on. When the vehicle has
reached the desired speed, push the
RES (+) or SET (-) button and release.
Release the accelerator and the vehicle will
operate at the selected speed. Once a speed
has been set a message “CRUISE CONTROL SET
TO MPH (km/h)” will appear indicating what
speed was set. This light will turn on when the
system is turned on via the on/off control. It
turns green when the cruise control is set.
To Vary The Speed Setting
To Increase Speed
When the Normal (Fixed Speed) Cruise Control
is set, you can increase speed by pushing the
RES (+) button.
The driver's preferred units can be selected
through the instrument panel settings. Refer to
“Instrument Cluster Display” in “Getting To
Know Your Instrument Panel” for more informa-
tion. The speed increment shown is dependent
on the speed of U.S. (mph) or Metric (km/h)
units:
U.S. Speed (mph)
Pushing the RES (+) button once will result in
a 1 mph increase in set speed. Each subse -
quent tap of the button results in an increase
of 1 mph.
If the button is continually pushed, the set
speed will continue to increase in 5 mph
increments until the button is released. The
increase in set speed is reflected in the
instrument cluster display. Metric Speed (km/h)
Pushing the RES (+) button once will result in
a 1 km/h increase in set speed. Each subse -
quent tap of the button results in an increase
of 1 km/h.
If the button is continually pushed, the set
speed will continue to increase in 10 km/h
increments until the button is released. The
increase in set speed is reflected in the
instrument cluster display.
To Decrease Speed
When the Normal (Fixed Speed) Cruise Control
is set, you can decrease speed by pushing the
SET (-) button.
The driver's preferred units can be selected
through the instrument panel settings. Refer to
“Instrument Cluster Display” in “Getting To
Know Your Instrument Panel” for more informa-
tion. The speed decrement shown is dependent
on the speed of U.S. (mph) or Metric (km/h)
units:
U.S. Speed (mph)
Pushing the SET (-) button once will result in
a 1 mph decrease in set speed. Each subse -
WARNING!
In the Normal (Fixed Speed) Cruise Control
mode, the system will not react to vehicles
ahead. In addition, the proximity warning
does not activate and no alarm will sound
even if you are too close to the vehicle ahead
since neither the presence of the vehicle
ahead nor the vehicle-to-vehicle distance is
detected. Be sure to maintain a safe distance
between your vehicle and the vehicle ahead.
Always be aware which mode is selected.
20_DJD2_OM_EN_USC_t.book Page 288
Page 291 of 553

STARTING AND OPERATING289
quent tap of the button results in a decrease
of 1 mph.
If the button is continually pushed, the set
speed will continue to decrease in 5 mph
decrements until the button is released. The
decrease in set speed is reflected in the
instrument cluster display.
Metric Speed (km/h)
Pushing the SET (-) button once will result in
a 1 km/h decrease in set speed. Each subse -
quent tap of the button results in a decrease
of 1 km/h.
If the button is continually pushed, the set
speed will continue to decrease in 10 km/h
decrements until the button is released. The
decrease in set speed is reflected in the
instrument cluster display.
To Cancel
The following conditions will cancel the Normal
(Fixed Speed) Cruise Control without clearing
the memory:
The brake pedal is applied.
The CANCEL button is pushed.
The Electronic Stability Control/Traction
Control System (ESC/TCS) activates.
The vehicle parking brake is applied.
The braking temperature exceeds normal
range (overheated).
The gear selector is removed from the DRIVE
position.
The driver switches ESC to Full Off mode.
To Resume Speed
To resume a previously set speed, push the RES
(+) button and release. Resume can be used at
any speed above 20 mph (32 km/h).
To Turn Off
The system will turn off and erase the set speed
in memory if:
The Normal (Fixed Speed) Cruise Control on/
off button is pushed.
The ignition is placed in the OFF position.
You engage Four-Wheel Drive Low.
The Adaptive Cruise Control (ACC) on/off
button is pushed.
PARKSENSE REAR PARK ASSIST — IF
EQUIPPED
The ParkSense Rear Park Assist system
provides visual and audible indications of the
distance between the rear fascia and a
detected obstacle when backing up (e.g. during
a parking maneuver). Refer to “ParkSense
System Usage Precautions” in this section for
limitations of this system and recommenda -
tions.
ParkSense will retain the system state (enabled
or disabled) from the previous ignition cycle
when the ignition is placed in the ON/RUN posi -
tion.
ParkSense can be active only when the gear
selector is in REVERSE. If ParkSense is enabled
at this gear selector position, the system will
remain active until the vehicle speed is
increased to approximately 7 mph (11 km/h) or
above. When in REVERSE and above the
system's operating speed, a warning will appear
within the instrument cluster display indicating
the vehicle speed is too fast. The system will
become active again if the vehicle speed is
decreased to speeds less than approximately
6 mph (9 km/h).
5
20_DJD2_OM_EN_USC_t.book Page 289
Page 292 of 553

290STARTING AND OPERATING
ParkSense Sensors
The four ParkSense sensors, located in the rear
fascia/bumper, monitor the area behind the
vehicle that is within the sensors’ field of view.
The sensors can detect obstacles from approxi -
mately 18 inches (45 cm) up to 79 inches (200
cm) from the rear fascia/bumper in the hori -
zontal direction, depending on the location, type
and orientation of the obstacle.
NOTE:
If equipped as a dually, the ParkSense system
has six rear sensors to assist in detection
around the dually flares.
ParkSense Warning Display
The ParkSense Warning screen is located within
the instrument cluster display. It provides visual
warnings to indicate the distance between the
rear fascia/bumper and the detected obstacle.
Refer to “Instrument Cluster Display” in
“Getting To Know Your Instrument Panel” for
further information.
ParkSense Display
When the vehicle is in REVERSE, the warning
display will turn on indicating the system status.
The system will indicate a detected obstacle by
showing a single arc in the left and/or right rear
regions based on the object’s distance and
location relative to the vehicle.
If an object is detected in the left and/or right
rear region, the display will show a single solid
arc in the left and/or right rear region and the
system will produce a tone. As the vehicle
moves closer to the object, the display will show
the single arc moving closer to the vehicle and
the tone will change from a single 1/2 second
tone to slow, to fast, to continuous.
Single 1/2 Second Tone Slow Tone
Slow Tone
20_DJD2_OM_EN_USC_t.book Page 290
Page 293 of 553
STARTING AND OPERATING291
Fast Tone Fast ToneContinuous Tone
The vehicle is close to the obstacle when the warning display shows one flashing arc and sounds a continuous tone. The following chart shows the
warning alert operation when the system is detecting an obstacle:
NOTE:
ParkSense will reduce the volume of the radio, if on, when the system is sounding an audio tone.
WARNING ALERTS
Rear Distance (inches/cm) Greater than
79 inches (200 cm) 79-59 inches
(200-150 cm) 59-47 inches
(150-120 cm) 47-39 inches
(120-100 cm) 39-25 inches
(100-65 cm) 25-12 inches
(65-30 cm) Less than
12 inches (30 cm)
Audible Alert Chime NoneSingle 1/2
Second Tone Slow
Slow FastFast Continuous
Arcs-Left None NoneNoneNoneNone 2nd Flashing 1st Flashing
Arcs-Center None 6th Solid 5th Solid 4th Solid 3rd Flashing 2nd Flashing 1st Flashing Arcs-Right None NoneNoneNoneNone 2nd Flashing 1st Flashing
Radio Volume Reduced No
Yes YesYesYesYesYes
5
20_DJD2_OM_EN_USC_t.book Page 291
Page 294 of 553

292STARTING AND OPERATING
Adjustable Chime Volume Settings
The rear chime volume settings are program -
mable through the Uconnect system. Refer to
“Uconnect Settings” in “Multimedia” for further
information.
The chime volume settings include low,
medium, and high. The factory default volume is
medium.
Enabling And Disabling ParkSense
ParkSense can be enabled and disabled with
the ParkSense switch.
When the gear selector is moved to
REVERSE and the system is disabled,
the instrument cluster display will
show the vehicle graphic with “Off”
over the arcs for as long as the vehicle is in
REVERSE.
NOTE:
The ParkSense system will automatically
disable when the system detects that a trailer
with trailer brakes has been connected to the
Integrated Trailer Brake Module. The instru -
ment cluster display will show an “Off” message over the arcs if the ParkSense system is off, or
a “Trailer” message if the system is on, for as
long as the vehicle is in REVERSE.
The ParkSense switch LED will be on when Park-
Sense is disabled or defective. The ParkSense
switch LED will be off when the system is
enabled.
If the ParkSense switch is pushed, and the
system is disabled or requires service, the Park-
Sense switch LED will blink momentarily, and
then the LED will be on.
Service The ParkSense Rear Park Assist
System
During vehicle start up, when the Rear Park
-
Sense System has detected a faulted condition,
the instrument cluster display will show the
"Rear ParkSense Unavailable Service Required"
or the "Rear ParkSense Unavailable Wipe
Sensors" message.
When the gear selector is moved into REVERSE,
a vehicle graphic will show in the instrument
cluster display, along with the display overlay
“Rear ParkSense Unavailable Wipe Sensors.” If
the system needs service, the display overlay
will read “Rear ParkSense Unavailable Service Required” Under this condition, ParkSense will
not operate.
If "Rear ParkSense Unavailable Wipe Sensors"
appears in the instrument cluster display make
sure the outer surface and the underside of the
rear fascia/bumper is clean and clear of snow,
ice, mud, dirt or other obstruction, and then
cycle the ignition. If the message continues to
appear, see an authorized dealer.
If "Rear ParkSense Unavailable Service
Required" appears in the instrument cluster
display, see an authorized dealer.
Cleaning The ParkSense System
Clean the ParkSense sensors with water, car
wash soap and a soft cloth. Do not use rough or
hard cloths. Do not scratch or poke the sensors.
Otherwise, you could damage the sensors.
ParkSense System Usage Precautions
NOTE:
Ensure that the rear bumper is free of snow,
ice, mud, dirt and debris to keep the Park
-
Sense system operating properly.
Jackhammers, large trucks, and other vibra -
tions could affect the performance of Park -
Sense.
20_DJD2_OM_EN_USC_t.book Page 292
Page 295 of 553

STARTING AND OPERATING293
(Continued)
(Continued)
When you move the gear selector into
REVERSE with ParkSense turned off, the
instrument cluster display will show "Off" on
the vehicle graphic arcs for as long as the
vehicle is in REVERSE.
ParkSense, when on, will reduce the volume
of the radio when it is sounding a tone.
Clean the ParkSense sensors regularly,
taking care not to scratch or damage them.
The sensors must not be covered with ice,
snow, slush, mud, dirt or debris. Failure to do
so can result in the system not working prop
-
erly. The ParkSense system might not detect
an obstacle behind the fascia/bumper, or it
could provide a false indication that an
obstacle is behind the fascia/bumper.
Ensure the ParkSense system is off if objects
such as bicycle carriers, trailer hitches, etc.,
are placed within 18 inches (45 cm) of the
rear fascia/bumper while driving the vehicle.
Failure to do so can result in the system
misinterpreting a close obstacle as a sensor
problem, causing the "Rear ParkSense
Unavailable Service Required" message to
appear in the instrument cluster display.
On vehicles equipped with a tailgate, Park -
Sense should be disabled when the tailgate
is in the lowered or open position and the
vehicle is in REVERSE. A lowered tailgate
could provide a false indication that an
obstacle is behind the vehicle.
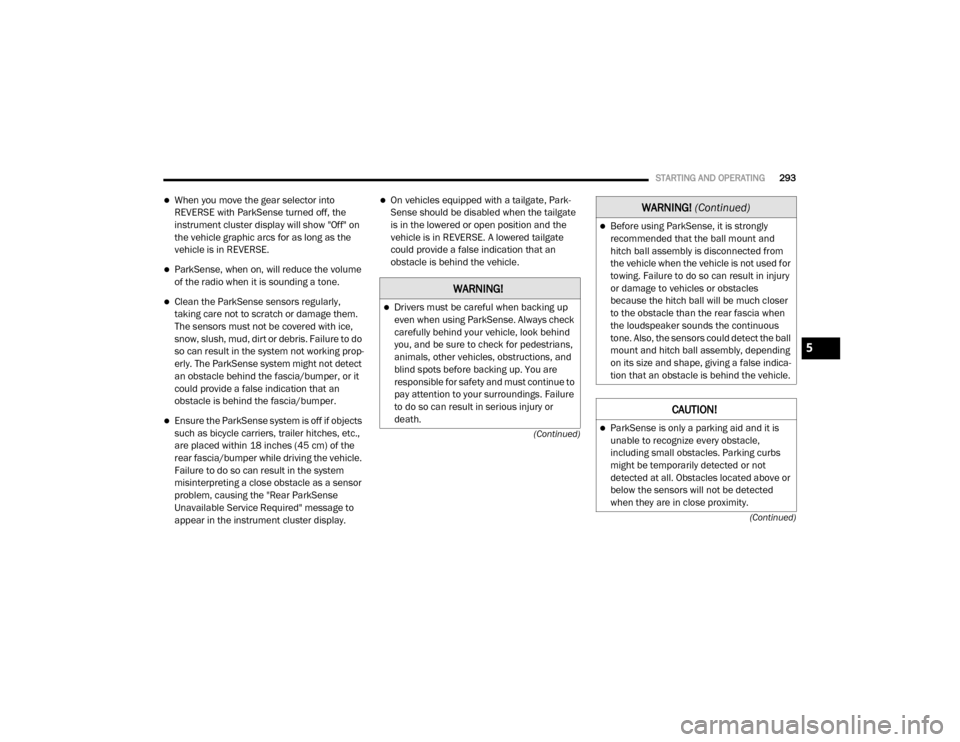
WARNING!
Drivers must be careful when backing up
even when using ParkSense. Always check
carefully behind your vehicle, look behind
you, and be sure to check for pedestrians,
animals, other vehicles, obstructions, and
blind spots before backing up. You are
responsible for safety and must continue to
pay attention to your surroundings. Failure
to do so can result in serious injury or
death.
Before using ParkSense, it is strongly
recommended that the ball mount and
hitch ball assembly is disconnected from
the vehicle when the vehicle is not used for
towing. Failure to do so can result in injury
or damage to vehicles or obstacles
because the hitch ball will be much closer
to the obstacle than the rear fascia when
the loudspeaker sounds the continuous
tone. Also, the sensors could detect the ball
mount and hitch ball assembly, depending
on its size and shape, giving a false indica -
tion that an obstacle is behind the vehicle.
CAUTION!
ParkSense is only a parking aid and it is
unable to recognize every obstacle,
including small obstacles. Parking curbs
might be temporarily detected or not
detected at all. Obstacles located above or
below the sensors will not be detected
when they are in close proximity.
WARNING! (Continued)
5
20_DJD2_OM_EN_USC_t.book Page 293
Page 296 of 553

294STARTING AND OPERATING
PARKSENSE FRONT AND REAR PARK ASSIST
The ParkSense Park Assist system provides
visual and audible indications of the distance
between the rear, and/or front fascia/bumper,
and a detected obstacle when backing up or
moving forward (e.g. during a parking
maneuver).
Refer to “ParkSense System Usage Precau -
tions” in this section for limitations of this
system and recommendations.
ParkSense will retain the system state (enabled
or disabled) from the previous ignition cycle
when the ignition is placed in the ON/RUN posi -
tion. ParkSense can be active only when the gear
selector is in REVERSE or DRIVE. If ParkSense is
enabled at one of these gear selector positions,
the system will remain active until the vehicle
speed is increased to approximately 7 mph
(11 km/h) or above. A warning will appear in the
instrument cluster display when the vehicle is in
REVERSE, indicating the vehicle is above Park
-
Sense operating speed. The system will become
active again if the vehicle speed is decreased to
speeds less than approximately 6 mph (9 km/h).
ParkSense Sensors
The four ParkSense sensors, located in the rear
fascia/bumper, monitor the area behind the
vehicle that is within the sensors’ field of view.
The sensors can detect obstacles from approxi -
mately 18 inches (45 cm) up to 79 inches (200 cm) from the rear fascia/bumper in the
horizontal direction, depending on the location,
type and orientation of the obstacle.
NOTE:
If equipped as a dually, the ParkSense system
has six rear sensors to assist in detection
around the dually flares.
The six ParkSense sensors, located in the front
fascia/bumper, monitor the area in front of the vehicle that is within the sensors’ field of view.
The sensors can detect obstacles from approxi
-
mately 12 inches (30 cm) up to 47 inches (120 cm) from the front fascia/bumper in the
horizontal direction, depending on the location,
type and orientation of the obstacle.
ParkSense Warning Display
The ParkSense Warning screen is located within
the instrument cluster display. It provides visual
warnings to indicate the distance between the
rear fascia/bumper and/or front fascia/bumper
and the detected obstacle. Refer to “Instrument
Cluster Display” in “Getting To Know Your
Instrument Panel” for further information.
The vehicle must be driven slowly when
using ParkSense in order to be able to stop
in time when an obstacle is detected. It is
recommended that the driver looks over
his/her shoulder when using ParkSense.
CAUTION! (Continued)
20_DJD2_OM_EN_USC_t.book Page 294