Page 144 of 216
142
Procedure
Before topping up, ensure that the vehicle is
parked on a flat and level sur face.
In wintry conditions, ensure that the
temperature of the vehicle is above -11°C.
Otherwise the AdBlue
® may be frozen and
so cannot be poured into its tank. Park your
vehicle in a warmer area for a few hours to
allow the top-up to be carried out. F
O
btain an AdBlue
® container or bottle. After
first checking the use-by date, read the
instructions on the label carefully before
pouring the contents of the container or
bottle into your vehicle's AdBlue tank.
Or
F
I
nsert the AdBlue
® pump nozzle and refill
the tank until the nozzle stops automatically.
Important:
-
T
o avoid over flowing the AdBlue
® tank,
i
t is recommended:
•
T
o top up between 10 and 13
litres
using AdBlue
® containers or bottles.
Or
•
T
hat you stop after the nozzle’s first
automatic cut-out if you are refilling
at a ser vice station.
-
I
f your vehicle's AdBlue
® tank is
completely empty – which is confirmed
by the alert messages and the
impossibility of starting the engine –
you must add at least 5
litres. Impor tant: when topping up after
a breakdown due to running out
of AdBlue,
you must wait for at least
5 minutes before switching on the
ignition, opening the driver's door,
unlocking the vehicle or inser ting the
key in the switch.
Switch on the ignition, then after a
minimum of 10 seconds, start the engine.
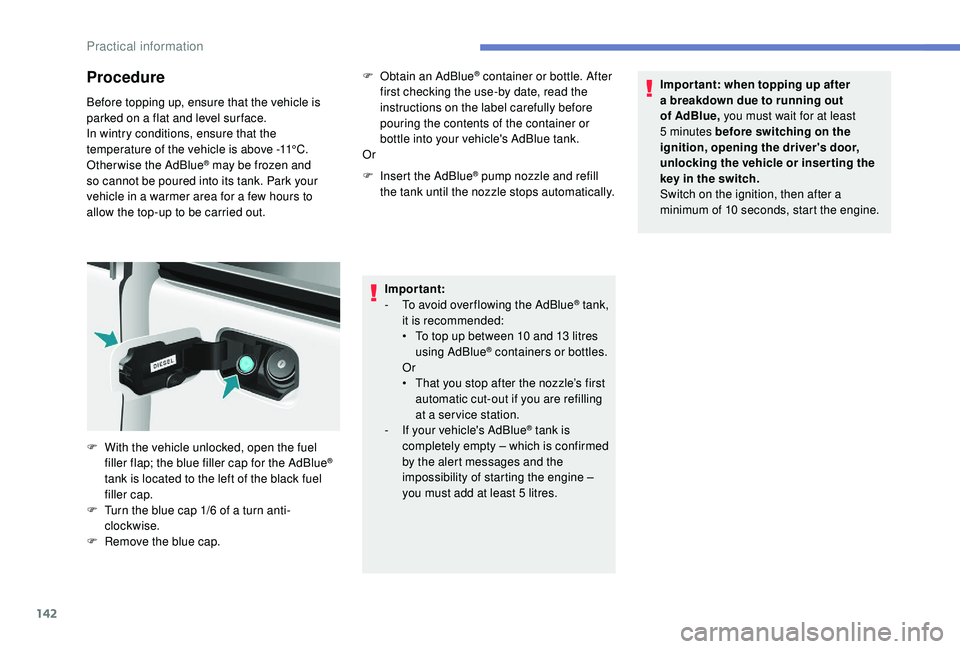
F
W
ith the vehicle unlocked, open the fuel
filler flap; the blue filler cap for the AdBlue
®
tank is located to the left of the black fuel
filler cap.
F
T
urn the blue cap 1/6 of a turn anti-
clockwise.
F
R
emove the blue cap.
Practical information
Page 151 of 216
149
Comply with the wheel trim fitting
procedure to avoid breaking of the
fixing tab and distor tion on the edge of
the wheel trim.
Correct
valve position: above the ring.
Changing a bulb
Types of bulb
Various types of bulb are fitted to your vehicle.
To remove them:
Ty p e A
All glass bulb: pull gently as it is fitted by
pressure. Ty p e B
Bayonet bulb: press on the bulb then turn it
anti-clockwise.
Ty p e C
Halogen bulb: release the retaining spring from
its housing.
Ty p e D
Light emitting diode (LED): to replace the
daytime running lamps, consult a PEUGEOT
dealer or a qualified workshop.
8
In the event of a breakdown
Page 152 of 216
150
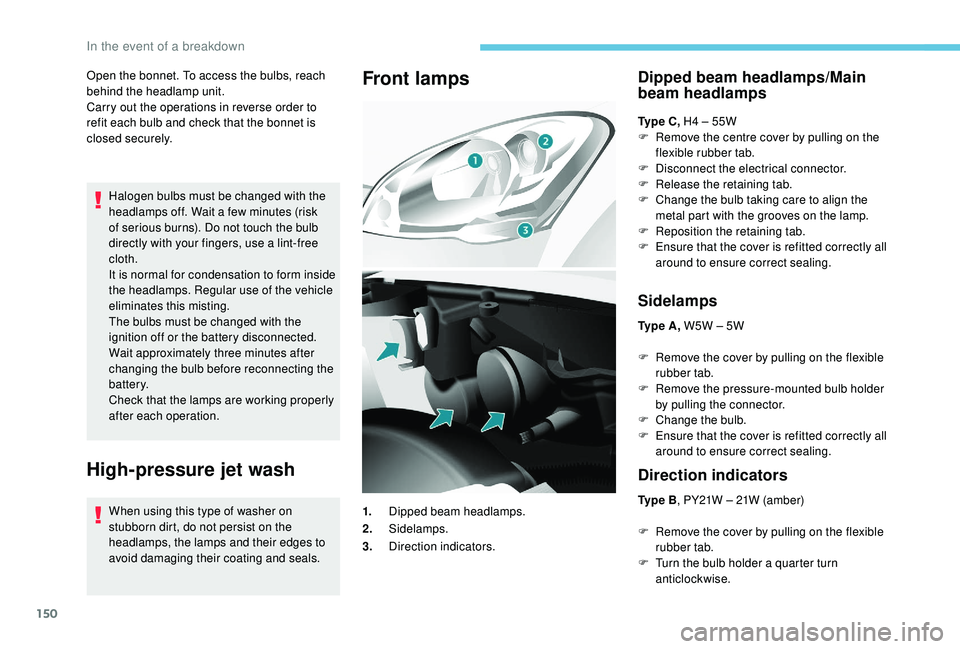
Open the bonnet. To access the bulbs, reach
behind the headlamp unit.
Carry out the operations in reverse order to
refit each bulb and check that the bonnet is
closed securely.Halogen bulbs must be changed with the
headlamps off. Wait a few minutes (risk
of serious burns). Do not touch the bulb
directly with your fingers, use a lint-free
cloth.
It is normal for condensation to form inside
the headlamps. Regular use of the vehicle
eliminates this misting.
The bulbs must be changed with the
ignition off or the battery disconnected.
Wait approximately three minutes after
changing the bulb before reconnecting the
battery.
Check that the lamps are working properly
after each operation.
High-pressure jet wash
When using this type of washer on
stubborn dirt, do not persist on the
headlamps, the lamps and their edges to
avoid damaging their coating and seals.
Front lampsDipped beam headlamps/Main
beam headlamps
Ty p e C , H4 – 55W
F R emove the centre cover by pulling on the
flexible rubber tab.
F
D
isconnect the electrical connector.
F
R
elease the retaining tab.
F
C
hange the bulb taking care to align the
metal part with the grooves on the lamp.
F
R
eposition the retaining tab.
F
E
nsure that the cover is refitted correctly all
around to ensure correct sealing.
Sidelamps
Ty p e A , W5W – 5W
F
R
emove the cover by pulling on the flexible
rubber tab.
F
R
emove the pressure-mounted bulb holder
by pulling the connector.
F
C
hange the bulb.
F
E
nsure that the cover is refitted correctly all
around to ensure correct sealing.
Direction indicators
Ty p e B , PY21W – 21W (amber)
F
R
emove the cover by pulling on the flexible
rubber tab.
F
T
urn the bulb holder a quarter turn
anticlockwise.
1.
Dipped beam headlamps.
2. Sidelamps.
3. Direction indicators.
In the event of a breakdown
Page 153 of 216
151
Foglamps
Ty p e C , H1 – 55W
F
R
emove the three clips and the bolt
securing the mudflap, located under the
b u m p e r.
F
M
ove the mudflap upwards.
F
D
isconnect the bulb holder connector by
pressing the tab at the top.
F
R
emove the bulb by pressing lightly on it,
then turning it anti-clockwise.
F
C
hange the bulb.
F
E
nsure that the cover is refitted correctly all
around to ensure correct sealing.
Side repeater
Ty p e A , W Y5W – 5W (amber)
F
R
emove the bulb holder by squeezing the
two clips (top and bottom) using a thumb
and forefinger.
F
C
hange the module (bulb holder and bulb).
F
F
ollow these steps in reverse order to refit
the module and the mudflap. F
P
ush the repeater towards the rear and
disengage it by pulling it forwards.
F
C
ontact a PEUGEOT dealer to obtain a new
repeater, which is a sealed component.
F
T
o fit it, engage the repeater towards the
rear and then bring it towards the front.
8
In the event of a breakdown
Page 155 of 216
153
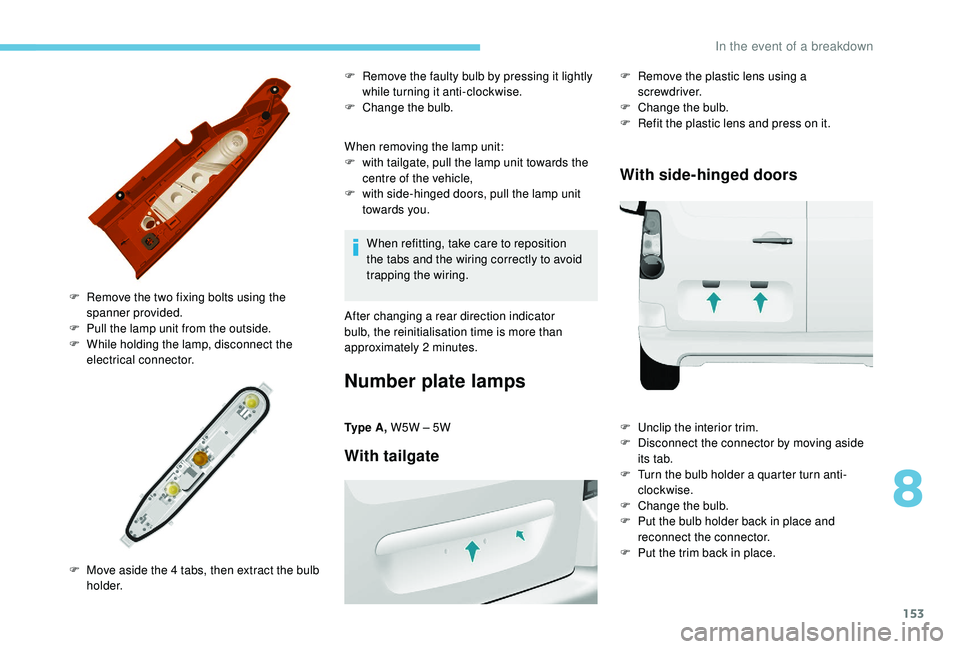
When removing the lamp unit:
F w ith tailgate, pull the lamp unit towards the
centre of the vehicle,
F
w
ith side-hinged doors, pull the lamp unit
towards you.
F
R
emove the two fixing bolts using the
spanner provided.
F
P
ull the lamp unit from the outside.
F
W
hile holding the lamp, disconnect the
electrical connector.
F
M
ove aside the 4 tabs, then extract the bulb
h o l d e r. F
R
emove the faulty bulb by pressing it lightly
while turning it anti-clockwise.
F
C
hange the bulb.
When refitting, take care to reposition
the tabs and the wiring correctly to avoid
trapping the wiring.
After changing a rear direction indicator
bulb, the reinitialisation time is more than
approximately 2
minutes.
Number plate lamps
Ty p e A , W5W – 5W
With tailgate
F Remove the plastic lens using a
screwdriver.
F
C
hange the bulb.
F
R
efit the plastic lens and press on it.
With side-hinged doors
F Unclip the interior trim.
F D isconnect the connector by moving aside
its tab.
F
T
urn the bulb holder a quarter turn anti-
clockwise.
F
C
hange the bulb.
F
P
ut the bulb holder back in place and
reconnect the connector.
F
P
ut the trim back in place.
8
In the event of a breakdown
Page 157 of 216
155
Dashboard fuses
Tilt the cover to access the fuses.Fuses
F Amps
A Allocation
1 15Rear wiper
2 –
30 Free
Central locking
3 5Airbags
4 10Air conditioning, diagnostic socket, rear view mirror control,
headlamp beam.
5 30Electric windows
6 30Locks
7 5Rear courtesy lamp, front map reading lamps, ceiling lamp.
8 20
Audio system, display screen, under-inflation detection, alarm and siren
930Front and rear 12 V socket
10 15Centre console
11 15Low current anti-theft
12 15Rain and sunshine sensor, airbags.
13 5Instrument panel
14 15Parking sensors, automatic air conditioning controls, Hands-
free kit
15 30Locks
16 -Free
17 40Rear screen/rear view mirrors defrosting.
8
In the event of a breakdown
Page 162 of 216
160
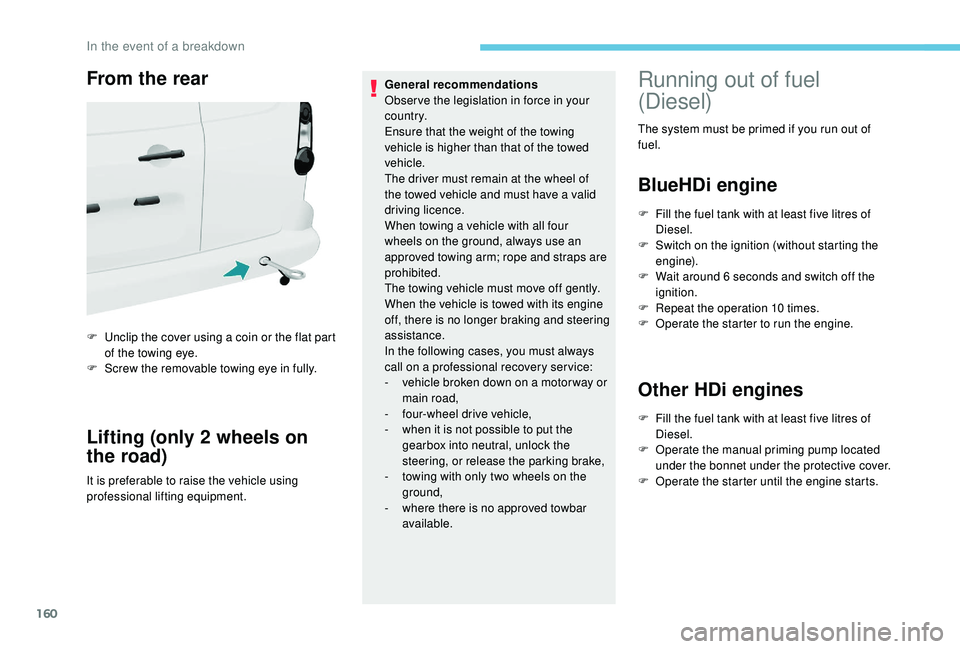
From the rear
F Unclip the cover using a coin or the flat part of the towing eye.
F
S
crew the removable towing eye in fully.
Lifting (only 2 wheels on
the road)
It is preferable to raise the vehicle using
professional lifting equipment. General recommendations
Obser ve the legislation in force in your
c o u nt r y.
Ensure that the weight of the towing
vehicle is higher than that of the towed
vehicle.
The driver must remain at the wheel of
the towed vehicle and must have a valid
driving licence.
When towing a vehicle with all four
wheels on the ground, always use an
approved towing arm; rope and straps are
prohibited.
The towing vehicle must move off gently.
When the vehicle is towed with its engine
off, there is no longer braking and steering
assistance.
In the following cases, you must always
call on a professional recovery ser vice:
-
v
ehicle broken down on a motor way or
main road,
-
f
our-wheel drive vehicle,
-
w
hen it is not possible to put the
gearbox into neutral, unlock the
steering, or release the parking brake,
- t owing with only two wheels on the
ground,
-
w
here there is no approved towbar
available.
Running out of fuel
(Diesel)
The system must be primed if you run out of
fuel.
BlueHDi engine
F Fill the fuel tank with at least five litres of Diesel.
F
S
witch on the ignition (without starting the
engine).
F
W
ait around 6 seconds and switch off the
ignition.
F
R
epeat the operation 10 times.
F
O
perate the starter to run the engine.
Other HDi engines
F Fill the fuel tank with at least five litres of Diesel.
F
O
perate the manual priming pump located
under the bonnet under the protective cover.
F
O
perate the starter until the engine starts.
In the event of a breakdown
Page 183 of 216
7
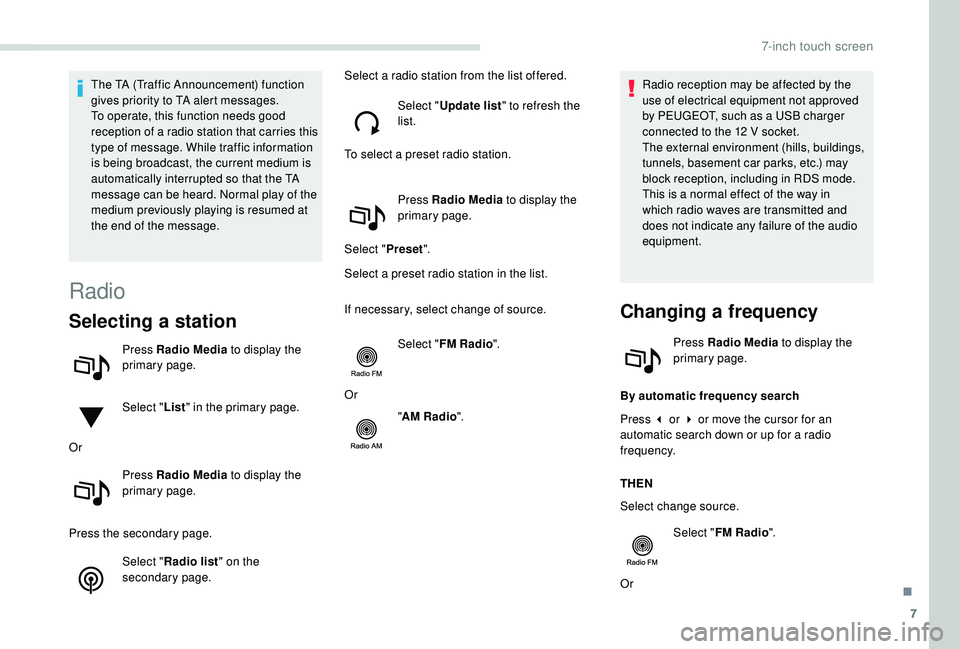
The TA (Traffic Announcement) function
gives priority to TA alert messages.
To operate, this function needs good
reception of a radio station that carries this
type of message. While traffic information
is being broadcast, the current medium is
automatically interrupted so that the TA
message can be heard. Normal play of the
medium previously playing is resumed at
the end of the message.
Radio
Selecting a station
Press Radio Media to display the
primary page.
Select " List" in the primary page.
Or Press Radio Media to display the
primary page.
Press the secondary page. Select "Radio list " on the
secondary page. Select a radio station from the list offered.
Select "Update list " to refresh the
list.
To select a preset radio station.
Press Radio Media to display the
primary page.
Select " Preset".
Select a preset radio station in the list.
If necessary, select change of source.
Select "FM Radio ".
Or "AM Radio ". Radio reception may be affected by the
use of electrical equipment not approved
by PEUGEOT, such as a USB charger
connected to the 12
V socket.
The external environment (hills, buildings,
tunnels, basement car parks, etc.) may
block reception, including in RDS mode.
This is a normal effect of the way in
which radio waves are transmitted and
does not indicate any failure of the audio
equipment.
Changing a frequency
Press Radio Media to display the
primary page.
By automatic frequency search
Press 3 or 4 or move the cursor for an
automatic search down or up for a radio
frequency.
THEN
Select change source. Select "FM Radio ".
Or
.
7-inch touch screen