Page 129 of 427

Power panoramic sunroof (if so equipped) 5-48 Features and controls
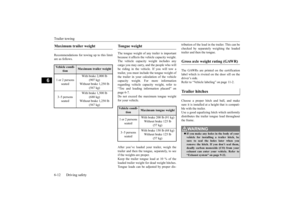
5
To stop the shade before it is fully closed, operate the switches in any of the directions (1) to (6). Within approximately 30 seconds after the ignition switch is changed to “ACC” or“OFF” or the operatio
n mode is changed to
ACC or OFF, the front sunroof and front shade can be opened and closed.However, if the driver’s or front passenger’s door is opened within 30 seconds after the ignition switch is changed to “ACC” or“OFF” or the operatio
n mode is changed to
ACC or OFF, the front sunroof and front shade cannot be opened or closed. If a person’s hand, neck, etc., is trapped in the front sunroof or front sh
ade, the front sunroof
or front shade will au
tomatically open a max-
imum of 8 inches (20 cm) as a safety func- tion. After the front sunroof and front shadeopen, you can use the switch to close them.
If the safety mechanism operates five times or more consecutively, you will not be able to close the front sunroof and front shade nor- mally.If this occurs, perform the following proce- dure to reset the safety mechanism. 1. Press and hold the switch in direction (3) or pull and hold the switch in direction(4). 2. The front sunroof (if open) and front shade will move to the fully closed posi-tions in small increments. 3. When the front sunroof and front shade have both stopped in the fully closed posi- tions, release the switch. (The resetting procedure is finished.)
If the front sunroof and front shade do not move correctly to the fully closed positions after you perform the resetting procedure, contact an authorized Mitsubishi Motorsdealer.
The rear shade can be opened or closed with the ignition switch in the “ON” position or the operation mode in ON.
NOTE
If the front sunroof is open, it will close together with the front shade.
Timer function
Safety mechanism
NOTE
If the front sunroof and front shade are both open, the front sunroof will move to the fullyclosed position, and then the front shade will move to the fully closed position.
CAUTION The safety mechanism is cancelled just before the front sunroof and front shade are fully closed. This allows the front sunroof and front shade to close completely. There- fore be especially careful that no fingers aretrapped in the front s
unroof and front shade.
NOTE
The safety mechanism can be activated if the driving conditions or other circumstancescause the front sunroof or the front shade to be subjected to a physical shock similar to that caused by a trapped hand or head. Do not release the switch until the resetting procedure is finished. If you release theswitch, the resetting mode will be cancelled. To perform the resetting procedure again, repeat the procedure from step 1.
Rear shade
BK0277700US.bo
ok 48 ページ 2019年3月8日 金曜日 午前9時23分
Page 130 of 427

Parking brake
Features and controls 5-49
5
Press the switch in direction (7) to fully open the rear shade automatically.To stop the shade before it is fully open, press the switch in direction (7) or (8). Press the switch in direction (8) to fully close the rear shade automatically. To stop the shade before it is fully closed,press the switch in direction (7) or (8).
If a person’s hand, neck, etc., is trapped in the rear shade, the shade will automatically opena maximum of 8 inches (20 cm) as a safety function. After the rear shade opens, you can use the switch to close it.If the safety mechanism operates five times or more consecutively, you will not be able to close the rear shade normally.If this occurs, perform the following proce-dure to reset the safety mechanism. 1. Press and hold the switch in direction (8). 2. The rear shade will move to the fully closed position in small increments.3. When the rear shade has stopped in the fully closed position, release the switch. (The resetting procedure is finished.)
If the rear shade does not move correctly to the fully closed positions after you perform the resetting procedure, contact an authorized Mitsubishi Motors dealer.
N00511401527
To park the vehicle, first bring it to a com-plete stop, firmly apply the parking brake, and then move the selector lever to the “P” (PARK) position.Make sure the brake warning light is illumi- nated.
7- Open (rear shade) 8- Close (rear shade)Opening the rear shade
Closing the rear shade
Safety mechanism
CAUTION The safety mechanism is cancelled just before the rear shade is fully closed. Thisallows the rear shade to close completely. Therefore be especially careful that no fin- gers are trapped in the rear shade.
NOTE
The safety mechanism can be activated if the driving conditions or other circumstances cause the rear shade to be subjected to a physical shock similar to that caused by a trapped hand or head. Do not release the switch until the resetting procedure is finished. If you release theswitch, the resetting mode will be cancelled. To perform the resetting procedure again, repeat the procedure from step 1.
Parking brake
BK0277700US.bo
ok 49 ページ 2019年3月8日 金曜日 午前9時23分
Page 131 of 427

Parking brake 5-50 Features and controls
5
N00593100059
When parking on a hill, set the parking brake, and turn the front wheels toward the curb on a downhill, or away from the curb on an uphill.
Before driving, be sure to release the parking brake.
N00593200089
The Electric parking brak
e is the system that
applies the parking brake by the electric motor.
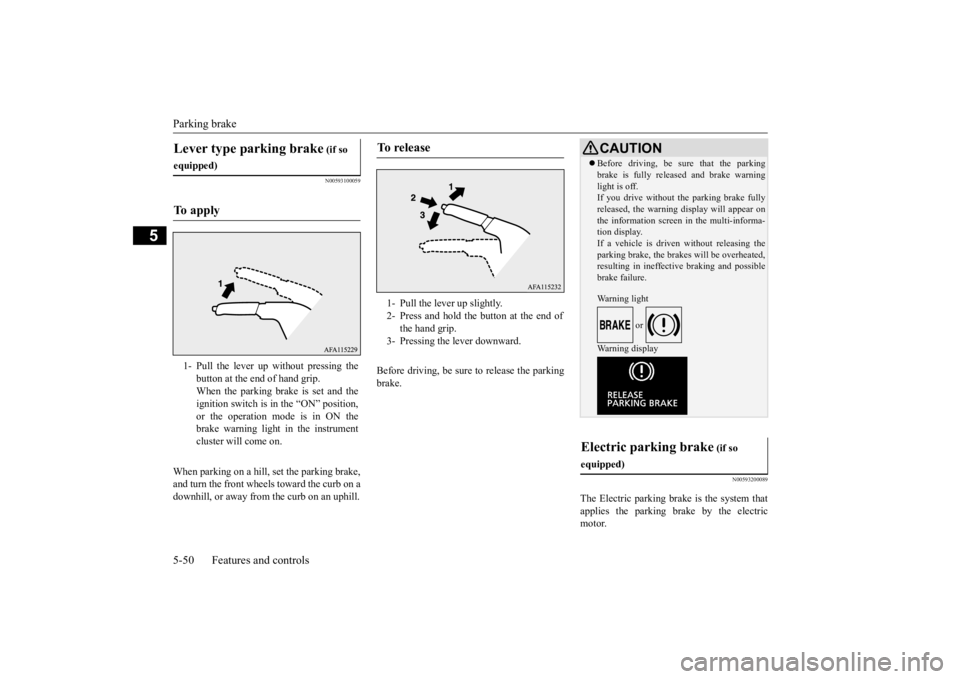
Lever type parking brake
(if so
equipped)To apply
1- Pull the lever up without pressing the
button at the end of hand grip.When the parking brake is set and the ignition switch is in the “ON” position, or the operation mode is in ON thebrake warning light in the instrument cluster will come on.
To release
1- Pull the lever up slightly. 2- Press and hold the button at the end of
the hand grip.
3- Pressing the lever downward.
CAUTION Before driving, be sure that the parking brake is fully released and brake warning light is off. If you drive without the parking brake fully released, the warning display will appear onthe information screen in the multi-informa- tion display. If a vehicle is driven without releasing theparking brake, the brakes will be overheated, resulting in ineffective braking and possible brake failure. Warning light
or
Wa r n i n g d i s p l a y
Electric parking brake
(if so
equipped)
BK0277700US.bo
ok 50 ページ 2019年3月8日 金曜日 午前9時23分
Page 132 of 427

Parking brake
Features and controls 5-51
5
When the Electric parking brake is applied, the brake warning light in the instrument cluster and the indicator light (A) on the Elec- tric parking brake switch will come on. When parking on a hill, set the parking brake, and turn the front wheels toward the curb on a downhill, or away from the curb on an uphill.
NOTE
You may hear an operation noise from the vehicle body when operating the Electric parking brake. This
does not indicate a mal-
function and the Electric parking brake is operating normally. When the battery is weak or dead, the Elec- tric parking brake cannot be applied orreleased. Refer to “Jump-starting the engine” on page 8-2. You may feel the brake pedal moving when operating the Electric parking brake. This does not indicate a malfunction.
To apply
1. Stop the vehicle completely. 2. Pull up the Electric parking brake switch
while depressing the brake pedal.
CAUTION While the vehicle is in motion, do not apply the Electric parking brake. Doing so may cause overheating and/or premature wear of brake parts, reducing brake performance. NOTE
In the following conditions, the brake warn- ing light will illuminate for approximately 15 seconds and then go off. • While the Electric parking brake is applied, the ignition switch is turned to the “OFF”position or the operation mode is put in OFF. • While the ignition switch is in the “OFF” position or the operation mode is in OFF, the Electric parking brake switch is pulled up.
If the Electric parking brake must be applied in an emergency situation, pull and hold the Electric parking brake switch to apply the Electric parking brake. At that time, the fol- lowing warning display will appear in themulti-information display and a buzzer will sound, however you should continue to pull and hold the Electric parking brake switch. When parking on steep grades, pull up the Electric parking brake switch twice (once more after the operation is completed once).The maximum effect of the parking brake will be obtained. If the parking brake does
not hold the vehicle
stationary after the foot brake is released, contact an authorized Mitsubishi Motorsdealer or a repair facility of your choice. When the ignition switch or the operation mode is other than ON, if the parking brake is applied, the Electric parking brake indica- tor light comes on for a while.NOTE
BK0277700US.bo
ok 51 ページ 2019年3月8日 金曜日 午前9時23分
Page 133 of 427

Parking brake 5-52 Features and controls
5
When the accelerator pedal is depressed slowly while all of the following conditionsare met, the Electric parking brake is auto- matically released. The engine is running. The selector lever is in the “D” (DRIVE) or the “R” (REVERSE) position. The driver’s seat belt is fastened.
When the Electric parking brake is released, the brake warning light and the indicator light on the Electric parking brake switch go off. Before driving, be sure that the parking brake is released and brake warning light is off.
If the Electric parking brake switch is repeat- edly operated in a short time, the following warning display will appear in the multi- information display and the Electric parking brake will temporarily stop working. In suchcase, wait for approximately 1 minute until the warning display disappears, and operate the Electric parking brake switch again. The brake warning light and the indicator light on the Electric parking brake switch may blink. This does not indicate a malfunc-tion, the lights go off when/if the Electric parking brake is released. Depending on the situation, the Electric parking brake may be applied automatically. Refer to “Brake auto hold” on page 5-77.NOTE
To release
Manual operation 1. Make sure that the ignition switch is in
the “ON” position or the operation mode is ON.
2. Press down the Electric parking brake
switch while depressing the brake pedal.
Automatic operation
CAUTION After the Electric parking brake switch has been operated to apply or release the Electricparking brake, if the brake warning light and the indicator light on the Electric parking brake switch remain blinking or the Electricparking brake warning light remain illumi- nated, the Electric parking brake system may be malfunctioning and the parking brakemay not be applied or released. Immediately park your vehicle in a safe place and contact the nearest authorized Mitsubishi Motorsdealer or a repair facility of your choice. If a vehicle is driven without releasing the parking brake, the brake will overheat, resulting in ineffective braking and possible brake failure. If the brake warning light does not go off after the parking brake has been released, thebrake system may be malfunctioning. Contact the nearest authorized Mitsubishi Motors dealer or a repair facility of your choice.
BK0277700US.bo
ok 52 ページ 2019年3月8日 金曜日 午前9時23分
Page 134 of 427

Steering wheel height and reach adjustment
Features and controls 5-53
5
Warning light Warning display If there is a malfunction in the system, the warning light will come on. In addition, thewarning display appears on the information screen in the multi-information display.
Under normal conditions, the warning light only comes on when the ignition switch is turned to the “ON” position or the operation mode is put in ON and goes off a few secondslater.
N00511501241
To adjust the steering wheel to the desiredposition, move the lever upward or down-
If the acceleration of the vehicle seems abnormally slow after the vehicle has been parked with the Electric parking brake applied in cold weather, stop the vehicle in a safe place, then apply and release the Elec-tric parking brake. If the vehicle acceleration is still slow, contact the nearest authorized Mitsubishi Motors dealer or a repair facilityof your choice.NOTE
When the ignition switch or the operation mode is other than ON, the parking brake cannot be released. If the Electric parking brake does not auto- matically release, it may be released by man-ual operation. When the selector lever is other than “P” (PARK) position, if you try to release the Electric parking brake without depressing the brake pedal, the warning display willappear.CAUTION
If you start driving without releasing the Electric parking brake, the warning display will appear. If the driver’s foot contacts the accelerator pedal in the condition that the Electric park-ing brake can release by an automatic opera- tion, the Electric parking brake may be released automatically.
Warning light/display
NOTE
CAUTION When the Electric parking brake warning light does not illuminate or remains illumi- nated when the ignition switch is turned tothe “ON” position or the operation mode is put in ON, or comes on while driving, the Electric parking brake may not be applied orreleased. Immediately contact the nearest authorized Mitsubishi Motors dealer or a repair facilityof your choice. For details, refer to “Electric parking brake warning light” on page 5-184. When parking your vehicle while the Elec-tric parking brake warning light is illumi- nated, park the vehicle on level and stable ground, move the selector lever to the “P”(PARK) position and place chocks, blocks, stones behind and in front of the tires to pre- vent the vehicle from moving.
Steering wheel height and reach adjustment
BK0277700US.bo
ok 53 ページ 2019年3月8日 金曜日 午前9時23分
Page 135 of 427

Inside rearview mirror 5-54 Features and controls
5
ward while moving the steering wheel to the desired position.
N00511601473
Adjust the inside rear
view mirror only after
making any seat adjustme
nts so as to have a
clear view to the rear of the vehicle.
Adjust the inside mirror to maximize the view through the rear window.
It is possible to move
the mirror up and down
to adjust its position. It is possible to move the mirror up/down and left/right to adjust its position.
1- Wheel lock 2- ReleaseWA R N I N G After adjusting, make sure the lock lever is secured in the locked (1) position. Do not attempt to adjust the steering wheel while driving. This can be danger- ous.
Inside rearview mirror
1 2
WA R N I N G Do not attempt to adjust the inside rear- view mirror while driving. This can be dangerous. Be sure to adjust the mirrors before driv-ing.Type 1 Type 2 Type 3
To adjust the vertical mirror position Except for vehicles equipped with For- ward Collision Mitigation system (FCM)To adjust the mirror position
BK0277700US.bo
ok 54 ページ 2019年3月8日 金曜日 午前9時23分
Page 136 of 427
Inside rearview mirror
Features and controls 5-55
5
The day/night knob (A) at the bottom of the mirror can be used to adjust the mirror to reduce the glare from the headlights of vehi-cles behind you during night driving.
When the headlights of the vehicles behind you are very bright, the reflection factor of the rearview mirror is automatically changedto reduce the glare. When the ignition switch is turned to the “ON” position or the operation mode is put in ON, the reflection factor of the mirror is auto-matically changed.
To reduce the glare Ty p e 1 1- Daytime position2- Night position
Ty p e 2
NOTE
Do not hang items on, or spray glass cleaner on the sensor (1), as reduced sensitivity could result.
BK0277700US.bo
ok 55 ページ 2019年3月8日 金曜日 午前9時23分