2020 MERCEDES-BENZ GLE COUPE maintenance reset
[x] Cancel search: maintenance resetPage 34 of 757
Diagnostics connection
The diagnostics connection is on ly intended for
th e connection of diagnostic devices at a quali‐
fi ed specialist workshop. &
WARNING Risk of accident due tocon‐
necting devices tothe diagnostics con‐
nection
If yo u connect equipment toa diagnostics
connection in theve hicle, it may af fect the
operation of vehicle sy stems.
As a result, the operating saf ety of theve hi‐
cle could be af fected. #
Only connect theve hicle diagnostics
connection todevices which ha vebeen
te sted with rega rd totheir use and are
considered safe. &
WARNING Risk of accident due to
objects in the driver's foot we ll
Objects in the driver's foot we ll may impede
pedal tr avel or block a depressed pedal. This jeopardises
the operating and road
saf ety of theve hicle. #
Stow all objects in theve hicle securely
so that they cannot getinto the driver's
fo ot we ll. #
Alw aysfit th efloor mats securely and
as prescribed in order toensure that
th ere is alw ays suf ficient room forthe
pedals. #
Do not use loose floor mats and do not
place floor mats on top of one ano ther. *
NO
TEBattery discharging from using
devices connected tothe diagnostics
connection Using devices at
the diagnostics connection
drains the batter y. #
Check thech arge leve l of the batter y. #
Ifth ech arge leve l is lo w,charge the
batter y,e.g. bydriving a considerable
dis tance. Connecting equipment
tothe diagnostics con‐
nection can lead toemissions monitoring infor‐
mation being reset, forex ample. This may lead
to theve hicle failing tomeet therequ irements of
th e next emissions inspection during the main
inspection. Qualified specialist
workshop
Plug-in hybrid: obser vethe no tes in the Supple‐
ment. Otherwise, you may failto recognise dan‐
ge rs.
A qu alified specialist workshop has the neces‐
sary special skills, tools and qualifications to
cor rectly car ryout any necessary workon your
ve hicle. This particularly applies tosaf ety-re le‐
va nt wo rks.
Alw ays ha vethefo llowing workcar ried out on
yo ur vehicle at a qualified specialist workshop:
R safety-re leva nt wo rks
R service and maintenance work
R repair work
R modifications as well as ins tallations and
con versions General no
tes31
Page 37 of 757
eration, lateral acceleration, display of
fas‐
te ned seat belts)
R malfunctions or faults in impor tant sy stem
components (e.g. lights, brakes)
R information on events leading tovehicle
damage
R system reactions in special driving situations
(e.g. airbag deployment, inter vention of sta‐
bility control sy stems)
R ambient conditions (e.g. temp erature, rain
sensor)
In addition toprov iding the actual control unit
function, this data assists the manufacturer in
de tecting and rectifying faults and optimising
ve hicle functions. The majority of this data is
te mp orary and is only processed in theve hicle
itself. Only a small portion of the data is stored
in theev ent or fault memor y.
When your vehicle is serviced, tech nical da ta
from theve hicle can be read out byservice net‐
wo rkemplo yees (e.g. workshops, manufactur‐
ers) or third parties (e.g. breakdown services).
Services include repair services, maintenance
processes, warranty claims and quality assur‐ ance measures,
forex ample. The read out is per‐
fo rm ed via the legally prescribed port forthe
diagnostics connection in theve hicle. The
re spective service network locations or third
parties collect, process and use the data. They
document tech nical statuses of theve hicle,
assist in finding faults and impr oving quality and
are transmit tedto the manufacturer, if neces‐
sar y.Fu rthermore, the manufacturer is subject
to product liability. Forth is, the manufacturer
re qu ires tech nical da tafrom vehicles.
Fa ult memories in theve hicle can be reset by a
service outlet as part of repair or maintenance
wo rk.
Depending on the selected equipment, you can
import data into vehicle con venience and info‐
ta inment functions yourself.
This includes, forex ample:
R multimedia data such as music, films or pho‐
to sfo r playback in an integrated multimedia
sy stem
R address book data for use in connection with
an integrated hands-free sy stem or an inte‐
grated navigation sy stem R
entered navigation destinations
R data about the use of internet services
This data can be sa ved locally in theve hicle or it
is located on a device which you ha veconnected
to theve hicle (e.g. a smartphone, USB flash
drive or MP3 pla yer). If this data is stored in the
ve hicle, you can dele teit at any time. This data
is sent tothird parties only at your requ est, par‐
ticular lywhen you use online services in accord‐
ance with the settings that you ha veselected.
Yo u can store or change con venience settings/
individualisations in theve hicle at any time.
Depending on the equipment, this includes, for
ex ample:
R settings forth e seat and steering wheel posi‐
tions
R suspension and climate control settings
R customisations such as interior lighting
If yo ur vehicle is accordingly equipped, you can
connect your smartphone or ano ther mobile end
device totheve hicle. You can cont rolth is by
means of the control elements integrated in the
ve hicle. Images and audio from the smartphone 34
General no tes
Page 528 of 757
R
the windscreen wiper switch is in position
005A.
R theke y is at a minimum dis tance of 3 m
aw ay from theve hicle, otherwise theta ilgate
could open unin tentionally.
R in car washes with a con veyo r sy stem: neu‐
tral 005Cis engaged.
% Drive stra ight and in tothe cent reofthe
guide rails of the car wash topreve nt dam‐
age tothe tyres and rims.
% In car washes with a con veyo r sy stem: if you
wo uld like tolea vetheve hicle while it is
being washed, make sure theke y is located
in theve hicle. The park position 005Disother‐
wise automatically engaged.
% If, af terth e car wash, youre mo vethewax
from the windscreen and wiper rubbers, this
will pr event smearing and reduce wiper
noise.
Au tomatic car wash mode
In car wash mode, theve hicle is prepared for
driving into the automatic car wash. Car wash mode can be activated at a speed of up
to
20 km/h (/ page 526).
The following settings are made when car wash
mode is activated:
R the outside mir rors are folded down.
R thera in sensor is deactivated topreve ntthe
windscreen washer sy stem from starting up
automaticall y.
R there ar wind owwiper is deactivated.
R the windo wsand the sliding sunroof are
closed.
R the air conditioning sy stem is set toair-recir‐
culation mode.
R Parking Assist PARKTRONIC is deacti vated.
R Vehicles with 360° Camera: the front
image is activated af ter appro x. eight sec‐
onds.
R Vehicles with AIRMATIC: theve hicle is
ra ised tothe maximum possible chassis
le ve l(/ page 249).
If rising takes longer than 25 seconds, the
fo llowing message appears on the multifunc‐
tion display: Preparation for car wash incomplete See
media display
. After some time, theve hicle
automatically continues rising.
R Vehicles with E- ACTIVE BODY CONT ROL:
th eve hicle is raised tothe maximum possi‐
ble chassis le vel(/ page 258).
If rising takes longer than 25 seconds, the
fo llowing message appears on the multifunc‐
tion display:
Preparation for car wash incomplete See
media display . After some time, theve hicle
automatically continues rising.
If one of the settings cann otbe selected, this is
displa yedby a% behind there spective set‐
ting.
Ab ove a speed of 20 km/h car wash mode is
automatically deactivated.
The following settings are reset when car wash
mode is deactivated:
R the outside mir rors are folded out.
R thera in sensor is activated.
R there ar wind owwiper is activated. Maintenance and care
525
Page 529 of 757
R
the air conditioning sy stem is set tofresh air
mode.
R Parking Assist PARKTRONIC is reset tothe
pr ev iously selec ted setting.
R the windo wsand the sliding sunroof remain
closed.
R Vehicles with 360° Camera: the front
image is deactivated at speeds abo ve
18 km/h.
R Vehicles with AIRMATIC: theve hicle is low‐
ered tothe pr eviously set chassis le vel.
R Vehicles with E- ACTIVE BODY CONT ROL:
th eve hicle is lo weredto the pr eviously set
ch assis le vel. Ac
tivating/deactivating automatic car wash
mode Re
quirements:
R The vehicle is stationar y.
R The engine is running. Multimedia sy
stem:
4 © 5
Settings 5
Quick access
Ac tivating automatic car wash mode #
Select Car wash mode . #
Select Start.
If one of the settings cann otbe selected, this is
displa yedby a% behind there spective set‐
ting.
% For an overview of the settings made when
activating automatic car wash mode
(/ page 524).
Deactivating automatic car wash mode #
Select Stop.
The automatic car wash settings are reset.
% The automatic car wash mode is automati‐
cally deactivated as soon as a speed of
20 km/h is exceeded. Information on using a high-p
ressure cleaner &
WARNING Risk of an accident when
using high-pressure cleane rswith circu‐
lar jet nozzles
The wate r jet of a circular jet nozzle (dirt
grinder) can cause extern ally invisible dam‐
age tothe tyres or chassis parts.
Components damaged in this wa y may unex‐
pec tedly fail. #
Do not use high-pressure cleaners with
circular jet nozzles toclean theve hicle. #
Have damaged tyres or chassis parts
re placed immediatel y. To
avo id damage to yourvehicle, obser vethefo l‐
lowing when using a high-pressure cleaner:
R keep theke y at least 3 m away from theve hi‐
cle. Otherwise theta ilgate could open unin‐
te ntional ly.
R maintain a dis tance of at least 30 cm tothe
ve hicle. 526
Maintenance and care
Page 732 of 757
M
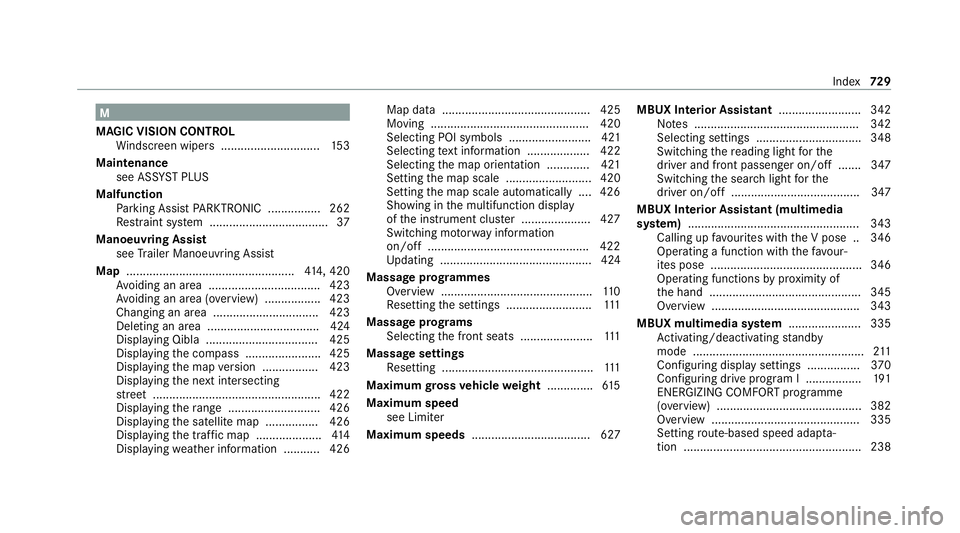
MAGIC VISION CONTROL Windsc reen wipers .............................. 15 3
Maintenance see ASS YST PLUS
Malfunction Parking Assist PARKTRONIC ................ 262
Re stra int sy stem .................................... 37
Manoeuvring Assist see Trailer Manoeuv ring Assi st
Map ................................................... 414, 420
Av oiding an area ..................................4 23
Av oiding an area (o verview) ................ .423
Changing an area ................................ 423
Deleting an area .................................. 424
Displ aying Qibla .................................. 425
Displaying the compass ....................... 425
Displaying the map version ................ .423
Displ aying the next intersecting
st re et ................................................... 422
Displaying thera nge ............................ 426
Displaying the satellite map ................4 26
Displ aying the tra ffic map .................... 414
Displ aying weather information .......... .426 Map data ............................................. 425
Moving ................................................ 420
Selecting POI symbols ......................... 421
Selecting text information ................... 422
Selecting the map orientation .............4 21
Setting the map scale .......................... 420
Setting the map scale automatically ....4 26
Showing in the multifunction display
of the instrument clus ter .................... .427
Switching mo torw ay information
on/off ................................................ .422
Up dating .............................................. 424
Massa geprog rammes
Overview .............................................. 11 0
Re setting the settings .......................... 111
Massage prog rams
Selecting the front seats ......................1 11
Massage settings Resetting ..............................................1 11
Maximum gross vehicle weight .............. 61 5
Maximum speed see Limiter
Maximum speeds .................................... 627 MBUX Interior Assistant
......................... 342
No tes .................................................. 342
Selecting settings ................................ 348
Switching there ading light forthe
driver and front passenger on/off .......3 47
Switching the sear chlight forthe
driver on/off .......................................3 47
MBUX Interior Assistant (multimedia
sy stem) .................................................... 343
Calling up favo urites with the V pose .. 346
Operating a function with thefa vo ur‐
ites pose .............................................. 346
Operating functions byprox imity of
th e hand ..............................................3 45
Overview ............................................. 343
MBUX multimedia sy stem ...................... 335
Ac tivating/deactivating standby
mode .................................................... 211
Con figuring display settings ................3 70
Configu ring drive program I ................. 191
ENERGIZING COMFORT prog ramme
(o ve rview) ............................................ 382
Overview ............................................ .335
Setting route-based speed adap ta‐
tion ...................................................... 238 Index
729