2020 MERCEDES-BENZ AMG GT R-ROADSTER ECU
[x] Cancel search: ECUPage 148 of 441
R
The electric parking brake is released.
This gives you enough time tomo veyour foot
from the brake pedal tothe accelera tor pedal
and depress it before theve hicle begins toroll
aw ay. &
WARNING Risk of accident and inju ry
due totheve hicle rolling away
Af ter a short time, Hill Start Assist no lon ger
holds theve hicle. #
Swiftly mo veyour foot from the brake
pedal tothe accelera tor pedal. Do not
lea vetheve hicle when it is being held
by Hill Start Assist. HOLD function
HOLD function
The HOLD function holds
theve hicle at a stand‐
st ill without requ iring youto depress the brake
pedal, e.g. while waiting in traf fic.
The HOLD function is only an aid. The responsi‐
bility forth eve hicle safely standing still remains
with the driver. Sy
stem limits
The HOLD function is only intended toprov ide
assis tance when driving and is not a su fficient
means of safeguarding theve hicle against rolling
aw ay when stationar y.
R The incline must not be greater than 30%.
Ac tivating/deactivating the HOLD function &
WARNING Risk of an accident due tothe
HOLD function being active when you
lea vetheve hicle
If th eve hicle is only braked with the HOLD
function it could, in thefo llowing situations,
ro llaw ay:
R Ifth ere is a malfunction in the sy stem or
in the po wer supp ly.
R Ifth e HOLD function is deactivated by
depressing the accelera tor pedal or brake
pedal, e.g. byave hicle occupant. #
Alw ays secure theve hicle against roll‐
ing away before you lea veit. Re
quirements: R
The vehicle is stationar y.
R The driver's door is closed or the seat belt on
th e driver's side is fastened.
R The engine is running or has been au tomati‐
cally switched off bythe ECO start/ stop
function.
R The electric parking brake is released.
R Active Dis tance Assi stDISTRONIC is deacti‐
va ted.
R The transmission is in position h,kori.
Ac tivating the HOLD function #
Dep ress the brake pedal, and af ter a short
time quickly depress fur ther until theë
display appears in the multifunction displa y. #
Release the brake pedal.
Deactivating the HOLD function #
Depress the accelerator pedal topull away.
or #
Depress the brake pedal until theë dis‐
play disappears from the multifunction dis‐
pla y. Driving and pa
rking 14 5
Page 149 of 441
The HOLD function is deactivated in
thefo llow‐
ing situations:
R Active Dis tance Assi stDISTRONIC is acti va‐
te d.
R The transmission is shif tedto position j.
R The vehicle is secured with the electric park‐
ing brake.
In thefo llowing situations, theve hicle is held by
transmission position jand/or bythe electric
parking brake:
R The seat belt is unfas tened and the driver's
door is opened.
R The vehicle is switched off.
R There is a malfunction in the sy stem or the
po we r supp lyis insuf ficient. RACE
START Fu
nction of RACE START
RACE START enables optimal vehicle accelera‐
tion from a standstill. Forth is, a suitably high-
gr ip road sur face is required, the tyres and vehi‐
cle must also be in good condition. %
RACE START is only available af terth eve hi‐
cle has been run in (/ page 106).
% RACE START may not be used on normal
ro ads. RACE START mu stonly be activated
and used on dedicated race circuits, not on
public roads.
Be sure toread the saf ety no tes and infor‐
mation on ESP ®
(/ page 133). &
WARNING Risk of skidding and having
an accident from wheels spinning
If yo u use RACE STAR T,depending on the
ESP ®
mode selected, there is an increased
ri sk of skidding and having an accident. #
Make sure that no persons or obstacles
are in the close vicinity of your vehicle. Ac
tivating RACE START
Re quirements:
R the driver's door is closed.
R the engine is running and the transmission
and engine are at normal operating temp era‐
ture. R
the front wheel is in thest ra ight-ahead posi‐
tion.
R theve hicle is on le velground.
R theve hicle is stationar y,the brake pedal is
depressed (left foot ) and the parking brake is
re leased.
R the transmission is in position h.
R one of the drive programs C,Bor
I is selected (/ page117). #
Rapidly depress the accelerator pedal full y.
The engine speed increases.
% Ifth e activation conditions are not fulfilled,
RACE START cannot be acti vated. The RACE
START not possible See Owner's Manual
message appears in the multifunction dis‐
pla y. #
The RACE START Release brake to start mes‐
sage appears in the multifunction displa y.14 6
Driving and pa rking
Page 159 of 441
Switching
reve rsing camera automatic mode
on/off
The reve rsing camera is only an aid. It is not a
substitute foryo ur attention tothe sur roundings.
The responsibility for safe manoeuvring and
parking remains with you. Make sure that no
persons, animals or objects etc. are in the
manoeuvring range. Pay attention to your sur‐
ro undings and be ready tobrake at all times.
Multimedia sy stem:
4 Vehicle 5
k Assistance
5 Camera & Park. Assist
5 Auto reversing camera #
Switch the function on Oor off ª. AT
TENTION ASSI STFu
nction of ATTENTION ASSI ST
AT TENTION ASSIST assists you on long, mon oto‐
nous journe ys, e.g. on mo torw ays and trunk
ro ads. If ATTENTION ASSIST de tects indicators
of fatigue or increasing lapses in concentration
on the part of the driver, it suggests taking a
brea k. AT
TENTION ASSIST is only an aid. It cannot
alw ays de tect fatigue or lapses in concentration
in time. The sy stem is not a substitute for a well-
re sted and attentive driver. On long journe ys,
ta ke regular breaks in good time that allow for
adequate recuperation.
Yo u can choose between two settings:
R Standard: normal sy stem sensitivity.
R Sensitive: higher system sensitivity. The
driver is warned earlier and the attention
le ve l de tected byATTENTION ASSIST is adap‐
te d according ly.
If dr owsiness or increasing lapses in concentra‐
tion are de tected, theATTENTION ASSIST: Take
a break! warning appears in the Instrument Dis‐
pla y.Yo u can ackn owledge the message and
tak e a break where necessar y.Ifyo u do not take
a break and ATTENTION ASSIST continues to
de tect increasing lapses in concentration, you
will be warned again af ter a minimum of
15 minutes. Yo
u can ha vethefo llowing status information for
AT TENTION ASSIST displa yed in the assis tance
menu of the on-board computer:
R The length of the journey since the last
break.
R The attention le vel de term ined byATTENTION
ASSIS T.
If AT TENTION ASSIST is unable tocalculate the
attention le vel and cannot issue a warning, the
System suspended messageappears.
If a warning is given in the Instrument Displa y,
th e multimedia sy stem of fers to sear chfor a rest
area. You can select a rest area and start naviga‐ 15 6
Driving and pa rking
Page 194 of 441
Yo
u can use Blue tooth®
to connect your mobile
phone tothe multimedia sy stem and use thefo l‐
lowing functions, forex ample:
R Hands-free sy stem with access tothefo llow‐
ing options:
- con tacts (/ page 239)
- call lists (/ page241)
- text messa ge (/page 242)
R Internet connection (/ page 257)
R Listening tomusic via Blue tooth®
audio
R Trans ferring business cards (vCards) into the
ve hicle
Blue tooth ®
is a regis tere d trademark of Blue‐
toot h Special Interest Group (SIG) Inc.
% Internet connection via Blue tooth®
is not
av ailable in all countries.
Ac tivating/deactivating Blue tooth ®
Re quirements:
R Deactivate Blue tooth®
: Apple CarPl ay®
is not
active. Multimedia sy
stem:
4 System 5
ö Connectivity #
Activate Oor deacti vate ª Bluetoo th®
.
If Android Autois active, a prom ptappears ask‐
ing whe ther Blue tooth®
should be deactivated. #
Select Yes.
Android Autois closed and Blue tooth®
is
deactivated. Wi
-Fi Wi
-Fi connection overview
Yo u can use Wi-Fi toestablish a connection with
a Wi -Fi network and toaccess the Internet or
ot her network devices.
The following connection options are available:
R Wi-Fi connection
The Wi-Fi connection toaWi -Fi-capable
device, e.g. the cus tomer's mobile phone or
a ta blet PC is es tablished.
R Multimedia sy stem as a Wi-Fi hotspot Using
this function, a tablet PC or no tebook
can be connecte d,forex ample.
To establish a connection, you can use thefo l‐
lowing me thods:
R WPS PIN
The connection toa secure Wi-Fi network is
made via a PIN.
R WPS PBC
The connection toa secure Wi-Fi network is
made bypressing a button (push button).
R Security key
The connection toa secure Wi-Fi network is
made via a secu rity key.
Setting up Wi-Fi
Requ irements:
R The device tobe connec ted supports one of
th eth re e means of connection described
(/ page 191). Multimedia sy
stem 191
Page 195 of 441
Multimedia sy
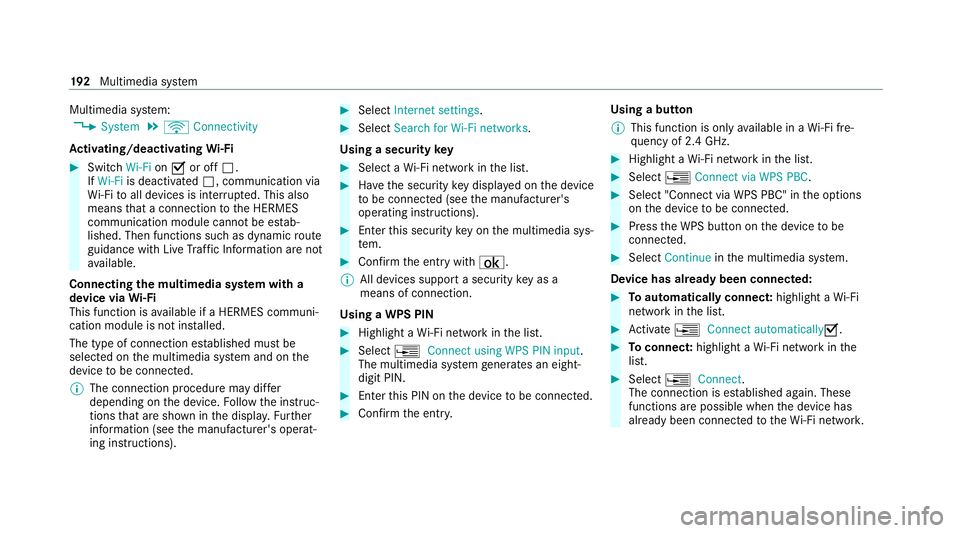
stem:
4 System 5
ö Connectivity
Ac tivating/deactivating Wi-Fi #
Switch Wi-FionO or off ª.
If Wi-Fi is deactivated ª, communication via
Wi -Fi toall devices is inter rupte d. This also
means that a connection tothe HERMES
communication module cann otbe es tab‐
lished. Then functions such as dynamic route
guidance with Live Traf fic Information are not
av ailable.
Connecting the multimedia sy stem with a
device via Wi-Fi
This function is available if a HERMES communi‐
cation module is not ins talled.
The type of connection es tablished must be
selected on the multimedia sy stem and on the
device tobe connec ted.
% The connection procedure may dif fer
depending on the device. Follow the instruc‐
tions that are shown in the displa y.Fu rther
information (see the manufacturer's operat‐
ing instructions). #
Select Internet settings . #
Select Search for Wi-Fi networks.
Using a security key #
Select a Wi-Fi network in the list. #
Have the security key displa yed on the device
to be connec ted (see the manufacturer's
operating instructions). #
Ente rth is security key on the multimedia sys‐
te m. #
Confirm the entry with¡.
% All devices support a security key as a
means of connection.
Using a WPS PIN #
Highlight a Wi-Fi network in the list. #
Select ¥Connect using WPS PIN input.
The multimedia sy stem generates an eight-
digit PIN. #
Enter this PIN on the device tobe connec ted. #
Confirm the entry. Using a button
%
This function is only available in a Wi-Fi fre‐
qu ency of 2.4 GHz. #
Highlight a Wi-Fi network in the list. #
Select ¥Connect via WPS PBC. #
Select "Connect via WPS PBC" in the options
on the device tobe connec ted. #
Press the WPS button on the device tobe
connecte d. #
Select Continue inthe multimedia sy stem.
Device has already been connected: #
Toautomatically connect: highlight aWi-Fi
network in the list. #
Activate ¥ Connect automaticallyO. #
Toconnect: highlight a Wi-Fi network in the
list. #
Select ¥Connect.
The connection is es tablished again. These
functions are possible when the device has
already been connected totheWi -Fi networ k. 19 2
Multimedia sy stem
Page 196 of 441
Setting up a
Wi-Fi hotspot
Re quirements:
R For connection bypressing a button: this
function is only available in a Wi-Fi frequency
of 2.4 GHz.
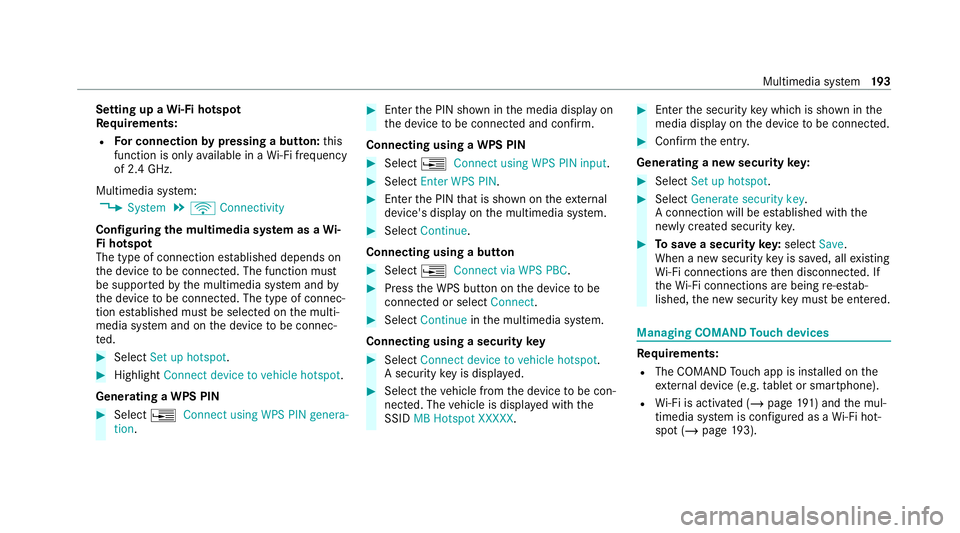
Multimedia sy stem:
4 System 5
ö Connectivity
Configuring the multimedia sy stem as a Wi-
Fi hotspot
The type of connection es tablished depends on
th e device tobe connec ted. The function must
be suppor tedby the multimedia sy stem and by
th e device tobe connec ted. The type of connec‐
tion es tablished must be selected on the multi‐
media sy stem and on the device tobe connec‐
te d. #
Select Set up hotspot. #
Highlight Connect device to vehicle hotspot.
Generating a WPS PIN #
Select ¥Connect using WPS PIN genera-
tion . #
Ente rth e PIN shown in the media display on
th e device tobe connec ted and confi rm.
Connecting using a WPS PIN #
Select ¥Connect using WPS PIN input. #
Select Enter WPS PIN. #
Enterth e PIN that is shown on theex tern al
device's display on the multimedia sy stem. #
Select Continue.
Connecting using a button #
Select ¥Connect via WPS PBC. #
Press the WPS button on the device tobe
connecte d or select Connect. #
Select Continue inthe multimedia sy stem.
Connecting using a security key #
Select Connect device to vehicle hotspot .
A secu rity key is displa yed. #
Select theve hicle from the device tobe con‐
nec ted. The vehicle is displa yed with the
SSID MB Hotspot XXXXX . #
Enter the security key which is shown in the
media display on the device tobe connec ted. #
Confirm the entry.
Genera ting a new security key: #
Select Set up hotspot . #
Select Generate security key .
A connection will be es tablished with the
newly crea ted security key. #
Tosave a security key:select Save.
When a new security key is sa ved, all existing
Wi -Fi connections are then disconnected. If
th eWi -Fi connections are being re-es tab‐
lished, the new security key must be ente red. Managing COMAND
Touch devices Re
quirements:
R The COMAND Touch app is ins talled on the
ex tern al device (e.g. tablet or smartphone).
R Wi-Fi is acti vated (/ page191) and the mul‐
timedia sy stem is confi gured as a Wi-Fi hot‐
spot (/ page 193). Multimedia sy
stem 19 3
Page 197 of 441
Multimedia sy
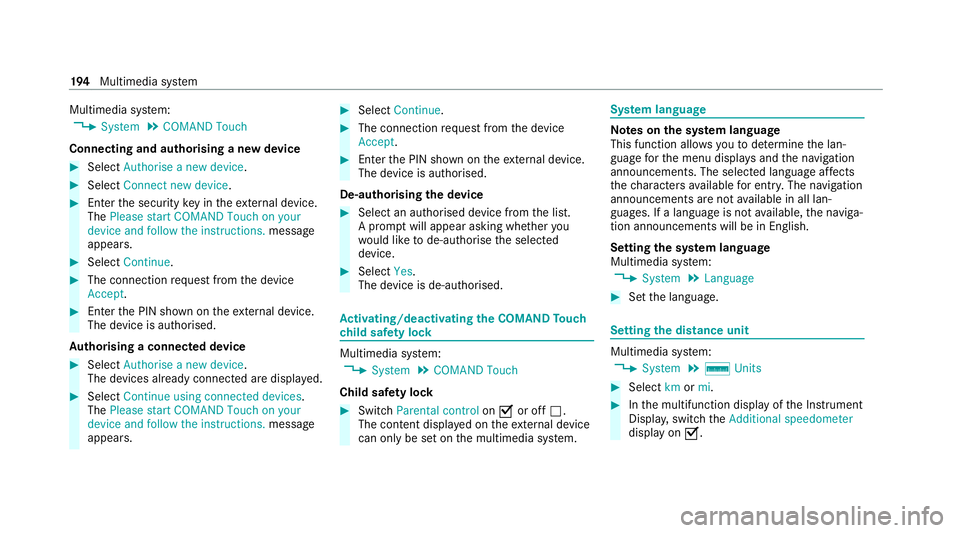
stem:
4 System 5
COMAND Touch
Connecting and authorising a new device #
Select Authorise a new device. #
Select Connect new device. #
Ente rth e security key in theex tern al device.
The Please start COMAND Touch on your
device and follow the instructions. message
appears. #
Select Continue. #
The connection requ est from the device
Accept. #
Ente rth e PIN shown on theex tern al device.
The device is authorised.
Au thorising a connected device #
Select Authorise a new device.
The devices already connec ted are displa yed. #
Select Continue using connected devices.
The Please start COMAND Touch on your
device and follow the instructions. message
appears. #
Select Continue. #
The connection requ est from the device
Accept. #
Ente rth e PIN shown on theex tern al device.
The device is authorised.
De-authorising the device #
Select an authorised device from the list.
A prom ptwill appear asking whe ther you
wo uld like tode-authorise the selected
device. #
Select Yes.
The device is de-authorised. Ac
tivating/deactivating the COMAND Touch
ch ild saf ety lock Multimedia sy
stem:
4 System 5
COMAND Touch
Child saf ety lock #
Switch Parental control onO or off ª.
The content displa yed on theex tern al device
can on lybe set on the multimedia sy stem. Sy
stem language Note
s onthe sy stem language
This function allo wsyouto determ ine the lan‐
guage forth e menu displa ysand the navigation
announcements. The selected language af fects
th ech aracters available for entr y.The navigation
announcements are not available in all lan‐
guages. If a language is not available, the naviga‐
tion announcements will be in Engl ish.
Setting the sy stem language
Multimedia sy stem:
4 System 5
Language #
Set the language. Setting
the distance unit Multimedia sy
stem:
4 System 5
% Units #
Select kmormi. #
Inthe multifunction display of the Instrument
Displa y,switch theAdditional speedometer
display on O. 194
Multimedia sy stem
Page 198 of 441
Data import and
export Data import/export function
The
following functions are possible:
R Trans ferring data from one sy stem or vehicle
to ano ther sy stem or vehicle.
R Creating a bac kup copy of your personal data
and loading it again.
R Protecting your personal data against un wan‐
te dex port with PIN pr otection.
% Please no tethat the NTFS file sy stem is not
suppor ted. The FAT32 file sy stem is recom‐
mended.
Importing/exporting data
* NO
TELoss of da tadue topremature
re mo val #
Do not remo vethe data storage
medium when data is being expor ted.
Mercedes-Benz is not liable for any loss of
data. Re
quirements: R
The vehicle is stationar y.
R The ignition is switched on or theve hicle has
been star ted.
R The SD card is inser ted (/ page 266) or the
USB device is connecte d (/page 267).
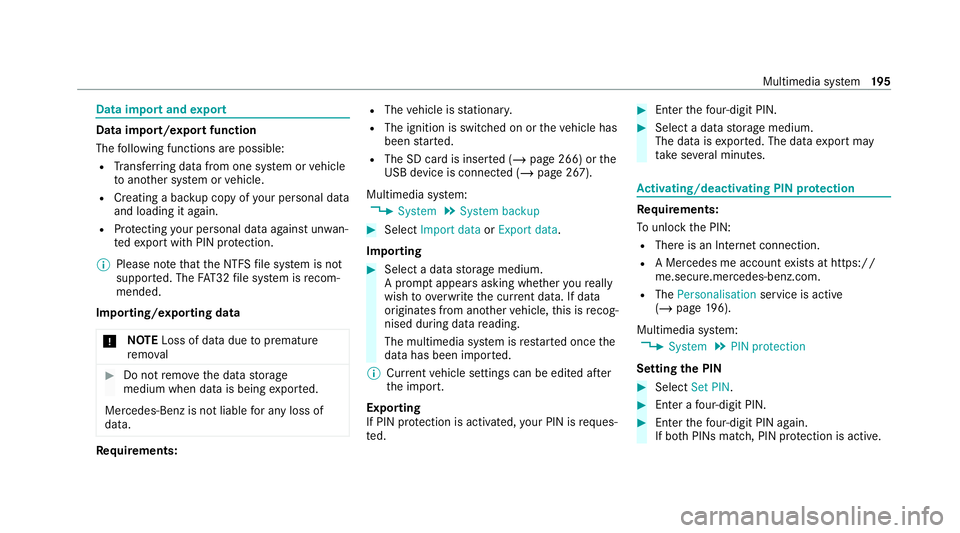
Multimedia sy stem:
4 System 5
System backup #
Select Import data orExport data.
Importing #
Select a data storage medium.
A prom ptappears asking whe ther youre ally
wish to overwrite the cur rent da ta. If da ta
originates from ano ther vehicle, this is recog‐
nised du ring da tareading.
The multimedia sy stem is restar ted once the
data has been impor ted.
% Current vehicle settings can be edited af ter
th e import.
Exporting
If PIN pr otection is activated, your PIN is reques‐
te d. #
Ente rth efo ur-digit PIN. #
Select a data storage medium.
The data is expor ted. The data export may
ta ke several minutes. Ac
tivating/deactivating PIN pr otection Re
quirements:
To unlo ckthe PIN:
R There is an Internet connection.
R A Mercedes me account exists at https://
me.secure.mercedes-benz.com.
R The Personalisation service is active
(/ page 196).
Multimedia sy stem:
4 System 5
PIN protection
Setting the PIN #
Select Set PIN. #
Enter a four-digit PIN. #
Enterth efo ur-digit PIN again.
If bo thPINs match, PIN pr otection is active. Multimedia sy
stem 19 5