2020 Hyundai Ioniq Hybrid display
[x] Cancel search: displayPage 1 of 613
HEV (Hybrid electric vehicle) system ................H-2
Hybrid Vehicle....................................................................H-2
Plug-in Hybrid Vehicle ....................................................H-3
Charging Information .......................................................H-4
Charging Time....................................................................H-4
Charging Types ..................................................................H-4
Charging Status .................................................................H-5
Charging the plug-in hybrid vehicle...................H-4
Scheduled Charging..........................................................H-6
Charging Connector AUTO/ LOCK Mode ....................H-7
Charging Precautions.......................................................H-8
Normal Charge.................................................................H-10
Trickle Charge..................................................................H-16
Driving the hybrid/plug-in hybrid vehicle.......H-28
Starting the Vehicle .......................................................H-28
Special Features ............................................................H-29
Hybrid System Gauge ....................................................H-31
Plug-in Hybrid Mode(Plug-in hybrid vehicle).........H-33
Aux. Battery Saver+ (Plug-in hybrid vehicle).........H-34
Warning and Indicator Lights ......................................H-36
LCD Display Messages ..................................................H-37
Energy Flow .....................................................................H-45
Safety precautions for hybrid system .............H-49
Hybrid Vehicle Components Safety Precautions ....H-49
Service Plug .....................................................................H-52
Hybrid Battery Cooling Duct........................................H-53
If an Accident Occurs ....................................................H-54
When the Hybrid Vehicle Shuts Off ..........................H-55
H Hy
yb
br
ri
id
d
s
sy
ys
st
te
em
m
o
ov
ve
er
rv
vi
ie
ew
w
Page 12 of 613

H127. Check if the charging indicator
light of the high voltage battery on
the instrument cluster is turned
ON. Charging is not done when
the charging indicator lamp is
OFF.
When the charging connector and
charging plug are not connected
properly, reconnect the charging
cable to charge.
Information
• Even though charging is possible
with the ignition switch in the
ON/START position, for your safe-
ty, start charging when the ignition
switch is in the LOCK/OFF position
and the vehicle shifted to P (Park).
After charging has started, you can
use electrical components such as
the radio by placing the ignition
switch in the ACC or ON position.
• During AC charging, the radio
reception may be bad.
• Moving the shift lever from P (Park)
to R (Reverse)/N(Neutral)/D (Drive)
stops the charging process.
To restart the charging process,
move the shift lever to P (Park),
place the ignition switch to the
LOCK/OFF position, and discon-
nect the charging cable. Then, con-
nect the charging cable.8. After charging has started, the esti-
mated charging time is displayed on
the instrument cluster for about 1
minute.
If you open the driver seat door
whilst charging, the estimated charg-
ing time is also displayed on the
instrument cluster for about 1
minute.
When scheduled charging is set, the
estimated charging time is displayed
as “--" .
Information
Depending on the condition and dura-
bility of the high voltage battery,
charger specifications, and ambient
temperature, the time required for
charging the battery may vary.
i
i
C CH
HA
AR
RG
GI
IN
NG
G
T
TH
HE
E
P
PL
LU
UG
G-
-I
IN
N
H
HY
YB
BR
RI
ID
D
V
VE
EH
HI
IC
CL
LE
E
(
(C
CO
ON
NT
T.
.)
)
OAEPHQ018032/OAEPHQ048804
■Type A■Type B
OAEPHQ049818L
Page 16 of 613
H16
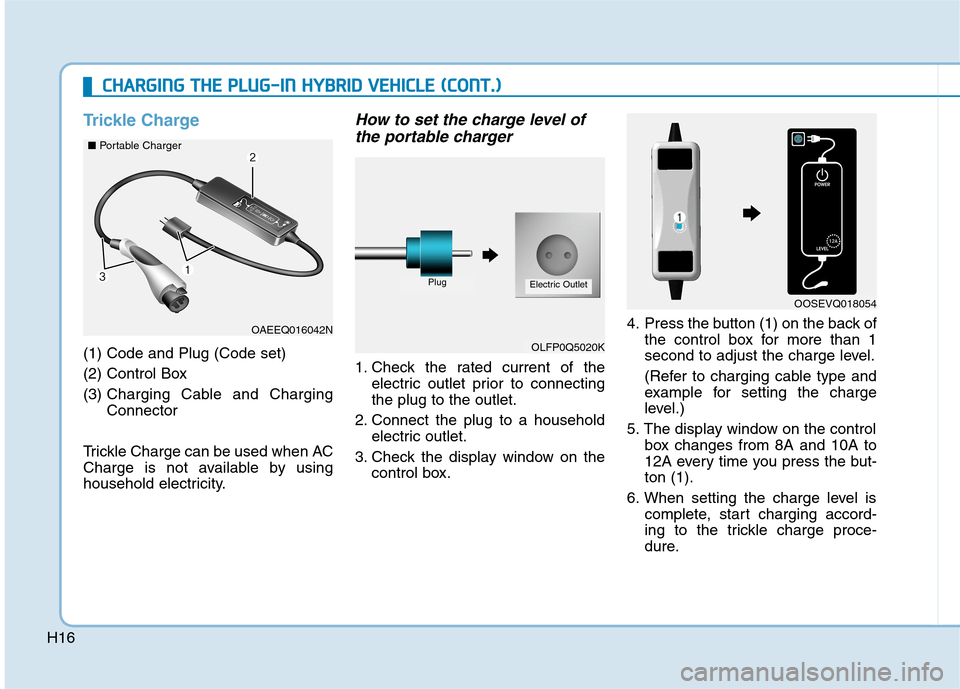
Trickle Charge
(1) Code and Plug (Code set)
(2) Control Box
(3) Charging Cable and Charging
Connector
Trickle Charge can be used when AC
Charge is not available by using
household electricity.
How to set the charge level of
the portable charger
1. Check the rated current of the
electric outlet prior to connecting
the plug to the outlet.
2. Connect the plug to a household
electric outlet.
3. Check the display window on the
control box.4. Press the button (1) on the back of
the control box for more than 1
second to adjust the charge level.
(Refer to charging cable type and
example for setting the charge
level.)
5. The display window on the control
box changes from 8A and 10A to
12A every time you press the but-
ton (1).
6. When setting the charge level is
complete, start charging accord-
ing to the trickle charge proce-
dure.
OAEEQ016042N ■Portable Charger
C
CH
HA
AR
RG
GI
IN
NG
G
T
TH
HE
E
P
PL
LU
UG
G-
-I
IN
N
H
HY
YB
BR
RI
ID
D
V
VE
EH
HI
IC
CL
LE
E
(
(C
CO
ON
NT
T.
.)
)
OLFP0Q5020K
PlugElectric Outlet
OOSEVQ018054
Page 17 of 613
H17
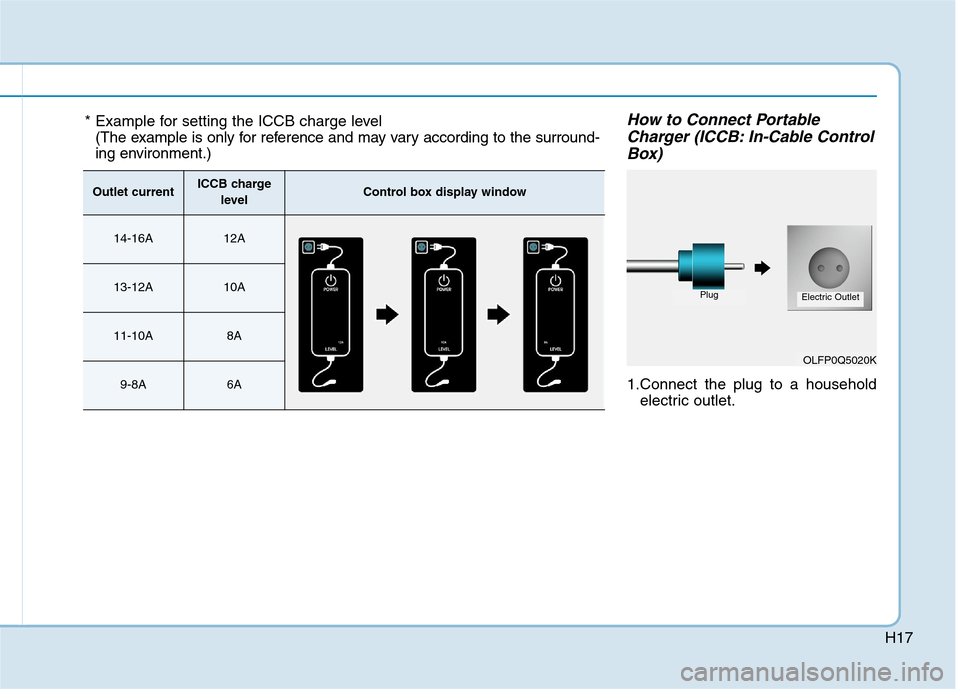
How to Connect Portable
Charger (ICCB: In-Cable Control
Box)
1.Connect the plug to a household
electric outlet.
OLFP0Q5020K
PlugElectric Outlet
* Example for setting the ICCB charge level
(The example is only for reference and may vary according to the surround-
ing environment.)
Outlet currentICCB charge
levelControl box display window
14-16A12A
13-12A10A
11-10A8A
9-8A6A
Page 20 of 613

H209. Check if the charging indicator
light of the high voltage battery on
the instrument cluster is turned
ON. Charging is not done when
the charging indicator lamp is
OFF.
When the charging connector is
not connected properly, reconnect
the charging cable to charge it
again.
Information
• Even though charging is possible
with the ignition switch in the
ON/START position, for your safe-
ty, start charging when the ignition
switch is in the LOCK/OFF position
and the vehicle shifted to P (Park).
After charging has started, you can
use electrical components such as
the radio by placing the ignition
switch in ACC or ON position.
• Moving the shift lever from P (Park)
to R (Reverse)/N(Neutral)/D (Drive)
stops the charging process.
To restart the charging process,
move the shift lever to P (Park),
place the ignition switch to the
LOCK/OFF position, and discon-
nect the charging cable. Then, con-
nect the charging cable.10. After charging has started, the
estimated charging time is dis-
played on the instrument cluster
for about 1 minute.
If you open the driver seat door
whilst charging, the estimated
charging time is also displayed on
the instrument cluster for about 1
minute.
When scheduled charging is set,
the estimated charging time is
displayed as “--" .
i
C CH
HA
AR
RG
GI
IN
NG
G
T
TH
HE
E
P
PL
LU
UG
G-
-I
IN
N
H
HY
YB
BR
RI
ID
D
V
VE
EH
HI
IC
CL
LE
E
(
(C
CO
ON
NT
T.
.)
)
OAEPHQ018032/OAEPHQ048804
■Type A■Type B
OAEPHQ049818L
Page 28 of 613
H28 Do not let children operate or touch
the portable charger.
Keep the control box free of water.
Keep the normal charging connec-
tor or plug terminal free of foreign
substances.
Do not step on the cable or cord.
Do not pull the cable or cord and
do not twist or bend it.
Do not charge when there is light-
ning.
Do not drop the control box or
place a heavy object on the control
box.
Do not place an object that can
generate high temperatures near
the charger when charging.
aged household electric outlet can
result in a risk of electric shock. If
you are in doubt to the household
electric outlet condition, have it
checked by a licenced electrician.
Stop using the portable charger
immediately if the household elec-
tric outlet or any components is
overheated or you notice burnt
odors.
Action to be taken when
charging stops abruptly
When the high voltage battery does
not charge, check the followings:
1. Check the charging setting for the
vehicle. (e.g. When scheduled
charging is set, charging is not ini-
tiated immediately when the AC
charger or portable charger
(ICCB: In-Cable Control Box) is
connected.)
2. Check the operation status of AC
charger, portable charger.
(Charging Status Indicator Lamp
for Portable Charger, refer to
“Checking Charging Status” for
trickle charge in this chapter.)
❈Actual method for indicating the
charging status may vary in
accordance with the charger
manufacturer.3. When the vehicle does not charge
and a warning message appears
on the cluster, check the corre-
sponding message. Refer to “LCD
Display Messages”, in this chap-
ter.
4. If the vehicle is properly charged
when charged with another nor-
mally working charger, contact the
charger manufacturer.
5. If the vehicle does not charge
when charged with another nor-
mally working charger, we recom-
mend that you contact an autho-
rised HYUNDAI dealer for inspec-
tion.
C CH
HA
AR
RG
GI
IN
NG
G
T
TH
HE
E
P
PL
LU
UG
G-
-I
IN
N
H
HY
YB
BR
RI
ID
D
V
VE
EH
HI
IC
CL
LE
E
(
(C
CO
ON
NT
T.
.)
)
Page 34 of 613
![Hyundai Ioniq Hybrid 2020 Owners Manual - RHD (UK, Australia) H34
Plug-in Hybrid Mode
(Plug-in hybrid vehicle)
HEV Button
Pressing the [HEV] button changes
the plug-in hybrid system modes,
between Electric (CD) mode and
Hybrid (CS) mode.Each time the mode is cha Hyundai Ioniq Hybrid 2020 Owners Manual - RHD (UK, Australia) H34
Plug-in Hybrid Mode
(Plug-in hybrid vehicle)
HEV Button
Pressing the [HEV] button changes
the plug-in hybrid system modes,
between Electric (CD) mode and
Hybrid (CS) mode.Each time the mode is cha](/manual-img/35/14927/w960_14927-33.png)
H34
Plug-in Hybrid Mode
(Plug-in hybrid vehicle)
HEV Button
Pressing the [HEV] button changes
the plug-in hybrid system modes,
between Electric (CD) mode and
Hybrid (CS) mode.Each time the mode is changed a
corresponding indicator is displayed
on the instrument cluster as follows.
Plug-in hybrid mode indicator
CD (Charge Depleting, Electric)
mode : The high-voltage (hybrid)
battery is used to drive the vehicle.
AUTO mode : CD mode and CS
mode are selected automatically
depending on road conditions.
D DR
RI
IV
VI
IN
NG
G
T
TH
HE
E
H
HY
YB
BR
RI
ID
D/
/P
PL
LU
UG
G-
-I
IN
N
H
HY
YB
BR
RI
ID
D
V
VE
EH
HI
IC
CL
LE
E
(
(C
CO
ON
NT
T.
.)
)
OAEPH049518R
OAEPH049633R
■ Type A
■ Type B
■AUTO mode
· Type A · Type B
OAEPH048520/OAEPH048594
■CS (Charge Sustaining, Hybrid) mode
· Type A · Type BOAEPH047519N/OAEPH048611
Page 35 of 613
H35
CS (Charge Sustaining, Hybrid)
mode : The high-voltage (hybrid)
battery and petrol engine is used to
drive the vehicle.
Information
Even when the battery charging rate
is high and driving in electric mode is
possible, engine may turn on in some
areas to protect the system.
Infotainment system Screen
(Plug-in hybrid vehicle)
(if equipped)
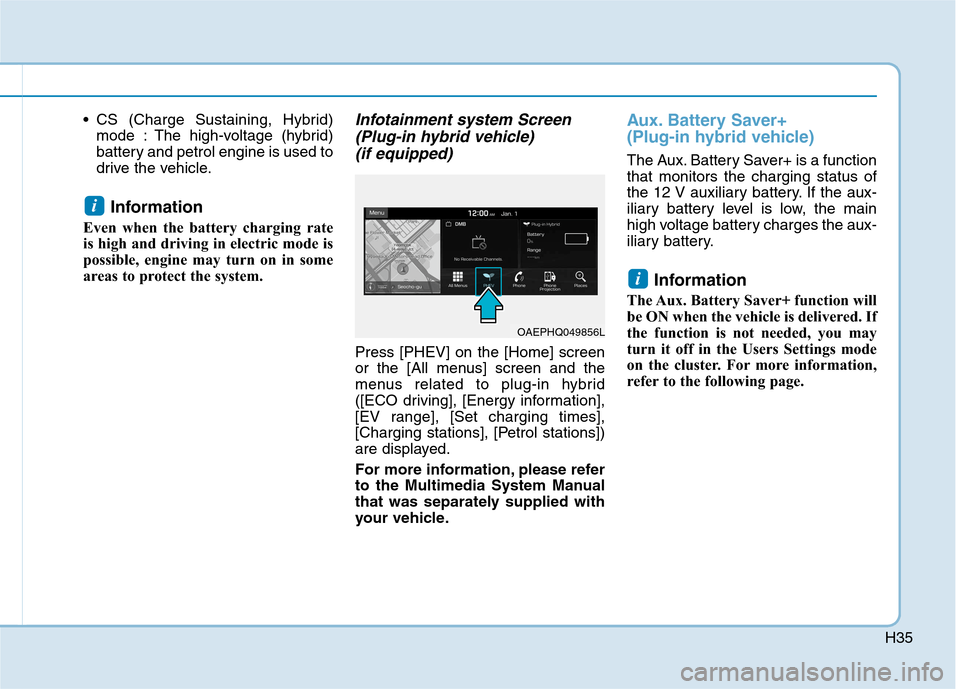
Press [PHEV] on the [Home] screen
or the [All menus] screen and the
menus related to plug-in hybrid
([ECO driving], [Energy information],
[EV range], [Set charging times],
[Charging stations], [Petrol stations])
are displayed.
For more information, please refer
to the Multimedia System Manual
that was separately supplied with
your vehicle.
Aux. Battery Saver+
(Plug-in hybrid vehicle)
The Aux. Battery Saver+ is a function
that monitors the charging status of
the 12 V auxiliary battery. If the aux-
iliary battery level is low, the main
high voltage battery charges the aux-
iliary battery.
Information
The Aux. Battery Saver+ function will
be ON when the vehicle is delivered. If
the function is not needed, you may
turn it off in the Users Settings mode
on the cluster. For more information,
refer to the following page.
i
i
OAEPHQ049856L