Page 320 of 613
5-6
Driving your vehicle
Key ignition switch
(if equipped)
Illuminated ignition switch
(if equipped)
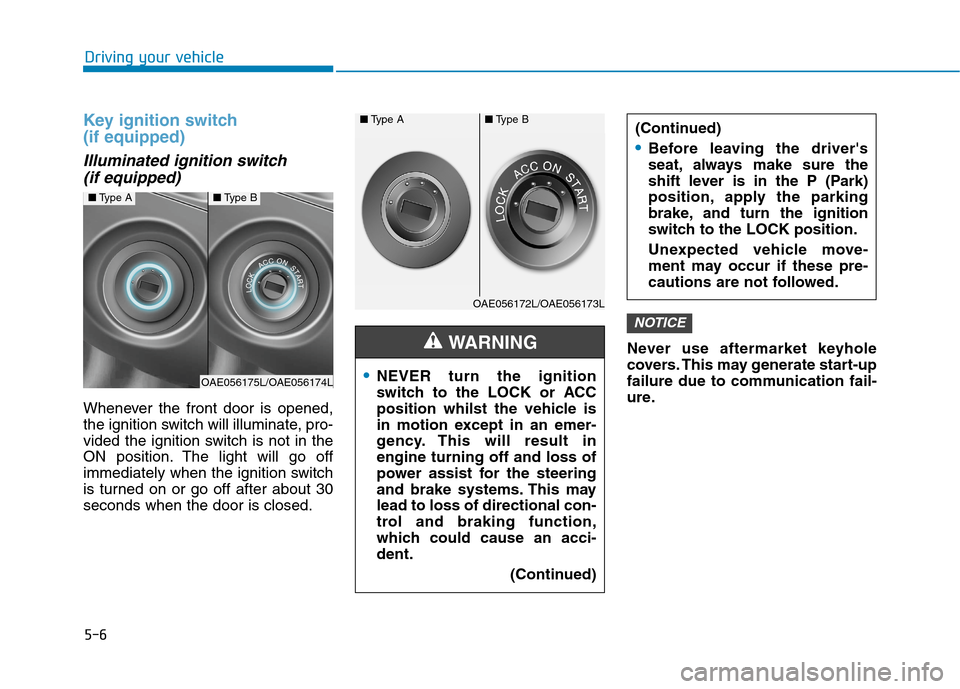
Whenever the front door is opened,
the ignition switch will illuminate, pro-
vided the ignition switch is not in the
ON position. The light will go off
immediately when the ignition switch
is turned on or go off after about 30
seconds when the door is closed.Never use aftermarket keyhole
covers. This may generate start-up
failure due to communication fail-
ure.
NOTICE
NEVER turn the ignition
switch to the LOCK or ACC
position whilst the vehicle is
in motion except in an emer-
gency. This will result in
engine turning off and loss of
power assist for the steering
and brake systems. This may
lead to loss of directional con-
trol and braking function,
which could cause an acci-
dent.
(Continued)
WARNING
(Continued)
Before leaving the driver's
seat, always make sure the
shift lever is in the P (Park)
position, apply the parking
brake, and turn the ignition
switch to the LOCK position.
Unexpected vehicle move-
ment may occur if these pre-
cautions are not followed.
■Type A■Type B
OAE056172L/OAE056173L
■Type A■Type B
OAE056175L/OAE056174L
Page 321 of 613
5-7
Driving your vehicle
5
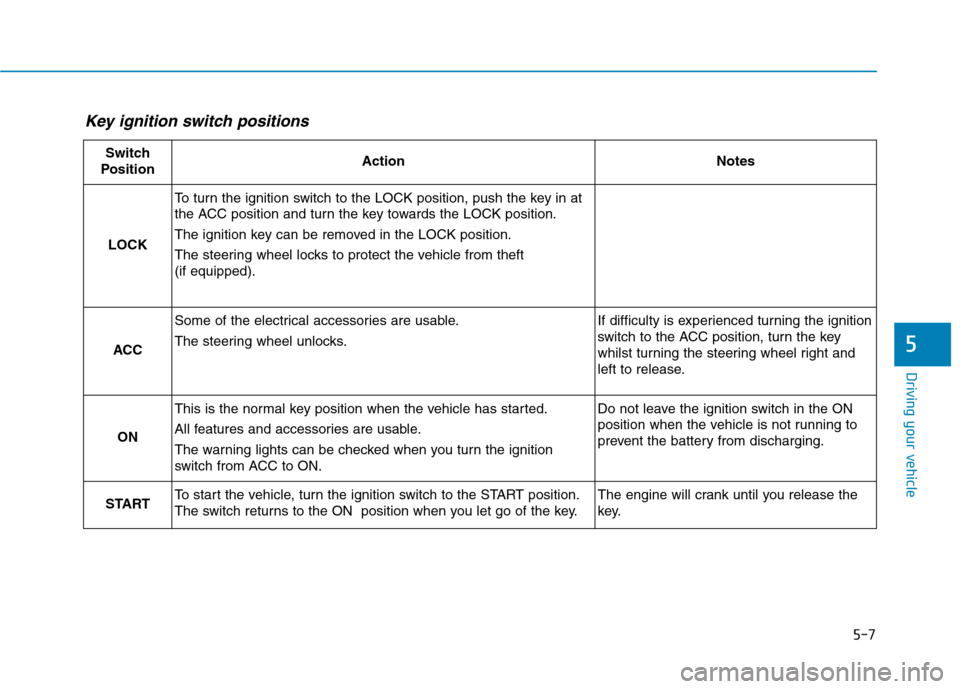
Key ignition switch positions
Switch
PositionActionNotes
LOCK
To turn the ignition switch to the LOCK position, push the key in at
the ACC position and turn the key towards the LOCK position.
The ignition key can be removed in the LOCK position.
The steering wheel locks to protect the vehicle from theft
(if equipped).
ACC
Some of the electrical accessories are usable.
The steering wheel unlocks.If difficulty is experienced turning the ignition
switch to the ACC position, turn the key
whilst turning the steering wheel right and
left to release.
ON
This is the normal key position when the vehicle has started.
All features and accessories are usable.
The warning lights can be checked when you turn the ignition
switch from ACC to ON.Do not leave the ignition switch in the ON
position when the vehicle is not running to
prevent the battery from discharging.
STARTTo start the vehicle, turn the ignition switch to the START position.
The switch returns to the ON position when you let go of the key.The engine will crank until you release the
key.
Page 322 of 613
5-8
Driving your vehicle
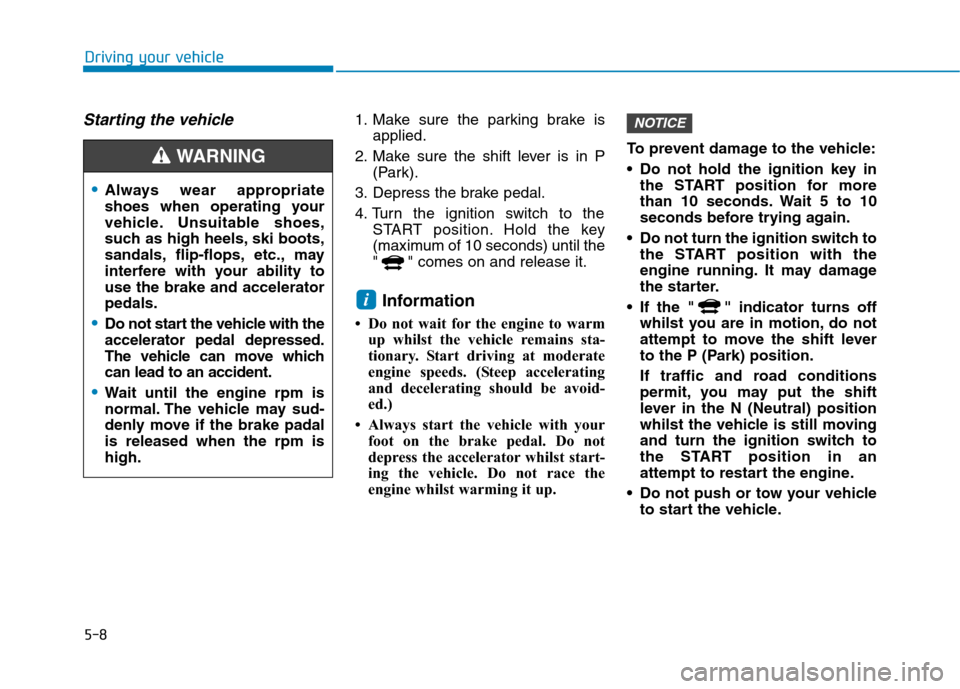
Starting the vehicle1. Make sure the parking brake is
applied.
2. Make sure the shift lever is in P
(Park).
3. Depress the brake pedal.
4. Turn the ignition switch to the
START position. Hold the key
(maximum of 10 seconds) until the
" " comes on and release it.
Information
• Do not wait for the engine to warm
up whilst the vehicle remains sta-
tionary. Start driving at moderate
engine speeds. (Steep accelerating
and decelerating should be avoid-
ed.)
• Always start the vehicle with your
foot on the brake pedal. Do not
depress the accelerator whilst start-
ing the vehicle. Do not race the
engine whilst warming it up.To prevent damage to the vehicle:
Do not hold the ignition key in
the START position for more
than 10 seconds. Wait 5 to 10
seconds before trying again.
Do not turn the ignition switch to
the START position with the
engine running. It may damage
the starter.
If the " " indicator turns off
whilst you are in motion, do not
attempt to move the shift lever
to the P (Park) position.
If traffic and road conditions
permit, you may put the shift
lever in the N (Neutral) position
whilst the vehicle is still moving
and turn the ignition switch to
the START position in an
attempt to restart the engine.
Do not push or tow your vehicle
to start the vehicle.
NOTICE
i
Always wear appropriate
shoes when operating your
vehicle. Unsuitable shoes,
such as high heels, ski boots,
sandals, flip-flops, etc., may
interfere with your ability to
use the brake and accelerator
pedals.
Do not start the vehicle with the
accelerator pedal depressed.
The vehicle can move which
can lead to an accident.
Wait until the engine rpm is
normal. The vehicle may sud-
denly move if the brake padal
is released when the rpm is
high.
WARNING
Page 331 of 613
5-17
Driving your vehicle
5
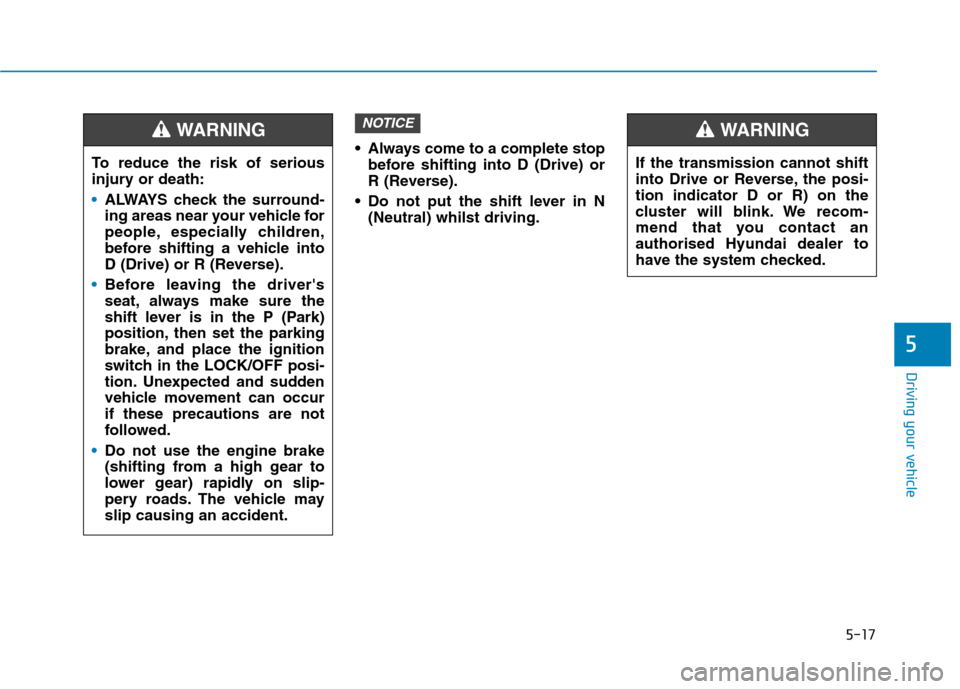
Always come to a complete stop
before shifting into D (Drive) or
R (Reverse).
Do not put the shift lever in N
(Neutral) whilst driving.
NOTICE
To reduce the risk of serious
injury or death:
ALWAYS check the surround-
ing areas near your vehicle for
people, especially children,
before shifting a vehicle into
D (Drive) or R (Reverse).
Before leaving the driver's
seat, always make sure the
shift lever is in the P (Park)
position, then set the parking
brake, and place the ignition
switch in the LOCK/OFF posi-
tion. Unexpected and sudden
vehicle movement can occur
if these precautions are not
followed.
Do not use the engine brake
(shifting from a high gear to
lower gear) rapidly on slip-
pery roads. The vehicle may
slip causing an accident.
WARNING
If the transmission cannot shift
into Drive or Reverse, the posi-
tion indicator D or R) on the
cluster will blink. We recom-
mend that you contact an
authorised Hyundai dealer to
have the system checked.
WARNING
Page 334 of 613
5-20
Driving your vehicle
Shift lever position
The indicator in the instrument clus-
ter displays the shift lever position
when the ignition switch is in the ON
position.
P (Park)
Always come to a complete stop
before shifting into P (Park).
To shift from P (Park), you must
depress firmly on the brake pedal
and make sure your foot is off the
accelerator pedal.
If you have done all of the above
and still cannot shift the lever out of
P (Park), see "Shift-Lock Release"
in this chapter.
The shift lever must be in P (Park)
before turning the vehicle off.
R (Reverse)
Use this position to drive the vehicle
rearward.
Always come to a complete stop
before shifting into or out of R
(Reverse); you may damage the
transmission if you shift into R
(Reverse) whilst the vehicle is in
motion.
N (Neutral)
The wheels and transmission are not
engaged.
NOTICE
Shifting into P (Park) whilst
the vehicle is in motion may
cause you to lose control of
the vehicle.
After the vehicle has stopped,
always make sure the shift
lever is in P (Park), apply the
parking brake, and turn the
vehicle off.
When parking on an incline,
place the shift lever in P (Park)
and apply the parking brake to
prevent the vehicle from
rolling downhill.
For safety, always engage the
parking brake with the shift
lever in the P (Park) position
except for the case of emer-
gency parking.
WARNING
Do not drive with the shift lever
in N (Neutral). The engine brake
will not work and lead to an acci-
dent.
WARNING
Page 337 of 613
5-23
Driving your vehicle
5
Type A
1. Place the ignition switch in the
LOCK/OFF position.
2. Apply the parking brake.
3. Push the shift-lock release button
(1).
4. Move the shift lever whilst pushing
the shift-lock release button.
5. Stop pushing the shift-lock release
button.If you need to use the shift-lock
release, we recommend that the sys-
tem be inspected by an authorised
HYUNDAI dealer immediately.
Type B
1. Place the ignition switch in the
LOCK/OFF position.
2. Apply the parking brake.
3. Carefully remove the cap (1) cov-
ering the shift-lock access hole.
4. Insert a tool (e.g. flathead screw-
driver) into the access hole and
press down on the tool.
5. Move the shift lever whilst holding
down the screwdriver.
6. Remove the tool from the shiftlock
release access hole then install
the cap.
OAEPH059011ROAEPH059646R
Page 338 of 613
5-24
Driving your vehicle
If you need to use the shift-lock
release, we recommend that the sys-
tem be inspected by an authorised
HYUNDAI dealer immediately.
Ignition key interlock system
(if equipped)
The ignition key cannot be removed
unless the shift lever is in the P
(Park) position.
Parking
Always come to a complete stop and
continue to depress the brake pedal.
Move the shift lever into the P (Park)
position, apply the parking brake,
and place the ignition switch in the
LOCK/OFF position. Take the Key
with you when exiting the vehicle.
Good driving practices
Never move the shift lever from P
(Park) or N (Neutral) to any other
position with the accelerator pedal
depressed.
Never move the shift lever into P
(Park) when the vehicle is in
motion.
Be sure the vehicle is completely
stopped before you attempt to shift
into R (Reverse) or D (Drive).
Do not move the shift lever to N
(Neutral) when driving. If the shift
lever is moved to N (Neutral) whilst
driving, the vehicle loses the ability
to provide engine braking. Doing
so may increase the risk of an acci-
dent.
Also, moving the shift lever back to
D (Drive) whilst the vehicle is mov-
ing may severely damage the
transmission.
Do not drive with your foot resting
on the brake pedal. Even light, but
consistent pedal pressure can
result in the brakes overheating,
brake wear and possibly even
brake failure. When you stay in the vehicle
with the engine running, be
careful not to depress the accel-
erator pedal for a long period of
time. The engine or exhaust
system may overheat and start
a fire.
The exhaust gas and the
exhaust system are very hot.
Keep away from the exhaust
system components.
Do not stop or park over flam-
mable materials, such as dry
grass, paper or leaves. They
may ignite and cause a fire.
WARNING
Page 343 of 613
5-29
Driving your vehicle
5
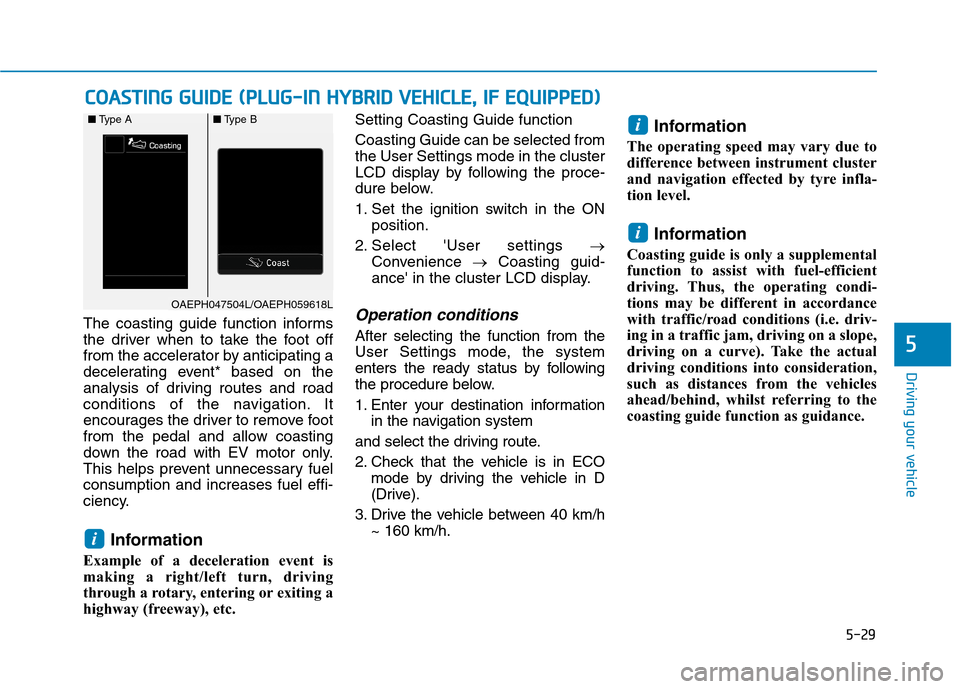
The coasting guide function informs
the driver when to take the foot off
from the accelerator by anticipating a
decelerating event* based on the
analysis of driving routes and road
conditions of the navigation. It
encourages the driver to remove foot
from the pedal and allow coasting
down the road with EV motor only.
This helps prevent unnecessary fuel
consumption and increases fuel effi-
ciency.
Information
Example of a deceleration event is
making a right/left turn, driving
through a rotary, entering or exiting a
highway (freeway), etc. Setting Coasting Guide function
Coasting Guide can be selected from
the User Settings mode in the cluster
LCD display by following the proce-
dure below.
1. Set the ignition switch in the ON
position.
2. Select 'User settings →
Convenience →Coasting guid-
ance' in the cluster LCD display.
Operation conditions
After selecting the function from the
User Settings mode, the system
enters the ready status by following
the procedure below.
1. Enter your destination information
in the navigation system
and select the driving route.
2. Check that the vehicle is in ECO
mode by driving the vehicle in D
(Drive).
3. Drive the vehicle between 40 km/h
~ 160 km/h.
Information
The operating speed may vary due to
difference between instrument cluster
and navigation effected by tyre infla-
tion level.
Information
Coasting guide is only a supplemental
function to assist with fuel-efficient
driving. Thus, the operating condi-
tions may be different in accordance
with traffic/road conditions (i.e. driv-
ing in a traffic jam, driving on a slope,
driving on a curve). Take the actual
driving conditions into consideration,
such as distances from the vehicles
ahead/behind, whilst referring to the
coasting guide function as guidance.
i
i
i
C CO
OA
AS
ST
TI
IN
NG
G
G
GU
UI
ID
DE
E
(
(P
PL
LU
UG
G-
-I
IN
N
H
HY
YB
BR
RI
ID
D
V
VE
EH
HI
IC
CL
LE
E,
,
I
IF
F
E
EQ
QU
UI
IP
PP
PE
ED
D)
)
OAEPH047504L/OAEPH059618L ■Type A■Type B