2020 Hyundai Ioniq Hybrid ignition
[x] Cancel search: ignitionPage 180 of 613
3-33
Convenient features of your vehicle
3
S SU
UN
NR
RO
OO
OF
F
(
(I
IF
F
E
EQ
QU
UI
IP
PP
PE
ED
D)
)
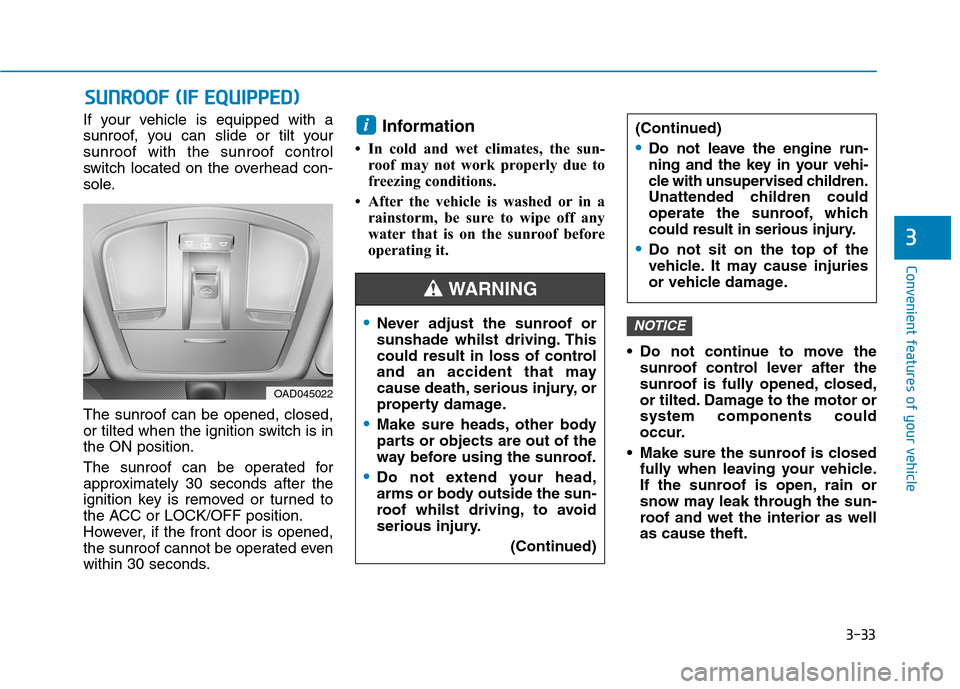
If your vehicle is equipped with a
sunroof, you can slide or tilt your
sunroof with the sunroof control
switch located on the overhead con-
sole.
The sunroof can be opened, closed,
or tilted when the ignition switch is in
the ON position.
The sunroof can be operated for
approximately 30 seconds after the
ignition key is removed or turned to
the ACC or LOCK/OFF position.
However, if the front door is opened,
the sunroof cannot be operated even
within 30 seconds.Information
• In cold and wet climates, the sun-
roof may not work properly due to
freezing conditions.
• After the vehicle is washed or in a
rainstorm, be sure to wipe off any
water that is on the sunroof before
operating it.
Do not continue to move the
sunroof control lever after the
sunroof is fully opened, closed,
or tilted. Damage to the motor or
system components could
occur.
Make sure the sunroof is closed
fully when leaving your vehicle.
If the sunroof is open, rain or
snow may leak through the sun-
roof and wet the interior as well
as cause theft.
NOTICE
i
OAD045022
Never adjust the sunroof or
sunshade whilst driving. This
could result in loss of control
and an accident that may
cause death, serious injury, or
property damage.
Make sure heads, other body
parts or objects are out of the
way before using the sunroof.
Do not extend your head,
arms or body outside the sun-
roof whilst driving, to avoid
serious injury.
(Continued)
WARNING
(Continued)
Do not leave the engine run-
ning and the key in your vehi-
cle with unsupervised children.
Unattended children could
operate the sunroof, which
could result in serious injury.
Do not sit on the top of the
vehicle. It may cause injuries
or vehicle damage.
Page 183 of 613
3-36
Convenient features of your vehicle
Resetting the sunroof
The sunroof may need to be reset if
the following conditions occur:
- The battery is discharged or dis-
connected or the sunroof fuse has
been replaced or disconnected
- The sunroof control lever is not
operating correctly
To reset the sunroof, perform the fol-
lowing steps:
1. Place the ignition switch to the ON
position or start the engine. It is rec-
ommended to reset the sunroof
whilst the engine is running.
2. Push the control lever forward. The
sunroof will close completely or tilt
depending on the condition of the
sunroof.
3. Release the control lever until the
sunroof does not move.4. Push the control lever forward
about 10 seconds.
- When the sunroof is in the close
position :
The glass will tilt and slightly move
up and down.
- When the sunroof is in the tilt posi-
tion:
The glass will slightly move up
and down.
Do not release the lever until the
operation is completed.
If you release the lever during opera-
tion, try again from step 2.
5. Within 3 seconds, push the control
lever forward until the sunroof
operates as follows:
Tilt down →Slide Open →Slide
Close.
Do not release the lever until the
operation is completed.
If you release the lever during opera-
tion, try again from step 2.6. Release the sunroof control lever
after all operation has completed.
The sunroof system has been
reset.
Information
• If the sunroof does not reset when
the vehicle battery is disconnected
or discharged, or related fuse is
blown, the sunroof may not operate
normally.
• For more detailed information, we
recommend that you contact an
authorised HYUNDAI dealer.
i
Page 188 of 613
3-41
Convenient features of your vehicle
3
Closing the fuel filler door
1. To install the fuel tank cap, turn it
clockwise until it “clicks” one time.
2. Close the fuel filler door until it is
latched securely.(Continued)When refuelling, always move
the shift lever to the P (Park)
position, set the parking
brake, and place the ignition
switch to the LOCK/OFF posi-
tion. Sparks produced by
electrical components related
to the engine can ignite fuel
vapours causing a fire.
When using an approved
portable fuel container, be sure
to place the container on the
ground prior to refuelling. Static
electricity discharge from the
container can ignite fuel
vapours causing a fire. Once
refuelling has begun, contact
between your bare hand and
the vehicle should be main-
tained until the filling is com-
plete.
Use only approved portable
plastic fuel containers designed
to carry and store petrol.
(Continued)
Petrol is highly flammable and
explosive. Failure to follow
these guidelines may result in
SERIOUS INJURY or DEATH:
Read and follow all warnings
posted at the service station.
Before refuelling, note the
location of the Emergency
Petrol Shut-Off, if available, at
the service station.
Before touching the fuel noz-
zle, you should eliminate the
potential build-up of static
electricity by touching a metal
part of the vehicle, a safe dis-
tance away from the fuel filler
neck, nozzle, or other gas
source, with your bare hand.
(Continued)
WARNING
(Continued)
Do not use mobile phones
whilst refuelling. Electric cur-
rent and/or electronic interfer-
ence from mobile phones can
potentially ignite fuel vapours
and cause a fire.
Do not get back into a vehicle
once you have begun refu-
elling. You can generate a
build-up of static electricity by
touching, rubbing or sliding
against any item or fabric capa-
ble of producing static electric-
ity. Static electricity discharge
can ignite fuel vapours causing
a fire. If you must re-enter the
vehicle, you should once again
eliminate potentially danger-
ous static electricity discharge
by touching a metal part of the
vehicle, away from the fuel filler
neck, nozzle or other petrol
source, with your bare hand.
(Continued)
Page 191 of 613
3-44
Closing the fuel filler door
1. To install the fuel tank cap, turn it
clockwise until it “clicks” one time.
2. Close the fuel filler door until it is
latched securely.
Convenient features of your vehicle
Petrol is highly flammable and
explosive. Failure to follow
these guidelines may result in
SERIOUS INJURY or DEATH:
Read and follow all warnings
posted at the service station.
Before refuelling, note the
location of the Emergency
Petrol Shut-Off, if available, at
the service station.
Before touching the fuel noz-
zle, you should eliminate the
potential build-up of static
electricity by touching a metal
part of the vehicle, a safe dis-
tance away from the fuel filler
neck, nozzle, or other gas
source, with your bare hand.
(Continued)
WARNING
(Continued)
Do not use mobile phones
whilst refuelling. Electric cur-
rent and/or electronic interfer-
ence from mobile phones can
potentially ignite fuel vapours
and cause a fire.
Do not get back into a vehicle
once you have begun refu-
elling. You can generate a
build-up of static electricity by
touching, rubbing or sliding
against any item or fabric capa-
ble of producing static electric-
ity. Static electricity discharge
can ignite fuel vapourscaus-
ing a fire. If you must re-enter
the vehicle, you should once
again eliminate potentially dan-
gerous static electricity dis-
charge by touching a metal
part of the vehicle, away from
the fuel filler neck, nozzle or
other petrol source, with your
bare hand.
(Continued)
(Continued)
When refuelling, always move
the shift lever to the P (Park)
position, set the parking
brake, and place the ignition
switch to the LOCK/OFF posi-
tion. Sparks produced by
electrical components related
to the engine can ignite fuel
vapours causing a fire.
When using an approved
portable fuel container, be sure
to place the container on the
ground prior to refuelling.Static
electricity discharge from the
container can ignite fuel
vapourscausing a fire. Once
refuelling has begun, contact
between your bare hand and
the vehicle should be main-
tained until the filling is com-
plete.
Use only approved portable
plastic fuel containers designed
to carry and store petrol.
(Continued)
Page 203 of 613
3-56
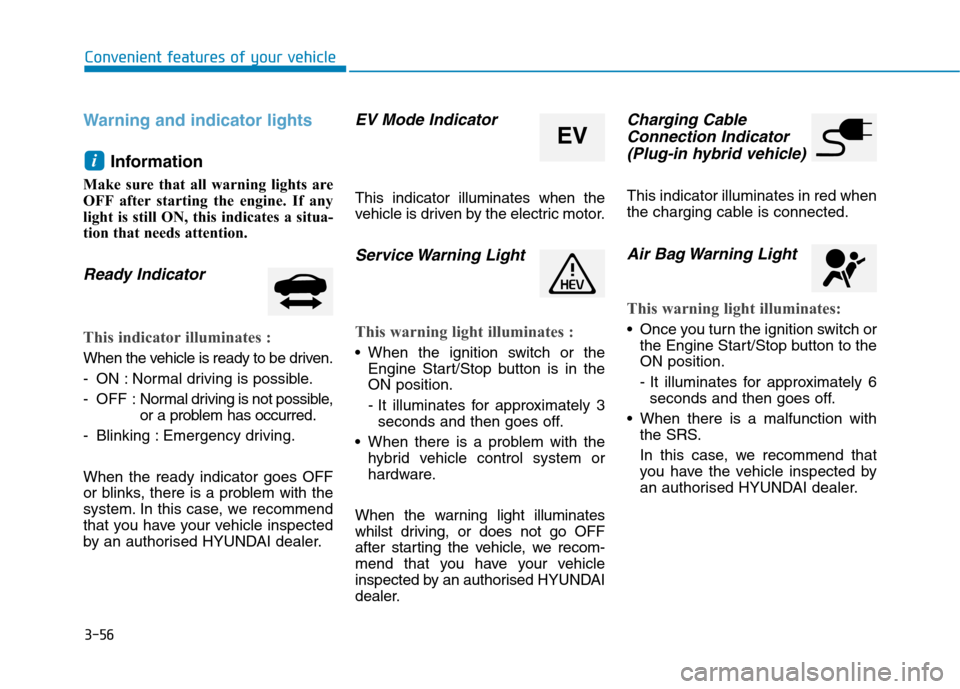
Warning and indicator lights
Information
Make sure that all warning lights are
OFF after starting the engine. If any
light is still ON, this indicates a situa-
tion that needs attention.
Ready Indicator
This indicator illuminates :
When the vehicle is ready to be driven.
- ON : Normal driving is possible.
- OFF : Normal driving is not possible,
or a problem has occurred.
- Blinking : Emergency driving.
When the ready indicator goes OFF
or blinks, there is a problem with the
system. In this case, we recommend
that you have your vehicle inspected
by an authorised HYUNDAI dealer.
EV Mode Indicator
This indicator illuminates when the
vehicle is driven by the electric motor.
Service Warning Light
This warning light illuminates :
When the ignition switch or the
Engine Start/Stop button is in the
ON position.
- It illuminates for approximately 3
seconds and then goes off.
When there is a problem with the
hybrid vehicle control system or
hardware.
When the warning light illuminates
whilst driving, or does not go OFF
after starting the vehicle, we recom-
mend that you have your vehicle
inspected by an authorised HYUNDAI
dealer.
Charging Cable
Connection Indicator
(Plug-in hybrid vehicle)
This indicator illuminates in red when
the charging cable is connected.
Air Bag Warning Light
This warning light illuminates:
Once you turn the ignition switch or
the Engine Start/Stop button to the
ON position.
- It illuminates for approximately 6
seconds and then goes off.
When there is a malfunction with
the SRS.
In this case, we recommend that
you have the vehicle inspected by
an authorised HYUNDAI dealer.
i
Convenient features of your vehicle
EV
Page 204 of 613
3-57
Convenient features of your vehicle
3
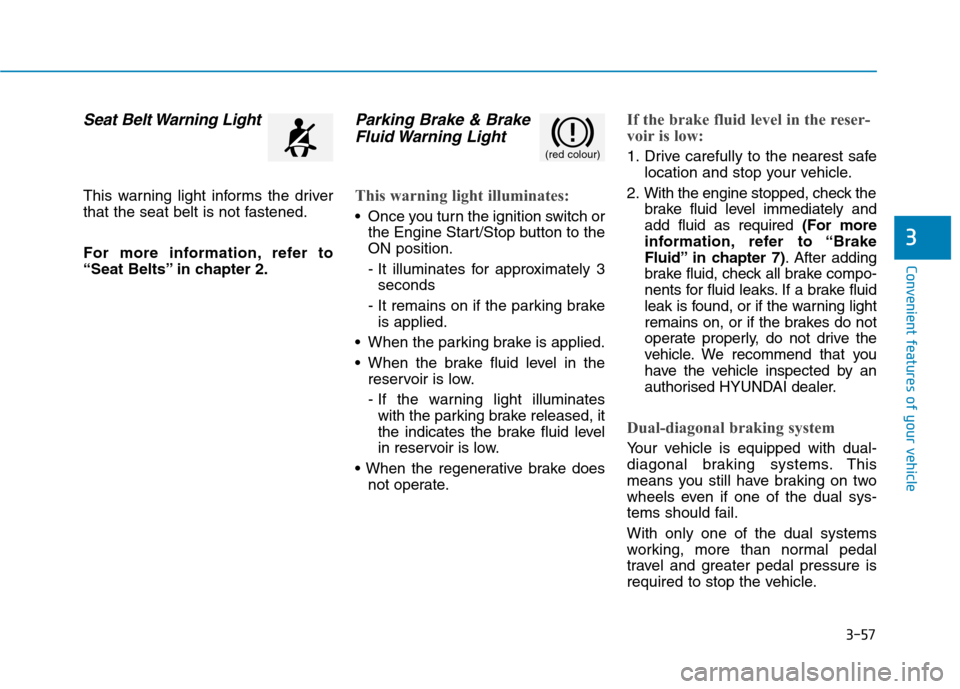
Seat Belt Warning Light
This warning light informs the driver
that the seat belt is not fastened.
For more information, refer to
“Seat Belts” in chapter 2.
Parking Brake & Brake
Fluid Warning Light
This warning light illuminates:
Once you turn the ignition switch or
the Engine Start/Stop button to the
ON position.
- It illuminates for approximately 3
seconds
- It remains on if the parking brake
is applied.
When the parking brake is applied.
When the brake fluid level in the
reservoir is low.
- If the warning light illuminates
with the parking brake released, it
the indicates the brake fluid level
in reservoir is low.
not operate.
If the brake fluid level in the reser-
voir is low:
1. Drive carefully to the nearest safe
location and stop your vehicle.
2. With the engine stopped, check the
brake fluid level immediately and
add fluid as required (For more
information, refer to “Brake
Fluid” in chapter 7). After adding
brake fluid, check all brake compo-
nents for fluid leaks. If a brake fluid
leak is found, or if the warning light
remains on, or if the brakes do not
operate properly, do not drive the
vehicle. We recommend that you
have the vehicle inspected by an
authorised HYUNDAI dealer.
Dual-diagonal braking system
Your vehicle is equipped with dual-
diagonal braking systems. This
means you still have braking on two
wheels even if one of the dual sys-
tems should fail.
With only one of the dual systems
working, more than normal pedal
travel and greater pedal pressure is
required to stop the vehicle.
(red colour)
Page 205 of 613
3-58
Convenient features of your vehicle
Also, the vehicle will not stop in as
short a distance with only a portion
of the brake system working.
If the brakes fail whilst you are driv-
ing, shift to a lower gear for addition-
al engine braking and stop the vehi-
cle as soon as it is safe to do so.
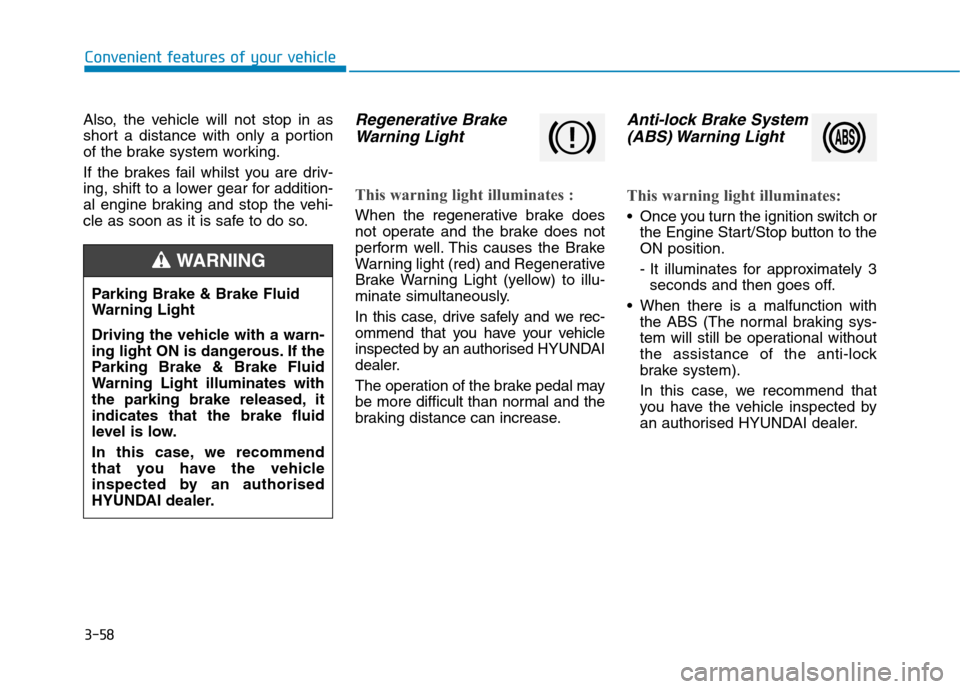
Regenerative Brake
Warning Light
This warning light illuminates :
When the regenerative brake does
not operate and the brake does not
perform well. This causes the Brake
Warning light (red) and Regenerative
Brake Warning Light (yellow) to illu-
minate simultaneously.
In this case, drive safely and we rec-
ommend that you have your vehicle
inspected by an authorised HYUNDAI
dealer.
The operation of the brake pedal may
be more difficult than normal and the
braking distance can increase.
Anti-lock Brake System
(ABS) Warning Light
This warning light illuminates:
Once you turn the ignition switch or
the Engine Start/Stop button to the
ON position.
- It illuminates for approximately 3
seconds and then goes off.
When there is a malfunction with
the ABS (The normal braking sys-
tem will still be operational without
the assistance of the anti-lock
brake system).
In this case, we recommend that
you have the vehicle inspected by
an authorised HYUNDAI dealer.
Parking Brake & Brake Fluid
Warning Light
Driving the vehicle with a warn-
ing light ON is dangerous. If the
Parking Brake & Brake Fluid
Warning Light illuminates with
the parking brake released, it
indicates that the brake fluid
level is low.
In this case, we recommend
that you have the vehicle
inspected by an authorised
HYUNDAI dealer.
WARNING
Page 207 of 613
![Hyundai Ioniq Hybrid 2020 Owners Manual - RHD (UK, Australia) 3-60
Convenient features of your vehicle
AUTO HOLD Indicator
Light (if equipped)
This indicator light illuminates:
[White] When you activate the auto
hold system by pressing the AUTO
HOLD button.
[G Hyundai Ioniq Hybrid 2020 Owners Manual - RHD (UK, Australia) 3-60
Convenient features of your vehicle
AUTO HOLD Indicator
Light (if equipped)
This indicator light illuminates:
[White] When you activate the auto
hold system by pressing the AUTO
HOLD button.
[G](/manual-img/35/14927/w960_14927-206.png)
3-60
Convenient features of your vehicle
AUTO HOLD Indicator
Light (if equipped)
This indicator light illuminates:
[White] When you activate the auto
hold system by pressing the AUTO
HOLD button.
[Green] When you stop the vehicle
completely by depressing the
brake pedal with the auto hold sys-
tem activated.
[Yellow] When there is a malfunc-
tion with the auto hold system.
In this case, we recommend that
you have the vehicle inspected by
an authorised HYUNDAI dealer.
For more details, refer to “Auto
Hold” in chapter 5.
Electric Power Steering
(EPS) Warning Light
This warning light illuminates:
Once you turn the ignition switch or
the Engine Start/Stop button to the
ON position.
- It illuminates for approximately 3
seconds and then goes off.
When there is a malfunction with
the EPS.
In this case, we recommend that
you have the vehicle inspected by
an authorised HYUNDAI dealer.
Malfunction Indicator
Lamp (MIL)
This warning light illuminates:
Once you turn the ignition switch or
the Engine Start/Stop button to the
ON position.
- It illuminates for approximately 3
seconds and then goes off.
When there is a malfunction with
the emission control system.
In this case, we recommend that
you have the vehicle inspected by
an authorised HYUNDAI dealer.
Driving with the Malfunction Indicator
Lamp (MIL) on may cause damage to
the emission control system which
could affect drivability and/or fuel
economy.
NOTICE