2020 FORD EXPLORER light
[x] Cancel search: lightPage 103 of 555
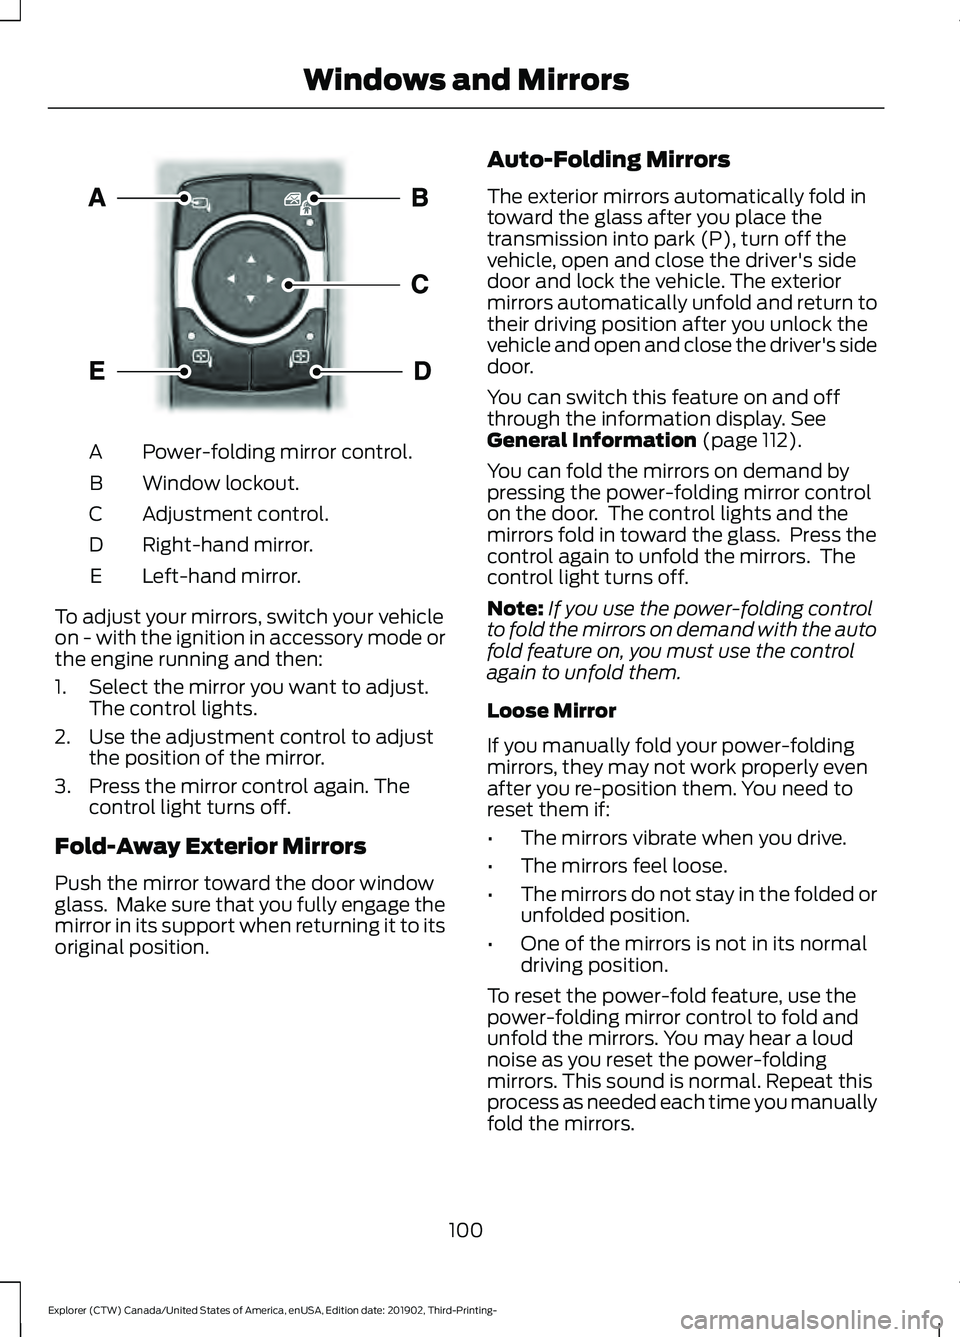
Power-folding mirror control.
A
Window lockout.
B
Adjustment control.
C
Right-hand mirror.
D
Left-hand mirror.
E
To adjust your mirrors, switch your vehicle
on - with the ignition in accessory mode or
the engine running and then:
1. Select the mirror you want to adjust. The control lights.
2. Use the adjustment control to adjust the position of the mirror.
3. Press the mirror control again. The control light turns off.
Fold-Away Exterior Mirrors
Push the mirror toward the door window
glass. Make sure that you fully engage the
mirror in its support when returning it to its
original position. Auto-Folding Mirrors
The exterior mirrors automatically fold in
toward the glass after you place the
transmission into park (P), turn off the
vehicle, open and close the driver's side
door and lock the vehicle. The exterior
mirrors automatically unfold and return to
their driving position after you unlock the
vehicle and open and close the driver's side
door.
You can switch this feature on and off
through the information display. See
General Information (page 112).
You can fold the mirrors on demand by
pressing the power-folding mirror control
on the door. The control lights and the
mirrors fold in toward the glass. Press the
control again to unfold the mirrors. The
control light turns off.
Note: If you use the power-folding control
to fold the mirrors on demand with the auto
fold feature on, you must use the control
again to unfold them.
Loose Mirror
If you manually fold your power-folding
mirrors, they may not work properly even
after you re-position them. You need to
reset them if:
• The mirrors vibrate when you drive.
• The mirrors feel loose.
• The mirrors do not stay in the folded or
unfolded position.
• One of the mirrors is not in its normal
driving position.
To reset the power-fold feature, use the
power-folding mirror control to fold and
unfold the mirrors. You may hear a loud
noise as you reset the power-folding
mirrors. This sound is normal. Repeat this
process as needed each time you manually
fold the mirrors.
100
Explorer (CTW) Canada/United States of America, enUSA, Edition date: 201902, Third-Printing- Windows and MirrorsE295322
Page 104 of 555

Heated Exterior Mirrors
See Heated Exterior Mirrors (page 142).
Memory Mirrors
You can save and recall the mirror
positions through the memory function.
See
Memory Function (page 150).
Auto-dimming Feature
The driver exterior mirror dims when the
interior auto-dimming mirror turns on.
Direction Indicator Mirrors
When the vehicle is running, the
forward-facing portion of the appropriate
mirror housing blinks when you switch on
the direction indicator.
Puddle Lamps
The lamps on the bottom part of the mirror
housing light when you use your
transmitter to unlock the doors or when
you open a door.
Blind Spot Information System
See
Blind Spot Information System
(page 264).
INTERIOR MIRROR WARNING:
Do not adjust the
mirrors when your vehicle is moving. This
could result in the loss of control of your
vehicle, serious personal injury or death.
Note: Do not clean the mirror housing or
glass with harsh abrasives, fuel or other
petroleum-based cleaning products. You can adjust the interior mirror to your
preference. Some mirrors also have a
second pivot point. This lets you move the
mirror head up or down and from side to
side.
Manual Dimming Mirror
Pull the tab below the mirror toward you
to reduce the effect of bright light from
behind.
Automatic Dimming Mirror (If Equipped)
Note:
Do not block the sensors on the front
and back of the mirror. A rear center
passenger or raised rear center head
restraint may also block light from reaching
the sensor.
The mirror dims to reduce the effect of
bright light from behind. It returns to
normal when the bright light from behind
is no longer present or if you shift into
reverse (R).
SUN VISORS Rotate the sun visor toward the side
window and extend it rearward for extra
shade.
101
Explorer (CTW) Canada/United States of America, enUSA, Edition date: 201902, Third-Printing- Windows and MirrorsE138666
Page 110 of 555

WARNING: Do not remove the
coolant reservoir cap when the engine is
on or the cooling system is hot. Wait 10
minutes for the cooling system to cool
down. Cover the coolant reservoir cap
with a thick cloth to prevent the
possibility of scalding and slowly remove
the cap. Failure to follow this instruction
could result in personal injury.
Fuel Gauge
The fuel gauge indicates about how much
fuel is in the fuel tank.
The arrow adjacent to the fuel pump
symbol indicates on which side of your
vehicle the fuel filler door is located.
Note: The fuel gauge may vary slightly
when your vehicle is moving or on a slope.
Low Fuel Reminder
A low fuel level reminder displays and
sounds when the distance to empty
reaches
75 mi (120 km) to empty for
MyKey, and at 50 mi (80 km), 25 mi
(40 km), 10 mi (20 km) and 0 mi (0 km)
for all vehicle keys.
Note: The low fuel reminder can appear at
different fuel gauge positions depending on
fuel economy conditions. This variation is
normal.
WARNING LAMPS AND
INDICATORS
The following warning lamps and
indicators alert you to a vehicle condition
that may become serious. Some lamps
illuminate when you start your vehicle to
make sure they work. If any lamps remain
on after starting your vehicle, refer to the
respective system warning lamp for further
information. Note:
Some warning indicators appear in
the information display and function the
same as a warning lamp, but do not display
when you start your vehicle.
Adaptive Cruise Control
(If Equipped) The cruise control system
indicator light changes color to
indicate what mode the system
is in. See
How Does Adaptive Cruise
Control With Stop and Go Work (page
246).
On (white light): Illuminates when you
switch on the adaptive cruise control
system. Turns off when you switch the
cruise control system off.
Engaged (green light): Illuminates when
you engage the adaptive cruise control
system. Turns off when you disengage the
cruise control system.
Anti-Lock Braking System If it illuminates when you are
driving, this indicates a system
error. You continue to have the
normal braking (without ABS) unless the
brake system warning lamp also
illuminates. Have the system checked by
an authorized dealer.
Automatic High Beam Control
(If
Equipped) Illuminates when this feature is
on. See
What Is Automatic
High Beam Control (page 95).
Auto Hold Active Illuminates when the system
holds your vehicle stationary.
107
Explorer (CTW) Canada/United States of America, enUSA, Edition date: 201902, Third-Printing- Instrument ClusterE144524 E197933 E322410
Page 121 of 555
The percent displayed is an indication of
the regenerative braking efficiency with
100% representing the maximum amount
of energy recovery. Brake Coach can be
turned on or off in the settings menu.
Trip Summary
Displays upon shutting off your vehicle.
The values are cumulative since you last
started your vehicle.
The information shown is the same as the
This Trip on demand screen. See
Personalized Settings (page 118).
Vehicle Charging Status
Displays when you switch off your vehicle
and when you switch on your vehicle while
plugged in. Charging status includes the
charge start or charge end time as
appropriate. You can modify your vehicle
charge settings through the touchscreen.
See
SYNC™ 3 (page 438).
PERSONALIZED SETTINGS
Select one of these options to display on
your main screen.
Note: Some options may appear slightly
different or not at all if the items are
optional.
Note: EV Now information is only available
when in EV Now mode. Select Screens
Calm Screen
Fuel Economy
Trip 1
Trip 2
This Trip 3
EV Coach 3
Electric Efficiency 3
Eco Coach 1
Eco Behavior 2
Tire Pressure
Intelligent AWD
Off Road
Trailer Light Check
118
Explorer (CTW) Canada/United States of America, enUSA, Edition date: 201902, Third-Printing- Information Displays
Page 137 of 555

Trailer
Action
Message
A correct trailer connection is sensed during a givenignition cycle.
Trailer Connected
A trailer connection becomes disconnected, either
intentionally or unintentionally, and has been sensed during a given ignition cycle.
Trailer Disconnected
The trailer sway control has detected trailer sway.
Trailer Sway Reduce Speed
There are certain faults in your vehicle wiring and trailer
wiring/brake system. See Towing a Trailer (page 289).
Trailer Wiring Fault
There is a fault with your trailer turn lamp. Check yourlamp.
Trailer Left Turn Lamps Fault
Check Lamps
There is a fault with your trailer turn lamp. Check yourlamp.
Trailer Right Turn Lamps Fault
Check Lamps
There is a fault with your trailer battery. See Towing
a Trailer (page 289).
Trailer Battery Not Charging See
Manual
There is a fault with your vehicle trailer lighting module.See
Towing a Trailer (page 289).
Trailer Lighting Module Fault
See Manual
Transmission Action
Message
You switched the engine off and shift select lever is in anyposition other than park (P).
Shift to Park
Transmission is too cold. Wait for it to warm up before you drive.
Transmission Warming
Up Please Wait
Displays when the brake pedal needs to be depressed.
Press Brake Pedal
The transmission is overheating and needs to cool. Stop in asafe place as soon as it’ s possible.
Transmission Over
Temperature Stop Safely
See an authorized dealer.
Transmission Service
Required
The transmission is overheating and needs to cool. Stop in asafe place as soon as it’ s possible.
Transmission Too Hot
Press Brake
134
Explorer (CTW) Canada/United States of America, enUSA, Edition date: 201902, Third-Printing- Information Displays
Page 142 of 555
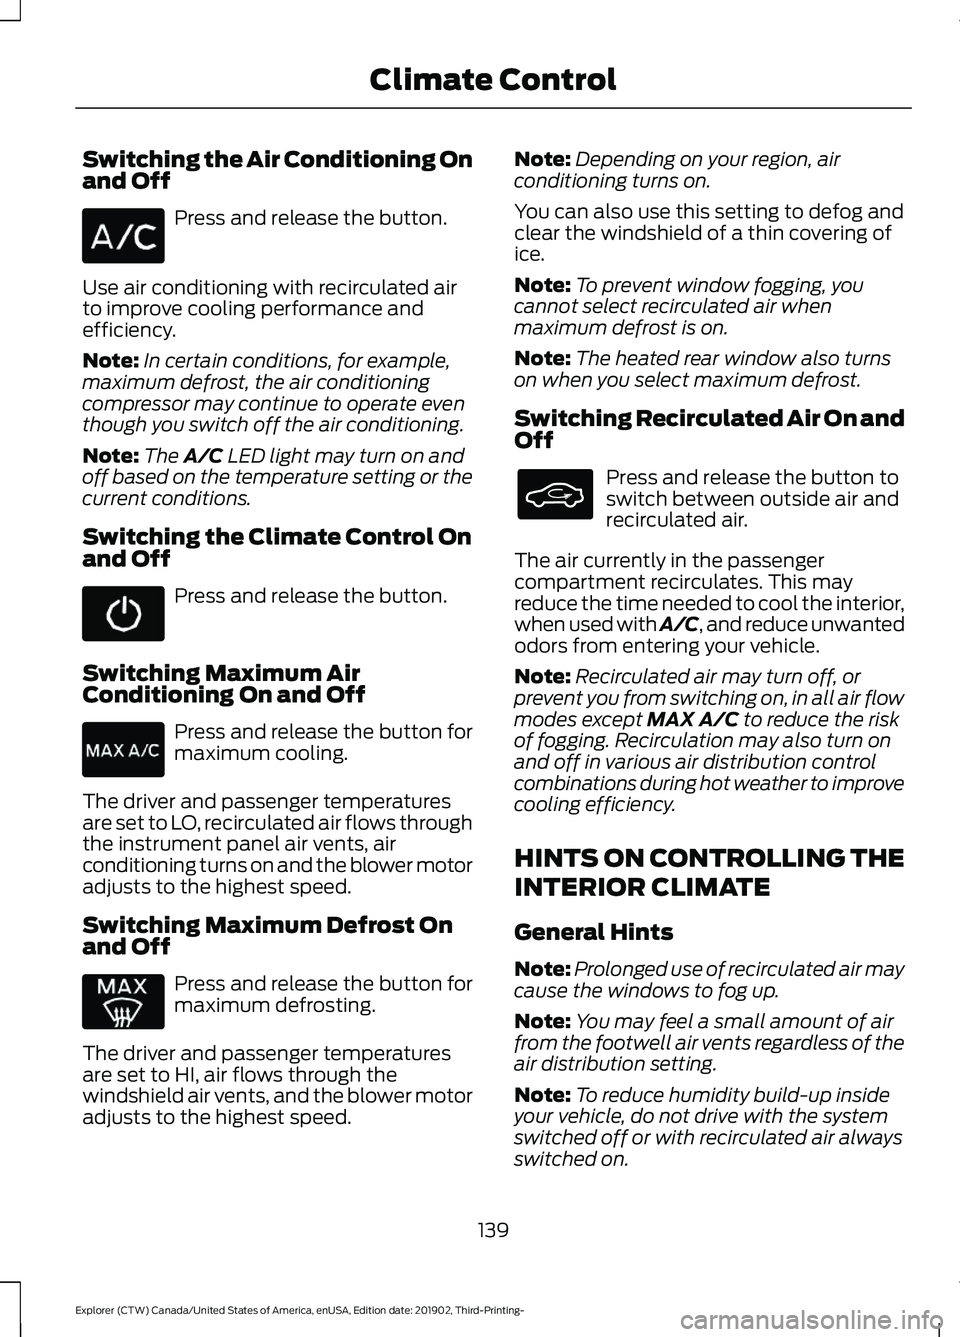
Switching the Air Conditioning On
and Off
Press and release the button.
Use air conditioning with recirculated air
to improve cooling performance and
efficiency.
Note: In certain conditions, for example,
maximum defrost, the air conditioning
compressor may continue to operate even
though you switch off the air conditioning.
Note: The A/C LED light may turn on and
off based on the temperature setting or the
current conditions.
Switching the Climate Control On
and Off Press and release the button.
Switching Maximum Air
Conditioning On and Off Press and release the button for
maximum cooling.
The driver and passenger temperatures
are set to LO, recirculated air flows through
the instrument panel air vents, air
conditioning turns on and the blower motor
adjusts to the highest speed.
Switching Maximum Defrost On
and Off Press and release the button for
maximum defrosting.
The driver and passenger temperatures
are set to HI, air flows through the
windshield air vents, and the blower motor
adjusts to the highest speed. Note:
Depending on your region, air
conditioning turns on.
You can also use this setting to defog and
clear the windshield of a thin covering of
ice.
Note: To prevent window fogging, you
cannot select recirculated air when
maximum defrost is on.
Note: The heated rear window also turns
on when you select maximum defrost.
Switching Recirculated Air On and
Off Press and release the button to
switch between outside air and
recirculated air.
The air currently in the passenger
compartment recirculates. This may
reduce the time needed to cool the interior,
when used with A/C, and reduce unwanted
odors from entering your vehicle.
Note: Recirculated air may turn off, or
prevent you from switching on, in all air flow
modes except
MAX A/C to reduce the risk
of fogging. Recirculation may also turn on
and off in various air distribution control
combinations during hot weather to improve
cooling efficiency.
HINTS ON CONTROLLING THE
INTERIOR CLIMATE
General Hints
Note: Prolonged use of recirculated air may
cause the windows to fog up.
Note: You may feel a small amount of air
from the footwell air vents regardless of the
air distribution setting.
Note: To reduce humidity build-up inside
your vehicle, do not drive with the system
switched off or with recirculated air always
switched on.
139
Explorer (CTW) Canada/United States of America, enUSA, Edition date: 201902, Third-Printing- Climate Control
Page 147 of 555
SITTING IN THE CORRECT
POSITION
WARNING: Sitting improperly, out
of position or with the seatback reclined
too far can take weight off the seat
cushion and affect the decision of the
passenger sensing system, resulting in
serious injury or death in the event of a
crash. Always sit upright against your
seat back, with your feet on the floor. WARNING:
Do not recline the
seatback too far as this can cause the
occupant to slide under the seatbelt,
resulting in serious injury in the event of
a collision. WARNING:
Do not place objects
higher than the top of the seat backrest.
Failure to follow this instruction could
result in personal injury or death in the
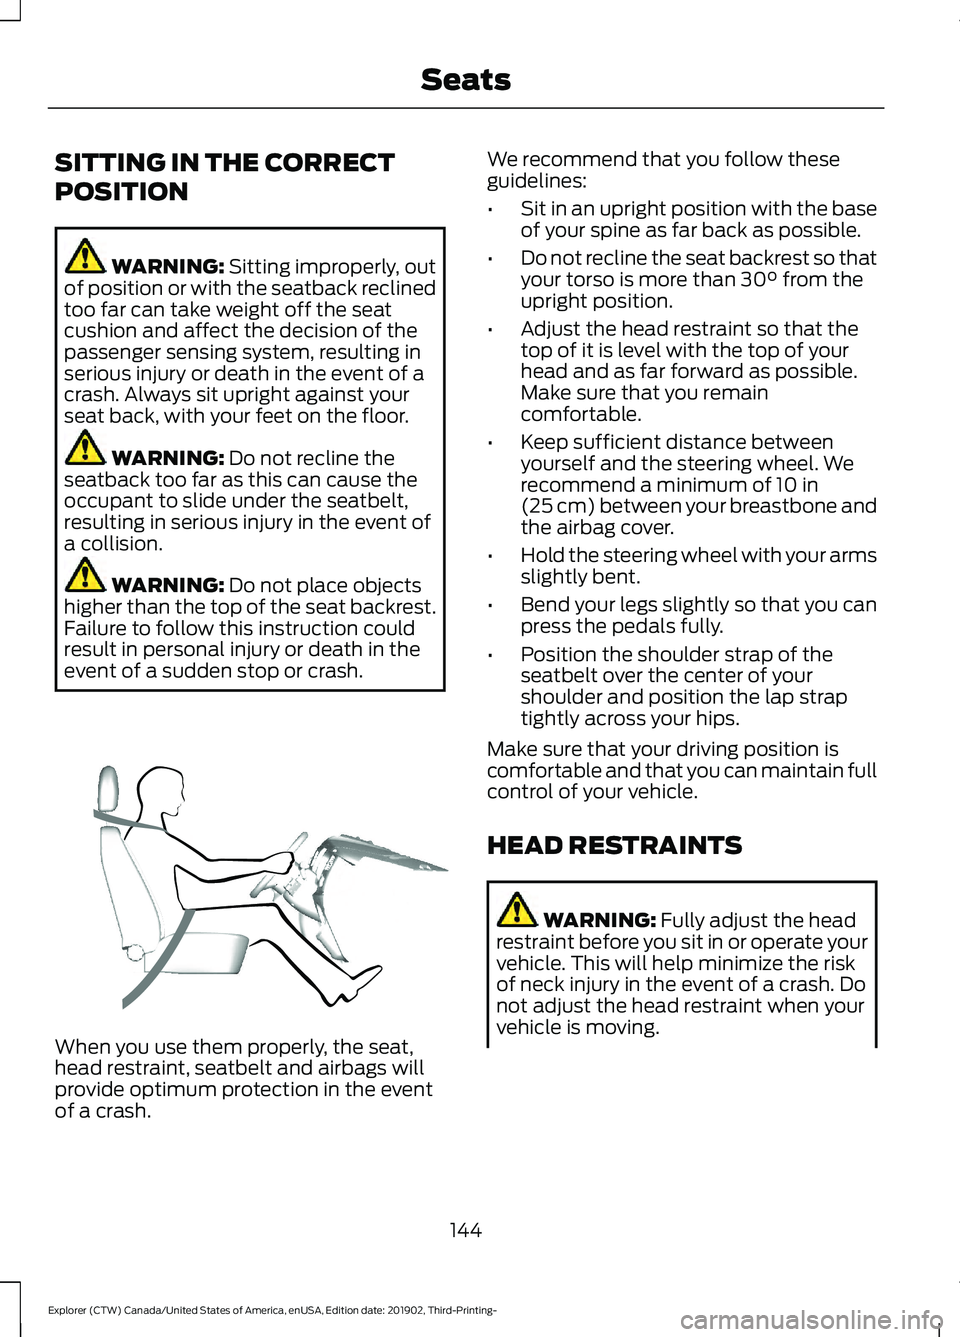
event of a sudden stop or crash. When you use them properly, the seat,
head restraint, seatbelt and airbags will
provide optimum protection in the event
of a crash. We recommend that you follow these
guidelines:
•
Sit in an upright position with the base
of your spine as far back as possible.
• Do not recline the seat backrest so that
your torso is more than
30° from the
upright position.
• Adjust the head restraint so that the
top of it is level with the top of your
head and as far forward as possible.
Make sure that you remain
comfortable.
• Keep sufficient distance between
yourself and the steering wheel. We
recommend a minimum of
10 in
(25 cm) between your breastbone and
the airbag cover.
• Hold the steering wheel with your arms
slightly bent.
• Bend your legs slightly so that you can
press the pedals fully.
• Position the shoulder strap of the
seatbelt over the center of your
shoulder and position the lap strap
tightly across your hips.
Make sure that your driving position is
comfortable and that you can maintain full
control of your vehicle.
HEAD RESTRAINTS WARNING:
Fully adjust the head
restraint before you sit in or operate your
vehicle. This will help minimize the risk
of neck injury in the event of a crash. Do
not adjust the head restraint when your
vehicle is moving.
144
Explorer (CTW) Canada/United States of America, enUSA, Edition date: 201902, Third-Printing- SeatsE68595
Page 160 of 555
WARNING: Do not place anything
on the seat that blocks the heat, for
example a seat cover or a cushion. This
could cause the seat to overheat. Failure
to follow this instruction could result in
personal injury.
Do not do the following:
• Place heavy objects on the seat.
• Operate the heated seat if water or any
other liquid spills on the seat. Allow the
seat to dry thoroughly.
Note: The engine must be running to use
this feature. Press the heated seat symbol to cycle
through the various heat settings and off.
More indicator lights indicate warmer
settings.
Note:
Based on your remote start settings,
the heated seats may remain on after you
remote start your vehicle. The heated seats
may also turn on when you start your vehicle
if they were on when you switched your
vehicle off. Second Row Heated Seats WARNING: Use caution when using
the heated seat if you are unable to feel
pain to your skin because of advanced
age, chronic illness, diabetes, spinal cord
injury, medication, alcohol use,
exhaustion or other physical conditions.
The heated seat could cause burns even
at low temperatures, especially if used
for long periods of time. Failure to follow
this instruction could result in personal
injury. WARNING:
Do not poke sharp
objects into the seat cushion or seat
backrest. This could damage the heated
seat element and cause it to overheat.
Failure to follow this instruction could
result in personal injury. WARNING:
Do not place anything
on the seat that blocks the heat, for
example a seat cover or a cushion. This
could cause the seat to overheat. Failure
to follow this instruction could result in
personal injury.
Do not do the following:
• Place heavy objects on the seat.
• Operate the seat heater if water or any
other liquid spills on the seat. Allow the
seat to dry thoroughly.
Note: The engine must be running to use
this feature. 157
Explorer (CTW) Canada/United States of America, enUSA, Edition date: 201902, Third-Printing- SeatsE146322 E146322