2020 CHRYSLER 300 radio
[x] Cancel search: radioPage 24 of 328

22GETTING TO KNOW YOUR VEHICLE
GENERAL INFORMATION
The following regulatory statement applies to all
Radio Frequency (RF) devices equipped in this
vehicle:
This device complies with Part 15 of the FCC
Rules and with Innovation, Science and
Economic Development Canada license-exempt
RSS standard(s). Operation is subject to the
following two conditions:
1. This device may not cause harmful
interference, and
2. This device must accept any interference received, including interference that may
cause undesired operation.
Le présent appareil est conforme aux CNR
d`Innovation, Science and Economic
Development applicables aux appareils radio
exempts de licence. L'exploitation est autorisée
aux deux conditions suivantes:
1. l'appareil ne doit pas produire de brouillage, et
2. l'utilisateur de l'appareil doit accepter tout brouillage radioélectrique subi, même si le brouillage est susceptible d'en compro
-
mettre le fonctionnement.
La operación de este equipo está sujeta a las
siguientes dos condiciones:
1. es posible que este equipo o dispositivo no cause interferencia perjudicial y
2. este equipo o dispositivo debe aceptar cualquier interferencia, incluyendo la que
pueda causar su operación no deseada.
NOTE:
Changes or modifications not expressly
approved by the party responsible for compli -
ance could void the user’s authority to operate
the equipment.
VEHICLE SECURITY ALARM — IF EQUIPPED
The vehicle security alarm monitors the vehicle
doors for unauthorized entry and the keyless
push button ignition for unauthorized operation.
While the vehicle security alarm is armed,
interior switches for door locks and trunk
release are disabled. If something triggers the
alarm, the vehicle security alarm will provide the
following audible and visible signals: the horn will pulse, the park lamps and/or turn signals
will flash, and the vehicle security light in the
instrument cluster will flash.
TO ARM THE SYSTEM
Follow these steps to arm the vehicle security
alarm:
1. Make sure the vehicle’s ignition is placed
in the OFF position. Refer to "Ignition
Switch" in this chapter for further
information.
2. Perform one of the following methods to lock the vehicle:
Push lock on the interior power door lock
switch with the driver and/or passenger
door open.
Push the lock button on the exterior
Passive Entry Door Handle with a valid
key fob available in the same exterior
zone (refer to "Keyless Enter-N-Go —
Passive Entry," in “Doors” in this chapter
for further information).
Push the lock button on the key fob.
3. If any doors are open, close them.
20_LX_OM_EN_USC_t.book Page 22
Page 29 of 328

GETTING TO KNOW YOUR VEHICLE27
NOTE:
After pushing the door handle button, you
must wait two seconds before you can lock or
unlock the doors, using either Passive Entry
door handle. This is done to allow you to
check if the vehicle is locked by pulling the
door handle, without the vehicle reacting and
unlocking.
The Passive Entry system will not operate if
the key fob battery is depleted.
The vehicle doors can also be locked by using
the key fob lock button or the lock button
located on the vehicle’s interior door panel.
General Information
The following regulatory statement applies to all
Radio Frequency (RF) devices equipped in this
vehicle:
This device complies with Part 15 of the FCC
Rules and with Innovation, Science and
Economic Development Canada license-exempt
RSS standard(s). Operation is subject to the
following two conditions:
1. This device may not cause harmful interference, and
2. This device must accept any interference
received, including interference that may
cause undesired operation.
Le présent appareil est conforme aux
CNR d`Innovation, Science and Economic
Development applicables aux appareils radio
exempts de licence. L'exploitation est autorisée
aux deux conditions suivantes:
1. l'appareil ne doit pas produire de brouillage, et
2. l'utilisateur de l'appareil doit accepter tout brouillage radioélectrique subi, même si le
brouillage est susceptible d'en compro -
mettre le fonctionnement.
La operación de este equipo está sujeta a las
siguientes dos condiciones:
1. es posible que este equipo o dispositivo no cause interferencia perjudicial y
2. este equipo o dispositivo debe aceptar cualquier interferencia, incluyendo la que
pueda causar su operación no deseada.
NOTE:
Changes or modifications not expressly
approved by the party responsible for compli -
ance could void the user’s authority to operate
the equipment.
AUTOMATIC UNLOCK DOORS ON EXIT
The doors will unlock automatically on vehicles
with power door locks if:
1. The Automatic Unlock Doors On Exit feature is enabled.
2. The vehicle was in motion, then speed returned to 0 mph (0 km/h) and the
transmission is placed in PARK.
3. The driver door is opened.
4. The doors were not previously unlocked.
Automatic Unlock Doors On Exit Programming
To change the current setting, refer to
“Uconnect Settings” in “Multimedia” for further
information.
NOTE:
Use the Automatic Unlock Doors On Exit feature
in accordance with local laws.
2
20_LX_OM_EN_USC_t.book Page 27
Page 30 of 328

28GETTING TO KNOW YOUR VEHICLE
AUTOMATIC DOOR LOCKS — IF
E
QUIPPED
The auto door lock feature default condition is
enabled. When enabled, the door locks will lock
automatically when the vehicle's speed exceeds
15 mph (24 km/h). The auto door lock feature
can be enabled or disabled by an authorized
dealer per written request of the customer.
Please see an authorized dealer for service.
CHILD-PROTECTION DOOR LOCK
S
YSTEM — REAR DOORS
To provide a safer environment for small
children riding in the rear seats, the rear doors
are equipped with Child-Protection Door Lock
system.
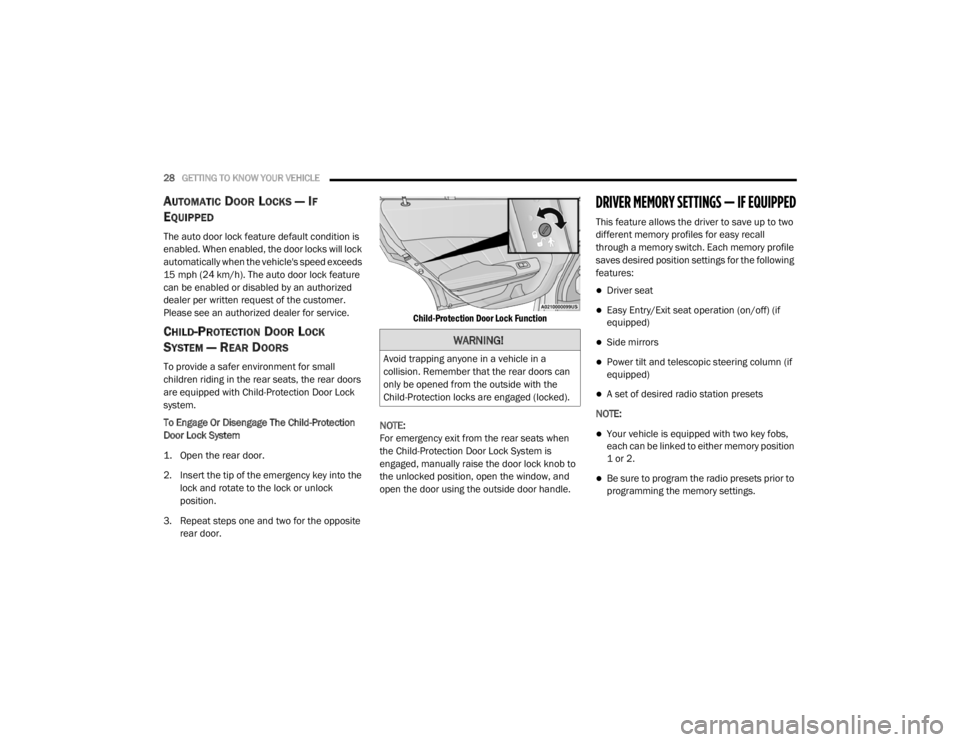
To Engage Or Disengage The Child-Protection
Door Lock System
1. Open the rear door.
2. Insert the tip of the emergency key into the
lock and rotate to the lock or unlock
position.
3. Repeat steps one and two for the opposite rear door.
Child-Protection Door Lock Function
NOTE:
For emergency exit from the rear seats when
the Child-Protection Door Lock System is
engaged, manually raise the door lock knob to
the unlocked position, open the window, and
open the door using the outside door handle.
DRIVER MEMORY SETTINGS — IF EQUIPPED
This feature allows the driver to save up to two
different memory profiles for easy recall
through a memory switch. Each memory profile
saves desired position settings for the following
features:
Driver seat
Easy Entry/Exit seat operation (on/off) (if
equipped)
Side mirrors
Power tilt and telescopic steering column (if
equipped)
A set of desired radio station presets
NOTE:
Your vehicle is equipped with two key fobs,
each can be linked to either memory position
1 or 2.
Be sure to program the radio presets prior to
programming the memory settings.
WARNING!
Avoid trapping anyone in a vehicle in a
collision. Remember that the rear doors can
only be opened from the outside with the
Child-Protection locks are engaged (locked).
20_LX_OM_EN_USC_t.book Page 28
Page 31 of 328

GETTING TO KNOW YOUR VEHICLE29
The memory settings switch is located on the
driver’s door trim panel. The switch consists of
three buttons:
The set (S) button, which is used to activate
the memory save function.
The (1) and (2) buttons which are used to
recall either of two pre-programmed memory
profiles.
Memory Settings Buttons
PROGRAMMING THE MEMORY FEATURE
To create a new memory profile, perform the
following:
NOTE:
Saving a new memory profile will erase the
selected profile from memory.
1. Place the vehicle’s ignition in the ON/RUN position (do not start the engine).
2. Adjust all memory profile settings to desired preferences (i.e., seat, side mirror, power tilt
and telescopic steering column [if
equipped], and radio station presets).
3. Push and release the set (S) button on the memory switch, and then push the desired
memory button (1 or 2) within five seconds.
The instrument cluster display will display
which memory position has been set.
NOTE:
Memory profiles can be set without the vehicle
in PARK, but the vehicle must be in PARK to
recall a memory profile.
LINKING AND UNLINKING THE REMOTE
K
EYLESS ENTRY KEY FOB TO MEMORY
Your key fobs can be programmed to recall one
of two saved memory profiles by pushing the
unlock button on the key fob.
NOTE:
Before programming your key fobs you must
select the “Personal Settings Linked To Key
Fob” feature through the Uconnect system
screen. Refer to “Uconnect Settings” in “Multi -
media” for further information.
To program your key fobs, perform the following:
1. Place the vehicle’s ignition in the OFF position.
2. Select a desired memory profile, 1 or 2.
3. Once the profile has been recalled, push and release the set (S) button on the
memory switch.
4. Within five seconds, push and release button (1) or (2) accordingly. “Memory
Profile Set” (1 or 2) will display in the
instrument cluster.
2
20_LX_OM_EN_USC_t.book Page 29
Page 35 of 328

GETTING TO KNOW YOUR VEHICLE33
seat position is greater than or equal to
2.7 inches (67.7 mm) forward of the rear
stop. The seat will return to its previously set
position when you place the vehicle’s ignition
in the ACC or RUN position.
The Easy Entry/Easy Exit feature is disabled
when the driver seat position is less than
0.9 of an inch (22.7 mm) forward of the rear
stop. At this position, there is no benefit to
the driver by moving the seat for Easy Exit or
Easy Entry.
Each stored memory setting will have an
associated Easy Entry and Easy Exit position.
NOTE:
The Easy Entry/Exit feature is not enabled when
the vehicle is delivered from the factory. The
Easy Entry/Exit feature is enabled (or later
disabled) through the programmable features
in the Uconnect system. Refer to “Uconnect
Settings” in “Multimedia”.
HEATED SEATS — IF EQUIPPED
On some models, the front and rear seats may
be equipped with heaters located in the seat
cushions and seat backs.
Front Heated Seats
The front heated seat control buttons are
located within the climate or controls screen of
the touchscreen.
You can choose from HI, LO, or OFF heat
settings. The indicator arrows in touchscreen
buttons indicate the level of heat in use. Two
indicator arrows will illuminate for HI, and one for LO. Turning the heating elements off will
return the user to the radio screen.
Press the heated seat button once to turn
the HI setting on.
Press the heated seat button a second
time to turn the LO setting on.
Press the heated seat button a third time
to turn the heating elements off.
If the HI-level setting is selected, the system will
automatically switch to LO-level after
approximately 60 minutes of continuous
operation. At that time, the display will change
from HI to LO, indicating the change. The
LO-level setting will turn off automatically after
approximately 45 minutes.
NOTE:
Once a heat setting is selected, heat will be
felt within two to five minutes.
The engine must be running for the heated
seats to operate.
WARNING!
Persons who are unable to feel pain to the
skin because of advanced age, chronic
illness, diabetes, spinal cord injury, medica -
tion, alcohol use, exhaustion or other phys -
ical condition must exercise care when
using the seat heater. It may cause burns
even at low temperatures, especially if
used for long periods of time.
Do not place anything on the seat or seat -
back that insulates against heat, such as a
blanket or cushion. This may cause the seat
heater to overheat. Sitting in a seat that has
been overheated could cause serious
burns due to the increased surface
temperature of the seat.
2
20_LX_OM_EN_USC_t.book Page 33
Page 50 of 328

48GETTING TO KNOW YOUR VEHICLE
(Continued)
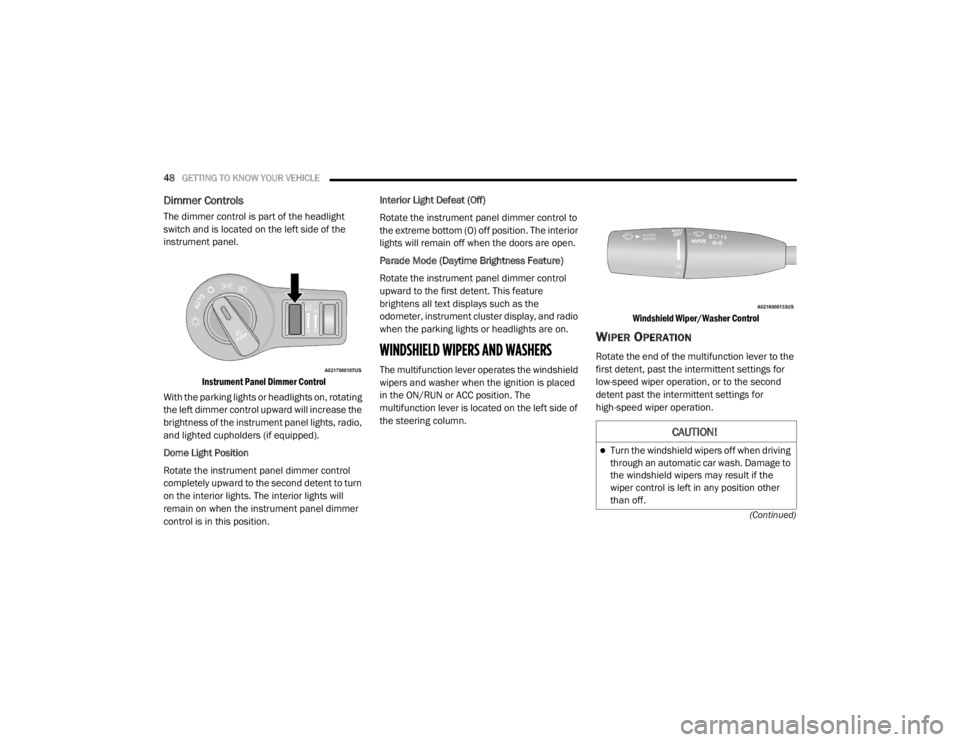
Dimmer Controls
The dimmer control is part of the headlight
switch and is located on the left side of the
instrument panel.
Instrument Panel Dimmer Control
With the parking lights or headlights on, rotating
the left dimmer control upward will increase the
brightness of the instrument panel lights, radio,
and lighted cupholders (if equipped).
Dome Light Position
Rotate the instrument panel dimmer control
completely upward to the second detent to turn
on the interior lights. The interior lights will
remain on when the instrument panel dimmer
control is in this position. Interior Light Defeat (Off)
Rotate the instrument panel dimmer control to
the extreme bottom (O) off position. The interior
lights will remain off when the doors are open.
Parade Mode (Daytime Brightness Feature)
Rotate the instrument panel dimmer control
upward to the first detent. This feature
brightens all text displays such as the
odometer, instrument cluster display, and radio
when the parking lights or headlights are on.
WINDSHIELD WIPERS AND WASHERS
The multifunction lever operates the windshield
wipers and washer when the ignition is placed
in the ON/RUN or ACC position. The
multifunction lever is located on the left side of
the steering column.
Windshield Wiper/Washer Control
WIPER OPERATION
Rotate the end of the multifunction lever to the
first detent, past the intermittent settings for
low-speed wiper operation, or to the second
detent past the intermittent settings for
high-speed wiper operation.
CAUTION!
Turn the windshield wipers off when driving
through an automatic car wash. Damage to
the windshield wipers may result if the
wiper control is left in any position other
than off.
20_LX_OM_EN_USC_t.book Page 48
Page 52 of 328

50GETTING TO KNOW YOUR VEHICLE
desires less wiper sensitivity. Setting 4 can be
used if the driver desires more sensitivity. The
rain sensing wipers will automatically change
between an intermittent wipe, slow wipe and a
fast wipe depending on the amount of moisture
that is sensed on the windshield. Place the
wiper switch in the OFF position when not using
the system.
The Rain Sensing feature can be turned on and
off using the Uconnect system, refer to
“Uconnect Settings” in “Multimedia” for further
information.
NOTE:
The Rain Sensing feature will not operate
when the wiper speed is in the low or high
position.
The Rain Sensing feature may not function
properly when ice or dried salt water is
present on the windshield.
Use of Rain-X or products containing wax or
silicone may reduce rain sensor perfor -
mance. The Rain Sensing system has protective
features for the wiper blades and arms. It will
not operate under the following conditions:
Low Temperature Wipe Inhibit
— The Rain
Sensing feature will not operate when the
ignition is placed in the ON/RUN position, the
vehicle is stationary and the outside
temperature is below 32°F (0°C), unless the
wiper control on the multifunction lever is
moved, the vehicle speed becomes greater
than 0 mph (0 km/h) or the outside tempera -
ture rises above freezing.
Neutral Wipe Inhibit — The Rain Sensing
feature will not operate when the ignition is
placed in the ON/RUN position, the auto -
matic transmission gear selector is in the
NEUTRAL position and the vehicle speed is
less than 3 mph (5 km/h), unless the wiper
control on the multifunction lever is moved or
the gear selector is moved out of the
NEUTRAL position.
Remote Start Mode Inhibit — On vehicles
equipped with Remote Starting system, Rain
Sensing wipers are not operational when the
vehicle is in the remote start mode. Once the
operator is in the vehicle and has placed the ignition switch in the ON/RUN position, rain
sensing wiper operation can resume, if it has
been selected, and no other inhibit condi
-
tions (mentioned previously) exist.
CLIMATE CONTROLS
The Climate Control system allows you to
regulate the temperature, air flow, and direction
of air circulating throughout the vehicle. The
controls are located on the touchscreen (if
equipped) and on the instrument panel below
the radio.
AUTOMATIC CLIMATE CONTROL
O
VERVIEW
Uconnect 4C/4C NAV Automatic Climate Controls
20_LX_OM_EN_USC_t.book Page 50
Page 68 of 328

66GETTING TO KNOW YOUR VEHICLE
GARAGE DOOR OPENER — IF EQUIPPED
HomeLink® replaces up to three hand-held
transmitters that operate devices such as
garage door openers, motorized gates, lighting
or home security systems. The HomeLink® unit
is powered by your vehicle’s battery.
The HomeLink® buttons, located on either the
overhead console, headliner or sunvisor,
designate the three different HomeLink®
channels. The HomeLink® indicator is located
above the center button.
Overhead Console HomeLink® Buttons
NOTE:
HomeLink® is disabled when the Vehicle Secu -
rity Alarm is active.
BEFORE YOU BEGIN PROGRAMMING
H
OMELINK®
Be sure that your vehicle is parked outside of
the garage before you begin programming.
For more efficient programming and accurate
transmission of the Radio Frequency (RF) signal
it is recommended that a new battery be placed
in the hand-held transmitter of the device that is
being programmed to the HomeLink® system.
To erase the channels, place the ignition in the
ON/RUN position, and push and hold the two
outside HomeLink® buttons (I and III) for up to
20 seconds or until the orange indicator
flashes.
NOTE:
Erasing all channels should only be
performed when programming HomeLink®
for the first time. Do not erase channels when
programming additional buttons.
If you have any problems, or require assis -
tance, please call toll-free 1-800-355-3515
or, on the Internet at HomeLink.com for infor -
mation or assistance.
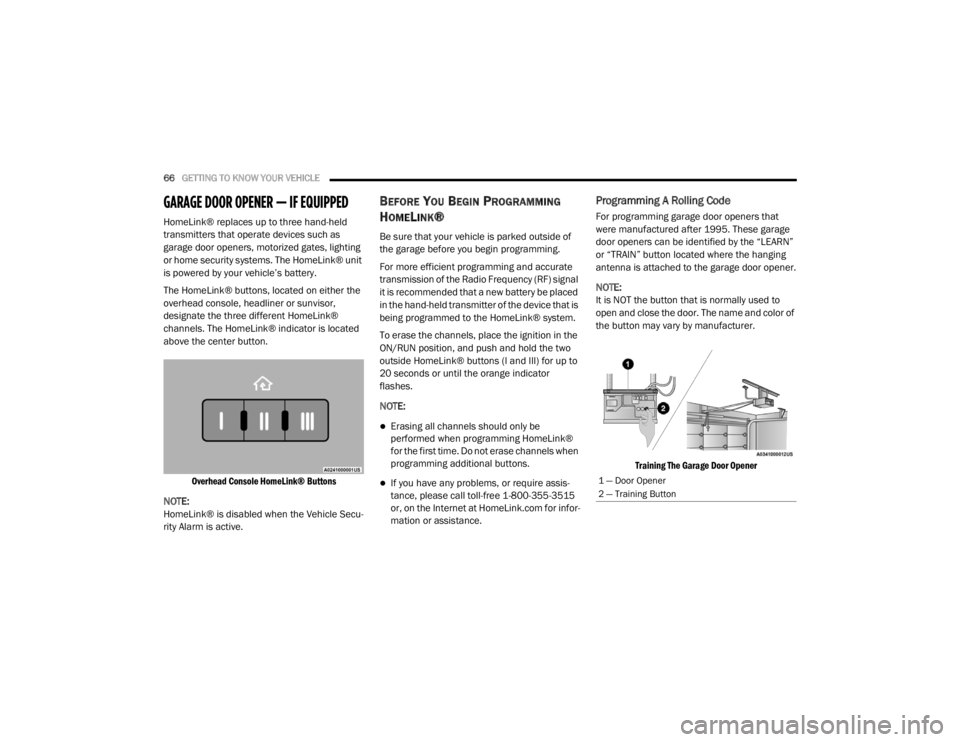
Programming A Rolling Code
For programming garage door openers that
were manufactured after 1995. These garage
door openers can be identified by the “LEARN”
or “TRAIN” button located where the hanging
antenna is attached to the garage door opener.
NOTE:
It is NOT the button that is normally used to
open and close the door. The name and color of
the button may vary by manufacturer.
Training The Garage Door Opener
1 — Door Opener
2 — Training Button
20_LX_OM_EN_USC_t.book Page 66