2020 CHRYSLER 300 homelink
[x] Cancel search: homelinkPage 5 of 328

3
EXTERIOR LIGHTS ................................................42 Multifunction Lever ...................................... 42
Headlight Switch .......................................... 42
Daytime Running Lights (DRLs) .................. 43
High/Low Beam Switch ............................... 43
Automatic High Beam — If Equipped ......... 43
Flash-To-Pass ............................................... 44
Automatic Headlights ................................. 44
Parking Lights ............................................. 44
Headlights On With Wipers ......................... 44
Adaptive Bi-Xenon High Intensity
Discharge Headlights — If Equipped........... 44 Headlight Time Delay .................................. 45
Lights-On Reminder .................................... 45
Fog Lights — If Equipped ............................. 45
Turn Signals ................................................ 46
Lane Change Assist — If Equipped ............. 46
INTERIOR LIGHTS ................................................46
Courtesy Lights ............................................ 46
WINDSHIELD WIPERS AND WASHERS .............48
Wiper Operation ........................................... 48
Rain Sensing Wipers — If Equipped ........... 49
CLIMATE CONTROLS ...........................................50
Automatic Climate Control Overview .......... 50
Climate Control Functions ........................... 55
Automatic Temperature Control (ATC) ....... 55
Operating Tips ............................................. 56 WINDOWS ............................................................ 57
Power Window Controls .............................. 57
Wind Buffeting ............................................ 59
PANORAMIC SUNROOF — IF EQUIPPED ........... 59
Opening Sunroof .......................................... 59
Closing Sunroof............................................ 60
Wind Buffeting ............................................ 60
Opening Power Shade ................................. 60
Closing Power Shade................................... 61
Pinch Protect Feature.................................. 61
Sunroof Maintenance.................................. 61
Ignition Off Operation .................................. 61
HOOD ..................................................................... 61
To Open The Hood ...................................... 61
To Close The Hood ....................................... 62
TRUNK.................................................................... 62
Opening ........................................................ 62
Closing .......................................................... 63
Trunk Safety ................................................. 63
Cargo Area Features ................................... 64
LOAD LEVELING SYSTEM — IF EQUIPPED ....... 65
GARAGE DOOR OPENER — IF EQUIPPED ........ 66 Before You Begin Programming
HomeLink® .................................................. 66 Canadian/Gate Operator Programming ..... 68
Using HomeLink®........................................ 69
Security......................................................... 69
Troubleshooting Tips ................................... 69
General Information .................................... 70 INTERNAL EQUIPMENT ........................................70
Storage ......................................................... 70
Cupholders .................................................. 72
Power Sunshade — If Equipped .................. 73
Electrical Power Outlets .............................. 74
Sunglasses Bin Door .................................. 75
GETTING TO KNOW YOUR
INSTRUMENT PANEL
INSTRUMENT CLUSTER .......................................76
Instrument Cluster Descriptions ................ 77
INSTRUMENT CLUSTER DISPLAY .......................78
Location And Controls ................................. 78
Engine Oil Life Reset .................................. 79
Instrument Cluster Display Selectable
Menu Items .................................................. 80 Battery Saver On/Battery Saver Mode
Message — Electrical Load Reduction
Actions — If Equipped ................................. 83
WARNING LIGHTS AND MESSAGES ..................84
Red Warning Lights ..................................... 85
Yellow Warning Lights ................................. 88
Yellow Indicator Lights ................................ 91
Green Indicator Lights ................................. 91
White Indicator Lights ................................. 92
Blue Indicator Lights ................................... 92
ONBOARD DIAGNOSTIC SYSTEM — OBD II ......93
Onboard Diagnostic System (OBD II)
Cybersecurity ............................................... 93
20_LX_OM_EN_USC_t.book Page 3
Page 68 of 328

66GETTING TO KNOW YOUR VEHICLE
GARAGE DOOR OPENER — IF EQUIPPED
HomeLink® replaces up to three hand-held
transmitters that operate devices such as
garage door openers, motorized gates, lighting
or home security systems. The HomeLink® unit
is powered by your vehicle’s battery.
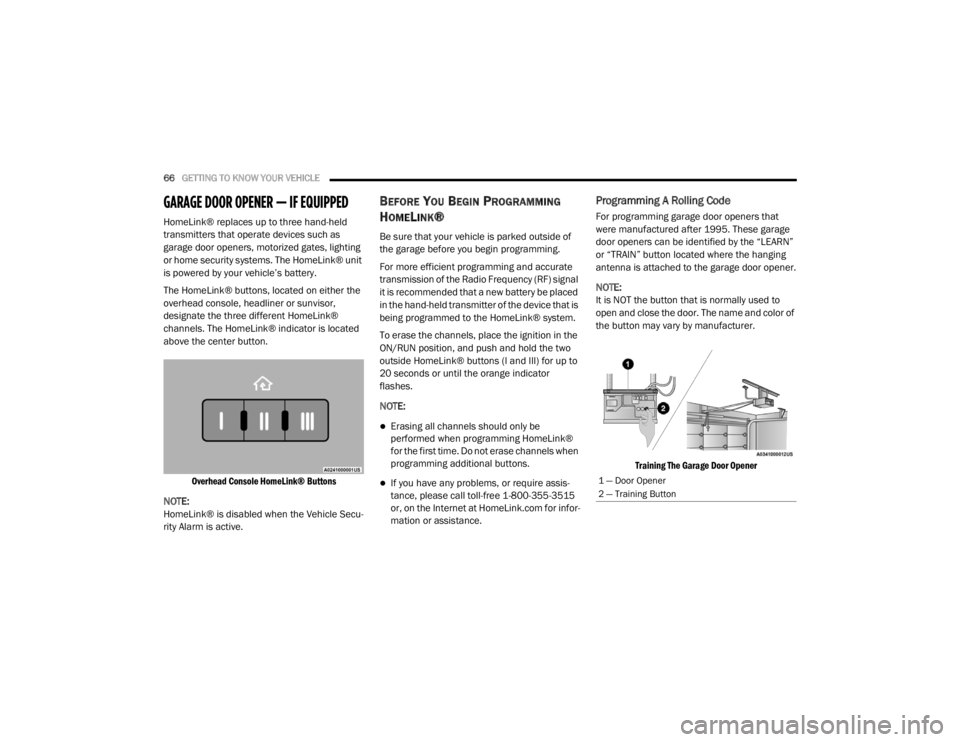
The HomeLink® buttons, located on either the
overhead console, headliner or sunvisor,
designate the three different HomeLink®
channels. The HomeLink® indicator is located
above the center button.
Overhead Console HomeLink® Buttons
NOTE:
HomeLink® is disabled when the Vehicle Secu -
rity Alarm is active.
BEFORE YOU BEGIN PROGRAMMING
H
OMELINK®
Be sure that your vehicle is parked outside of
the garage before you begin programming.
For more efficient programming and accurate
transmission of the Radio Frequency (RF) signal
it is recommended that a new battery be placed
in the hand-held transmitter of the device that is
being programmed to the HomeLink® system.
To erase the channels, place the ignition in the
ON/RUN position, and push and hold the two
outside HomeLink® buttons (I and III) for up to
20 seconds or until the orange indicator
flashes.
NOTE:
Erasing all channels should only be
performed when programming HomeLink®
for the first time. Do not erase channels when
programming additional buttons.
If you have any problems, or require assis -
tance, please call toll-free 1-800-355-3515
or, on the Internet at HomeLink.com for infor -
mation or assistance.
Programming A Rolling Code
For programming garage door openers that
were manufactured after 1995. These garage
door openers can be identified by the “LEARN”
or “TRAIN” button located where the hanging
antenna is attached to the garage door opener.
NOTE:
It is NOT the button that is normally used to
open and close the door. The name and color of
the button may vary by manufacturer.
Training The Garage Door Opener
1 — Door Opener
2 — Training Button
20_LX_OM_EN_USC_t.book Page 66
Page 69 of 328

GETTING TO KNOW YOUR VEHICLE67
1. Place the ignition in the ON/RUN position.
2. Place the hand-held transmitter 1 to
3 inches (3 to 8 cm) away from the
HomeLink® button you wish to program
while keeping the HomeLink® indicator
light in view.
3. Push and hold the HomeLink® button you want to program while you push and hold
the hand-held transmitter button.
4. Continue to hold both buttons and observe the indicator light. The HomeLink®
indicator will flash slowly and then rapidly
after HomeLink® has received the
frequency signal from the hand-held
transmitter. Release both buttons after the
indicator light changes from slow to rapid.
5. On the garage door opener (in the garage), locate the “LEARN” or “TRAINING” button.
This can usually be found where the
hanging antenna wire is attached to the
garage door opener/device motor. Firmly
push and release the “LEARN” or
“TRAINING” button. On some garage door
openers/devices there may be a light that
blinks when the garage door opener/device
is in the LEARN/TRAIN mode. NOTE:
You have 30 seconds in which to initiate the
next step after the LEARN button has been
pushed.
6. Return to the vehicle and push the
programmed HomeLink® button twice
(holding the button for two seconds each
time). If the garage door opener/device
activates, programming is complete.
NOTE:
If the garage door opener/device does not acti -
vate, push the button a third time (for two
seconds) to complete the training.
To program the remaining two HomeLink®
buttons, repeat each step for each remain -
ing button. DO NOT erase the channels.
Reprogramming A Single HomeLink® Button
(Rolling Code)
To reprogram a channel that has been
previously trained, follow these steps:
1. Place the ignition in the ON/RUN position.
2. Push and hold the desired HomeLink® button until the indicator light begins to flash after 20 seconds. Do not release the
button.
3. Without releasing the button proceed with “Programming A Rolling Code” step 2 and
follow all remaining steps.
Programming A Non-Rolling Code
For programming garage door openers
manufactured before 1995.
1. Place the ignition in the ON/RUN position.
2. Place the hand-held transmitter 1 to 3 inches (3 to 8 cm) away from the
HomeLink® button you wish to program
while keeping the HomeLink® indicator
light in view.
3. Press and hold the HomeLink® button you want to program while you press and hold
the hand-held transmitter button.
4. Continue to hold both buttons and observe the indicator light. The HomeLink®
indicator will flash slowly and then rapidly
after HomeLink® has received the
frequency signal from the hand-held
transmitter. Release both buttons after the
indicator light changes from slow to rapid.
2
20_LX_OM_EN_USC_t.book Page 67
Page 70 of 328

68GETTING TO KNOW YOUR VEHICLE
5. Press and hold the programmed
HomeLink® button and observe the
indicator light.
If the indicator light stays on constantly,
programming is complete and the garage
door/device should activate when the
HomeLink® button is pressed.
To program the two remaining Home -
Link® buttons, repeat each step for each
remaining button. DO NOT erase the
channels.
Reprogramming A Single HomeLink® Button
(Non-Rolling Code)
To reprogram a channel that has been
previously trained, follow these steps:
1. Place the ignition in the ON/RUN position.
2. Press and hold the desired HomeLink® button until the indicator light begins to
flash after 20 seconds. Do not release the
button.
3. Without releasing the button, proceed with “Programming A Non-Rolling Code” step 2
and follow all remaining steps.
CANADIAN/GATE OPERATOR
P
ROGRAMMING
For programming transmitters in Canada/
United States that require the transmitter
signals to “time-out” after several seconds of
transmission.
Canadian radio frequency laws require
transmitter signals to time-out (or quit) after
several seconds of transmission – which may
not be long enough for HomeLink® to pick up
the signal during programming. Similar to this
Canadian law, some U.S. gate operators are
designed to time-out in the same manner.
It may be helpful to unplug the device during the
cycling process to prevent possible overheating
of the garage door or gate motor.
1. Place the ignition in the ON/RUN position.
2. Place the hand-held transmitter 1 to
3 inches (3 to 8 cm) away from the
HomeLink® button you wish to program
while keeping the HomeLink® indicator
light in view.
3. Continue to press and hold the HomeLink® button, while you press and release
(“cycle”) your hand-held transmitter every two seconds until HomeLink® has
successfully accepted the frequency signal.
The indicator light will flash slowly and then
rapidly when fully trained.
4. Watch for the HomeLink® indicator to change flash rates. When it changes, it is
programmed. It may take up to 30 seconds
or longer in rare cases. The garage door
may open and close while you are
programming.
5. Press and hold the programmed HomeLink® button and observe the
indicator light.
NOTE:
If the indicator light stays on constantly,
programming is complete and the garage
door/device should activate when the Home -
Link® button is pressed.
To program the two remaining HomeLink®
buttons, repeat each step for each remaining
button. DO NOT erase the channels.
If you unplugged the garage door opener/
device for programming, plug it back in at this
time.
20_LX_OM_EN_USC_t.book Page 68
Page 71 of 328

GETTING TO KNOW YOUR VEHICLE69
Reprogramming A Single HomeLink® Button
(Canadian/Gate Operator)
To reprogram a channel that has been
previously trained, follow these steps:
1. Place the ignition in the ON/RUN position.
2. Press and hold the desired HomeLink®
button until the indicator light begins to
flash after 20 seconds. Do not release the
button.
3. Without releasing the button, proceed with “Canadian/Gate Operator Programming”
step 2 and follow all remaining steps.
USING HOMELINK®
To operate, push and release the programmed
HomeLink® button. Activation will now occur for
the programmed device (i.e. garage door
opener, gate operator, security system, entry
door lock, home/office lighting, etc.). The
hand-held transmitter of the device may also be
used at any time.
SECURITY
It is advised to erase all channels before you sell
or turn in your vehicle.
To do this, push and hold the two outside
buttons for 20 seconds until the orange
indicator flashes. Note that all channels will be
erased. Individual channels cannot be erased.
The HomeLink® Universal Transceiver is
disabled when the Vehicle Security Alarm is
active.
TROUBLESHOOTING TIPS
If you are having trouble programming
HomeLink®, here are some of the most
common solutions:
Replace the battery in the garage door
opener hand-held transmitter.
Push the LEARN button on the garage door
opener to complete the training for a rolling
code.
Did you unplug the device for programming
and remember to plug it back in? If you have any problems, or require assistance,
please call toll-free 1-800-355-3515 or, on the
Internet at HomeLink.com for information or
assistance.
WARNING!
Vehicle exhaust contains carbon monoxide,
a dangerous gas. Do not run your vehicle in
the garage while programming the trans -
ceiver. Exhaust gas can cause serious
injury or death.
Your motorized door or gate will open and
close while you are programming the
universal transceiver. Do not program the
transceiver if people, pets or other objects
are in the path of the door or gate. Only use
this transceiver with a garage door opener
that has a “stop and reverse” feature as
required by Federal safety standards. This
includes most garage door opener models
manufactured after 1982. Do not use a
garage door opener without these safety
features. Call toll-free 1-800-355-3515 or,
on the Internet at HomeLink.com for safety
information or assistance.
2
20_LX_OM_EN_USC_t.book Page 69
Page 320 of 328

318 Floor Console
................................................... 71Fluid Capacities............................................. 280Fluid Leaks.................................................... 145Fluid Level Checks Brake........................................................ 251Cooling System.......................................... 247Engine Oil.................................................. 238Transfer Case............................................ 253Fluid, Brake......................................... 281, 283Fluids And Lubricants.................................... 281Fog Lights........................................................ 45Fold-Flat Seats................................................. 30Folding Rear Seats.......................................... 30Forward Collision Warning............................. 106Four-Way Hazard Flasher............................... 201Freeing A Stuck Vehicle................................. 227Fuel............................................................... 276Additives................................................... 277Clean Air.................................................... 277Ethanol...................................................... 277Gasoline.................................................... 276Gauge.......................................................... 90Materials Added........................................ 277Methanol................................................... 277Octane Rating................................. 276, 281Requirements........................................... 276Specifications............................................ 281Tank Capacity............................................ 280Fuses............................................................. 209
G
Garage Door Opener (HomeLink)..................... 66Gasoline, Clean Air........................................ 277Gasoline, Reformulated................................ 277GaugesFuel............................................................. 90Gear Ranges................................................. 155Glass Cleaning.............................................. 274Gross Axle Weight Rating..................... 190, 191Gross Vehicle Weight Rating................ 190, 191GVWR............................................................ 190
H
HazardDriving Through Flowing, Rising, Or Shallow Standing Water
.................................... 199Hazard Warning Flashers.............................. 201Head Restraints........................................ 35, 36Head Rests............................................... 35, 36Headlights.................................................... 207Automatic.................................................... 44Cleaning................................................... 272High Beam/Low Beam Select Switch.......... 43Lights On Reminder..................................... 45On With Wipers............................................ 44Passing........................................................ 44Switch.......................................................... 42Time Delay................................................... 45Washers................................................... 238
Heated Mirrors.................................................41Heater, Engine Block..................................... 149High Beam/Low Beam Select (Dimmer)
Switch..............................................................43Hill Start Assist.............................................. 100HitchesTrailer Towing........................................... 193Holder, Coin.....................................................71HomeLink (Garage Door Opener).....................66Hood Prop........................................................61Hood Release...................................................61
I
Ignition.............................................................16Switch..........................................................16In Vehicle HelpVehicle User Guide......................................10Inside Rearview Mirror........................... 39, 201Instrument Cluster....................................76, 77Descriptions.................................................92Display.................................................. 78, 80Instrument Panel Lens Cleaning................... 274Interior Appearance Care.............................. 273Interior Lights...................................................46Intermittent Wipers (Delay Wipers)..................49Introduction....................................................... 8
20_LX_OM_EN_USC_t.book Page 318
Page 325 of 328

323
Radial
........................................................ 262Replacement................................... 222, 264Rotation.................................................... 270Safety.............................................. 253, 261Sizes.......................................................... 254Snow Tires................................................. 266Spare Tires............................. 218, 266, 267Spinning.................................................... 263Trailer Towing............................................ 195Tread Wear Indicators............................... 264Wheel Mounting........................................ 222Wheel Nut Torque..................................... 275To Open Hood.................................................. 61Tongue Weight/Trailer Weight....................... 194Towing........................................................... 191Behind A Motorhome................................ 198Disabled Vehicle........................................ 228Guide......................................................... 194Recreational.............................................. 198Weight....................................................... 194Towing Behind A Motorhome......................... 198Traction............................................... 198, 199Traction Control............................................. 102Trailer Towing................................................ 191Cooling System Tips.................................. 198Hitches...................................................... 193Minimum Requirements............................ 195Tips........................................................... 197Trailer And Tongue Weight........................ 194
Wiring....................................................... 196Trailer Towing Guide..................................... 194Trailer Weight................................................ 194Transfer Case Fluid....................................... 253, 281, 283Maintenance............................................ 253Transmission................................................ 153Automatic........................................ 153, 251Fluid................................................ 281, 283Maintenance............................................ 251Shifting..................................................... 151Transporting Pets.......................................... 142Tread Wear Indicators.................................. 264Trunk Lid (Deck Lid)......................................... 62Trunk Release Remote Control........................ 62Turn Signals.............................................. 46, 92
U
UconnectUconnect Settings
................12, 13, 20, 285Uconnect 4C/4C Nav With 8.4-Inch
Display.......................................................... 285Uconnect SettingsCustomer Programmable Features
..................................20, 24, 285Passive Entry Programming......................... 24
Uniform Tire Quality Grades.......................... 270Universal Garage Door Opener (HomeLink).....66Universal Transmitter.......................................66Unleaded Gasoline........................................ 276Untwisting Procedure, Seat Belt.................... 118USB............................................................... 302
V
Vanity Mirrors...................................................42Vehicle Certification Label............................ 190Vehicle Identification Number (VIN).............. 275Vehicle Loading.................................... 190, 258Vehicle Modifications/Alterations...................... 9Vehicle Security Alarm.....................................22Vehicle Storage...................................... 56, 271Vehicle User GuideIn Vehicle Help.............................................10Navigation...................................................10Operating Instructions.................................10Searching User Guide..................................10Viscosity, Engine Oil............................. 240, 241Voice Command............................................ 304Voice Recognition System (VR)..................... 304
11
20_LX_OM_EN_USC_t.book Page 323