2019 VOLVO S60 TWIN ENGINE steering
[x] Cancel search: steeringPage 422 of 645

STARTING AND DRIVING
* Option/accessory.420
Leveling control settings*
Turn off leveling control before lifting the vehiclewith a jack to help avoid problems with thepneumatic suspension.
Center display settings
Disable Leveling Control
In certain situations, this function must be turnedoff, e.g. before the vehicle is raised using a jack*.The level difference caused by raising the vehiclewith a jack could cause problems with the pneu-matic suspension.
Turning off the function in the center display:
1.Tap Settings in the Top view.
2.Tap My CarParking Brake andSuspension.
3.Select Disable Leveling Control.
Related information
Leveling control* and suspension (p. 418)
Loading recommendations (p. 551)
Economical driving
Drive economically and more environmentallyconscious by thinking ahead and avoiding rapidstarts and stops.
Adapt your driving style and speed to the currenttraffic conditions.
To help achieve the greatest distance with thelowest fuel consumption with Twin Engine,observe the following:
Charge
Charge the vehicle regularly by plugging itinto an electrical outlet. Make it a habit toalways begin trips with the hybrid battery fullycharged.
Locate charging stations along your route.
If possible, choose parking spots with charg-ing stations.
NOTE
Charge the vehicle from the electricity grid asoften as possible!
Preconditioning
Whenever possible, precondition the vehiclebefore driving by connecting the chargingcable to an electrical outlet.
Avoid parking the vehicle somewhere wherethe interior will become too hot or too cold
while the vehicle is parked. If possible, parkthe vehicle in a climate-controlled garage.
During a short drive after passenger com-partment preconditioning, turn off the pas-senger compartment fan or the air condition-ing in a hot climate.
If preconditioning is not possible when it iscold outside, use seat and steering wheelheating first. Avoid heating the entire pas-senger compartment to reduce the amountof current being taken from the hybrid bat-tery.
Page 423 of 645

STARTING AND DRIVING
}}
* Option/accessory.421
Driving
Choose the Pure drive mode to help mini-mize electric power consumption.
Maintain a steady speed and a generous fol-lowing distance to traffic ahead to minimizebraking. This drive mode has the lowestpower consumption.
Balance energy requirements using theaccelerator pedal. Use the indicator on theinstrument panel to see available electricpower and avoid starting the combustionengine unnecessarily. The electric motor ismore effective than the combustion engine,especially at low speeds.
When braking is necessary, brake gentlyusing the brake pedal. This will help rechargethe hybrid battery. A regenerative function isintegrated in the brake pedal and can beaugmented by the electric motor's brakingcapacity when the gear selector is in modeB.
Higher speeds increase energy consumption- air resistance increases with speed.
Activate the Hold function in the Functionview at high speeds when traveling fartherthan is possible using the hybrid battery'scapacity.
Whenever possible, avoid using the Chargefunction to charge the hybrid battery. Charg-ing the battery using the combustion engine
increases fuel consumption and carbon diox-ide emissions.
In a cold climate, reduce heating of the wind-shield/rear window, mirrors, seats and thesteering wheel.
Maintain the correct pressure in the tires andcheck pressure regularly.
The type of tires used could affect energyconsumption - consult a retailer for advice onsuitable tires.
Remove unnecessary items from the vehicle- the heavier the load, the higher the fuelconsumption.
Roof loads increase air resistance andincrease fuel consumption. Remove roofboxes, ski racks, etc. that are not in use.
Avoid driving with the windows open.
Do not keep the vehicle still on an upwardgradient by using the accelerator pedal. Usethe brakes instead.
Related information
Drive-E ‒ purer driving pleasure (p. 27)
Energy distribution in hybrid mode using mapdata* (p. 417)
Factors affecting electric motor range(p. 421)
Hybrid gauge (p. 85)
Checking tire pressure (p. 519)
Factors affecting electric motorrange
A number of factors affect the electric motor'sdriving range. The ability to achieve a long driv-ing range varies according to the outside condi-tions and to how the vehicle is driven.
The certified value for the distance that can bedriven using the electric motor should not beconsidered an expected driving range. The actualrange is dependent on a number of factors.
Factors affecting driving range
The driver can influence some factors affectingdriving range, but not all.
The longest range is achieved under very favora-ble conditions when all factors positively influ-ence range.
Page 436 of 645

||
STARTING AND DRIVING
434
If contact occurs, flush the affected areaimmediately with water. Obtain medicalhelp immediately if eyes are affected.
Never expose the battery to open flameor electric spark. Do not smoke near thebattery. Failure to follow the instructionsfor jump starting can lead to injury.
NOTE
The vehicle cannot be started if the hybridbattery is discharged.
NOTE
If the starter battery has been discharged tothe extent that the vehicle does not have nor-mal electrical functions and the engine mustthen be jump-started with an external batteryor a battery charger, the Start/Stop functionmay remain activated. If the Start/Stop func-tion shortly thereafter auto-stops the engine,there is a huge risk that auto-start of theengine will fail due to insufficient batterycapacity since the battery had not had time torecharge.
If the vehicle has been jump-started or ifthere has not been enough time for the bat-tery to be charged with a battery charger, theStart/Stop function should be temporarilydeactivated until the battery has beenrecharged by the vehicle. At an ambient tem-perature of about +15°C (about 60°F), thebattery must be charged by the vehicle for atleast one hour. At lower ambient tempera-tures, the charging time can increase to3-4 hours. It is advisable to charge the batterywith an external battery charger.
Related information
Starting the vehicle (p. 392)
Ignition modes (p. 395)
Adjusting the steering wheel (p. 193)
Selecting ignition mode (p. 396)
Driving with a trailer
There are a number of things to consider whentowing a trailer, such as the towbar, the trailerand how the load is distributed in the trailer.
Load-carrying capacity is determined by the vehi-cle's curb weight. The total weight of all passen-gers and any installed accessories, e.g. towbar,reduces the vehicle's load-carrying capacity bythe corresponding amount.
Towbars used on the vehicle must beapproved for the applicable use.
Distribute the load on the trailer so that theweight on the towbar complies with thespecified maximum towball weight. Thetongue weight is calculated as part of thevehicle's payload.
Increase the tire pressure to the recom-mended pressure for a full load.
The engine is subjected to more load thanusual when towing a trailer.
Towing a trailer affects the vehicle's han-dling, durability and driving economy.
Do not drive with a heavy trailer when thevehicle is very new. Wait until the mileagehas reached at least 1000 km (620 miles).
On long and steep downgrades, the vehicle'sbrakes are subjected to much more loadthan usual. When manually shifting, down-shift and adapt speed accordingly.
Page 438 of 645

||
STARTING AND DRIVING
* Option/accessory.436
The automatic transmission selects the optimalgear for the current load and engine speed.
Steep inclines
Do not lock the automatic transmission into ahigher gear than what the engine can handle ‒ itis not always preferable to drive in high gears atlow rpm.
Parking on a hill
1. Depress the brake pedal.
2. Apply the parking brake.
3.Put the gear selector in P.
4. Release the brake pedal.
Put chocks behind the wheels when the vehicleis parked on a hill with a trailer attached.
Starting on a hill
1. Depress the brake pedal.
2.Put the gear selector in D.
3. Release the parking brake.
4. Release the brake pedal and start driving.
Related information
Trailer Stability Assist* (p. 436)
Checking trailer lights (p. 437)
Towing capacity and tongue weight (p. 618)
Overheating of engine and transmission(p. 431)
Trailer Stability Assist*
Trailer Stability Assist (TSA12) is a functiondesigned to help stabilize a vehicle that is tow-ing a trailer when the vehicle and trailer havebegun to sway. The function is part of the Elec-
tronic Stability Control system ESC13.
Reasons for swaying
A vehicle towing a trailer may begin to sway forvarious reasons. Normally this only occurs at highspeeds. However, if the trailer is overloaded orunevenly distributed, e.g. too far back, there is arisk of swaying even at low speeds.
Swaying may be caused by factors such as:
The vehicle and trailer are hit by a sudden,strong crosswind.
The vehicle and trailer are traveling on anuneven road or over a bump.
Sudden movements of the steering wheel.
Once swaying has begun, it can be difficult orimpossible to stop it. This makes the vehicle andtrailer difficult to control and there is a risk ofswerving into oncoming traffic or driving off theroad.
Trailer Stability Assist function
Trailer Stability Assist continuously monitors thevehicle's movements, particularly lateral move-
ments. If swaying is detected, the brakes areapplied individually on the front wheels, which hasa stabilizing effect on the vehicle and trailer. Thisis often enough to enable the driver to regaincontrol of the vehicle.
If the Trailer Stability Assist function's firstattempt is not adequate to stop the swayingmotion, the brakes are applied on all wheels andengine power is temporarily reduced. As theswaying motion begins to decrease and the vehi-cle and trailer have once again become stable,TSA stops regulating the brakes/engine powerand the driver regains control of the vehicle.
NOTE
Trailer Stability Assist is deactivated if thedriver selects the sport mode by deactivatingESC in the center display's menu system.
Trailer Stability Assist may not intervene if thedriver tries to compensate for the swaying motionby moving the steering wheel rapidly, becausethe system will then not be able to determine if itis the trailer or the driver causing the swaying.
12Trailer Stability Assist13Electronic Stability Control
Page 439 of 645

STARTING AND DRIVING
}}
* Option/accessory.437
When Trailer Stability Assist isactivated, the ESC symbol isdisplayed in the instrumentpanel.
Related information
Driving with a trailer (p. 434)
Electronic Stability Control (p. 261)
Checking trailer lights
When connecting a trailer, make sure that all ofthe lights on the trailer are functioning beforestarting to drive.
Trailer turn signals and brake lights
If one or more of the turn signals or brake lightson the trailer is not working, a symbol and mes-sage will be displayed in the instrument panel.The other lights on the trailer must be checkedmanually by the driver before the vehicle is driven.
SymbolMessage
Trailer turn indicator Rightturn indicator malfunction
Trailer turn indicator Leftturn indicator malfunction
Trailer brake light Malfunc-tion
If any of the trailer's turn signal lights is not work-ing, the turn signal symbol in the instrumentpanel will also flash more quickly than normal.
Trailer rear fog light
When a trailer is connected, the vehicle's rear foglight may not illuminate and rear fog light func-tionality is instead transferred to the trailer. If thisis the case, check to see if the trailer is equippedwith a rear fog light before activating the vehicle's
fog lights when driving with a trailer to helpensure safe operation.
Checking trailer lights *
Automatic check
When the trailer has been connected to the vehi-cle's electrical system, its lights can be checkedby automatically activating them. This functionhelps the driver check that the trailer's lights arefunctioning correctly before starting to drive.
In order to perform this check, the vehicle mustbe switched off.
1. When a trailer is connected to the towbar,the message Automatic Trailer LampCheck will appear in the instrument panel.
2.Acknowledge the message by pressing theO button on the right-side steering wheelkeypad.
> The light check will begin.
3. Get out of the vehicle to perform the check.
> All of the lights on the trailer will beginflashing, and then illuminate separatelyone at a time.
4. Visually check that all of the trailer's lightsare functioning correctly.
5. After a short time, all of the trailer's lights willstart flashing again.
> The light check is completed.
Page 450 of 645

AUDIO, MEDIA AND INTERNET
* Option/accessory.448
Audio, media and Internet
The audio and media system consists of a mediaplayer and a radio. A cellular phone can also beconnected through Bluetooth to use hands-freefunctions or play music in the vehicle. When thevehicle is connected to the Internet, it is alsopossible to use apps to play media.
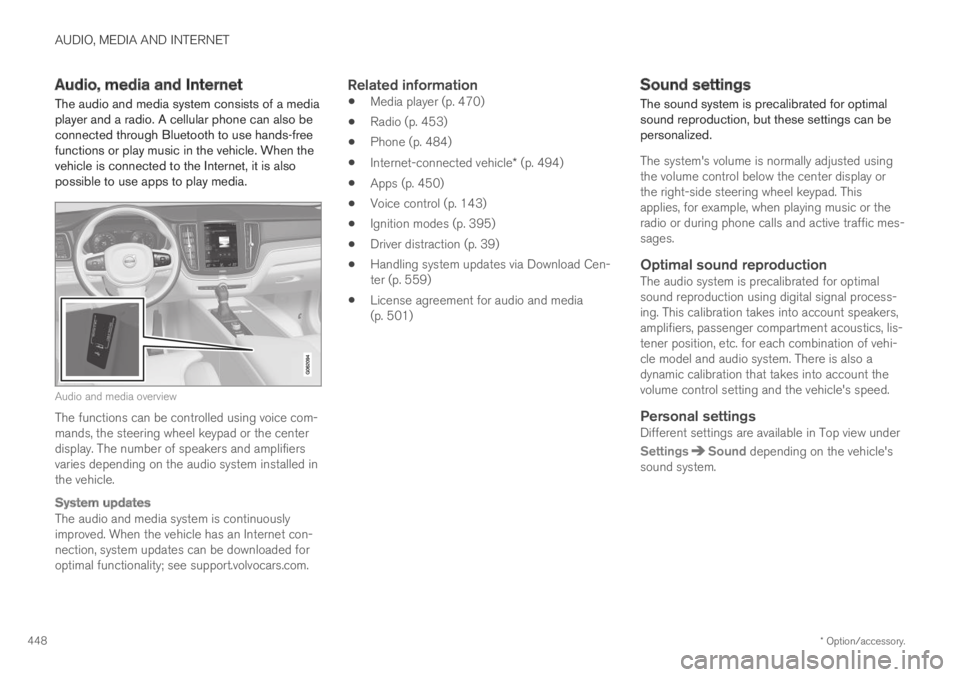
Audio and media overview
The functions can be controlled using voice com-mands, the steering wheel keypad or the centerdisplay. The number of speakers and amplifiersvaries depending on the audio system installed inthe vehicle.
System updates
The audio and media system is continuouslyimproved. When the vehicle has an Internet con-nection, system updates can be downloaded foroptimal functionality; see support.volvocars.com.
Related information
Media player (p. 470)
Radio (p. 453)
Phone (p. 484)
Internet-connected vehicle* (p. 494)
Apps (p. 450)
Voice control (p. 143)
Ignition modes (p. 395)
Driver distraction (p. 39)
Handling system updates via Download Cen-ter (p. 559)
License agreement for audio and media(p. 501)
Sound settings
The sound system is precalibrated for optimalsound reproduction, but these settings can bepersonalized.
The system's volume is normally adjusted usingthe volume control below the center display orthe right-side steering wheel keypad. Thisapplies, for example, when playing music or theradio or during phone calls and active traffic mes-sages.
Optimal sound reproduction
The audio system is precalibrated for optimalsound reproduction using digital signal process-ing. This calibration takes into account speakers,amplifiers, passenger compartment acoustics, lis-tener position, etc. for each combination of vehi-cle model and audio system. There is also adynamic calibration that takes into account thevolume control setting and the vehicle's speed.
Personal settings
Different settings are available in Top view under
SettingsSound depending on the vehicle'ssound system.
Page 455 of 645

AUDIO, MEDIA AND INTERNET
}}
* Option/accessory.453
Radio
The radio can receive broadcasting from the FMwaveband with HD Radio™ Technology and
SiriusXM® Satellite radio *. When the vehicle hasan Internet connection, it is also possible to lis-ten to web radio.
The radio can be controlledusing voice commands, theright-side steering wheel key-pad or the center display.
Related information
Starting the radio (p. 453)
Changing waveband and radio station(p. 454)
Storing radio favorites (p. 455)
Radio settings (p. 456)
RBDS (p. 457)
HD Radio™ (p. 457)
SiriusXM® Satellite radio* (p. 460)
Internet-connected vehicle* (p. 494)
Voice control for radio and media (p. 146)
Media player (p. 470)
Starting the radio
The radio is started from the center display'sApp view.
1.Open the desired waveband (e.g. FM) fromApp view.
2. Select a radio station.
Related information
Radio (p. 453)
Searching for a radio station (p. 455)
Page 456 of 645

AUDIO, MEDIA AND INTERNET
454
Changing waveband and radio station(p. 454)
Storing radio favorites (p. 455)
Radio settings (p. 456)
Voice control for radio and media (p. 146)
Changing waveband and radiostation
Instructions for changing wavebands, wavebandlists and radio stations in the selected list areprovided here.
Changing wavebands
Swipe from App view on the center display andselect the desired waveband (e.g. FM) or openthe App menu in the instrument panel with theright-side steering wheel keypad and make yourselection there.
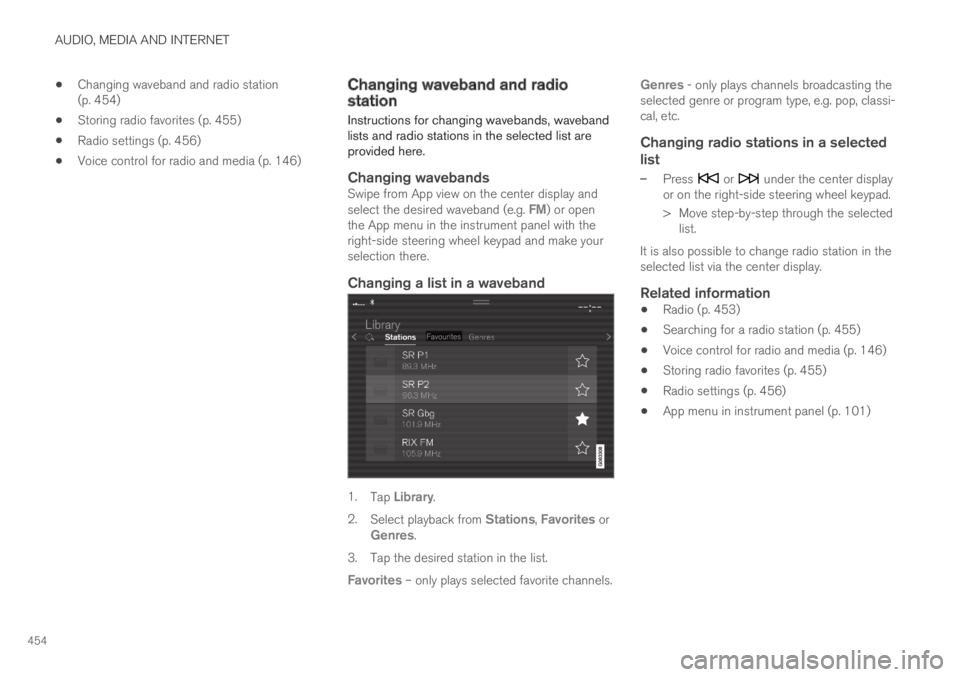
Changing a list in a waveband
1.Tap Library.
2.Select playback from Stations, Favorites orGenres.
3.Tap the desired station in the list.
Favorites – only plays selected favorite channels.
Genres - only plays channels broadcasting theselected genre or program type, e.g. pop, classi-cal, etc.
Changing radio stations in a selected
list
–Press or under the center displayor on the right-side steering wheel keypad.
>Move step-by-step through the selectedlist.
It is also possible to change radio station in theselected list via the center display.
Related information
Radio (p. 453)
Searching for a radio station (p. 455)
Voice control for radio and media (p. 146)
Storing radio favorites (p. 455)
Radio settings (p. 456)
App menu in instrument panel (p. 101)