2019 MERCEDES-BENZ EQC SUV wheel
[x] Cancel search: wheelPage 114 of 629
Ve
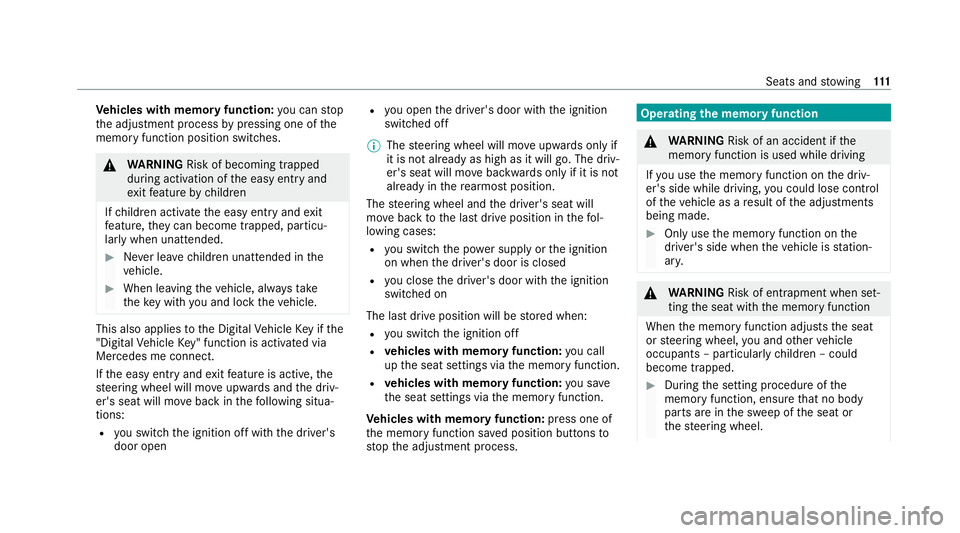
hicles with memory function: you can stop
th e adjustment process bypressing one of the
memory function position switches. &
WARNING Risk of becoming trapped
du ring acti vation of the easy entry and
ex itfeature bychildren
If ch ildren activate the easy entry andexit
fe ature, they can become trapped, pa rticu‐
lar lywhen unat tended. #
Never lea vechildren unat tended in the
ve hicle. #
When leaving theve hicle, alw aysta ke
th eke y with you and lock theve hicle. This also applies
tothe Digital Vehicle Key if the
"Digital Vehicle Key" function is activated via
Mercedes me connect.
If th e easy entry andexitfeature is active, the
st eering wheel will mo veupwards and the driv‐
er's seat will mo veback in thefo llowing situa‐
tions:
R you swit chthe ignition off with the driver's
door open R
you open the driver's door with the ignition
switched off
% The steering wheel will mo veupwards on lyif
it is not already as high as it will go. The driv‐
er's seat will mo vebackwards only if it is not
already in there armost position.
The steering wheel and the driver's seat will
mo veback tothe last drive position in thefo l‐
lowing cases:
R you swit chthe po wer supp lyor the ignition
on when the driver's door is closed
R you close the driver's door with the ignition
switched on
The last drive position will be stored when:
R you swit chthe ignition off
R vehicles with memory function: you call
up the seat settings via the memory function.
R vehicles with memory function: you sa ve
th e seat settings via the memory function.
Ve hicles with memory function: press one of
th e memory function sa ved position buttons to
st op the adjustment process. Operating
the memory function &
WARNING Risk of an accident if the
memory function is used while driving
If yo u use the memory function on the driv‐
er's side while driving, you could lose cont rol
of theve hicle as a result of the adjustments
being made. #
Only use the memory function on the
driver's side when theve hicle is station‐
ar y. &
WARNING Risk of entrapment when set‐
ting the seat with the memory function
When the memory function adjusts the seat
or steering wheel, you and other vehicle
occupants – particularly children – could
become trapped. #
During the setting procedure of the
memory function, ensure that no body
parts are in the sweep of the seat or
th esteering wheel. Seats and
stowing 111
Page 115 of 629
#
If somebody becomes trapped, immedi‐
ately release the memory function posi‐
tion button.
The adjustment process is stopped. &
WARNING Risk of entrapment if the
memory function is activated bychildren
Children could become trapped if they acti‐
va te the memory function, particularly when
unattended. #
Never lea vechildren unat tended in the
ve hicle. #
When leaving theve hicle, alw aysta ke
th eke y with you and lock theve hicle. This also applies
tothe Digital Vehicle Key if the
"Digital Vehicle Key" function is activated via
Mercedes me connect.
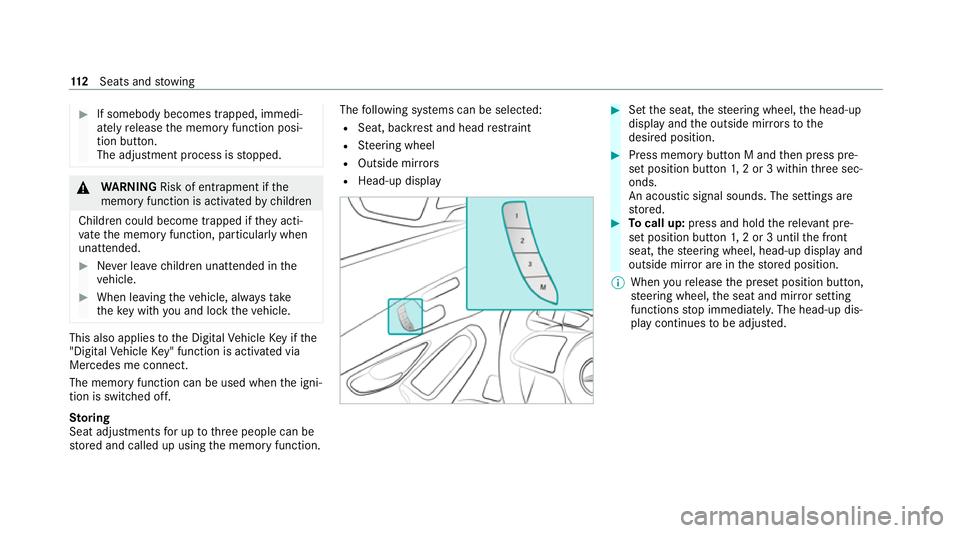
The memory function can be used when the igni‐
tion is switched off.
St oring
Seat adjustments for up tothre e people can be
st ored and called up using the memory function. The
following sy stems can be selected:
R Seat, backrest and head restra int
R Steering wheel
R Outside mir rors
R Head-up display #
Set the seat, thesteering wheel, the head-up
display and the outside mir rors to the
desired position. #
Press memory button M and then press pre‐
set position button 1,2 or 3 within thre e sec‐
onds.
An acoustic signal sounds. The settings are
st ored. #
Tocall up: press and hold there leva nt pre‐
set position button 1,2 or 3 until the front
seat, thesteering wheel, head-up display and
outside mir ror are in thestored position.
% When youre lease the preset position button,
st eering wheel, the seat and mir ror setting
functions stop immediatel y.The head-up dis‐
play continues tobe adjus ted. 11 2
Seats and stowing
Page 140 of 629
When
you pull away again, the hazard warning
lamps will switch off automatically at appr ox‐
imately 10km/h. You can also swit choff the
hazard warning lamps using button 1.Ad
aptive functions, MULTIBEAM LED Fu
nctions of the Intelligent Light Sy stem
The MULTIBEAM LED headlamps adapt tothe
driving and weather situation and pr ovide exten‐
ded functions for impr oved illumination of the
ro ad.
The sy stem comprises thefo llowing functions:
R Active headla mps (/ page137)
R Cor nering light (/ page 137)
R Motorw ay mode (/ page138)
R City lighting (/ page138)
Sy stem limits
R The sy stem is active only when it is dar k.Ac
tive headlamps function Fu
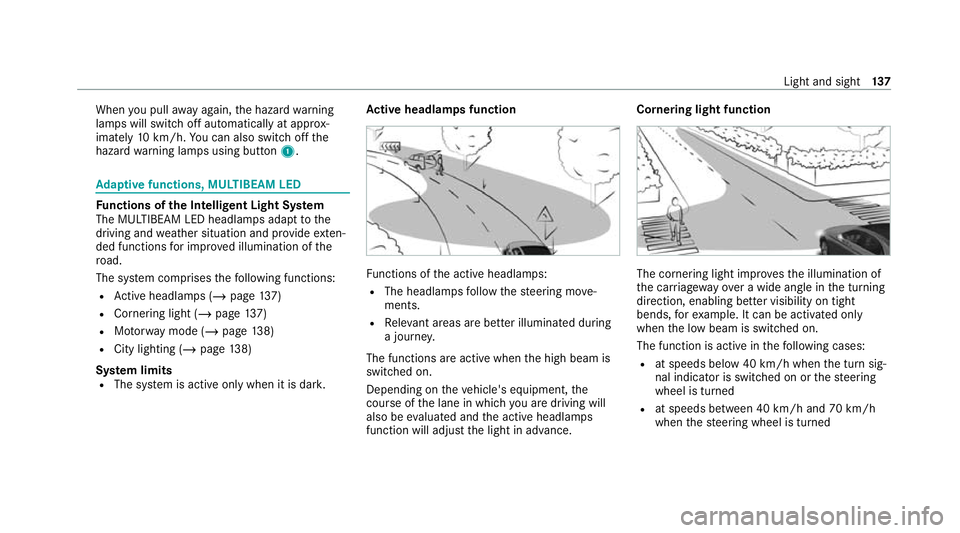
nctions of the active headlamps:
R The headlamps follow thesteering mo ve‐
ments.
R Releva nt areas are better illumina ted during
a journe y.
The functions are active when the high beam is
switched on.
Depending on theve hicle's equipment, the
cou rse of the lane in which you are driving will
also be evaluated and the active headlamps
function will adjust the light in advance. Cornering light function
The cornering light impr
ovesth e illumination of
th e car riag ewa yove r a wide angle in the turning
direction, enabling better visibility on tight
bends, forex ample. It can be activated on ly
when the low beam is switched on.
The function is active in thefo llowing cases:
R at speeds below 40 km/h when the turn sig‐
nal indicator is switched on or thesteering
wheel is turned
R at speeds between 40 km/h and 70 km/h
when thesteering wheel is turned Light and sight
137
Page 149 of 629
Fi
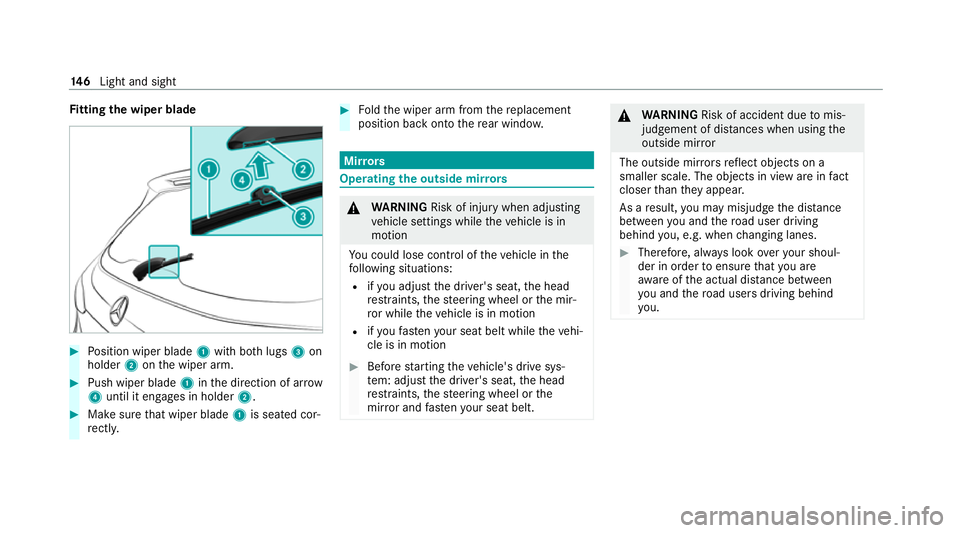
tting the wiper blade #
Position wiper blade 1with bo thlugs 3on
holder 2onthe wiper arm. #
Push wiper blade 1inthe direction of ar row
4 until it en gage s in holder 2. #
Make sure that wiper blade 1is seated cor‐
re ctly. #
Foldthe wiper arm from there placement
position back onto there ar wind ow. Mir
rors Operating
the outside mir rors &
WARNING Risk of inju rywhen adjusting
ve hicle settings while theve hicle is in
motion
Yo u could lose cont rol of theve hicle in the
fo llowing situations:
R ifyo u adjust the driver's seat, the head
re stra ints, thesteering wheel or the mir‐
ro r while theve hicle is in motion
R ifyo ufast enyour seat belt while theve hi‐
cle is in motion #
Before starting theve hicle's drive sys‐
te m: adju stthe driver's seat, the head
re stra ints, thesteering wheel or the
mir ror and fastenyour seat belt. &
WARNING Risk of accident due tomis‐
judgement of dis tances when using the
outside mir ror
The outside mir rors reflect objects on a
smaller scale. The objects in view are in fact
closer than they appear.
As a result, you may misjud gethe dis tance
between you and thero ad user driving
behind you, e.g. when changing lanes. #
Therefore, alw ays look over your shoul‐
der in order toensure that you are
aw are of the actual dis tance between
yo u and thero ad users driving behind
yo u. 14 6
Light and sight
Page 151 of 629
The inside
rearview mir ror and the outside mir‐
ro r on the driver's side will automatically go into
anti-dazzle mode if light from a headlamp hits
th e sensor on the inside rearview mir ror.
Sy stem limits
The sy stem will not go into anti-dazzle mode if:
R The drive sy stem is switched off.
R Reversege ar is engaged.
R The interior lighting is swit ched on. Fr
ont-passenger outside mir ror parking posi‐
tion function %
The pa rking position is available on ly invehi‐
cles with a memory function.
The parking position makes parking easier.
The front-passenger outside mir ror will swivel
down wards in the direction of there ar wheel on
th e front passenger's side when:
R the parking position is stored (/ page148).
R the front-passen ger mir ror is selected.
R reve rsege ar is engaged. The front-passenger outside mir
ror will mo ve
back toits original position when:
R you shift the transmission toano ther trans‐
mission position.
R you are tra velling at a speed greaterth an
15 km/h.
R you press the button forth e outside mir ror
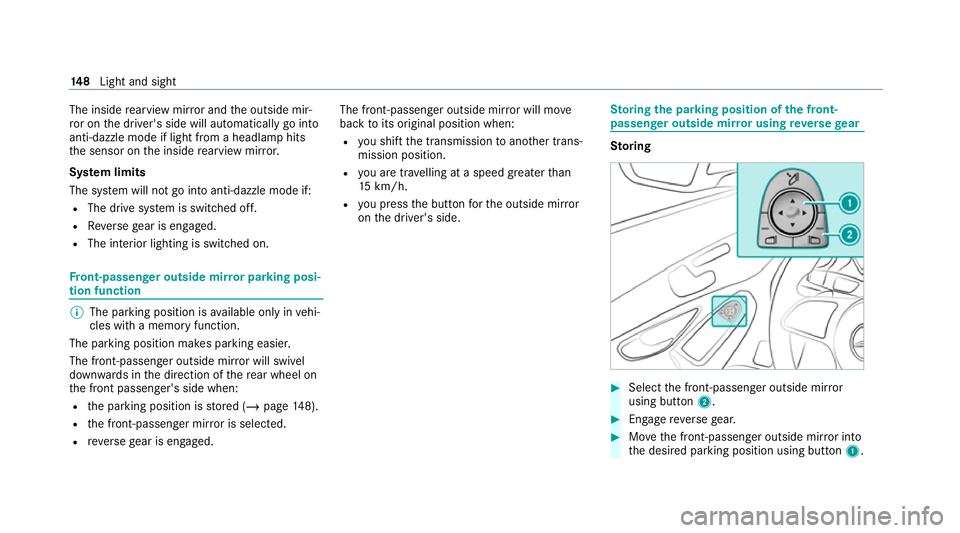
on the driver's side. St
oring the pa rking position of the front-
passenger outside mir ror using reve rsege ar St
oring #
Select the front-passen ger outside mir ror
using but ton2. #
Engage reve rsege ar. #
Movethe front-passen ger outside mir ror into
th e desired parking position using button 1.14 8
Light and sight
Page 157 of 629
Dispose of
thege nuine Mercedes-Benz interior
pe rfume flacon when it is em pty and do not refill
it.
Re fillable flacon #
Unscr ew cap 1of em ptyflacon 2. #
Fillflacon 2with a maximum of 15ml. #
Screw cap 1back onto flacon 2.
Alw aysre fill th e em ptyre fillable flacon with the
same perfume. Obser vethe separate informa‐
tion sheet attached totheflacon. Pre-ent
ryclimate cont rol via key Fu
nction of pre-entry climate control using
th ekey
Before entering theve hicle, the driver's seat
area or the whole vehicle interior can be briefly
pre-warmed or pre-cooled.
When pre-cooling, thefo llowing functions are
activated as needed:
R Automatic clima tecontrol
R Blower R
Seat ventilation
When pre-heating, thefo llowing functions are
activated as needed:
R Automatic clima tecontrol
R Blower
R Seat hea ter
R Steering wheel heater
R Panel heating
R Mirror heater
R Rear wind owheater
R Frag rancing
R Ionisation
Setting pre-entry climate control via key #
Call up the air conditioning menu (see the
section on climate contro l intheve hicle
Owner's Manual). #
Select Pre-entry climate ctrl .
Ac tivating/deactivating #
Select Z. #
Select Pre-entry climate control via key .
Depending on the pr evious status, the func‐
tion is activated or deactivated.
Switching pre-entry climate on/off control
using thekey
Re quirements:
R the high-voltage battery is charge d suf fi‐
ciently
R the function has been activated via the multi‐
media sy stem #
Toswitch on: unlocktheve hicle.
The climate contro l functions are activated
fo r up tofive minutes for pre-heating and
pre-cooling.
Pre-entry clima tecontrol using theke y cannot
be activated more than thre e times when the
ve hicle is switched off. #
Todeactivate: presstheto p or bottom of
th e & button.
The following functions will remain active once
th eve hicle has been star ted:
R seat heating 15 4
Climate cont rol
Page 158 of 629
R
seat ventilation
R panel heating
R frag rancing
R ionisation Pre-entry climate control at depa
rture time Pre-entry climate control at departure time
function
&
WARNING Risk offata l injury due to
ex posure toextreme heat or cold in the
ve hicle
If people –particular lych ildren – are exposed
to extreme temp eratures over an extended
pe riod of time, there is a risk of serious or
eve nfa ta l injury! #
Never lea veanyone – pa rticularly chil‐
dren – unat tended in theve hicle. #
Never lea veanimals in theve hicle unat‐
te nded. The
vehicle interior can be heated or ventilated
when theve hicle is par ked. When
theve hicle is connected topowe r supply
equipment, priority is given tocharging the high-
vo ltage battery toa specified minimum charge.
The pre-ent ryclimate control running time may
be reduced under thefo llowing conditions:
R theve hicle is not connected topowe r supp ly
equipment
R the high-voltage battery is not fully charged
Wi th active pre-ent ryclimate control, thech arge
le ve l of the high-voltage battery may be reduced,
eve n if thech arging cable connec tor is connec‐
te d.
When cooling, thefo llowing functions are activa‐
te d as needed:
R Automatic clima tecontrol
R Blower
R Seat ventilation
When heating, thefo llowing functions are activa‐
te d as needed:
R Automatic clima tecontrol
R Blower R
Seat hea ter
R Steering wheel heater
R Panel heating
R Mirror heater
R Rear wind owheater
R Frag rancing
R Ionisation
Setting pre-entry climate control at depar‐
ture time #
Call up the air conditioning menu (see the
section on climate contro l intheve hicle
Owner's Manual). #
Select Pre-entry climate ctrl .
Setting a single departure time #
Select ONCE. #
Set a departure time.
Changing the active departu retime #
Select the pen icon next tothe displa yed
departure time. #
Set a departure time. Climate control
15 5
Page 160 of 629
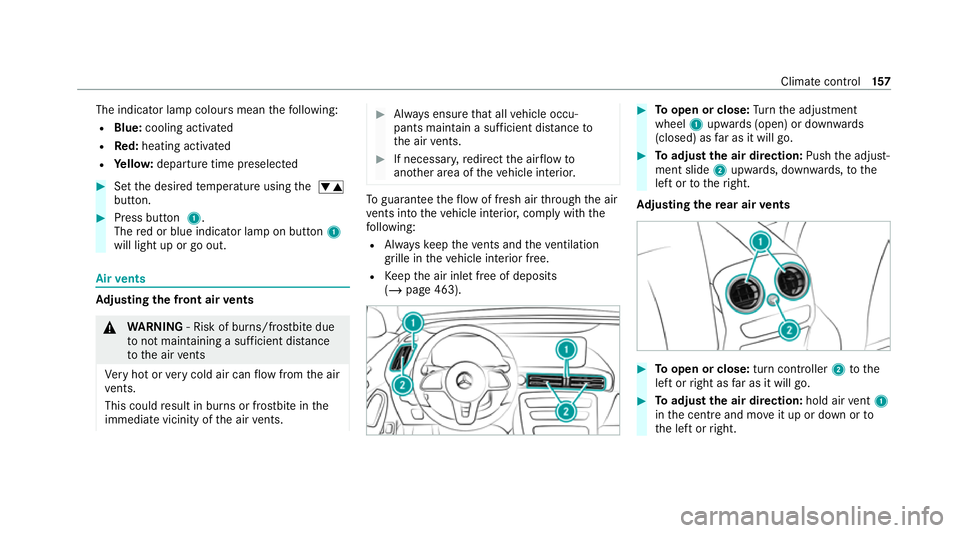
The indicator lamp colours mean
thefo llowing:
R Blue: cooling activated
R Red:heating acti vated
R Yello w: departure time preselected #
Set the desired temp erature using the w
button. #
Press button 1.
The red or blue indicator lamp on button 1
will light up or go out. Air
vents Ad
justing the front air vents &
WARNING ‑ Risk of bu rns/frostbite due
to not maintaining a su fficient dis tance
to the air vents
Ve ry hot or very cold air can flow from the air
ve nts.
This could result in burns or frostbite in the
immediate vicinity of the air vents. #
Alw ays ensure that all vehicle occu‐
pants maintain a suf ficient di stance to
th e air vents. #
If necessa ry,re direct the air flow to
ano ther area of theve hicle interior. To
guarantee theflow of fresh air thro ugh the air
ve nts into theve hicle interior, comply with the
fo llowing:
R Alw ayske ep theve nts and theve ntilation
grille in theve hicle interior free.
R Keep the air inlet free of deposits
(/ page 463). #
Toopen or close: Turn the adjustment
wheel 1upwards (open) or down wards
(closed) as far as it will go. #
Toadjust the air direction: Pushthe adjust‐
ment slide 2upwards, down wards, to the
left or totheright.
Ad justing the rear air vents #
Toopen or close: turn controller2tothe
left or right as far as it will go. #
Toadjust the air direction: hold airvent 1
in the cent reand mo veit up or down or to
th e left or right. Climate control
157