Page 267 of 629
VO
L: control knob, adjusts thevo lume or
switches the sound off 8(press)
6 Makes/accepts a call
~ Rejects/ends a call
5 ò Calls up the home screen
6 Touch Control multimedia sy stem
7 % Back button Operating
the on-boa rdcompu ter &
WARNING Risk of di stra ction from infor‐
mation sy stems and communications
equipment
If yo u operate information and communica‐
tion equipment integ rated in theve hicle
when driving, you will be distracted from the
traf fic situation. This could also cause youto
lose control of theve hicle. #
Only operate this equipment when the
traf fic situation permits. #
Ifyo u cannot be sure of this, stop the
ve hicle whilst paying attention toroad and traf
fic conditions and ope rate the
equipment with theve hicle stationar y. Obser
vethe legal requ irements forth e count ry
in which you are cur rently driving when operat‐
ing the on-board computer.
% The on-board computer displa yswill appear
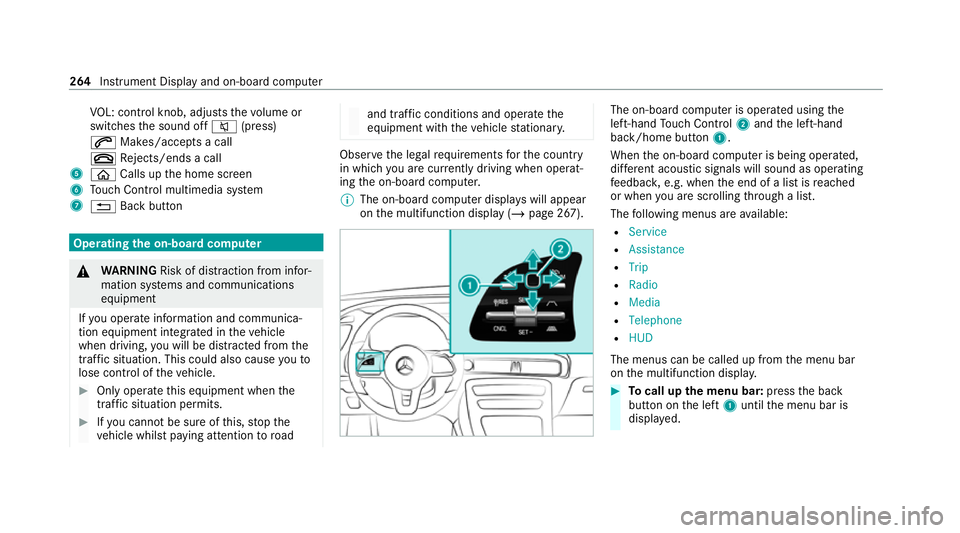
on the multifunction display (/ page 267). The on-board computer is operated using
the
left-hand Touch Control 2and the left-hand
back/home button 1.
When the on-board computer is being operated,
dif fere nt acoustic signals will sound as operating
fe edbac k,e.g. when the end of a list is reached
or when you are sc rolling thro ugh a list.
The following menus are available:
R Service
R Assistance
R Trip
R Radio
R Media
R Telephone
R HUD
The menus can be called up from the menu bar
on the multifunction displa y. #
Tocall up the menu bar: pressthe back
button on the left 1until the menu bar is
displa yed. 264
Instrument Display and on-board computer
Page 268 of 629
%
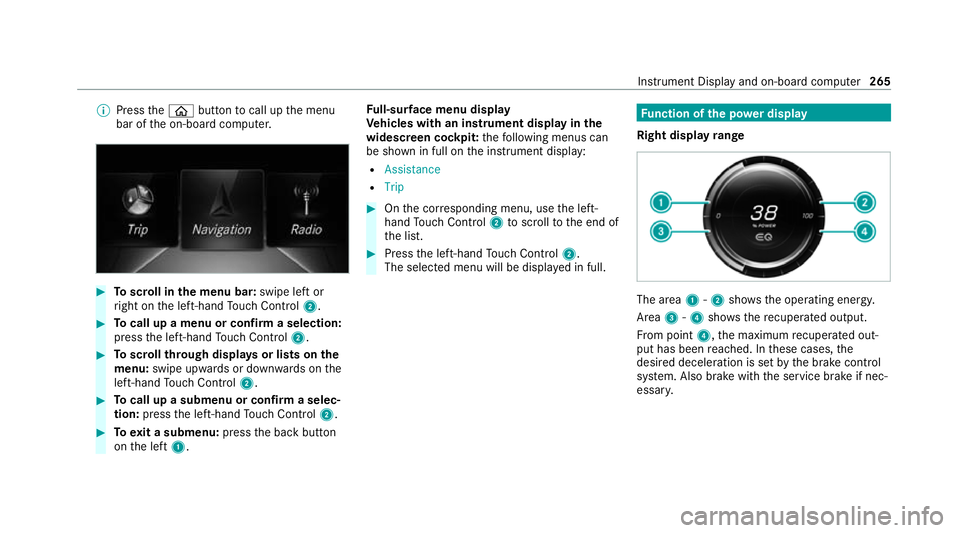
Press theò button tocall up the menu
bar of the on-board computer. #
Toscroll in the menu bar: swipe left or
ri ght on the left-hand Touch Control 2. #
Tocall up a menu or confirm a selection:
press the left-hand Touch Control 2. #
Toscroll through displa ysor lists on the
menu: swipe upwards or down wards on the
left-hand Touch Control 2. #
Tocall up a submenu or confirm a selec‐
tion: press the left-hand Touch Control 2. #
Toexit a submenu: pressthe back button
on the left 1. Fu
ll-sur face menu display
Ve hicles with an instrument display in the
widescreen cockpit: thefo llowing menus can
be shown in full on the instrument display:
R Assistance
R Trip #
Onthe cor responding menu, use the left-
hand Touch Control 2toscroll tothe end of
th e list. #
Press the left-hand Touch Control 2.
The selected menu will be displ ayed in full. Fu
nction of the po wer display
Right display range The area
1-2 showsthe operating energy.
Area 3-4 showsthere cuperated output.
Fr om point 4,the maximum recuperated out‐
put has been reached. In these cases, the
desired deceleration is set bythe brake control
sy stem. Also brake with the service brake if nec‐
essar y. Instrument Display and on-board computer
265
Page 269 of 629
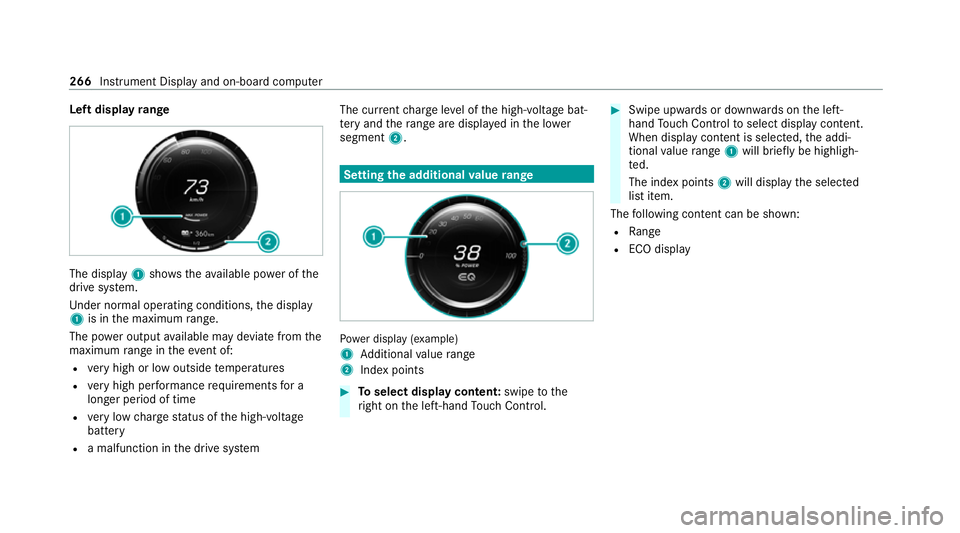
Left display
range The display
1showstheav ailable po wer of the
drive sy stem.
Und er normal operating conditions, the display
1 is in the maximum range.
The po wer output available may deviate from the
maximum range in theeve nt of:
R very high or low outside temp eratures
R very high per form ance requ irements for a
longer period of time
R very low charge status of the high-voltage
battery
R a malfunction in the drive sy stem The cur
rent charge leve l of the high-voltage bat‐
te ry and thera nge are displ ayed in the lo wer
segment 2. Setting the additional
value range Po
we r display (e xample)
1 Additional value range
2 Index points #
Toselect display content: swipetothe
ri ght on the left-hand Touch Control. #
Swipe upwards or down wards on the left-
hand Touch Control toselect display content.
When display content is selected, the addi‐
tional value range 1will brie fly be highligh‐
te d.
The index points 2will display the selected
list item.
The following con tent can be shown:
R Range
R ECO displ ay 266
Instrument Display and on-board computer
Page 270 of 629
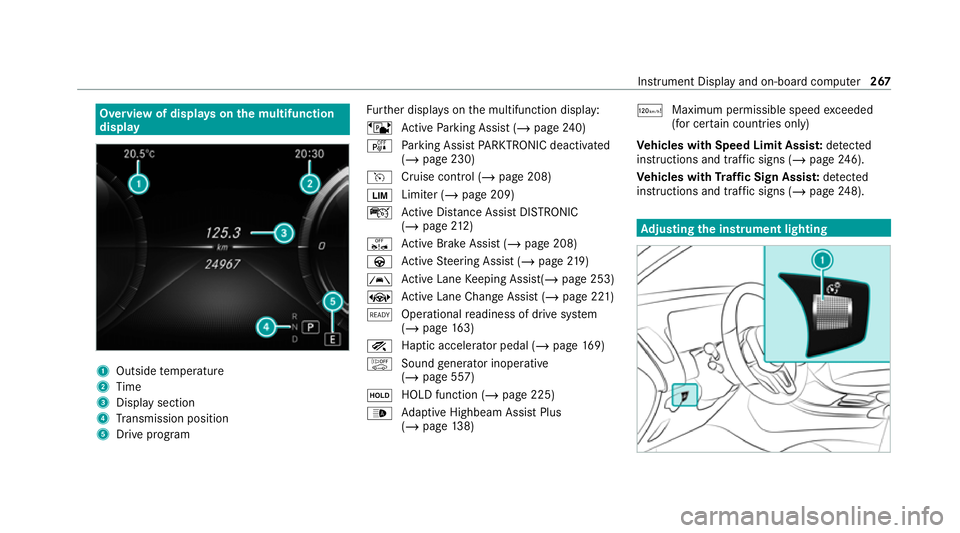
Overview of displa
yson the multifunction
display 1
Outside temp erature
2 Time
3 Display section
4 Transmission position
5 Drive prog ram Fu
rther displa yson the multifunction display:
ë Active Parking Assist (/ page240)
é Parking Assist PARKTRONIC deacti vated
( / page 230)
h Cruise control (/ page 208)
È Limiter (/
page 209)
ç Active Dis tance Assi stDISTRONIC
(/ page 212)
ê Active Brake Assi st (/ page 208)
à Active Steering Assist (/ page219)
à Ac
tive Lane Keeping Assist(/ page 253)
± Active Lane Change Assi st (/ page 221)
õ Operational readiness of drive sy stem
(/ page 163)
° Haptic accelerator pedal (/ page169)
ò Sound generator inope rative
(/ page 557)
ë HOLD function (/
page 225)
_ Ad
aptive Highbeam Assist Plus
(/ page 138) ð
Maximum permissible speed exceeded
(for cer tain countries only)
Ve hicles with Speed Limit Assis t:de tected
instructions and traf fic signs (/ page 246).
Ve hicles with Traf fic Sign Assis t:de tected
instructions and traf fic signs (/ page 248). Ad
justing the in strument lighting Instrument Displ
ayand on-board computer 267
Page 271 of 629
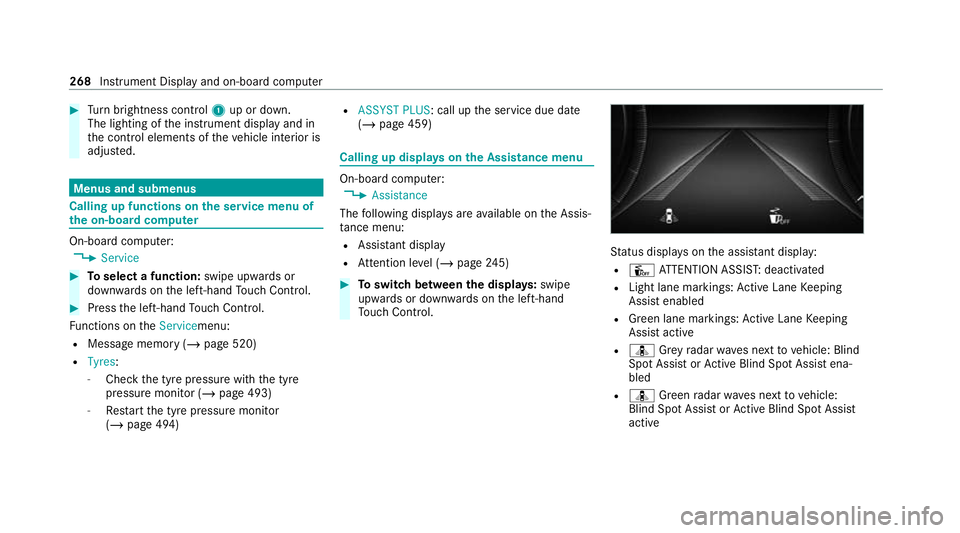
#
Turn brightness control 1up or down.
The lighting of the instrument display and in
th e control elements of theve hicle interior is
adjus ted. Menus and submenus
Calling up functions on
the service menu of
th e on-boa rdcompu ter On-board computer:
4 Service #
Toselect a function: swipe upwards or
down wards on the left-hand Touch Control. #
Press the left-hand Touch Control.
Fu nctions on theServicemenu:
R Message memory (/ page 520)
R Tyres:
- Check the tyre pressure with the tyre
pressure monitor (/ page 493)
- Restart the tyre pressure monitor
(/ page 494) R
ASSYST PLUS: call up the service due date
(/ page 459) Calling up displa
yson the Assistance menu On-board computer:
4 Assistance
The following displa ysare available on the Assis‐
ta nce menu:
R Assi stant display
R Attention le vel (/ page 245) #
Toswitch between the displa ys:swipe
upwards or down wards on the left-hand
To uch Control. St
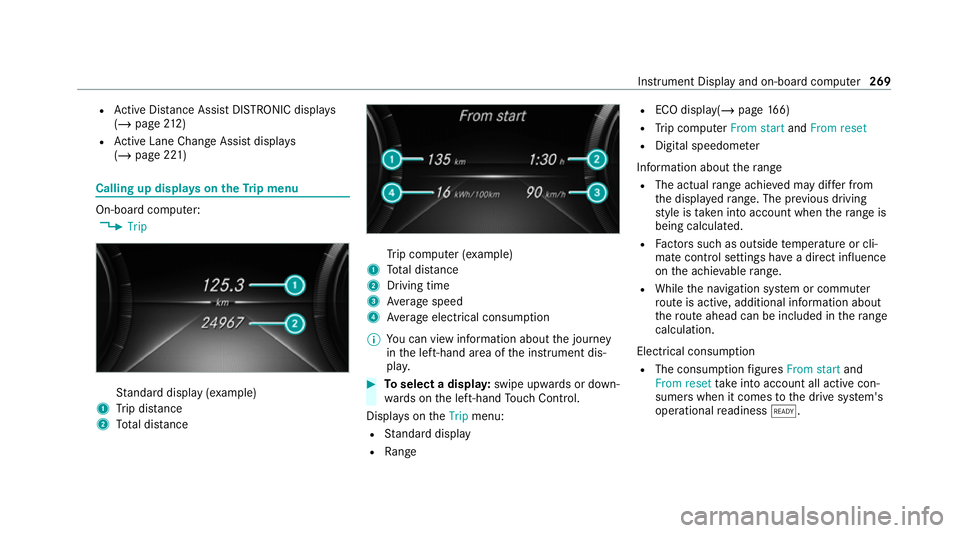
atus displa yson the assis tant displ ay:
R Û ATTENTION ASSIS T:deactivated
R Light lane markings: Active Lane Keeping
Assist enabled
R Green lane markings: Active Lane Keeping
Assist active
R ¸ Grey radar waves next tovehicle: Blind
Spot Assist or Active Blind Spot Assi stena‐
bled
R ¸ Green radar waves next tovehicle:
Blind Spot Assist or Active Blind Spot Assi st
active 268
Instru ment Display and on-board computer
Page 272 of 629
R
Active Dis tance Assi stDISTRONIC displa ys
( / page 212)
R Active Lane Change Assi stdispla ys
( / page 221) Calling up displa
yson theTr ip menu On-board computer:
4 Trip St
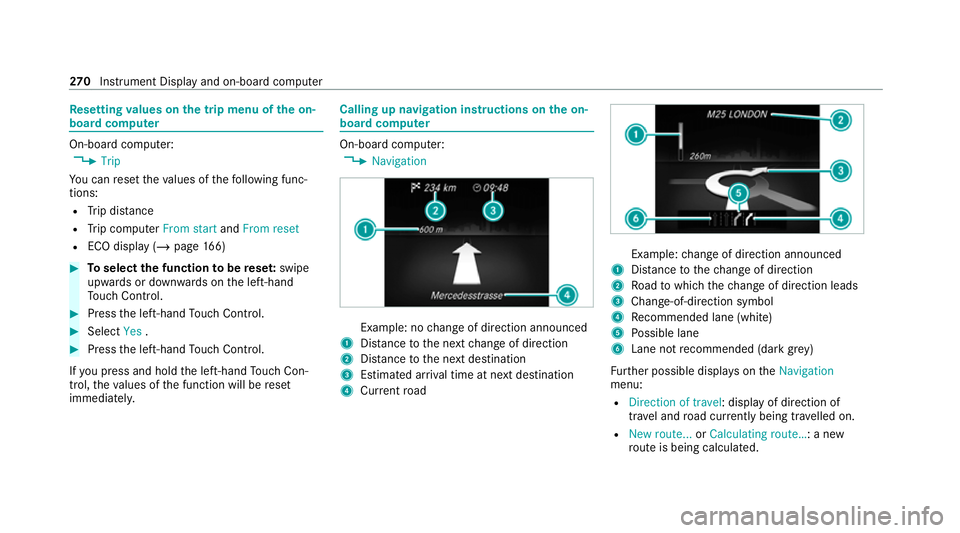
andard display (e xamp le)
1 Trip dis tance
2 Total dis tance Tr
ip computer (e xamp le)
1 Total dis tance
2 Driving time
3 Average speed
4 Average electrical consum ption
% You can view information about the journey
in the left-hand area of the instrument dis‐
pla y. #
Toselect a displa y:swipe upwards or down‐
wa rds on the left-hand Touch Control.
Displa yson theTrip menu:
R Standard display
R Range R
ECO displ ay(/ page 166)
R Trip computer From startandFrom reset
R Digital speedom eter
Information about thera nge
R The actual range achi eved may dif fer from
th e displa yedra nge. The pr evious driving
st yle is take n into account when thera nge is
being calculated.
R Factors su chas outside temp erature or cli‐
mate control settings ha vea direct influence
on the achie vable range.
R While the navigation sy stem or commuter
ro ute is active, additional information about
th ero ute ahead can be included in thera nge
calculation.
Electrical consu mption
R The consumption figures From start and
From reset take into account all active con‐
sumers when it comes tothe drive sy stem's
operational readiness õ. In
stru ment Display and on-board computer 269
Page 273 of 629
Re
setting values on the trip menu of the on-
board compu terOn-board computer:
4 Trip
Yo u can reset theva lues of thefo llowing func‐
tions:
R Trip dis tance
R Trip computer From startandFrom reset
R ECO display (/ page166) #
Toselect the function tobe rese t:swipe
upwards or down wards on the left-hand
To uch Control. #
Press the left-hand Touch Control. #
Select Yes. #
Press the left-hand Touch Control.
If yo u press and hold the left-hand Touch Con‐
trol, theva lues of the function will be reset
immediatel y. Calling up navigation instructions on
the on-
board compu ter On-board computer:
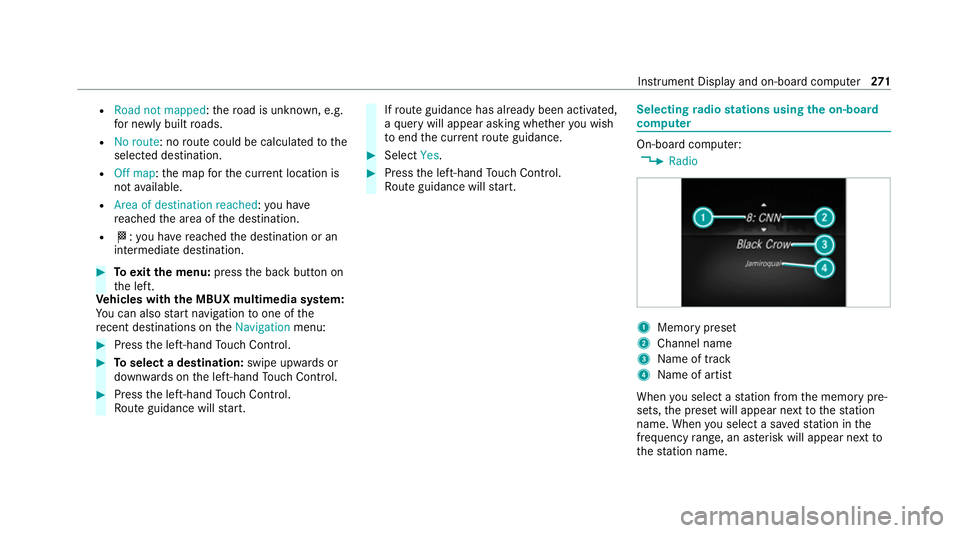
4 Navigation Example: no
change of direction announced
1 Distance tothe next change of direction
2 Distance tothe next destination
3 Estimated ar riva l time at next destination
4 Current road Example:
change of direction announced
1 Distance tothech ange of direction
2 Road towhich thech ange of direction leads
3 Chan ge-of-direction symbol
4 Recommended lane (white)
5 Possible lane
6 Lane not recommended (da rkgrey)
Fu rther possible displa yson theNavigation
menu:
R Direction of travel: display of direction of
tra vel and road cur rently being tr avelled on.
R New route... orCalculating route… : a new
ro ute is being calculated. 270
Instrument Display and on-board computer
Page 274 of 629
R
Road not mapped :th ero ad is unknown, e.g.
fo r newly built roads.
R No route: no route could be calculated tothe
selected destination.
R Off map: the map forth e cur rent location is
not available.
R Area of destination reached: you ha ve
re ached the area of the destination.
R O: you ha vereached the destination or an
intermediate destination. #
Toexitth e menu: pressthe back button on
th e left.
Ve hicles with the MBUX multimedia sy stem:
Yo u can also start navigation toone of the
re cent destinations on theNavigation menu: #
Press the left-hand Touch Control. #
Toselect a destination: swipe upwards or
down wards on the left-hand Touch Control. #
Press the left-hand Touch Control.
Ro ute guidance will start. If
ro ute guidance has already been activated,
a qu ery will appear asking whe ther you wish
to end the cur rent route guidance. #
Select Yes. #
Press the left-hand Touch Control.
Ro ute guidance will start. Selecting
radio stations using the on-boa rd
compu ter On-board computer:
4 Radio 1
Memory preset
2 Channel name
3 Name of track
4 Name of artist
When you select a station from the memory pre‐
sets, the preset will appear next tothest ation
name. When you select a sa vedstation in the
frequency range, an as terisk will appear next to
th est ation name. In
stru ment Display and on-board computer 271