2019 MERCEDES-BENZ EQC SUV charging
[x] Cancel search: chargingPage 5 of 629

Symbols
........................................................ 5At
agl ance .................................................... 6
Cockpit ........................................................... 6
Indica tor and warning lamps .......................... .8
Overhead contro l panel ................................ 10
Door control panel and seat adjustment ....... 12
Emergencies and breakdowns ...................... 14Digital Owner's Manual
.............................16
Calling up the Digital Owner's Manual ..........16 Genera
l notes............................................. 17
Pr otection of the environment ......................17
Ta ke -ba ckof end-of-life vehicles ...................17
Mercedes-Benz Genuine Parts ......................17
Owner's Manual ............................................ 18
Operating saf ety .......................................... .19
Declaration of Conformity ............................. 21
Diagno stics connection ................................ 25
Qualified specialist workshop ....................... 25
Ve hicle registration ....................................... 26
Cor rect use of theve hicle ............................26 Information on
the REA CHregulation ........... 26
Implied warranty .......................................... .26
QR code forre scue card ...............................27
Data storage .................................................27
Copyrights .................................................... 29 Occupant saf
ety......................................... 30
Re stra int sy stem ...........................................30
Seat belts ..................................................... 32
Airbags ......................................................... 37
PRE-SAFE ®
sy stem ....................................... 44
Safely transporting children in theve hi‐
cle ................................................................45
No tes on pets in theve hicle .........................70 Opening and closing
.................................. 72
Ke y .............................................................. .72
Doo rs............................................................ 76
Load compartment ....................................... 82
Side windo ws................................................ 87
Sliding sunroof .............................................. 91
Ro ller sunblinds ............................................ 95
Anti- theft pr otection .....................................96 Seats and
stowing ..................................... 99
Cor rect driver's seat position ....................... 99
Seats .......................................................... 100
St eering wheel ............................................ 108
Easy entry and exitfeature ........................ .110
Operating the memory function .................. 111
St ow age areas ............................................ .113
Cup holders ................................................ 12 6
Ashtr ayand cigar ette lighter ...................... .127
Soc kets ....................................................... 12 9
Wi reless charging of the mobile phone
and connection with theex terior aerial .......1 31
Fitting/removing thefloor mats ................. 13 2 Light and sight
......................................... 134
Exterior lighting .......................................... 13 4
Interior lighting ........................................... 14 0
Wi ndsc reen wipers and windscreen
wa sher sy stem ............................................ 14 2
Mir rors ........................................................ 14 6
Operating the sun visors ............................. 14 9 Climate control
........................................ 15 0
Overview of climate contro l systems ..........1 502
Contents
Page 6 of 629

Operating
the climate control sy stem ......... 15 0 Driving and pa
rking ................................. 15 8
Driving ........................................................ 15 8
DY NA MIC SELECT switch ............................1 69
Tr ansmission .............................................. .173
Fu nction of flex ible all-wheel distribution .... 175
Charging the high-voltage battery ............... 175
Pa rking ...................................................... .189
Driving and driving saf ety sy stems .............. 197
Tr ailer hit ch................................................ 256
Bicycle rack function .................................. 260
Ve hicle towing instructions ........................ .262 Instrument Display and on-board
comp uter.................................................. 263
Instrument display overview ...................... .263
Overview of the buttons on thesteering
wheel ..........................................................2 63
Operating the on-board computer .............. 264
Fu nction of the po wer display ..................... 265
Setting the additional value range .............. 266
Overview of displ ays on the multifunc‐
tion display .................................................2 67Ad
justing the instrument lighting ................2 67
Menus and submenus ................................ 268
Head-up Display .......................................... 274 LINGU
ATRO NIC ......................................... 275
No tes on operating saf ety .......................... .275
Operation ....................................................2 76
Using LINGU ATRO NIC ef fectively ................ 278
Essential voice commands ........................ .279 MBUX multimedia sy
stem ...................... 295
Overview and operation .............................. 295
Sy stem settings .......................................... 329
Fit & Healt hy............................................... 338
Na vigation .................................................. 343
Te lephone .................................................. .391
Online and Internet functions ..................... 427
Media ......................................................... 436
Ra dio .......................................................... 444
TV ............................................................... 447
Sound ......................................................... 455 Main
tenance and care ............................. 459
ASS YST PLUS service inter val display ........ 459
Engine compartment .................................. 460
Cleaning and care ...................................... .463 Breakdown assi
stance ............................ 473
Emergency ................................................. .473
Flat tyre ...................................................... 475
Battery (vehicle) ......................................... 480
To w- starting or towing away ....................... 482
Electrical fuses ........................................... 486 Wheels and tyres
..................................... 490
No tes on noise or unusual handling char‐
acteristics .................................................. .490
No tes on regular lyinspecting wheels and
tyres .......................................................... .490
No tes on snow chains ................................ 490
Ty re pressure .............................................. 491
Wheel change ............................................ .498
Emergency spa rewheel .............................. 508 Contents
3
Page 10 of 629
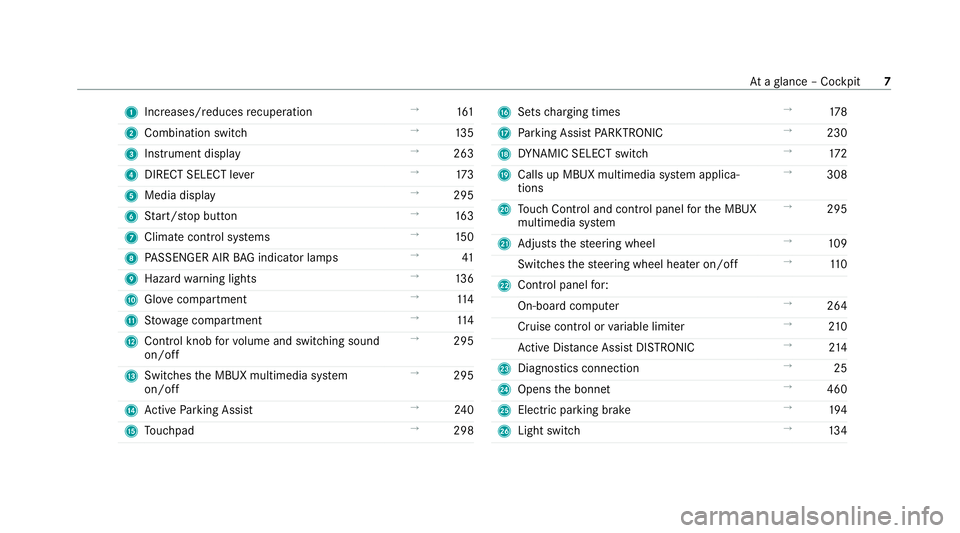
1
Increases/reduces recuperation →
161
2 Combination swit ch →
13 5
3 Instrument display →
263
4 DIRECT SELECT le ver →
173
5 Media display →
295
6 Start/ stop button →
16 3
7 Climate cont rol sy stems →
15 0
8 PASSENGER AIR BAG indicator lamps →
41
9 Haza rdwa rning lights →
13 6
A Glovecompa rtment →
11 4
B Stow age compartment →
11 4
C Control knob forvo lume and switching sound
on/off →
295
D Swit ches the MBUX multimedia sy stem
on/off →
295
E Active Parking Assist →
24 0
F Touchpad →
298 G
Sets charging times →
178
H Parking Assist PARKTRONIC →
230
I DYNA MIC SELECT switch →
172
J Calls up MBUX multimedia sy stem applica‐
tions →
308
K Touch Control and cont rol panel forth e MBUX
multimedia sy stem →
295
L Adjusts thesteering wheel →
109
Switches thesteering wheel heater on/off →
11 0
M Control panel for:
On-board computer →
264
Cruise contro l orvariable limiter →
210
Ac tive Dis tance Assi stDISTRONIC →
214
N Diagno stics connection →
25
O Opens the bonn et →
460
P Electric parking brake →
194
Q Light switch →
13 4 At
aglance – Cockpit 7
Page 28 of 629
Auth
orised representative: IMS dept.
Date: June 20 15
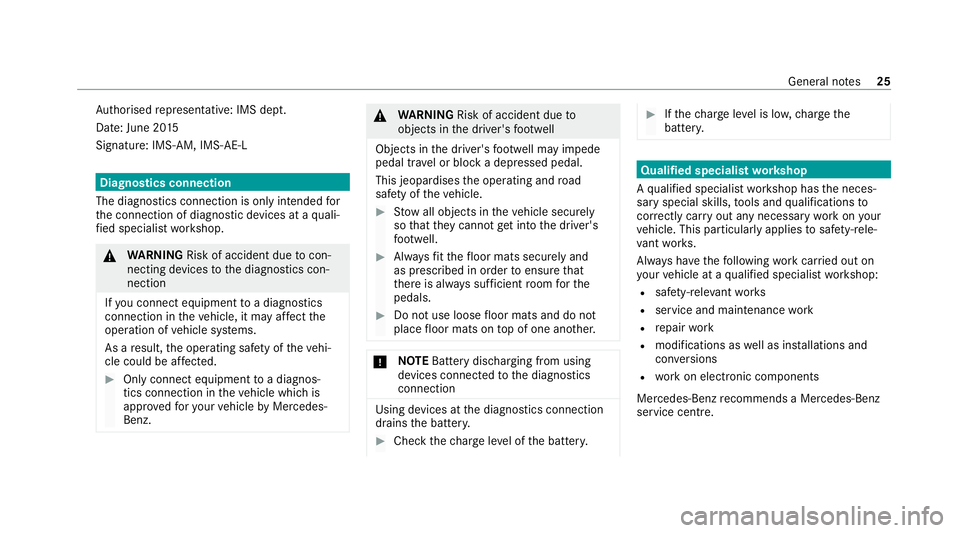
Signatu re: IMS-AM, IMS-AE-L Diagnostics connection
The diagnostics connection is only intended for
th e connection of diagnostic devices at a quali‐
fi ed specialist workshop. &
WARNING Risk of accident due tocon‐
necting devices tothe diagnostics con‐
nection
If yo u connect equipment toa diagnostics
connection in theve hicle, it may af fect the
operation of vehicle sy stems.
As a result, the operating saf ety of theve hi‐
cle could be af fected. #
Only connect equipment toa diagnos‐
tics connection in theve hicle which is
appr ovedfo ryo ur vehicle byMercedes-
Benz. &
WARNING Risk of accident due to
objects in the driver's foot we ll
Objects in the driver's foot we ll may impede
pedal tr avel or block a depressed pedal.
This jeopardises the operating and road
saf ety of theve hicle. #
Stow all objects in theve hicle securely
so that they cannot getinto the driver's
fo ot we ll. #
Alw aysfit th efloor mats securely and
as prescribed in order toensure that
th ere is alw ays suf ficient room forthe
pedals. #
Do not use loose floor mats and do not
place floor mats on top of one ano ther. *
NO
TEBattery discharging from using
devices connected tothe diagnostics
connection Using devices at
the diagnostics connection
drains the batter y. #
Check thech arge leve l of the batter y. #
Ifth ech arge leve l is lo w,charge the
batter y. Qualified specialist
workshop
A qu alified specialist workshop has the neces‐
sary special skills, tools and qualifications to
cor rectly car ryout any necessary workon your
ve hicle. This particularly applies tosaf ety-re le‐
va nt wo rks.
Alw ays ha vethefo llowing workcar ried out on
yo ur vehicle at a qualified specialist workshop:
R safety-re leva nt wo rks
R service and maintenance work
R repair work
R modifications as well as ins tallations and
con versions
R workon electronic components
Mercedes‑Benz recommends a Mercedes‑Benz
service centre. General no
tes25
Page 117 of 629

St
ow age spaces in theve hicle interior Overview of
the front stowage compa rt‐
ments 1
Stow age space in the doors
2 Stow age compartment in the armrest with a
multimedia and USB connection
3 Stow age compartment in the front cent re
console wi tha USB connection and charging
module for wireless charging of a mobile
phone (not available in all countries)
4 Glovecompa rtment Locking/unlo
cking thegl ove compa rtment #
Turn the emer gency key a quarter turn clock‐
wise 2(to lock) or anti-clockwise 1(to
unlock). Opening
the spectacles compa rtment #
Press button 1.
Opening the stowage compa rtment in the
re ar armrest 11 4
Seats and stowing
Page 134 of 629
Wire
lesscharging of the mobile phone and
connection with theex terior aerial Note
s on wirelessly charging the mobile
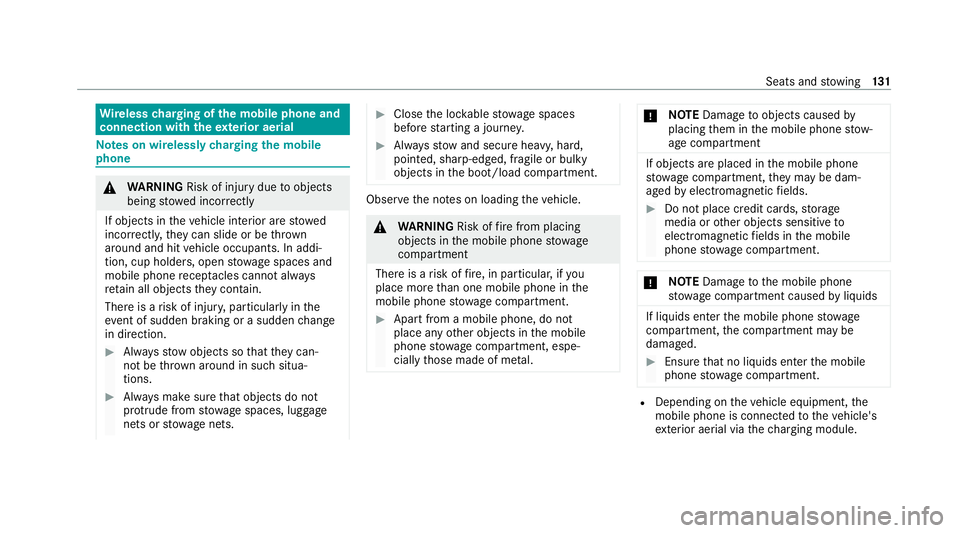
phone &
WARNING Risk of inju rydue toobjects
being stowed incor rectly
If objects in theve hicle interior are stowed
incor rectly, they can slide or be thrown
around and hit vehicle occupants. In addi‐
tion, cup holders, open stowage spaces and
mobile phone recep tacles cannot al ways
re tain all objects they contain.
The reis a risk of injur y,particularly in the
ev ent of sudden braking or a sudden change
in direction. #
Alw aysstow objects so that they can‐
not be throw n around in su chsitua‐
tions. #
Alw ays make sure that objects do not
pr otru de from stowage spaces, luggage
nets or stowage nets. #
Close the loc kable stow age spaces
before starting a journe y. #
Alw aysstow and secure heavy, hard,
poin ted, sharp-edged, fragile or bulky
objects in the boot/load compartment. Obser
vethe no tes on loading theve hicle. &
WARNING Risk offire from placing
objects in the mobile phone stowage
compartment
There is a risk of fire , in particular, if you
place more than one mobile phone in the
mobile phone stowage compartment. #
Apart from a mobile phone, do not
place any other objects in the mobile
phone stowage compartment, espe‐
cially those made of me tal. *
NO
TEDama getoobjects caused by
placing them in the mobile phone stow‐
age compartment If objects are placed in
the mobile phone
stow age compartment, they may be dam‐
aged byelectromagnetic fields. #
Do not place credit cards, storage
media or other objects sensitive to
electromagnetic fields in the mobile
phone stowage compartment. *
NO
TEDama getothe mobile phone
stow age compartment caused byliquids If liquids enter
the mobile phone stowage
compartment, the compartment may be
damaged. #
Ensure that no liquids enter the mobile
phone stowage compartment. R
Depending on theve hicle equipment, the
mobile phone is connected totheve hicle's
ex terior aerial via thech arging module. Seats and
stowing 131
Page 135 of 629
R
The charging function and wireless connec‐
tion of the mobile phone totheve hicle's
ex terior aerial are only available if the ignition
is switched on.
R Small mobile phones may not be able tobe
ch arge d in everyposition of the mobile
phone stowage compartment.
R Largemobile phones which do not rest flat in
th e mobile phone stowage compartment may
not be able tobe charge d or connec ted with
th eve hicle's exterior aerial.
R The mobile phone may heat up during the
ch arging process. This may particular ly
depend on the applications (apps) cur rently
open in the bac kground.
R Toensure more ef ficient charging and con‐
nection with theve hicle's exterior aerial,
re mo vethe pr otective co ver from the mobile
phone. Pr otective co vers which are neces‐
sary for wireless charging are excluded. Wi
relessly charging a mobile phone Requ
irements: R
The mobile phone is suitable for wireless
ch arging. You can find a li stof compatible
mobile phones at:
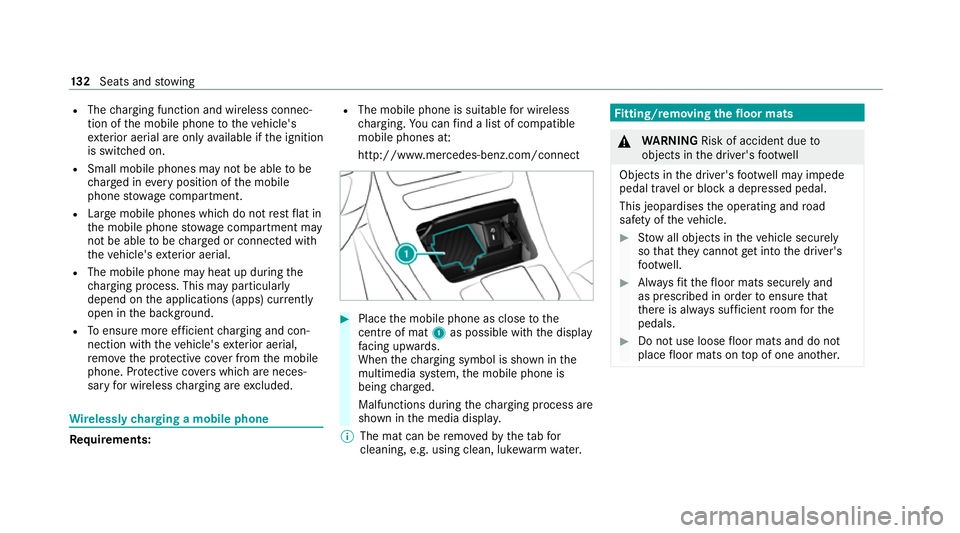
http://www.mercedes-benz.com/connect #
Place the mobile phone as close tothe
centre of mat 1as possible wi th the display
fa cing up wards.
When thech arging symbol is shown in the
multimedia sy stem, the mobile phone is
being charge d.
Malfunctions during thech arging process are
shown in the media displa y.
% The mat can be remo vedby theta bfor
cleaning, e.g. using clean, lu kewa rm wate r. Fi
tting/ removing the floormats &
WARNING Risk of accident due to
objects in the driver's foot we ll
Objects in the driver's foot we ll may impede
pedal tr avel or block a depressed pedal.
This jeopardises the operating and road
saf ety of theve hicle. #
Stow all objects in theve hicle securely
so that they cannot getinto the driver's
fo ot we ll. #
Alw aysfit th efloor mats securely and
as prescribed in order toensure that
th ere is alw ays suf ficient room forthe
pedals. #
Do not use loose floor mats and do not
place floor mats on top of one ano ther. 13 2
Seats and stowing
Page 137 of 629
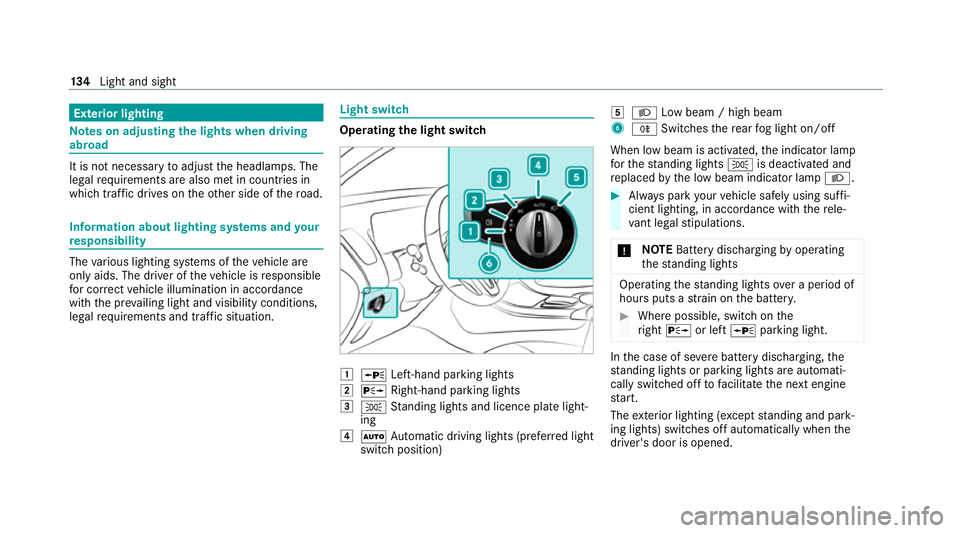
Exterior lighting
Note
s on adjusting the lights when driving
abroad It is not necessary
toadjust the headlamps. The
legal requirements are also met in countries in
which traf fic drives on theot her side of thero ad. Information about lighting sy
stems and your
re sponsibility The
various lighting sy stems of theve hicle are
only aids. The driver of theve hicle is responsible
fo r cor rect vehicle illumination in accordance
with the pr evailing light and visibility conditions,
legal requirements and traf fic situation. Light switch
Ope
rating the light switch 1
W Left-hand pa rking lights
2 X Right-hand parking lights
3 T Standing lights and licence plate light‐
ing
4 Ã Automatic driving lights (prefer red light
switch position) 5
L Low beam / high beam
6 R Switches there ar fog light on/off
When low beam is activated, the indicator lamp
fo rth est anding lights Tis deactivated and
re placed bythe low beam indicator lamp L. #
Alw ays park your vehicle safely using suf fi‐
cient lighting, in acco rdance with there le‐
va nt le galst ipulations.
* NO
TEBattery discharging byoperating
th est anding lights Operating
thest anding lights over a period of
hours puts a stra in on the batter y. #
Where possible, switch on the
ri ght X or left Wparking light. In
the case of se vere battery discharging, the
st anding lights or parking lights are automati‐
cally swit ched off tofacilitate the next engine
st art.
The exterior lighting (e xcept standing and park‐
ing lights) swit ches off automatically when the
driver's door is opened. 134
Light and sight