2019 MERCEDES-BENZ EQC SUV change time
[x] Cancel search: change timePage 4 of 629

We
lcome totheworl d of Mercedes-Benz
Before youfirs t drive off, read this Owner's Man‐
ual carefully and familiarise yourself with your
ve hicle. Foryo ur ow n sa fety and a longer operat‐
ing li fespan of theve hicle, follow the instructions
and warning notices in this Owner's Manual. Dis‐
re ga rding them may lead todamage totheve hi‐
cle or injury topeople.
The standard equipment and product desc ript ion
of your vehicle may vary and depends on thefo l‐
lowing factors:
R model
R order
R national version
R availability
The illustrations in this Owner's Manual show a
left-hand drive vehicle. On right-hand-drive vehi‐
cles, the la yout of car parts and cont rol ele‐
ments dif fers accordin gly.
Mercedes-Benz is cons tantly de veloping its vehi‐
cles fur ther. Mercedes-Benz
therefore reser vesth eright to
int roduce changes in thefo llowing areas:
R design
R equipment
R tech nical features
The equipment in your vehicle may therefore dif‐
fe r from that shown in the descriptions and illus‐
trations.
The following documents are integral parts of
th eve hicle:
R Digital Owner's Manual
R printed Owner's Manual
R service booklet
R equipment-dependent Supplements
Ke ep these documents in theve hicle at all
times. If you sell theve hicle, alw ays pass all of
th e documents on tothe new owner.
2935843001Z102
2935843001Z102
Page 6 of 629

Operating
the climate control sy stem ......... 15 0 Driving and pa
rking ................................. 15 8
Driving ........................................................ 15 8
DY NA MIC SELECT switch ............................1 69
Tr ansmission .............................................. .173
Fu nction of flex ible all-wheel distribution .... 175
Charging the high-voltage battery ............... 175
Pa rking ...................................................... .189
Driving and driving saf ety sy stems .............. 197
Tr ailer hit ch................................................ 256
Bicycle rack function .................................. 260
Ve hicle towing instructions ........................ .262 Instrument Display and on-board
comp uter.................................................. 263
Instrument display overview ...................... .263
Overview of the buttons on thesteering
wheel ..........................................................2 63
Operating the on-board computer .............. 264
Fu nction of the po wer display ..................... 265
Setting the additional value range .............. 266
Overview of displ ays on the multifunc‐
tion display .................................................2 67Ad
justing the instrument lighting ................2 67
Menus and submenus ................................ 268
Head-up Display .......................................... 274 LINGU
ATRO NIC ......................................... 275
No tes on operating saf ety .......................... .275
Operation ....................................................2 76
Using LINGU ATRO NIC ef fectively ................ 278
Essential voice commands ........................ .279 MBUX multimedia sy
stem ...................... 295
Overview and operation .............................. 295
Sy stem settings .......................................... 329
Fit & Healt hy............................................... 338
Na vigation .................................................. 343
Te lephone .................................................. .391
Online and Internet functions ..................... 427
Media ......................................................... 436
Ra dio .......................................................... 444
TV ............................................................... 447
Sound ......................................................... 455 Main
tenance and care ............................. 459
ASS YST PLUS service inter val display ........ 459
Engine compartment .................................. 460
Cleaning and care ...................................... .463 Breakdown assi
stance ............................ 473
Emergency ................................................. .473
Flat tyre ...................................................... 475
Battery (vehicle) ......................................... 480
To w- starting or towing away ....................... 482
Electrical fuses ........................................... 486 Wheels and tyres
..................................... 490
No tes on noise or unusual handling char‐
acteristics .................................................. .490
No tes on regular lyinspecting wheels and
tyres .......................................................... .490
No tes on snow chains ................................ 490
Ty re pressure .............................................. 491
Wheel change ............................................ .498
Emergency spa rewheel .............................. 508 Contents
3
Page 31 of 629

Fa
ult memories in theve hicle can be reset by a
service outlet as part of repair or maintenance
wo rk.
Depending on the selected equipment, you can
import data into vehicle con venience and info‐
ta inment functions yourself.
This includes, forex ample:
R multimedia data such as music, films or pho‐
to sfo r playback in an integrated multimedia
sy stem
R address book data for use in connection with
an integrated hands-free sy stem or an inte‐
grated navigation sy stem
R entered navigation destinations
R data about the use of internet services
This data can be sa ved locally in theve hicle or it
is located on a device which you ha veconnected
to theve hicle (e.g. a smartphone, USB flash
drive or MP3 pla yer). If this data is stored in the
ve hicle, you can dele teit at any time. This data
is sent tothird parties only at your requ est, par‐
ticular lywhen you use online services in accord‐
ance with the settings that you ha veselected. Yo
u can store or change con venience settings/
individualisations in theve hicle at any time.
Depending on the equipment, this includes, for
ex ample:
R settings forth e seat and steering wheel posi‐
tions
R suspension and climate control settings
R customisations such as interior lighting
If yo ur vehicle is accordingly equipped, you can
connect your smartphone or ano ther mobile end
device totheve hicle. You can cont rolth is by
means of the control elements integrated in the
ve hicle. Images and audio from the smartphone
can be output via the multimedia sy stem. Cer‐
ta in information is simultaneously transfer redto
yo ur smartphone.
Depending on the type of integration, this can
include:
R general vehicle data
R position data
This allo wsyouto use selected apps on your
smartphone, such as navigation or music play‐ bac
k.There is no fur ther interaction between the
smartphone and theve hicle; in particular, vehi‐
cle data is not directly accessible. Which type of
fur ther data processing occurs is de term ined by
th e pr ovider of the specific app used. Which set‐
tings you can make, if an y,depends on the spe‐
cific app and the operating sy stem of your
smartphone. Online services
Wire
less network connection
If yo ur vehicle has a wireless network connec‐
tion, it enables data tobe exc hanged between
yo ur vehicle and additional sy stems. The wire‐
less network connection is enabled via theve hi‐
cle's transmission and reception unit or via con‐
nected mobile end devices (e.g. sma rtphones).
Online functions can be used via the wireless
network connection. This includes online serv‐
ices and applications/apps pr ovided bythe man‐
ufacturer or other pr oviders.
Manu factu rer's se rvices
Re garding online services of the manufacturer,
th e individual functions are described bythe 28
General no tes
Page 108 of 629
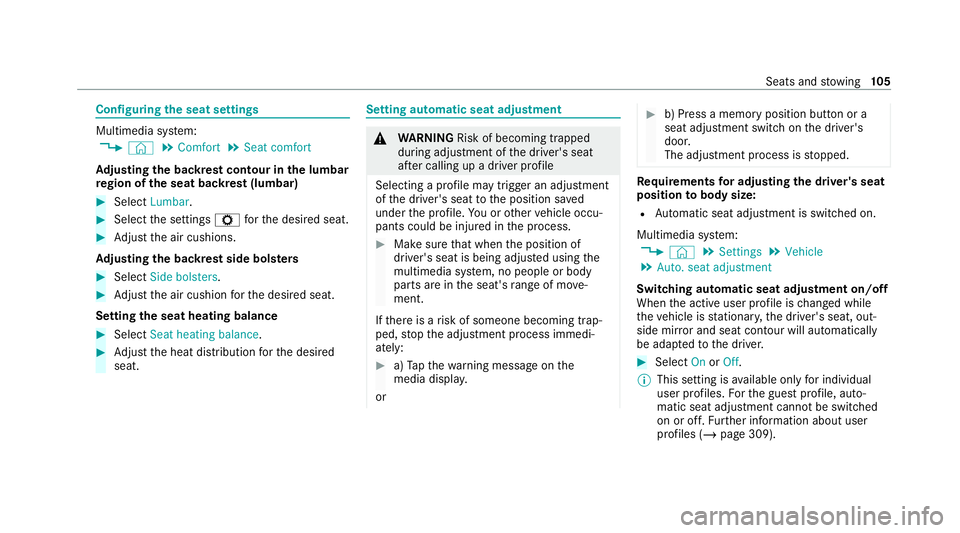
Configuring
the seat settings Multimedia sy
stem:
4 © 5
Comfort 5
Seat comfort
Ad justing the backrest contour in the lumbar
re gion of the seat backrest (lumbar) #
Select Lumbar . #
Select the settings Zforth e desired seat. #
Adjust the air cushions.
Ad justing the backrest side bols ters #
Select Side bolsters . #
Adjust the air cushion forth e desired seat.
Setting the seat heating balance #
Select Seat heating balance. #
Adjust the heat distribution forth e desired
seat. Setting automatic seat adjustment
&
WARNING Risk of becoming trapped
du ring adjustment of the driver's seat
af te r calling up a driver profile
Selecting a profile may trigger an adju stment
of the driver's seat tothe position sa ved
under the profile. You or other vehicle occu‐
pants could be injured in the process. #
Make sure that when the position of
driver's seat is being adjus ted using the
multimedia sy stem, no people or body
parts are in the seat's range of mo ve‐
ment.
If th ere is a risk of someone becoming trap‐
ped, stop the adjustment process immedi‐
ately: #
a)Tapth ewa rning message on the
media displa y.
or #
b) Press a memory position button or a
seat adjustment switch on the driver's
door.
The adjustment process is stopped. Re
quirements for adjusting the driver's seat
position tobody size:
R Automatic seat adju stment is switched on.
Multimedia sy stem:
4 © 5
Settings 5
Vehicle
5 Auto. seat adjustment
Switching automatic seat adjustment on/off
When the active user profile is changed while
th eve hicle is stationar y,the driver's seat, out‐
side mir ror and seat contour will auto matically
be adapte dto the driver. #
Select OnorOff.
% This setting is available on lyfor individual
user profiles. Forth e guest profile, auto‐
matic seat adjustment cann otbe switched
on or off. Further information about user
profiles (/ page 309). Seats and
stowing 105
Page 109 of 629
Ad
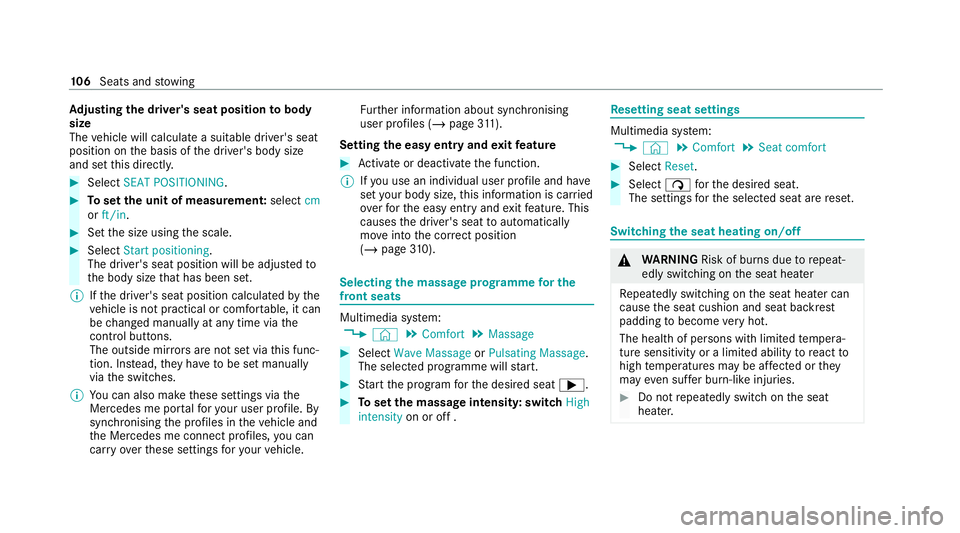
justing the driver's seat position tobody
size
The vehicle will calculate a suitable driver's seat
position on the basis of the driver's body size
and set this direct ly. #
Select SEAT POSITIONING .#
Toset the unit of measurement: selectcm
or ft/in. #
Set the size using the scale. #
Select Start positioning.
The driver's seat position will be adjus tedto
th e body size that has been set.
% Ifth e driver's seat position calculated bythe
ve hicle is not practical or comfor table, it can
be changed manually at any time via the
control buttons.
The outside mir rors are not set via this func‐
tion. Ins tead, they have tobe set manually
via the switches.
% You can also make these settings via the
Mercedes me por talfo ryo ur user profile. By
syn chro nising the profiles in theve hicle and
th e Mercedes me connect profiles, you can
car ryove rth ese settings foryo ur vehicle. Fu
rther information about synchronising
user profiles (/ page311).
Setting the easy entry and exitfeature #
Activate or deacti vate the function.
% Ifyo u use an individual user profile and ha ve
set your body size, this information is car ried
ove rfo rth e easy entry andexitfeature. This
causes the driver's seat toautomatically
mo veinto the cor rect position
(/ page 310). Selec
ting the massage prog ramme for the
front seats Multimedia sy
stem:
4 © 5
Comfort 5
Massage #
Select Wave Massage orPulsating Massage .
The selected prog ramme will start. #
Start the program forth e desired seat ;. #
Toset the massage intensit y:switch High
intensity on or off . Re
setting seat settings Multimedia sy
stem:
4 © 5
Comfort 5
Seat comfort #
Select Reset. #
Select ßforth e desired seat.
The settings forth e selected seat are reset. Switching
the seat heating on/off &
WARNING Risk of bu rns due torepeat‐
edly switching on the seat heater
Re peatedly switching on the seat heater can
cause the seat cushion and seat backrest
padding tobecome very hot.
The health of persons with limited temp era‐
ture sensitivity or a limited ability toreact to
high temp eratures may be af fected or they
may even su ffer burn-like injuries. #
Do not repeatedly switch on the seat
heater. 106
Seats and stowing
Page 139 of 629
High beam
#
Toswitch on: turnthe light switch tothe
L orà position. #
Press the combination switch be yond the
point of resis tance in the direction of ar row
1 .
When the main beam is activated, the indica‐
to r lamp for dipped beam Lis deactiva‐
te d and replaced bythe indicator lamp for
th e main beam K.#
Toswitch off: movethe combination switch
back toits starting position.
Headla mpflasher #
Pull the combination switch in the direction
of ar row3.
Tu rn signal indicators #
Toindicate briefl y:press the combination
switch briefly tothe point of resis tance in the
direction of ar row2or4.
The cor responding turn signal indicator will
fl ash thre e times. #
Toindicate permanentl y:press the combi‐
nation switch be yond the point of resis tance
in the direction of ar row2or4.
Ve hicles with Active Lane Change Assi st:
R Indicator operation activated bythe driver
can extend forth e duration of the lane
ch ange.
R Ifth e driver indicated directly beforehand
but a lane change was not immediately
possible, the turn signal indicator may
activate automaticall y. Ac
tivating/deactivating the hazard warning
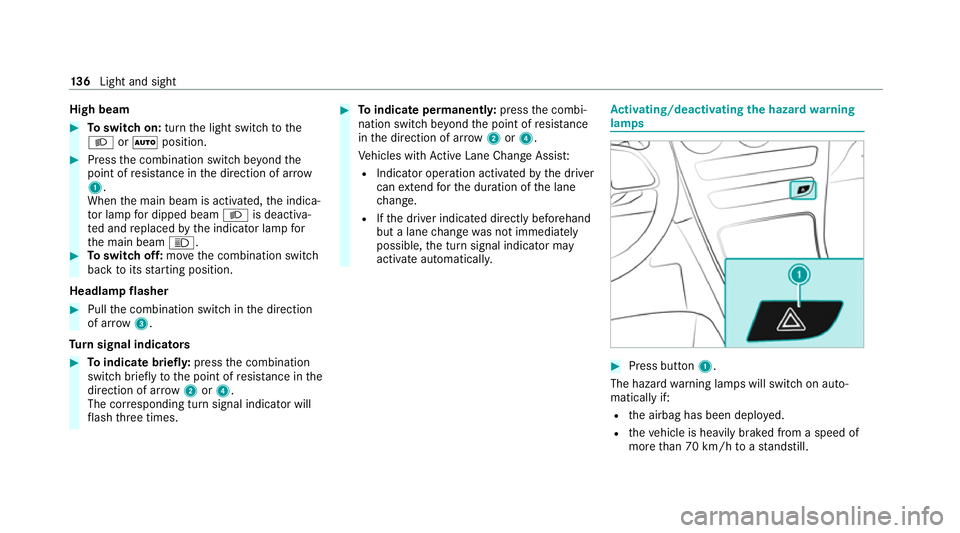
lamps #
Press button 1.
The hazard warning lamps will switch on auto‐
matically if:
R the airbag has been deplo yed.
R theve hicle is heavily braked from a speed of
more than 70 km/h toast andstill. 13 6
Light and sight
Page 145 of 629
#
Select Multi-colour.
The reare ten preset colour combinations
av ailable. #
Select a colour combination.
Ac tivating multi-coloured animation #
Select Colour. #
Select Multi-colour animat..
The chosen colour combination will change
at predefined inter vals.
Ac tivating welcome lighting #
Select Colour. #
Select Welcome.
When theve hicle is unloc ked, a special ambi‐
ent lighting sequence will run.
Ac tivating dependency on air conditioning
settings #
Select Colour. #
Select Climate.
If ch anges are made tothete mp erature set‐
ting in theve hicle, the colour of the ambient
lighting will change brief ly. Switching
the interior lighting switch-off
delay time on/off Multimedia sy
stem:
4 © 5
Settings 5
Lights
5 Int. light. del. sw. off #
Switch the lighting switch-off delay time on
or off.
When this function is active, the interior light‐
ing is lit up for short time af terth eve hicle
has been loc ked. Wi
ndscreen wipers and windscreen washer
sy stem Switching
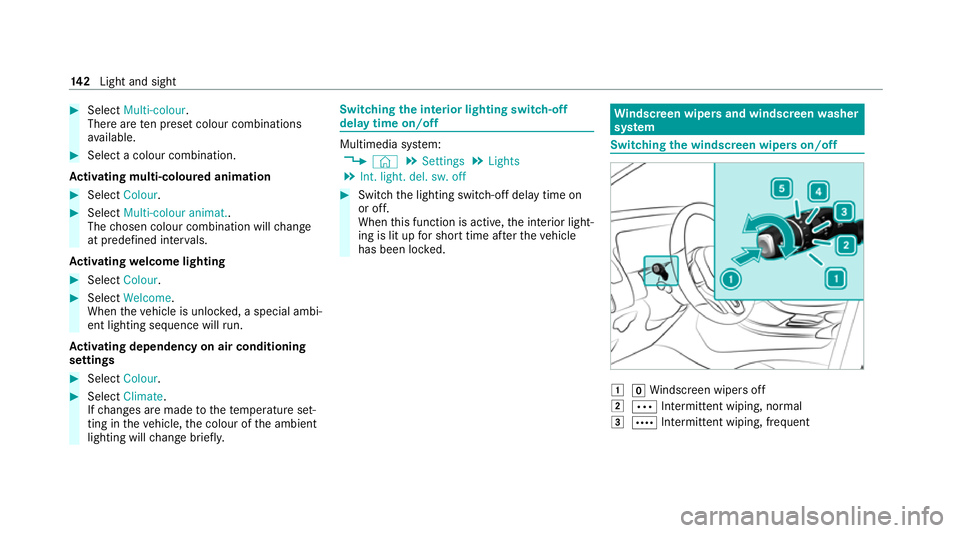
the windscreen wipers on/off 1
gWindsc reen wipers off
2 Ä Intermittent wiping, normal
3 Å Intermittent wiping, frequent 14 2
Light and sight
Page 179 of 629
*
NO
TEDama gecaused tothe high-volt‐
age battery thro ugh lengt hyidle periods
or exhaustive discharging Lengt
hyidle periods with a high charge level
may result in an accelerated ageing of the
high-voltage batter y.
Exhaustive discha rging caused bythe battery
being idle for lengt hyperiods can damage
th e high-voltage batter y.#
Before long idle periods, pa rktheve hi‐
cle with a high-voltage battery charge
le ve l between 30% and 50%. Do not
ke ep the high-voltage battery continu‐
ously connected topowe r supp lyequip‐
ment. #
Check thech arge leve l of the high-volt‐
age battery every two tothre e months.
Re charge the high-voltage battery if the
ch arge leve l is insuf ficient. As a
result of its basic characteristics, the
amount of ene rgyav ailable from the high-voltage
battery decreases overth e course of its life. Due
tothis, the maximum range that can be ach‐
ie ve dby theve hicle is reduced and the maxi‐
mum output (acceleration) of theve hicle can be
re duced.
Yo u can cont ribute toreducing theve hicle's
energy consum ption in thefo llowing ways:
R An anticipatory driving style (/ page166)
R Reduced use of elect rical consumers
R Having theve hicle regularly maintained
The charging time of the high-voltage battery
may change overth e course of its life.
% You can check thech arge leve l of the high-
vo ltage battery in the multimedia sy stem
(/ page 160)
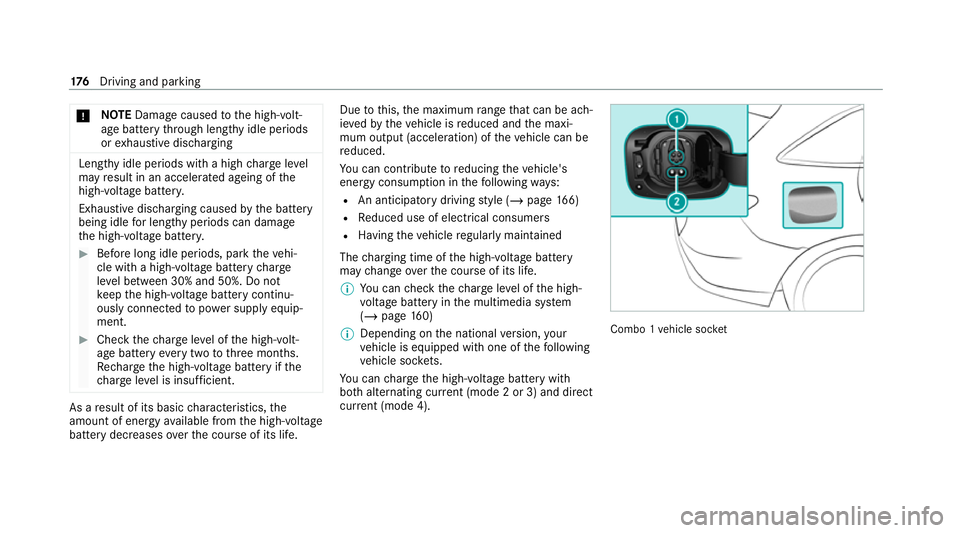
% Depending on the national version, your
ve hicle is equipped with one of thefo llowing
ve hicle soc kets.
Yo u can charge the high-voltage battery with
bo th alternating cur rent (mode 2 or 3) and di rect
cur rent (mode 4). Combo 1
vehicle soc ket 176
Driving and pa rking