2019 MERCEDES-BENZ AMG GT ROADSTER open hood
[x] Cancel search: open hoodPage 14 of 298
Hood
Closing ........................................... 236
Display message ............................ 196
Important safety notes .................. 235
Opening ........................................ .235
Horn ...................................................... 33
Hydroplaning ..................................... 134 I
Ignition key see SmartKey
Ignition lock
see Key positions
Immobilizer .......................................... 64
Indicator lamps
see Warning and indicator lamps
Indicators
see Turn signals
Inspection
see ASSYST PLUS
Instrument cluster
Overview .......................................... 34
Warning and indicator lamps ........... 34
Instrument cluster lighting .............. 169
Interior lighting
Automatic control .......................... 100
Overview .......................................... 99
Reading lamp ................................... 99
Setting the brightness of the dis-
play/switch (on-board computer) .. 169
iPod ®
see also Digital Operator's Man-
ual ................................................. .209 J
Jack Using ............................................. 282
Jump starting (engine) ......................256 K
Key positions SmartKey ....................................... 111
Start/Stop button .......................... 110
KEYLESS-GO
Convenience closing feature ............ 78
Deactivation ..................................... 67 Locking ............................................ 67
Start function ................................... 67
Unlocking ......................................... 67
KEYLESS-GO start function
Start/Stop button .......................... 110
Kickdown
Driving tips ................................... .120
Knee bag .............................................. 46 L
Lamps see Warning and indicator lamps
Lane detection (automatic)
see Lane Keeping Assist
Lane Keeping Assist
Activating/deactivating (on-
board computer) ............................ 169
Display message ............................ 190
Function/informatio n.................... 157
Lane Tracking package ..................... 155
Lap time (RACETIMER) ...................... 172
License plate lamp (display mes-
sage) ................................................... 186
Light sensor (display message) ....... 186
Lights
Automatic headlamp mode .............. 96
Fogged up headlamp s...................... 99
Hazard warning lamps ..................... 98
High beam flasher ............................ 97
High-beam headlamp s..................... 97
Light switch ..................................... 96
Low-beam headlamp s...................... 97
Parking lamps .................................. 97
Rear fog lamp .................................. 97
Setting exterior lighting ................... 96
Setting the brightness of the dis-
play/switch (on-board computer) .. 169
Standing lamps ................................ 97
Switching the daytime running
lamps on/off (on-board com-
puter) ............................................. 169
Turn signals ..................................... 97
see Interior lighting
Loading guidelines ............................ 218
Locking (doors)
Automatic ........................................ 73
Emergency locking ........................... 73 12
Index
Page 35 of 298
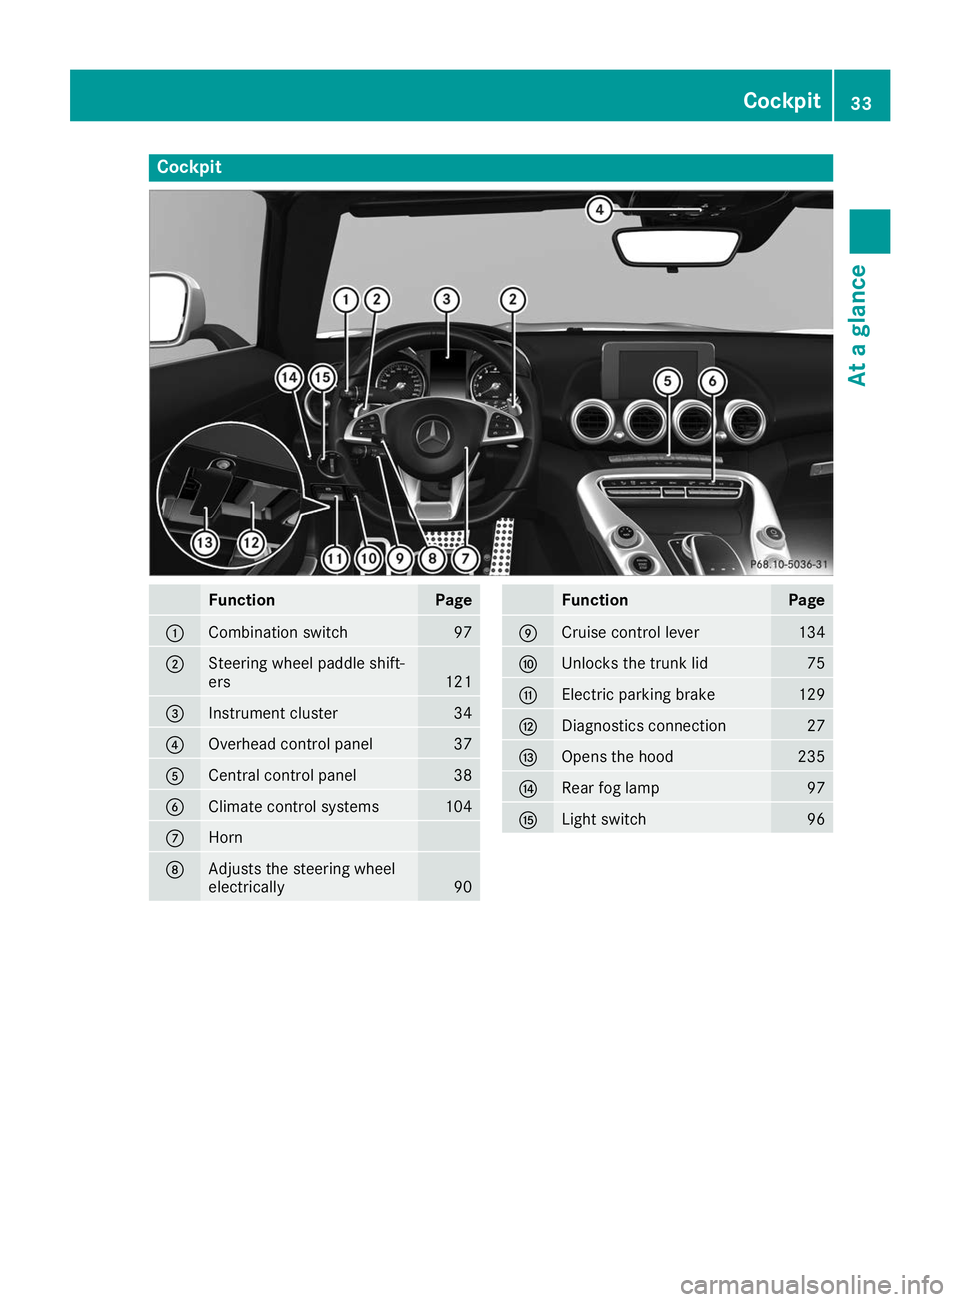
Cockpit
Function Page
0043
Combination switch 97
0044
Steering wheel paddle shift-
ers
121
0087
Instrument cluster 34
0085
Overhead control panel 37
0083
Central control panel 38
0084
Climate control systems 104
006B
Horn
006C
Adjusts the steering wheel
electrically 90 Function Page
006D
Cruise control lever 134
006E
Unlocks the trunk lid 75
006F
Electric parking brake 129
0070
Diagnostics connection 27
0071
Opens the hood 235
0072
Rear fog lamp 97
0073
Light switch 96Cockpit
33At a glance
Page 67 of 298
or
X Insert the SmartKey into the ignition lock.
A visual and audible alarm is triggered if the
alarm system is armed and you open:
R a door
R the vehicle with the mechanical key
R the trunk lid
R the hood
R the glove box
X To turn the alarm off with the SmartKey:
press the
0036or0037 button on the Smart-
Key.
The alarm is stopped.
or
X Insert the SmartKey into the ignition lock.
The alarm is stopped.
X To stop the alarm using KEYLESS-GO:
grasp the outside door handle. The SmartKey must be outside the vehicle.
The alarm is stopped.
or
X Press the Start/Stop button. The SmartKey
must be inside the vehicle.
The alarm is stopped.
The alarm is not switched off, even if you close
the open door that triggered it, for example.
i If the alarm continues for more than
30 seconds, the mbrace emergency call sys-
tem automatically notifies the Customer
Assistance Center. This is done either by text
message or data connection.
The emergency call system sends a message
or establishes a data connection provided
that:
R you have subscribed to the mbrace service.
R the mbrace service has been activated
properly.
R the necessary mobile phone network is
available. Protection against theft
65Safety Z
Page 103 of 298
Replacing the wiper blades
Important safety notes G
WARNING
If the windshield wipers begin to move while
you are changing the wiper blades, you could be trapped by the wiper arm. There is a risk of
injury.
Always switch off the windshield wipers and
ignition before changing the wiper blades.
! Never open the hood if a windshield wiper
arm has been folded away from the wind-
shield.
Never fold a windshield wiper arm without a
wiper blade back onto the windshield.
Hold the windshield wiper arm firmly when
you change the wiper blade. If you release the
windshield wiper arm without a wiper blade
and it falls onto the windshield, the windshield may be damaged by the force of the impact.
Mercedes-Benz recommends that you have
the wiper blades changed at a qualified spe-
cialist workshop.
! To avoid damaging the wiper blades, make
sure that you touch only the wiper arm of the
wiper.
Replacing the wiper blades Adjusting the wiper blades so that they
are vertical
X Switch off the engine.
X Remove your foot from the brake pedal. X
Set the windshield wiper to the 00AAposition.
X Press the Start/Stop button repeatedly until
the windshield wiper starts.
X When the wiper arms are in a vertical position
to the hood, press the Start/Stop button.
X Fold the wiper arm away from the windshield.
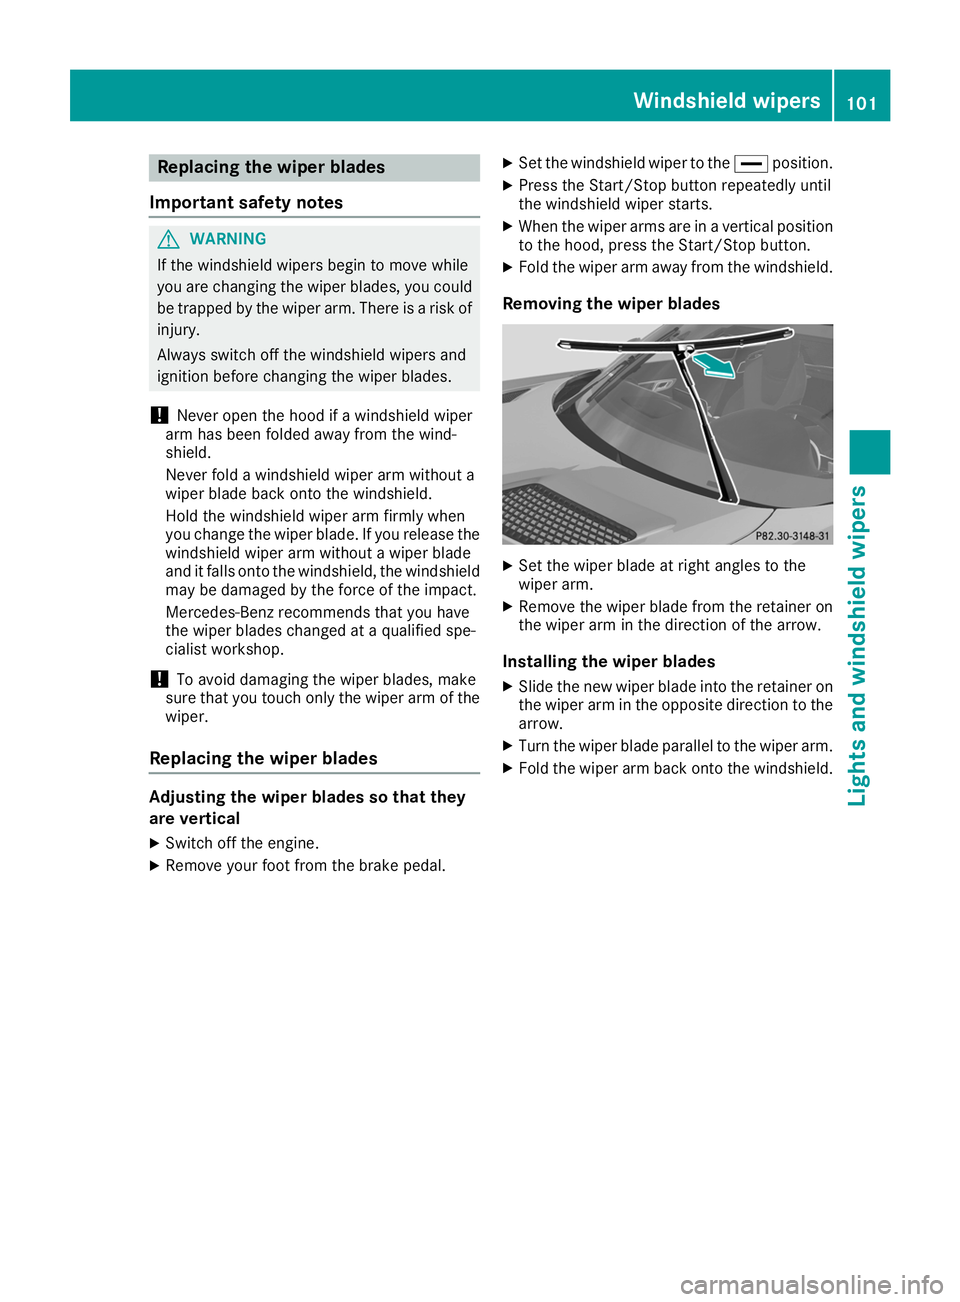
Removing the wiper blades X
Set the wiper blade at right angles to the
wiper arm.
X Remove the wiper blade from the retainer on
the wiper arm in the direction of the arrow.
Installing the wiper blades
X Slide the new wiper blade into the retainer on
the wiper arm in the opposite direction to the arrow.
X Turn the wiper blade parallel to the wiper arm.
X Fold the wiper arm back onto the windshield. Windshield wipers
101Lights and windshield wipers Z
Page 110 of 298
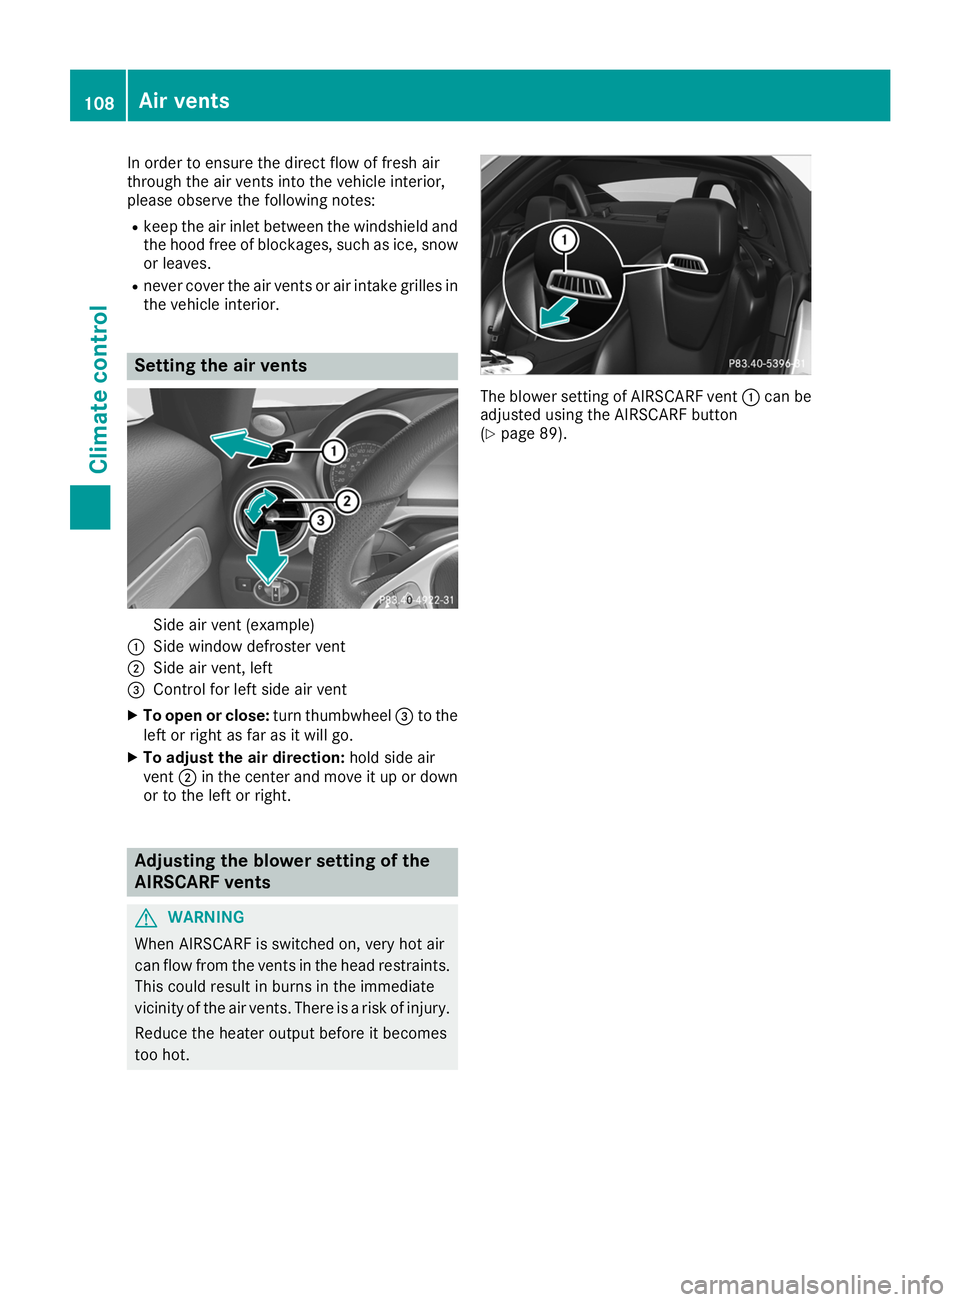
In order to ensure the direct flow of fresh air
through the air vents into the vehicle interior,
please observe the following notes:
R keep the air inlet between the windshield and
the hood free of blockages, such as ice, snow
or leaves.
R never cover the air vents or air intake grilles in
the vehicle interior. Setting the air vents
Side air vent (example)
0043 Side window defroster vent
0044 Side air vent, left
0087 Control for left side air vent
X To open or close: turn thumbwheel0087to the
left or right as far as it will go.
X To adjust the air direction: hold side air
vent 0044in the center and move it up or down
or to the left or right. Adjusting the blower setting of the
AIRSCARF vents G
WARNING
When AIRSCARF is switched on, very hot air
can flow from the vents in the head restraints. This could result in burns in the immediate
vicinity of the air vents. There is a risk of injury.
Reduce the heater output before it becomes
too hot. The blower setting of AIRSCARF vent
0043can be
adjusted using the AIRSCARF button
(Y page 89). 108
Air ventsClimate control
Page 116 of 298
R
the engine and the transmission are at a suf-
ficient temperature for the ECO start/stop
function
R the set temperature for the vehicle interior
has been reached
R the battery is sufficiently charged
R the system detects that the windshield is not
fogged up when the air-conditioning system is switched on
R the hood is closed
R the driver's door is closed and the driver's
seat belt is fastened
All of the vehicle's systems remain active when
the engine is stopped automatically.
The HOLD function can also be activated if the
engine has been switched off automatically. It is then not necessary to continue applying the
brakes during the automatic stop phase. When
you depress the accelerator pedal, the engine
starts automatically and the braking effect of
the HOLD function is deactivated.
Automatic engine start The engine starts automatically if:
R you switch off the ECO start/stop function by
pressing the ECO button
R switch to drive program RACE,S+orS
(Y page 116)
R you switch to manual mode M(Y page 121)
R in transmission position 005B, the brake pedal
is released and the HOLD function is not
active
R you depress the accelerator pedal
R you engage reverse gear 005E
R you move the transmission out of position 005D
R you unfasten your seat belt or open the driv-
er's door
R the vehicle starts to roll
R the brake system requires this
R the temperature in the vehicle interior devi-
ates from the set range
R the system detects moisture on the wind-
shield when the air-conditioning system is
switched on
R the battery's condition of charge is too low
Shifting the transmission to position 005Ddoes
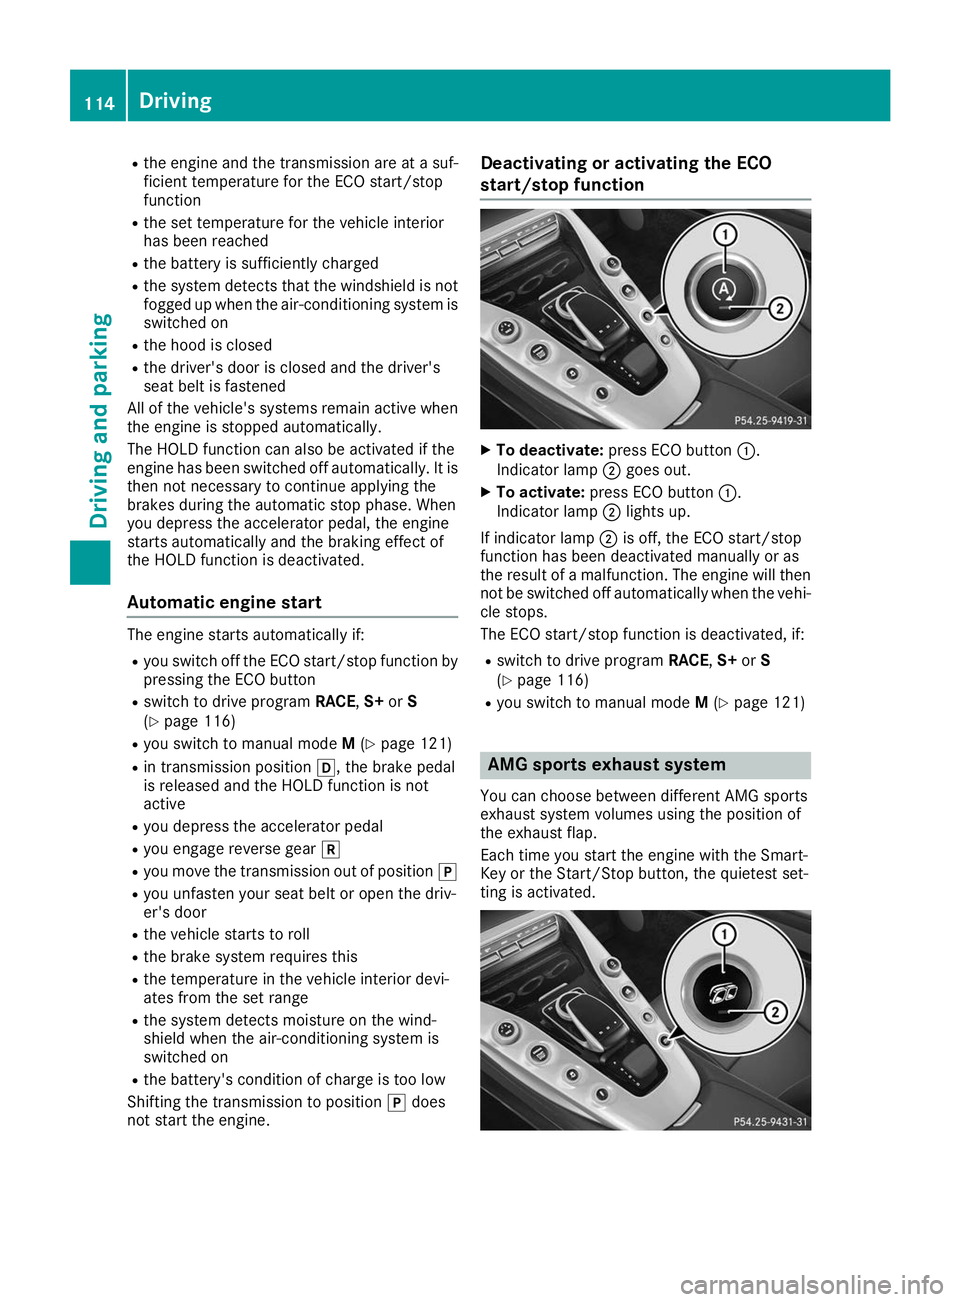
not start the engine. Deactivating or activating the ECO
start/stop function
X
To deactivate: press ECO button 0043.
Indicator lamp 0044goes out.
X To activate: press ECO button 0043.
Indicator lamp 0044lights up.
If indicator lamp 0044is off, the ECO start/stop
function has been deactivated manually or as
the result of a malfunction. The engine will then
not be switched off automatically when the vehi- cle stops.
The ECO start/stop function is deactivated, if:
R switch to drive program RACE,S+orS
(Y page 116)
R you switch to manual mode M(Y page 121) AMG sports exhaust system
You can choose between different AMG sports
exhaust system volumes using the position of
the exhaust flap.
Each time you start the engine with the Smart-
Key or the Start/Stop button, the quietest set-
ting is activated. 114
DrivingDriving an
d parking
Page 161 of 298
Important safety notes
G
WARNING
If you operate information systems and com-
munication equipment integrated in the vehi- cle when driving, you may be distracted from
the traffic situation. You could also lose con-
trol of the vehicle. There is a risk of an acci-
dent.
Only operate this equipment when the traffic
situation permits. If you are not sure that this
is possible, park the vehicle paying attention
to traffic conditions and operate the equip-
ment when the vehicle is stationary.
You must observe the legal requirements for the country in which you are currently driving whenoperating the on-board computer. G
WARNING
If the instrument cluster has failed or mal-
functioned, you may not recognize function
restrictions in systems relevant to safety. The operating safety of your vehicle may be
impaired. There is a risk of an accident.
Drive on carefully. Have the vehicle checked
at a qualified specialist workshop immedi-
ately.
The on-board computer only shows messages or
warnings from certain systems in the multifunc- tion display. You should therefore make sure
your vehicle is operating safely at all times.
If the operating safety of your vehicle is
impaired, pull over as soon as it is safe to do so. Contact a qualified specialist workshop.
For an overview, see the instrument panel illus-
tration (Y page 34). Displays and operation
Speedometer with segments
The segments in the speedometer indicate
which speed range is available:
R Cruise control activated (Y page 134):The segments light up from the stored speed
to the type-tested maximum speed.
R Active Distance Assist DISTRONIC activated
(Y page 136):
One or two segments in the set speed range
light up.
R Active Distance Assist DISTRONIC detects a
vehicle in front moving more slowly than the
stored speed:
The segments between the speed of the vehi-
cle in front and the stored speed light up. Tachometer
! Do not drive in the overrevving range, as this
could damage the engine.
The red band in the tachometer indicates the
engine's overrevving range.
The fuel supply is interrupted to protect the
engine when the red band is reached. Outside temperature display
You should pay special attention to road condi-
tions when temperatures are around freezing
point.
Bear in mind that the outside temperature dis-
play indicates the measured air temperature
and not the road surface temperature.
The outside temperature display is in the multi-
function display (Y page 161).
Changes in the outside temperature are dis-
played after a short delay. Coolant temperature gauge
G
WARNING
Opening the hood when the engine is over-
heated or when there is a fire in the engine
compartment could expose you to hot gases
or other service products. There is a risk of
injury.
Let an overheated engine cool down before
opening the hood. If there is a fire in the
engine compartment, keep the hood closed
and contact the fire department. Displays and operation
159On-board computer and displays Z
Page 189 of 298
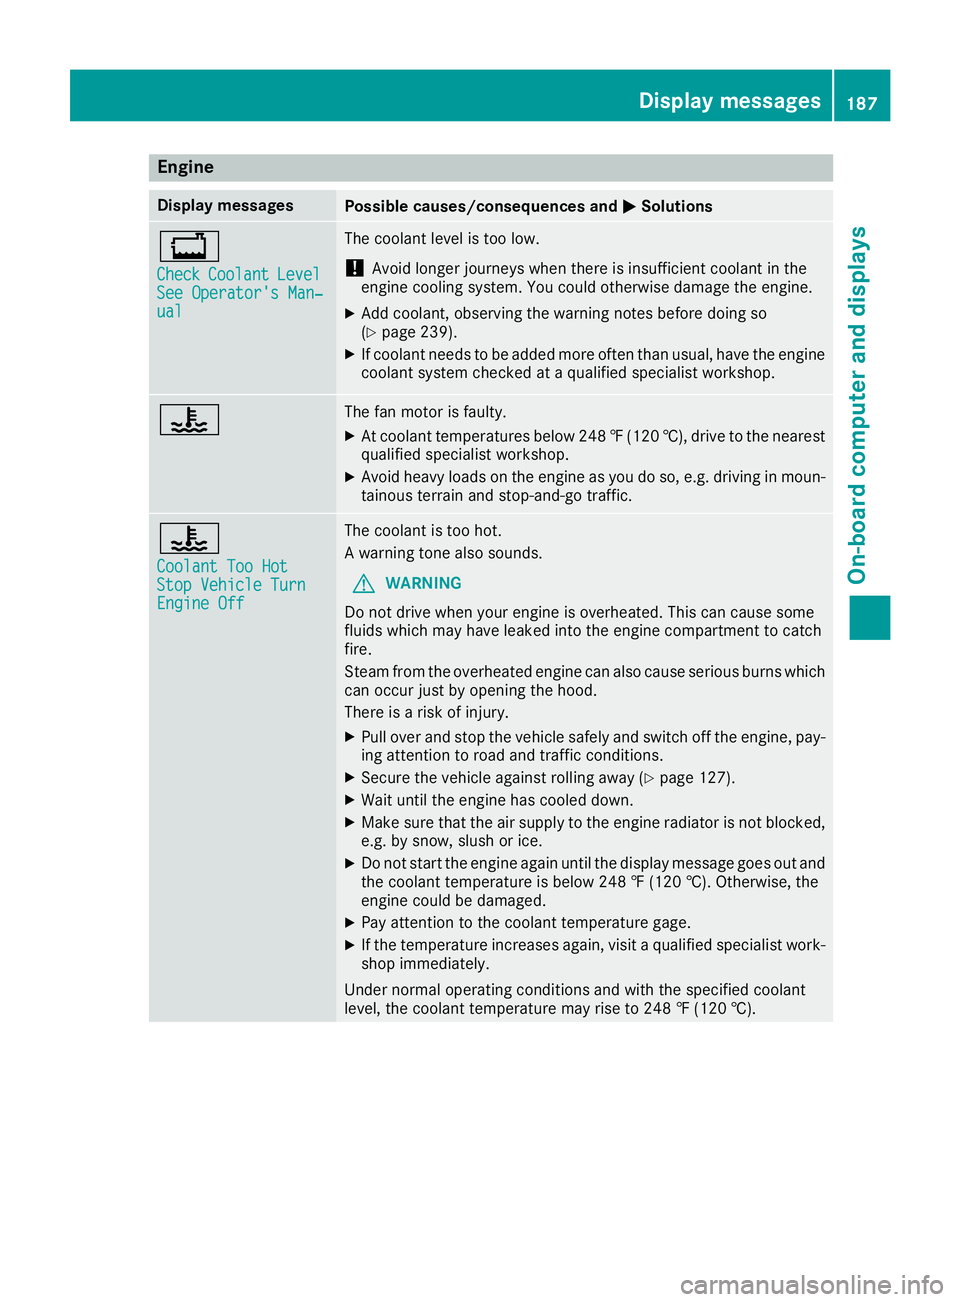
Engine
Display messages
Possible causes/consequences and
0050
0050Solutions 00BD
Check Check
Coolant
Coolant Level
Level
See Operator's Man‐
See Operator's Man‐
ual ual The coolant level is too low.
! Avoid longer journeys when there is insufficient coolant in the
engine cooling system. You could otherwise damage the engine.
X Add coolant, observing the warning notes before doing so
(Y page 239).
X If coolant needs to be added more often than usual, have the engine
coolant system checked at a qualified specialist workshop. 00AC The fan motor is faulty.
X At coolant temperatures below 248 ‡(120 †), drive to the nearest
qualified specialist workshop.
X Avoid heavy loads on the engine as you do so, e.g. driving in moun-
tainous terrain and stop-and-go traffic. 00AC
Coolant Too Hot Coolant Too Hot
Stop Vehicle Turn Stop Vehicle Turn
Engine Off Engine Off The coolant is too hot.
A warning tone also sounds.
G WARNING
Do not drive when your engine is overheated. This can cause some
fluids which may have leaked into the engine compartment to catch
fire.
Steam from the overheated engine can also cause serious burns which can occur just by opening the hood.
There is a risk of injury.
X Pull over and stop the vehicle safely and switch off the engine, pay-
ing attention to road and traffic conditions.
X Secure the vehicle against rolling away (Y page 127).
X Wait until the engine has cooled down.
X Make sure that the air supply to the engine radiator is not blocked,
e.g. by snow, slush or ice.
X Do not start the engine again until the display message goes out and
the coolant temperature is below 248 ‡ (120 †). Otherwise, the
engine could be damaged.
X Pay attention to the coolant temperature gage.
X If the temperature increases again, visit a qualified specialist work-
shop immediately.
Under normal operating conditions and with the specified coolant
level, the coolant temperature may rise to 248 ‡ (120 †). Display messages
187On-board computer and displays Z