2019 MASERATI QUATTROPORTE instrument cluster
[x] Cancel search: instrument clusterPage 130 of 396
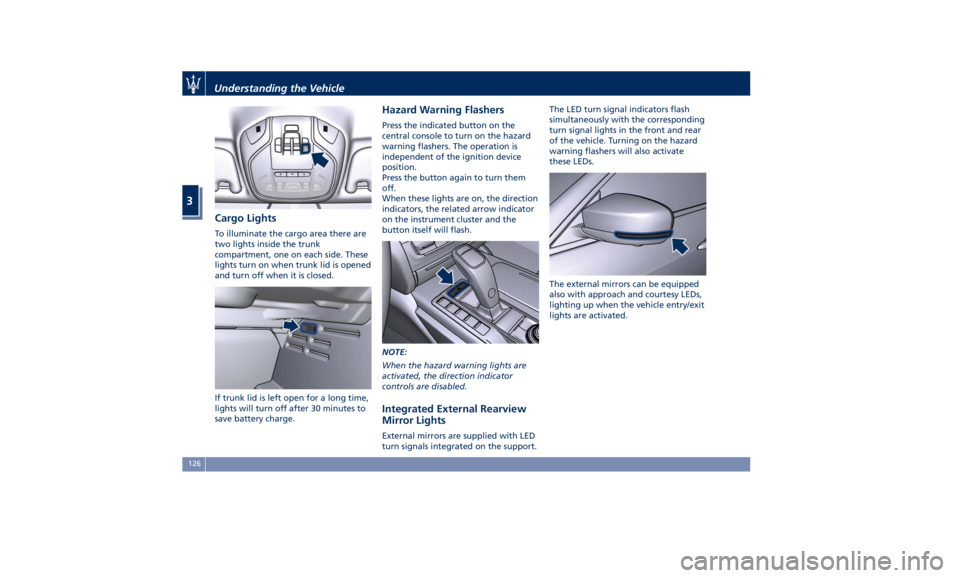
Cargo Lights To illuminate the cargo area there are
two lights inside the trunk
compartment, one on each side. These
lights turn on when trunk lid is opened
and turn off when it is closed.
If trunk lid is left open for a long time,
lights will turn off after 30 minutes to
save battery charge. Hazard Warning Flashers Press the indicated button on the
central console to turn on the hazard
warning flashers. The operation is
independent of the ignition device
position.
Press the button again to turn them
off.
When these lights are on, the direction
indicators, the related arrow indicator
on the instrument cluster and the
button itself will flash.
NOTE:
When the hazard warning lights are
activated, the direction indicator
controls are disabled.
Integrated External Rearview
Mirror Lights External mirrors are supplied with LED
turn signals integrated on the support. The LED turn signal indicators flash
simultaneously with the corresponding
turn signal lights in the front and rear
of the vehicle. Turning on the hazard
warning flashers will also activate
these LEDs.
The external mirrors can be equipped
also with approach and courtesy LEDs,
lighting up when the vehicle entry/exit
lights are activated.Understanding the Vehicle
3
126
Page 131 of 396

Windshield Wipers and
Washers The multifunction lever operates the
wipers and washers acting on the
windshield when the ignition switch is
placed in RUN or ACC position. The
multifunction lever is located on the
left side of the steering column.
A low fluid level of windshield
washers is indicated by the indicator
light
and by the message on the
instrument cluster.
To refill the fluid, see “Maintenance
Procedures” in section “Maintenance
and Care”.
Windshield Wipers • Rotate the end of the multifunction
lever to one of the four settings to
activate the automatic intermittent setting (see “Rain Sensing Wipers”
paragraph in this chapter).
• For low speed wiper operation
(stable position "LO"): rotate the
end of the multifunction control
lever forward to the first trigger
after the intermittent setting.
• Rotate to the second trigger after
the intermittent setting for
high-speed (stable position HI) wiper
operation.
• Rotate the end of the lever
downward to the “MIST” position to
activate a single wipe cycle.
• The wipers will continue to operate
until you release the multifunction
lever.
• To turn the wipers off rotate the
lever to “OFF”. CAUTION!
• Turn the windshield wipers off when
driving through an automatic car
wash. The windshield wipers may be
damaged if the wiper control is left
in any position other than “OFF”.
• In cold weather, always turn off the
wiper switch and allow the wipers to
return to the park position before
turning off the engine. If the wiper
switch is left on and the wipers
freeze to the windshield, the wiper
motor may be damaged when the
vehicle is restarted.
• Always remove any buildup of snow
that prevents the windshield wiper
blades from returning to the off
position. If the windshield wiper
control is turned off and the blades
cannot return to the off position, the
wiper motor may be damaged.
Rain Sensing Wipers This feature detects moisture on the
windshield through an internal
rearview mirror integrated sensor,
which automatically activates the
relative wipers.
Rotate forward the end of the
multifunction lever to one of fourUnderstanding the Vehicle
3
127
Page 155 of 396

4 – Dashboard Instruments and Controls Instrument Cluster ...................................... 152
Infotainment System .................................... 176
Audio Controls ......................................... 183
Audio System .......................................... 184
MTC+ “Controls” Screen ................................. 185
MTC+ Settings ......................................... 189
Dashboard Compartment ................................ 200
Analog Clock .......................................... 203
Air Conditioning Controls ................................ 203
Phone and Voice Controls on Steering Wheel ................. 213
151
Page 156 of 396
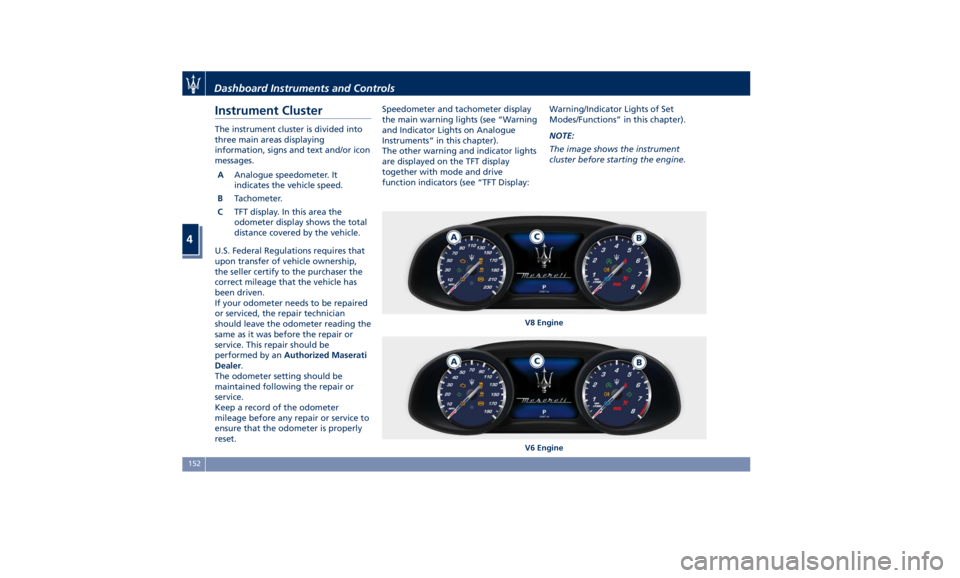
Instrument Cluster The instrument cluster is divided into
three main areas displaying
information, signs and text and/or icon
messages.
A Analogue speedometer. It
indicates the vehicle speed.
B Tachometer.
C TFT display. In this area the
odometer display shows the total
distance covered by the vehicle.
U.S. Federal Regulations requires that
upon transfer of vehicle ownership,
the seller certify to the purchaser the
correct mileage that the vehicle has
been driven.
If your odometer needs to be repaired
or serviced, the repair technician
should leave the odometer reading the
same as it was before the repair or
service. This repair should be
performed by an Authorized Maserati
Dealer .
The odometer setting should be
maintained following the repair or
service.
Keep a record of the odometer
mileage before any repair or service to
ensure that the odometer is properly
reset. Speedometer and tachometer display
the main warning lights (see “Warning
and Indicator Lights on Analogue
Instruments” in this chapter).
The other warning and indicator lights
are displayed on the TFT display
together with mode and drive
function indicators (see “TFT Display: Warning/Indicator Lights of Set
Modes/Functions” in this chapter).
NOTE:
The image shows the instrument
cluster before starting the engine.
V8 Engine
V6 EngineDashboard Instruments and Controls
4
152
Page 158 of 396

(Continued)
makes it possible to read the error
codes stored in the control unit,
together with a set of specific
parameters for the engine operation
diagnostic cycle, for compliance with
CARB & EPA OBDII regulations.
Left Turn Signal Indicator Light
The
indicator lights
up when
the left turn signals or the
hazard flashers are turned on.
The indicator light will flash at
the same frequency of the turn signals
and is controlled by the stalk switch
lever.
If the vehicle electronics sense that the
vehicle drives for more than 1 mile
(1.6 km) with either turn signal on, a
continuous sound will alert the driver
to turn the signal off.
If the indicator flashes at a rapid rate,
check for a defective exterior light
bulb.
Tire Pressure Monitoring Light
This warning light is connected
to the Tire Pressure
Monitoring System (TPMS).
Under normal conditions, the
warning light should illuminate when
the ignition switch is in RUN and should go off once the engine is
started.
If the warning light remains lit or
illuminates while driving, the pressure
of one or more tires is too low and a
message will be displayed.
The TPMS malfunction warning light is
connected to the low tire pressure
monitoring light.
When the system detects a
malfunction, the monitoring light and
the related message will flash for
approximately one minute and then
remain lit.
This sequence will continue upon
subsequent vehicle startups as long as
the malfunction lasts.
When the malfunction warning lights
up, the system may not be able to
detect or signal low tire pressure
correctly.
Please refer to “Tire Pressure
Monitoring System (TPMS)” in section
“Driving” for further information.
Anti-Lock Braking System (ABS)
Malfunction Warning Light
This light, and its related
message, indicate possible
malfunctions of the Anti-Lock
Brake System (ABS).
The light will turn on when the
ignition switch is in RUN position and may stay on for 4 seconds. If the ABS
light remains lit or turns on while
driving, the Anti-Lock portion of the
brake system is not functioning and
requires service. However, the
conventional brake system will
continue to operate normally if the
(USA) warning light is switched
off. If the ABS light turns on while
driving, or if it does not switch on
when the ignition switch is in RUN
position, please visit an Authorized
Maserati Dealer as soon as possible to
restore the Anti-Lock brake function.
Electronic Stability Control (ESC)
Activation/Malfunction Indicator Light
The ESC activation/malfunction
indicator light on the
instrument cluster will display
when the ignition switch is in
RUN position.
It should switch off by starting the
engine.
If the light stays on with the engine
running, there is a malfunction in the
ESC system.
If the light still stays on after several
ignition cycles, and the vehicle has
been driven for several miles at more
than 30 mph (48 km/h) speed, visit an
Authorized Maserati Dealer as soon asDashboard Instruments and Controls
4
154
Page 162 of 396
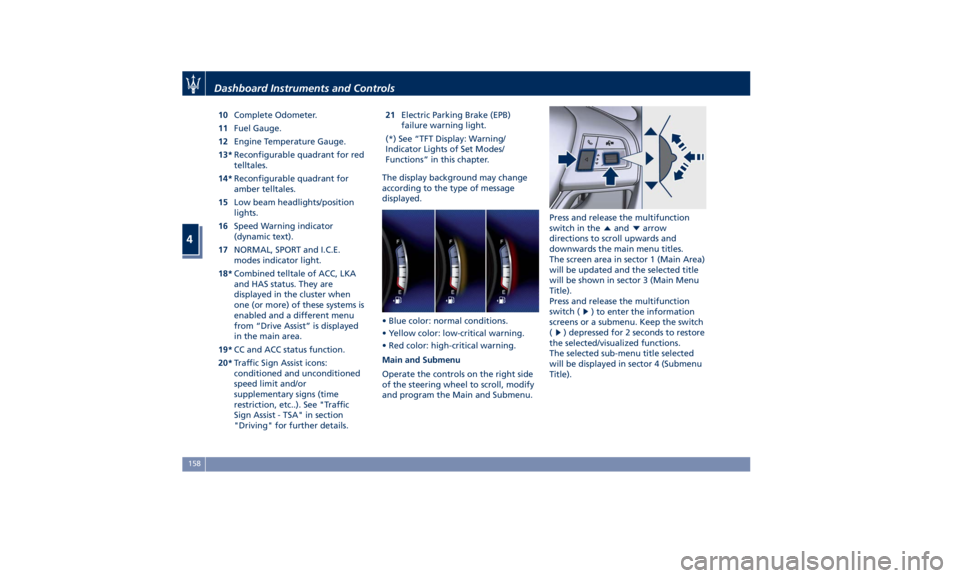
10 Complete Odometer.
11 Fuel Gauge.
12 Engine Temperature Gauge.
13* Reconfigurable quadrant for red
telltales.
14* Reconfigurable quadrant for
amber telltales.
15 Low beam headlights/position
lights.
16 Speed Warning indicator
(dynamic text).
17 NORMAL, SPORT and I.C.E.
modes indicator light.
18* Combined telltale of ACC, LKA
and HAS status. They are
displayed in the cluster when
one (or more) of these systems is
enabled and a different menu
from “Drive Assist” is displayed
in the main area.
19* CC and ACC status function.
20* Traffic Sign Assist icons:
conditioned and unconditioned
speed limit and/or
supplementary signs (time
restriction, etc..). See "Traffic
Sign Assist - TSA" in section
"Driving" for further details. 21 Electric Parking Brake (EPB)
failure warning light.
(*) See “TFT Display: Warning/
Indicator Lights of Set Modes/
Functions” in this chapter.
The display background may change
according to the type of message
displayed.
• Blue color: normal conditions.
• Yellow color: low-critical warning.
• Red color: high-critical warning.
Main and Submenu
Operate the controls on the right side
of the steering wheel to scroll, modify
and program the Main and Submenu. Press and release the multifunction
switch in the
and arrow
directions to scroll upwards and
downwards the main menu titles.
The screen area in sector 1 (Main Area)
will be updated and the selected title
will be shown in sector 3 (Main Menu
Title).
Press and release the multifunction
switch (
) to enter the information
screens or a submenu. Keep the switch
(
) depressed for 2 seconds to restore
the selected/visualized functions.
The selected sub-menu title selected
will be displayed in sector 4 (Submenu
Title).Dashboard Instruments and Controls
4
158
Page 187 of 396
Audio Controls The vehicle is equipped with audio
controls that allow both driver and
front passenger to operate the audio
system. These controls can be used to
adjust audio volume, change radio
station or mode (FM, AM, USB, etc).
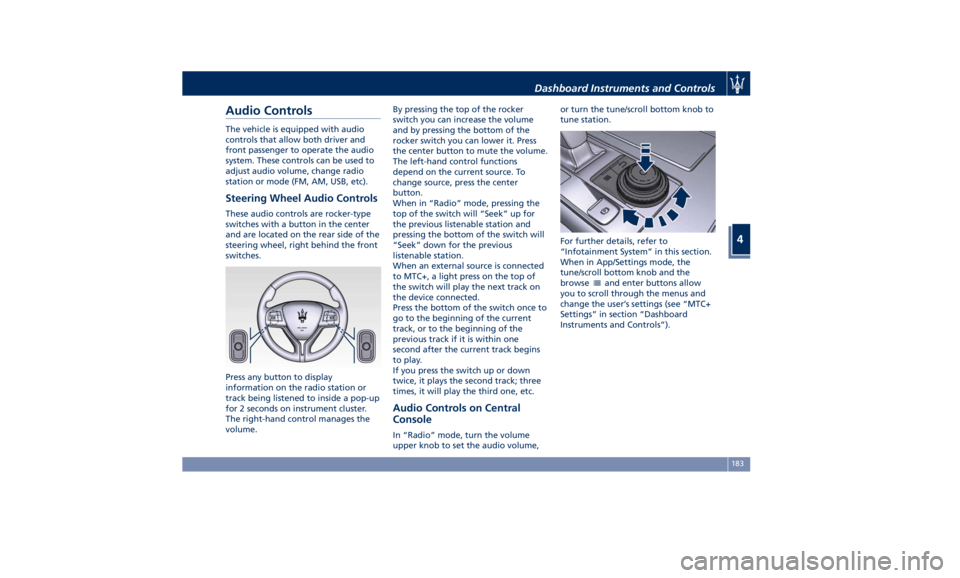
Steering Wheel Audio Controls These audio controls are rocker-type
switches with a button in the center
and are located on the rear side of the
steering wheel, right behind the front
switches.
Press any button to display
information on the radio station or
track being listened to inside a pop-up
for 2 seconds on instrument cluster.
The right-hand control manages the
volume. By pressing the top of the rocker
switch you can increase the volume
and by pressing the bottom of the
rocker switch you can lower it. Press
the center button to mute the volume.
The left-hand control functions
depend on the current source. To
change source, press the center
button.
When in “Radio” mode, pressing the
top of the switch will “Seek” up for
the previous listenable station and
pressing the bottom of the switch will
“Seek” down for the previous
listenable station.
When an external source is connected
to MTC+, a light press on the top of
the switch will play the next track on
the device connected.
Press the bottom of the switch once to
go to the beginning of the current
track, or to the beginning of the
previous track if it is within one
second after the current track begins
to play.
If you press the switch up or down
twice, it plays the second track; three
times, it will play the third one, etc.
Audio Controls on Central
Console In “Radio” mode, turn the volume
upper knob to set the audio volume, or turn the tune/scroll bottom knob to
tune station.
For further details, refer to
“Infotainment System” in this section.
When in App/Settings mode, the
tune/scroll bottom knob and the
browse
and enter buttons allow
you to scroll through the menus and
change the user’s settings (see “MTC+
Settings” in section “Dashboard
Instruments and Controls”).Dashboard Instruments and Controls
4
183
Page 192 of 396
in front of you when you are farther
away. This gives you the best
reaction time, though could lead to
some more unwanted warnings.
“Medium” gives instead a little less
time for reacting compared to
“Far”, but at the same time should
lead to less not desired warning.
To change the setting for more
dynamic driving, select the “Near”
setting. This warns you of a possible
collision when you are much closer
to the vehicle or pedestrian (if the
car is equipped with Pedestrian
Emergency Braking - PEB function)in
front of you.
FCW with active braking can be set
to "On" or "Off".
• Surround View Camera
By activating this feature the system
uses four cameras to monitor the
area around the vehicle when
transmission lever is shifted to P
(Park), N (Neutral) or D (Drive)
position.
When activation occurs by pressing
the “Surround Camera” button in
the “Controls” screen or moving the
shift lever in R (Reverse) position,
the initial view will be the default
view (associated with current gear
state). Image will be displayed with active guidelines while in that gear
as long as vehicle speed remains
lower than 8 mph (12 km/h).
When vehicle is shifted into a
different gear, the image will
remain displayed for 10 seconds, or
vehicle is shifted in P (Park), or until
vehicle speed exceeds 8 mph
(12 km/h), at which point it will
immediately cancel and return to
the last-viewed screen.
The feature can be set to “On” or
“Off”. See “Surround View Camera
System (optional)” in section
“Understanding the Vehicle” for
further details.
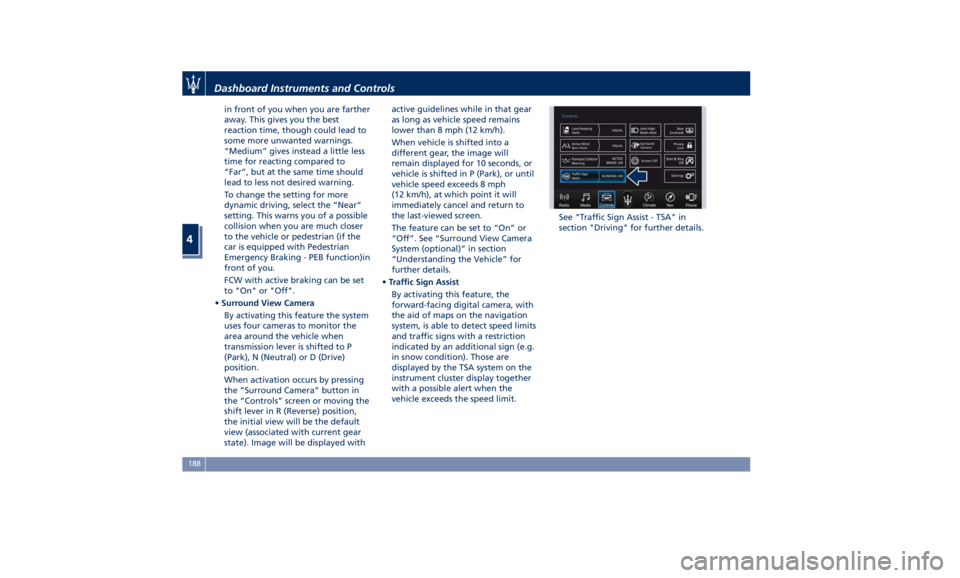
• Traffic Sign Assist
By activating this feature, the
forward-facing digital camera, with
the aid of maps on the navigation
system, is able to detect speed limits
and traffic signs with a restriction
indicated by an additional sign (e.g.
in snow condition). Those are
displayed by the TSA system on the
instrument cluster display together
with a possible alert when the
vehicle exceeds the speed limit. See "Traffic Sign Assist - TSA" in
section "Driving" for further details.Dashboard Instruments and Controls
4
188