Page 255 of 296

Fuse Replacement
Used Fuses Characteristics
When an electrical device is not
functioning, check that the
corresponding fuse is in proper
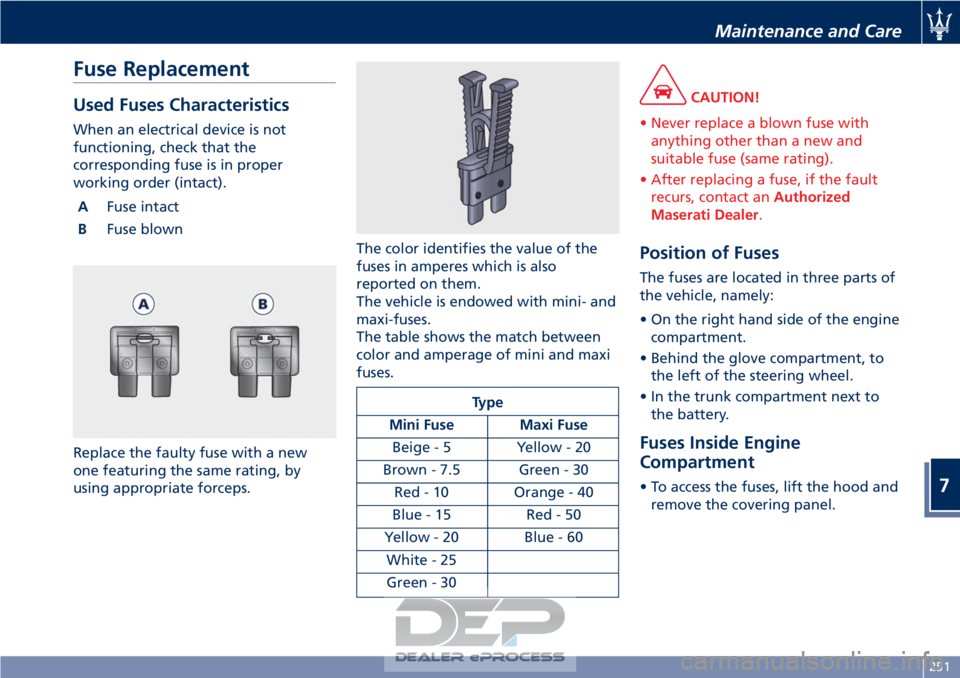
working order (intact).A Fuse intact
B Fuse blown
Replace the faulty fuse with a new
one featuring the same rating, by
using appropriate forceps. The color identifies the value of the
fuses in amperes which is also
reported on them.
The vehicle is endowed with mini- and
maxi-fuses.
The table shows the match between
color and amperage of mini and maxi
fuses.
Type
Mini Fuse Maxi Fuse Beige - 5 Yellow - 20
Brown - 7.5 Green - 30 Red - 10 Orange - 40
Blue-15 Red-50
Yellow - 20 Blue - 60 White - 25
Green - 30
CAUTION!
• Never replace a blown fuse with anything other than a new and
suitable fuse (same rating).
• After replacing a fuse, if the fault recurs, contact an Authorized
Maserati Dealer.
Position of Fuses
The fuses are located in three parts of
the vehicle, namely:
• On the right hand side of the engine compartment.
• Behind the glove compartment, to the left of the steering wheel.
• In the trunk compartment next to the battery.
Fuses Inside Engine
Compartment
• To access the fuses, lift the hood andremove the covering panel.
Maintenance and Care
7
251
Page 259 of 296

Pos. Amp. –Color System / Component
F39 15 A – Blue NIM (Inside Roof
Node), NCL (Air
conditioning and
heating system
node), OBD socket,
CSA (Alarm system
siren ECU), CAV
(Motion sensing
alarm ECU), radio,
NAVTRAK
F40 30 A – Green Heated rear window
F41 - Not used
F42 7.5 A – Brown NCL and windshield
wiper control
F43 30 A – Green Windshield
wiper/washer
(Connected Devices
Relay INT/A)
F44 20 A – Yellow Front and rear power
outlets (INT/A device
relay) front seat
heating (passenger
side)
F45 - Not used
F46 20 A – Yellow NPG/NPP locksPos. Amp. –
Color System / Component
F47 30 A – Green NPG (Driver’s door
node)
F48 30 A – Green NPP (Passenger’s
door node)
F49 7.5 A – Brown NVO (Steering wheel
node), CSG (Power
steering ECU), CSP
(Twilight/rain sensor
ECU), NIM (Inside
Roof Node), NCL,
Radio, CEM, CRP,
domelight molding,
NAVTRAK
F50 7.5 A – Brown Air bag system
F51 7.5 A – Brown NCA (Automatic
Gearbox Node)
F52 15 A – Blue Front seat heating
(driver side) (INT/A
device relay)
F53 10 A – Red Rear fog lights
Fuses in Trunk Compartment
• To access the fuses, remove the floor
panel. • Remove the inside covering panel of
the battery compartment.
There are two control boxes.
• To access the fuses inside the control boxes, remove the covers by levering
up the fastening tabs.
Maintenance and Care
7
255
Page 260 of 296
The following table points out the
position as featured in the picture, the
type and function of the fuses
included in these control boxes.Trunk Compartment Fuses
Pos. Amp. –
Color System /
Component
F54 30 A – Green HI-Fi amplifier
F55 7.5 A – Brown Lights
F56 10 A – Red +30 NAG, NAVTRAK,
Harman tuner, MTC+
(Japan)
F57 - Not used
F58 7.5 A – Brown Reverse
F59 15 A – Blue Fuel tank door
power supply from
T22
F60 7.5 A – Brown NSP
F61 20 A – Yellow Rear RH ACE
F62 20 A – Yellow NCA
F63 15 A – Blue +30 battery charge
F64 - Not used
F65 20 A – Yellow Rear LH ACE
Pos. Amp. –
Color System /
Component
F66 20 A – Yellow Fuel pumps
F67 - Not used
F68 - Not used
F69 - Not used
F77 - Not used
F78 20 A – Yellow Power outlet
F79 - Not used
F80 30 A – Green Bass box
F108 40 A – Orange +30 NCP hydraulic
pump
F109 40 A – Orange +30 NCP ECU/front
latch
F110 - Not used
F111 - Not used
F112 - Not used
F113 - Not used
Maintenance and Care
7
256
Page 262 of 296

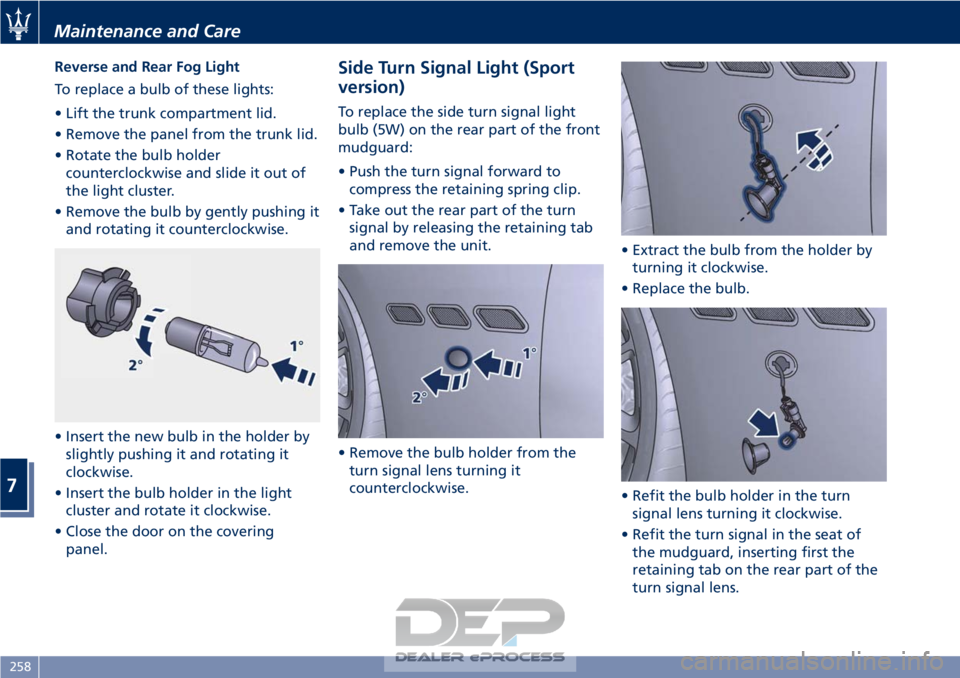
Reverse and Rear Fog Light
To replace a bulb of these lights:
• Lift the trunk compartment lid.
• Remove the panel from the trunk lid.
• Rotate the bulb holdercounterclockwise and slide it out of
the light cluster.
• Remove the bulb by gently pushing it and rotating it counterclockwise.
• Insert the new bulb in the holder by slightly pushing it and rotating it
clockwise.
• Insert the bulb holder in the light cluster and rotate it clockwise.
• Close the door on the covering panel.Side Turn Signal Light (Sport
version)
To replace the side turn signal light
bulb (5W) on the rear part of the front
mudguard:
• Push the turn signal forward tocompress the retaining spring clip.
• Take out the rear part of the turn signal by releasing the retaining tab
and remove the unit.
• Remove the bulb holder from the turn signal lens turning it
counterclockwise. • Extract the bulb from the holder by
turning it clockwise.
• Replace the bulb.
• Refit the bulb holder in the turn signal lens turning it clockwise.
• Refit the turn signal in the seat of the mudguard, inserting first the
retaining tab on the rear part of the
turn signal lens.
Maintenance and Care
7
258
Page 264 of 296
License Plate Lights
To replace the license plate light bulb
(C 5W):
• Undo the two fastening screws forthe lens/bulb holder unit.
• Remove the unit from the trunk lid and replace the bulb.
Interior Lights
CAUTION!
Before replacing a bulb, ensure that
the matching fuse is intact. For
replacement, use only original new
light bulbs having the same rating as
the old one.
Courtesy Lights (below Door)
T
o replace the bulb (W5W):
• use a screwdriver positioned at the indicated point to lever out the light
fixing frame;
• rotate the bulb holder and take it out; • replace the pressure-fitted bulb;
• refit the bulb holder inserting first
the electrical connector side and
then pressing on the other side to
hook up the clip.
Front Domelight
To replace the light bulbs:
• Gently pry with a screwdriver at points indicated in picture and
remove the molding.
Maintenance and Care
7
260
Page 265 of 296

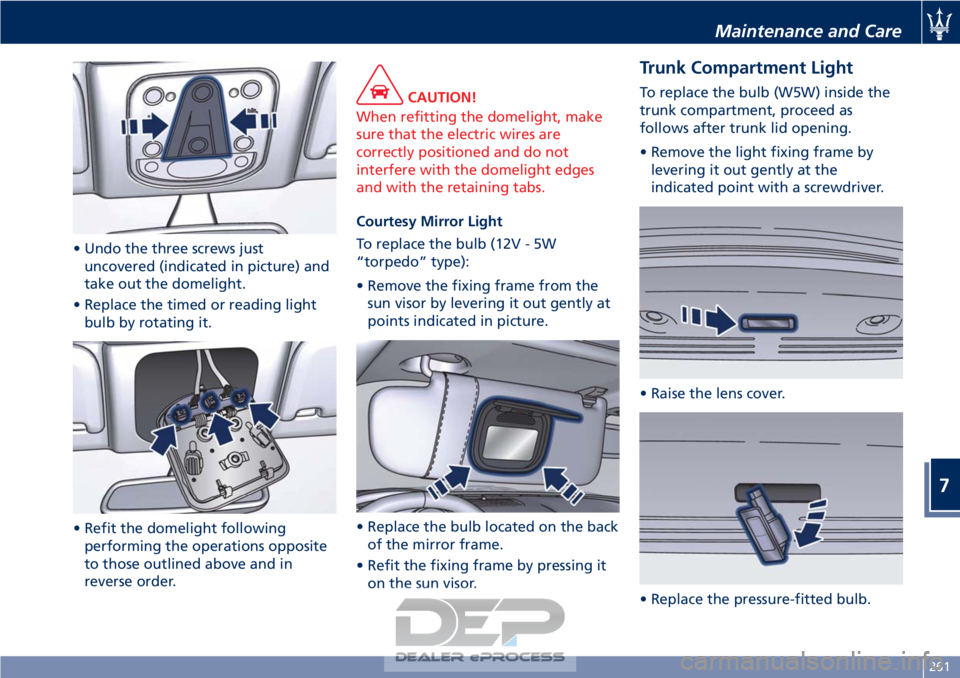
• Undo the three screws justuncovered (indicated in picture) and
take out the domelight.
• Replace the timed or reading light bulb by rotating it.
• Refit the domelight following performing the operations opposite
to those outlined above and in
reverse order.
CAUTION!
When refitting the domelight, make
sure that the electric wires are
correctly positioned and do not
interfere with the domelight edges
and with the retaining tabs.
Courtesy Mirror Light
T
o replace the bulb (12V - 5W
“torpedo” type):
• Remove the fixing frame from the sun visor by levering it out gently at
points indicated in picture.
• Replace the bulb located on the back of the mirror frame.
• Refit the fixing frame by pressing it on the sun visor.
Trunk Compartment Light
To replace the bulb (W5W) inside the
trunk compartment, proceed as
follows after trunk lid opening.
• Remove the light fixing frame bylevering it out gently at the
indicated point with a screwdriver.
• Raise the lens cover.
• Replace the pressure-fitted bulb.
Maintenance and Care
7
261
Page 270 of 296

Normal paint maintenance consists in
washing, the frequency of which
depends on the conditions of use and
of the environment. For example, if
driving the vehicle in areas where
there is high atmospheric pollution or
the roads are spread with anti-freeze
salt, it is advisable to wash the vehicle
more frequently.
ENVIRONMENTAL!
Detergents pollute water. Therefore
the vehicle should be washed in areas
equipped for the collection and
purification of the fluids used for
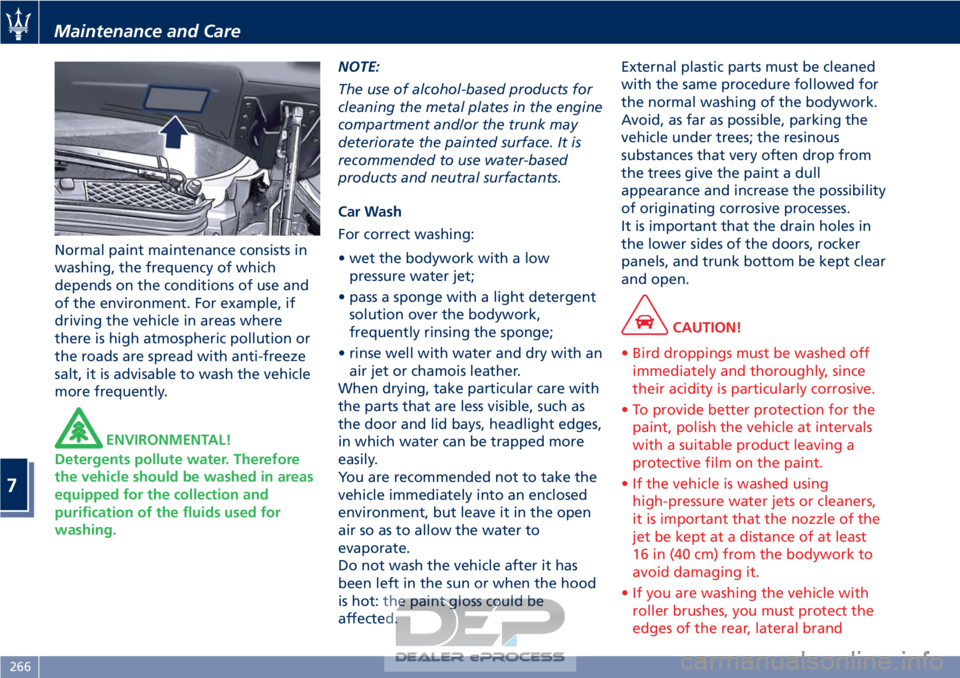
washing. NOTE:
The use of alcohol-based products for
cleaning the metal plates in the engine
compartment and/or the trunk may
deteriorate the painted surface. It is
recommended to use water-based
products and neutral surfactants.
Car Wash
For correct washing:
• wet the bodywork with a low
pressure water jet;
• pass a sponge with a light detergent solution over the bodywork,
frequently rinsing the sponge;
• rinse well with water and dry with an air jet or chamois leather.
When drying, take particular care with
the parts that are less visible, such as
the door and lid bays, headlight edges,
in which water can be trapped more
easily.
You are recommended not to take the
vehicle immediately into an enclosed
environment, but leave it in the open
air so as to allow the water to
evaporate.
Do not wash the vehicle after it has
been left in the sun or when the hood
is hot: the paint gloss could be
affected. External plastic parts must be cleaned
with the same procedure followed for
the normal washing of the bodywork.
Avoid, as far as possible, parking the
vehicle under trees; the resinous
substances that very often drop from
the trees give the paint a dull
appearance and increase the possibility
of originating corrosive processes.
It is important that the drain holes in
the lower sides of the doors, rocker
panels, and trunk bottom be kept clear
and open.
CAUTION!
• Bird droppings must be washed off immediately and thoroughly, since
their acidity is particularly corrosive.
• To provide better protection for the paint, polish the vehicle at intervals
with a suitable product leaving a
protective film on the paint.
• If the vehicle is washed using high-pressure water jets or cleaners,
it is important that the nozzle of the
jet be kept at a distance of at least
16 in (40 cm) from the bodywork to
avoid damaging it.
• If you are washing the vehicle with roller brushes, you must protect the
edges of the rear, lateral brand
Maintenance and Care
7
266
Page 275 of 296

miles/6000 km. Please note that
allowing the battery to go dead
repeatedly can cause premature wear
on the internal cells and greatly
reduce their life, leading to problems
with the ignition system and other
electrical/electronic systems.
TheAuthorized Maserati Dealer is
available to advise you on how to
recharge your battery correctly and
give you useful information on battery
care and maintenance.
NOTE:
The Authorized Maserati Dealer can
provide you with any information
about the Maserati approved “Battery
Charger and Conditioner”, available in
the “Genuine Accessories” range.
WARNING!
The process of charging or recharging
the battery produces hydrogen, a
dangerous gas that can explode and
cause serious injuries. When charging
or recharging the battery, follow the
recommended precautions at all
times:
• always charge or recharge the
battery in a well-ventilated
environment; •
never charge or recharge a battery
that has frozen: it can explode due
to hydrogen trapped inside the ice
crystals;
• ensure that any sparks or open
flames are nowhere near the battery
while it is charging;
• before using a charger to charge or
maintain the battery charge status,
carefully follow the instructions
provided to ensure the charger is
connected to the battery safely and
correctly.
Battery Charge Maintainer
Operation
Charge Maintainer Socket
Charge maintainer socket is located
inside the trunk compartment, on the
right-hand side. NOTE:
The
Authorized Maserati Dealer can
give you all details concerning the
battery charge maintainer, available
from the "Genuine Accessories" range
with four types of socket, and its use.
Instructions for Use
First connect the battery charge
maintainer to vehicle socket: this
trigger the “Active” stage and the
maintainer can stay connected to
vehicle for a few months with no
problem.
Position the device outside the vehicle,
leaving trunk lid slightly open,
avoiding to squeeze the cable that
gets out of the luggage compartment
and/or damaging the edge seal.
Maintenance and Care
7
271