2019 MASERATI GRANTURISMO CONVERTIBLE trunk
[x] Cancel search: trunkPage 106 of 296
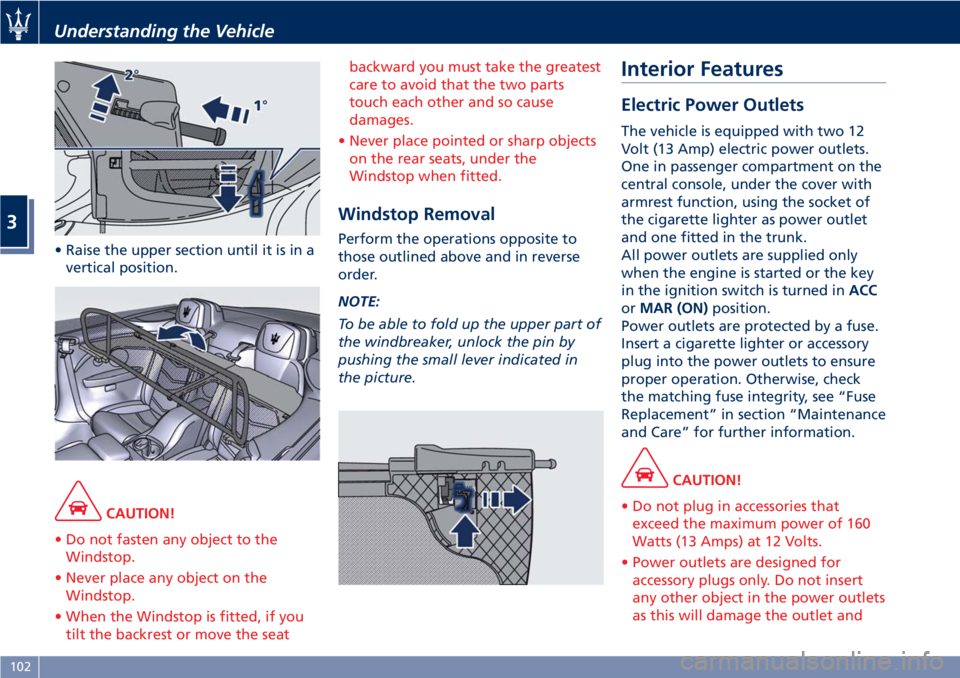
• Raise the upper section until it is in a
vertical position.
CAUTION!
• Do not fasten any object to the
Windstop.
• Never place any object on the
Windstop.
• When the Windstop is fitted, if you
tilt the backrest or move the seat backward you must take the greatest
care to avoid that the two parts
touch each other and so cause
damages.
• Never place pointed or sharp objects
on the rear seats, under the
Windstop when fitted.
Windstop Removal Perform the operations opposite to
those outlined above and in reverse
order.
NOTE:
To be able to fold up the upper part of
the windbreaker, unlock the pin by
pushing the small lever indicated in
the picture. Interior Features Electric Power Outlets The vehicle is equipped with two 12
Volt (13 Amp) electric power outlets.
One in passenger compartment on the
central console, under the cover with
armrest function, using the socket of
the cigarette lighter as power outlet
and one fitted in the trunk.
All power outlets are supplied only
when the engine is started or the key
in the ignition switch is turned in ACC
or MAR (ON) position.
Power outlets are protected by a fuse.
Insert a cigarette lighter or accessory
plug into the power outlets to ensure
proper operation. Otherwise, check
the matching fuse integrity, see “Fuse
Replacement” in section “Maintenance
and Care” for further information.
CAUTION!
• Do not plug in accessories that
exceed the maximum power of 160
Watts (13 Amps) at 12 Volts.
• Power outlets are designed for
accessory plugs only. Do not insert
any other object in the power outlets
as this will damage the outlet andUnderstanding the Vehicle
3
102
Page 107 of 296
blow the fuse. Damages caused by
improper use of the power outlet
are not covered by the New Vehicle
Limited Warranty.
WARNING!
To avoid serious injury or death:
• Only devices designed for use in this
type of outlet should be inserted
into any 12 Volt outlet.
• Replacing the fuses that protect
power outlets with others of higher
amperage, there is the risk of fire.
• Do not touch with wet hands.
• If this outlet is mishandled, it may
cause an electric shock and failure.
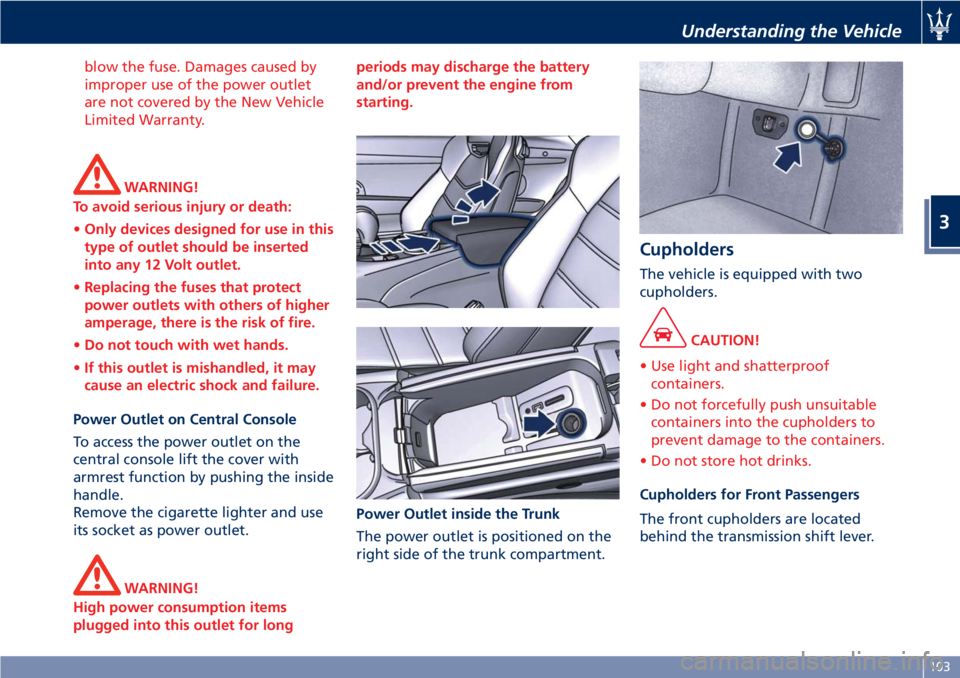
Power Outlet on Central Console
T o access the power outlet on the
central console lift the cover with
armrest function by pushing the inside
handle.
Remove the cigarette lighter and use
its socket as power outlet.
WARNING!
High power consumption items
plugged into this outlet for long periods may discharge the battery
and/or prevent the engine from
starting.
Power Outlet inside the Trunk
The
power outlet is positioned on the
right side of the trunk compartment. Cupholders The vehicle is equipped with two
cupholders.
CAUTION!
• Use light and shatterproof
containers.
• Do not forcefully push unsuitable
containers into the cupholders to
prevent damage to the containers.
• Do not store hot drinks.
Cupholders for Front Passengers
The
front cupholders are located
behind the transmission shift lever.Understanding the Vehicle
3
103
Page 111 of 296
Cargo Area WARNING!
To help protect against personal
injury, passengers must not be seated
in the rear cargo area. The rear cargo
space is intended for load carrying
purposes only, not for passengers,
who should sit in seats and use seat
belts.
Vehicle Load Carrying Capacity The load carrying capacity of your
vehicle is shown on the “Tire and
Loading Information Label”
positioned on the rear driver door's
pillar.
The information indicated on the label
concerns passengers and luggage
loading operations. Do not exceed the specified Gross
Vehicle Weight Rating (GVWR) or the
Gross Axle Weight Rating (GAWR) for
either the front or rear axle.
The GVWR is the total allowable
weight of your vehicle. This includes
driver, passengers, and cargo.
The maximum load which may be
carried in the rear luggage
compartment is 66 lbs (30 kg).
WARNING!
Do not exceed the GVWR, or front or
rear GAWR. Exceeding these limits
may lead to poor handling, vehicle
instability or tire damage which could
cause a crash in which you or others
could be seriously injured or killed.
WARNING!
• Improper weight distribution can
have an adverse effect on the way
the vehicle steers, handles and the
way the brakes operate.
• Never drive with the trunk lid open.
Exhaust gases can enter the
passenger compartment. The trunk is the most suitable place to
load
bulky and heavy objects onboard
the vehicle.
To load your vehicle properly, store
heavier items below and be sure you
distribute their weight as evenly as
possible.
Stow all loose items securely before
start driving as they could move
during the trip.
Carrying Luggage on Rear
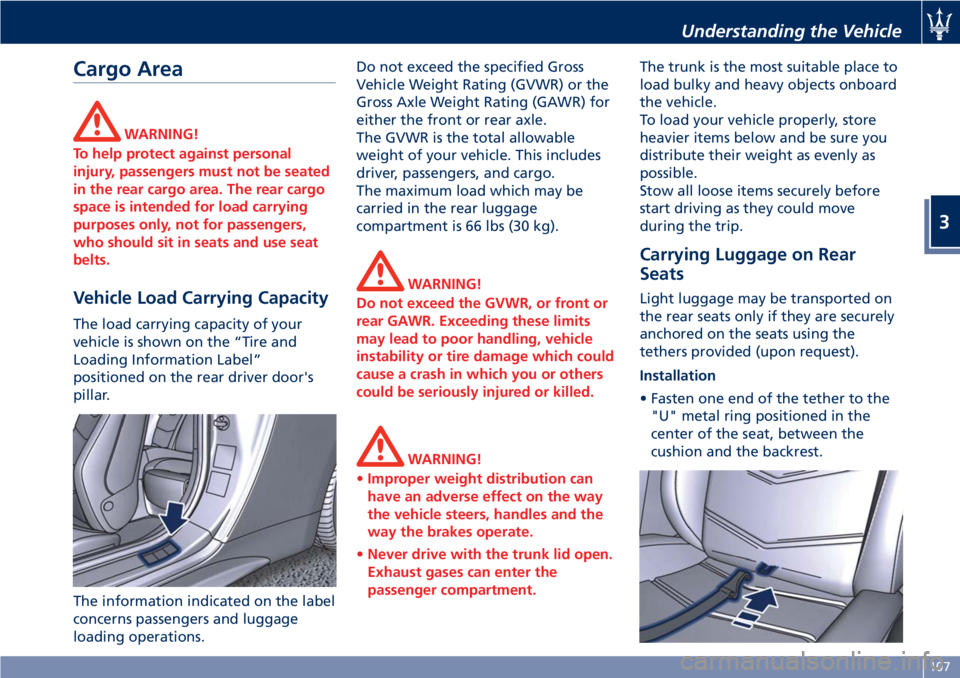
Seats Light luggage may be transported on
the rear seats only if they are securely
anchored on the seats using the
tethers provided (upon request).
Installation
• Fasten one end of the tether to the
"U" metal ring positioned in the
center of the seat, between the
cushion and the backrest.Understanding the Vehicle
3
107
Page 144 of 296
Audio System The vehicle is equipped with an audio
system that offers superior sound
quality, higher sound pressure levels
and reduced energy consumption.
The system maximizes the amplifier
and speaker technology delivering
substantially higher components and
system efficiency.
Premium System The vehicle is equipped with a
“Premium” sound system which
features 9 speakers and can develop a
sound output of 900 W.
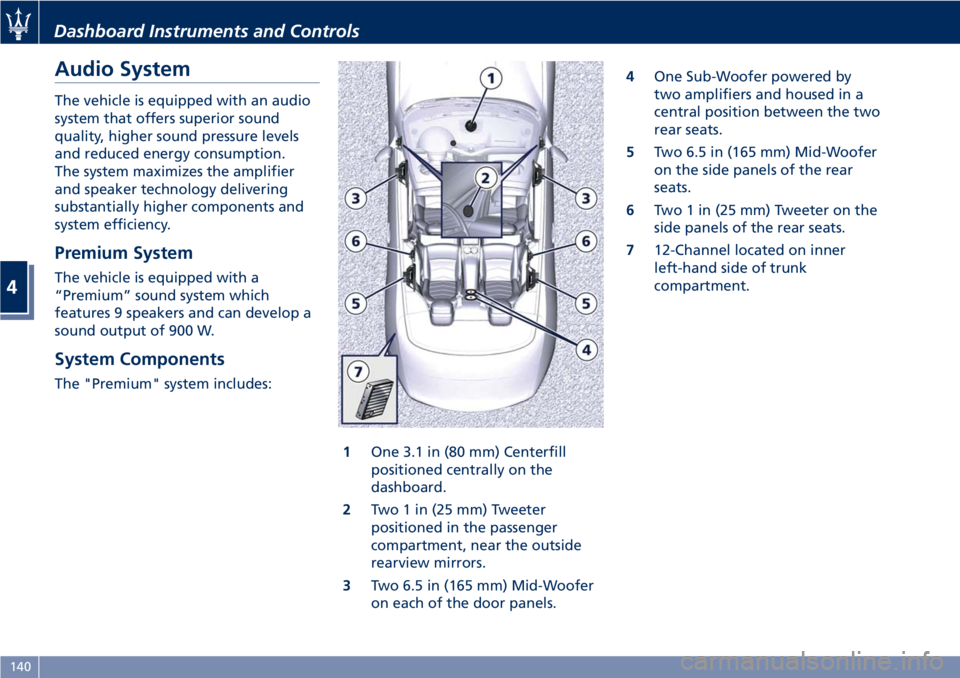
System Components The "Premium" system includes:
1 One 3.1 in (80 mm) Centerfill
positioned centrally on the
dashboard.
2 Two 1 in (25 mm) Tweeter
positioned in the passenger
compartment, near the outside
rearview mirrors.
3 Two 6.5 in (165 mm) Mid-Woofer
on each of the door panels. 4 One Sub-Woofer powered by
two amplifiers and housed in a
central position between the two
rear seats.
5 Two 6.5 in (165 mm) Mid-Woofer
on the side panels of the rear
seats.
6 Two 1 in (25 mm) Tweeter on the
side panels of the rear seats.
7 12-Channel located on inner
left-hand side of trunk
compartment.Dashboard Instruments and Controls
4
140
Page 150 of 296

and rearview mirror position
storage).
The volume can be set to 7 levels
identified by numbers from "1" to
"7" by pressing the "+" or "–"
softkey.
• Light Sensor
This feature allows to adjust the
sensitivity of the twilight sensor for
turning on the lights.
The feature can be set to 3 levels:
"Low", "Medium" (default setting)
and "High".
• Speed Limit
This feature allows to set a speed
limit and activate an alarm signal
which will sound when the maximum speed limit set is
exceeded.
Checkmarked the softkey to enable
the feature.
Press then the "+" or "–" softkey to
increase or decrease the speed limit.
Each touch increases/decreases the
value by 5 units.
Lights
Press the “Lights” softkey to set the
following modes.
•
Daytime Lights (DRL, for
versions/markets where provided)
If activated, this feature allows the
automatic switching on of the DRL
upon switching off of the position
lights and vice versa. When the
position lights switch on, the DRL
switch off.
See “Lights” in section
“Understanding the Vehicle” for
further information.
Doors & Locks
Press the “Doors & Locks” softkey to
set the following modes.
• Auto Door Locks (Autoclose)
When this feature is selected, all
doors will automatically lock when the vehicle is in motion. The feature
can be set to “On” or “Off”.
• Independent Trunk Lid Unlocking
When this feature is selected and
checkmarked, only the trunk
compartment lid remains unlocked
and can be opened by pressing the
button between the license plate
lights.
When there is not checkmark, the
trunk lid unlocking follows the logic
of the doors.
• Key Fob Unlocks
By selecting this feature you may set
up only the driver's door or all doors
mode will unlock on the first press
of the
button on the radio
control case (key fob). When "Driver
Door" is selected, you must press the
key fob
button twice to unlock
also the passenger’s door. When
Dashboard Instruments and Controls
4
146
Page 166 of 296
(Continued)
(Reverse) or MANUAL and the
Electric Parking Brake (EPB)
engaged), push the brake pedal,
manually deactivate the EPB system
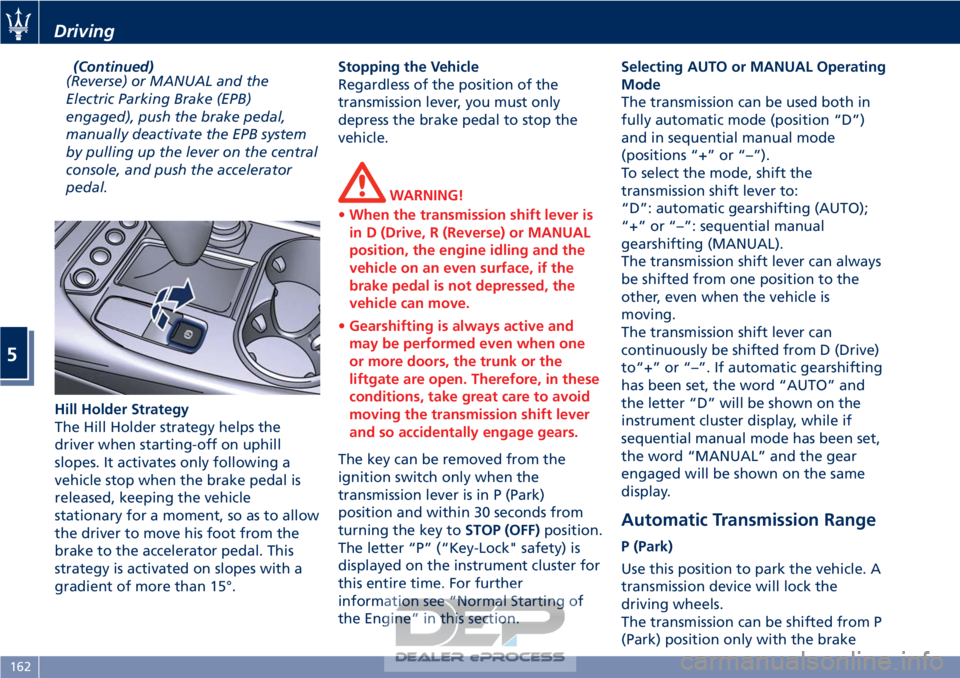
by pulling up the lever on the central
console, and push the accelerator
pedal.
Hill Holder Strategy
The Hill Holder strategy helps the
driver when starting-off on uphill
slopes. It activates only following a
vehicle stop when the brake pedal is
released, keeping the vehicle
stationary for a moment, so as to allow
the driver to move his foot from the
brake to the accelerator pedal. This
strategy is activated on slopes with a
gradient of more than 15°. Stopping the Vehicle
Regardless of the position of the
transmission lever, you must only
depress the brake pedal to stop the
vehicle.
WARNING!
• When the transmission shift lever is
in D (Drive, R (Reverse) or MANUAL
position, the engine idling and the
vehicle on an even surface, if the
brake pedal is not depressed, the
vehicle can move.
• Gearshifting is always active and
may be performed even when one
or more doors, the trunk or the
liftgate are open. Therefore, in these
conditions, take great care to avoid
moving the transmission shift lever
and so accidentally engage gears.
The key can be removed from the
ignition
switch only when the
transmission lever is in P (Park)
position and within 30 seconds from
turning the key to STOP (OFF)position.
The letter “P” (“Key-Lock" safety) is
displayed on the instrument cluster for
this entire time. For further
information see “Normal Starting of
the Engine” in this section. Selecting AUTO or MANUAL Operating
Mode
The transmission can be used both in
fully automatic mode (position “D”)
and in sequential manual mode
(positions “+” or “–”).
To select the mode, shift the
transmission shift lever to:
“D”: automatic gearshifting (AUTO);
“+” or “–”: sequential manual
gearshifting (MANUAL).
The transmission shift lever can always
be shifted from one position to the
other, even when the vehicle is
moving.
The transmission shift lever can
continuously be shifted from D (Drive)
to“+” or “–”. If automatic gearshifting
has been set, the word “AUTO” and
the letter “D” will be shown on the
instrument cluster display, while if
sequential manual mode has been set,
the word “MANUAL” and the gear
engaged will be shown on the same
display.
Automatic Transmission Range
P (Park)
Use this position to park the vehicle. A
transmission device will lock the
driving wheels.
The transmission can be shifted from P
(Park) position only with the brake
Driving
5
162
Page 207 of 296
the amount of fuel allowed by the
system is very low, we recommend
therefore not to persist further.
• Wait approximately 10 seconds before removing the fuel nozzle in
order to ensure completed supply of
residual fuel and restrict the risk of
fouling the fuel filler door area.
• Remove the fuel nozzle.
• Insert the cap on the fuel filler neck.
• Tighten the cap, turning it clockwise until it stops.
• Close the fuel tank door.
CAUTION!
To avoid fuel spillage and overfilling,
do not “top off” the fuel tank after
filling.
Emergency Fuel Filler Door
Release
If you are unable to unlock the fuel
filler door using the dedicated button,
use the fuel filler door emergency
release located in the trunk.
• Open the trunk lid (see “Open and Close the Trunk Lid” in section
“Before Starting”).
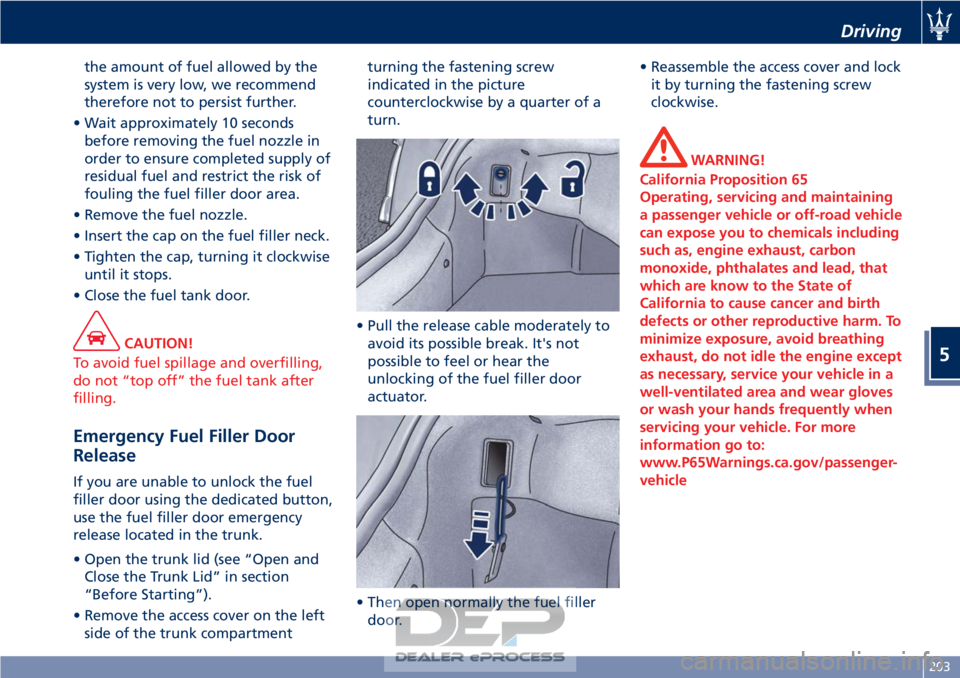
• Remove the access cover on the left side of the trunk compartment turning the fastening screw
indicated in the picture
counterclockwise by a quarter of a
turn.
• Pull the release cable moderately to avoid its possible break. It's not
possible to feel or hear the
unlocking of the fuel filler door
actuator.
• Then open normally the fuel filler door. • Reassemble the access cover and lock
it by turning the fastening screw
clockwise.
WARNING!
California Proposition 65
Operating, servicing and maintaining
a passenger vehicle or off-road vehicle
can expose you to chemicals including
such as, engine exhaust, carbon
monoxide, phthalates and lead, that
which are know to the State of
California to cause cancer and birth
defects or other reproductive harm. To
minimize exposure, avoid breathing
exhaust, do not idle the engine except
as necessary, service your vehicle in a
well-ventilated area and wear gloves
or wash your hands frequently when
servicing your vehicle. For more
information go to:
www.P65Warnings.ca.gov/passenger-
vehicle
Driving
5
203
Page 208 of 296
Driving Conditions
Before the Trip
Check the following at regular
intervals and always before long trips:
• tire pressure and condition;
• levels of fluids and lubricants;
• conditions of the windshield wiperblades;
• clean the glass on the external light and all other glass surfaces;
• proper operation of the indicator lights and of the external lights.
CAUTION!
It is however advisable to perform
these checks at least every 500 mi
(800 km) and always following the
maintenance schedule reported in
section “Maintenance and Care”.
Before you drive:
•
adjust seat position, steering wheel
and rearview mirrors in order to have
the best driving position;
• ensure that nothing (mat covers, etc.) is obstructing the pedals movement;
• carefully arrange and secure any objects in the trunk, to prevent them from moving forward in case of
sudden stops;
• avoid heavy meals before a trip. A light snack helps keep your reflexes
sharp. In particular, avoid drinking
alcohol.
WARNING!
Beyond being prohibited by law, it is
extremely dangerous to ride inside the
trunk or on the hood. In the event of
an accident, passengers sitting here
are more exposed to the risk of
serious injury. Passengers must only
travel seated in the vehicle seats, with
the seat belts fastened. Always check
that the driver and all passengers
have the seat belts correctly fastened.
Safe Driving
Although the vehicle is equipped with
active and passive safety devices, the
driver's conduct is always a decisive
factor for road safety.
Some simple rules for traveling safely
in different conditions are listed
below. Some of them will probably
already sound familiar but, in any case,
it would be useful to read them
carefully. Driving at Night
The main guidelines to follow when
driving at night are set out below.
• Drive carefully. Night conditions
demand more focus and attention.
• Reduce your speed, especially on roads with no streetlights.
• Stop at early signs of drowsiness. Continuing to drive would be a risk
for yourself and for others. Have a
rest before continuing your trip.
• Keep the vehicle at a greater distance from vehicles in front of you
than you would during the day: it is
difficult to assess the speed of other
vehicles when you only see the lights.
• Use the high beams only outside of densely-populated areas and when
you are sure that they will not
disturb other drivers.
• When another vehicle is approaching, switch from high
beams (if on) to low beams.
• Keep lights and headlights clean.
• Outside of densely-populated areas, beware of animals crossing the road.
Driving in the Rain
Rain and wet roads are dangerous. On
a wet road all maneuvers are more
difficult since wheel grip on the
Driving
5
204