2019 MASERATI GRANTURISMO CONVERTIBLE trunk
[x] Cancel search: trunkPage 42 of 296
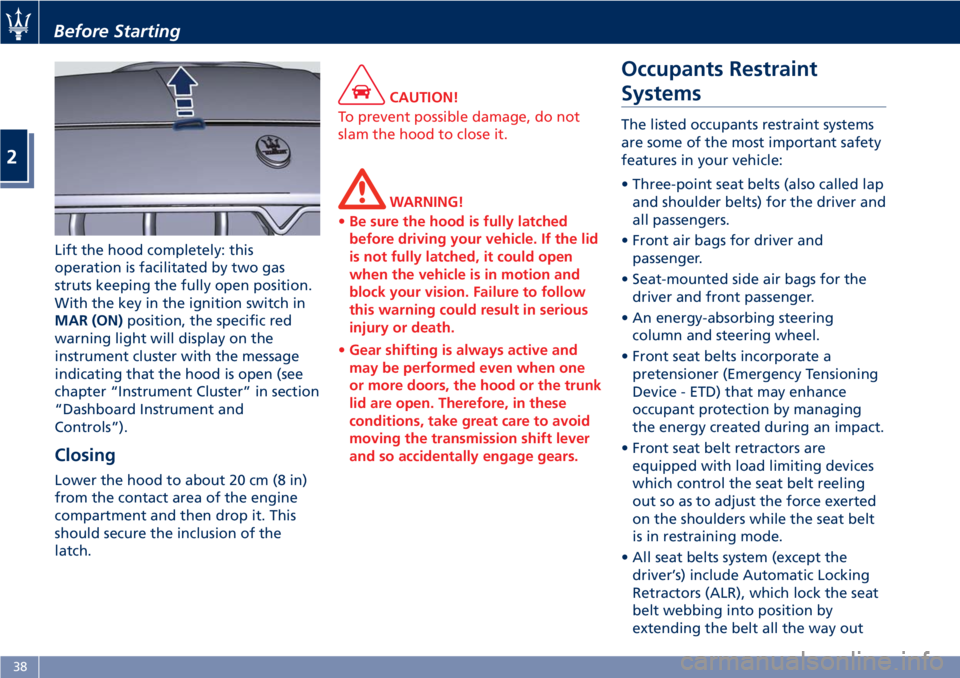
Lift the hood completely: this
operation is facilitated by two gas
struts keeping the fully open position.
With the key in the ignition switch in
MAR (ON) position, the specific red
warning light will display on the
instrument cluster with the message
indicating that the hood is open (see
chapter “Instrument Cluster” in section
“Dashboard Instrument and
Controls”).
Closing Lower the hood to about 20 cm (8 in)
from the contact area of the engine
compartment and then drop it. This
should secure the inclusion of the
latch. CAUTION!
To prevent possible damage, do not
slam the hood to close it.
WARNING!
• Be sure the hood is fully latched
before driving your vehicle. If the lid
is not fully latched, it could open
when the vehicle is in motion and
block your vision. Failure to follow
this warning could result in serious
injury or death.
• Gear shifting is always active and
may be performed even when one
or more doors, the hood or the trunk
lid are open. Therefore, in these
conditions, take great care to avoid
moving the transmission shift lever
and so accidentally engage gears. Occupants Restraint
Systems The listed occupants restraint systems
are some of the most important safety
features in your vehicle:
• Three-point seat belts (also called lap
and shoulder belts) for the driver and
all passengers.
• Front air bags for driver and
passenger.
• Seat-mounted side air bags for the
driver and front passenger.
• An energy-absorbing steering
column and steering wheel.
• Front seat belts incorporate a
pretensioner (Emergency Tensioning
Device - ETD) that may enhance
occupant protection by managing
the energy created during an impact.
• Front seat belt retractors are
equipped with load limiting devices
which control the seat belt reeling
out so as to adjust the force exerted
on the shoulders while the seat belt
is in restraining mode.
• All seat belts system (except the
driver’s) include Automatic Locking
Retractors (ALR), which lock the seat
belt webbing into position by
extending the belt all the way outBefore Starting
2
38
Page 69 of 296
Safety Tips Transporting Passengers WARNING!
• Do not leave children or animals
inside parked vehicles in hot
weather. Interior heat build-up may
cause serious injury.
• Never ride in a cargo area, inside of
a vehicle.
• Do not allow people to ride in any
area of your vehicle that is not
equipped with seats and seat belts.
• Be sure everyone in your vehicle is
in a seat and using a seat belt
properly. Exhaust Gas WARNING!
Exhaust gases can injure. They contain
carbon monoxide (CO), which is
colorless and odorless. Breathing it
can make you unconscious and can
eventually poison you. To avoid
breathing (CO), follow these safety
tips:
• Do not run the engine in a closed
garage or in confined areas any
longer than needed to move your
vehicle in or out of the area.
• If it is necessary to sit in a parked
vehicle with the engine running,
adjust your heating or cooling
controls to force outside air into the
vehicle. Set the blower at high
speed.
• If you are required to drive with the
trunk lid open, make sure that all
windows are closed and the climate
control blowers switch is set at high
speed. DO NOT use the recirculation
mode.
The best protection against carbon
monoxide
entry into the passenger
compartment is a properly maintained
engine exhaust system. Whenever detecting a change in the
sound of the exhaust system or
eventual exhaust fumes inside the
vehicle have the Authorized Maserati
Dealer inspect the complete exhaust
system and adjacent body areas for
broken, damaged, deteriorated, or
mispositioned parts.
Open seams or loose connections
could permit exhaust fumes to seep
into the passenger compartment.
WARNING!
California Proposition 65
Operating, servicing and maintaining
a passenger vehicle or off-road vehicle
can expose you to chemicals including
such as, engine exhaust, carbon
monoxide, phthalates and lead, that
which are know to the State of
California to cause cancer and birth
defects or other reproductive harm. To
minimize exposure, avoid breathing
exhaust, do not idle the engine except
as necessary, service your vehicle in a
well-ventilated area and wear gloves
or wash your hands frequently when
servicing your vehicle. For more
information go to:
www.P65Warnings.ca.gov/passenger-
vehicleBefore Starting
2
65
Page 71 of 296
• Mounting posts must be properly
installed, if not equipped from the
factory. Failure to properly follow
floor mat installation or mounting
can cause interference with the
brake pedal and accelerator pedal
operation causing loss of control of
the vehicle.
Tires
•
Examine tires for excessive tread
wear and uneven wear patterns.
• Check for stones, nails, glass, or
other objects lodged in the tread or
sidewall.
• Inspect the tread for cuts and cracks.
• Inspect sidewalls for cuts, cracks and
bulges.
• Check the wheel nuts for tightness.
• Check the tires (see “Tire Inflation
Pressure” chapter in section
“Features and Specifications”) for
proper cold inflation pressure.
Lights and Indicator Lights
• Have someone observe the
operation of exterior lights while
you operate the controls (see
“Lights” chapter in section
“Understanding the Vehicle”).
• Check turn signal and high beam
indicator lights on the instrument cluster (see “Instrument Cluster”
chapter in section “Dashboard
Instruments and Controls”).
Door Latches
• Check for positive closing, latching,
and locking of doors and trunk lid
(see chapter “Doors” and “Open and
Close the Trunk Lid” in this section).
Fluid Leaks
• Check area under vehicle after
overnight parking for recent fluid
leaks (oil, fuel, etc.).
• If gasoline fumes are detected or
fluid leaks are suspected, contact an
Authorized Maserati Dealer .
WARNING!
California Proposition 65
Operating, servicing and maintaining
a passenger vehicle or off-road vehicle
can expose you to chemicals including
such as, engine exhaust, carbon
monoxide, phthalates and lead, that
which are know to the State of
California to cause cancer and birth
defects or other reproductive harm. To
minimize exposure, avoid breathing
exhaust, do not idle the engine except
as necessary, service your vehicle in a
well-ventilated area and wear gloves or wash your hands frequently when
servicing your vehicle. For more
information go to:
www.P65Warnings.ca.gov/passenger-
vehicle
Before Starting
2
67
Page 75 of 296

1 Adjustable side air vents.
2 Hood lid opening lever.
3 Headlight and fog light switch.
4 "Mode" and adjust "+" and
"–" buttons.
5 Front parking sensors
disabling/enabling.
6 Trunk lid opening button.
7 Fuel tank door opening button
(see "Refueling" in section
"Driving" for operation).
8 Multifunction lever (Cruise
Control, turn signals, headlight
washer and headlight
selection).
9 Lower gearshift paddle
"DOWN".
10 Instrument cluster.
11 Steering wheel height and
depth adjustment lever.
12 Upper air vent.
13 Sun radiation sensor.
14 Horn control.
15 Multimedia controls repeated
on the steering wheel.
16 Windshield/headlight
wiper/washer control lever. 17 Upper gearshift paddle "UP".
18 Ignition switch.
19 Clock.
20 Central adjustable air vents.
21 MTC+ display.
22 Glove compartment.
23 Side window vents.
Front Dome Console
Components
1 Reading lights control button.
2 Central light control button.
3 Reading lights.
4 Central light. 5 Anti-lift and anti-intrusion
alarm system deactivation
button.
6 Paired phone hands-free
microphone.Understanding the Vehicle
3
71
Page 92 of 296
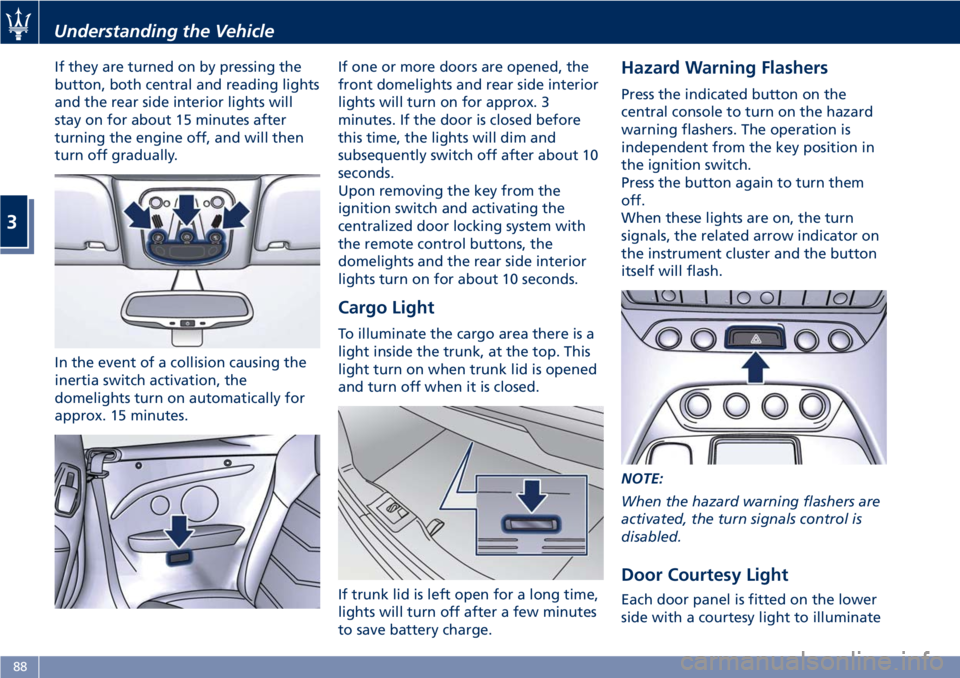
If they are turned on by pressing the
button, both central and reading lights
and the rear side interior lights will
stay on for about 15 minutes after
turning the engine off, and will then
turn off gradually.
In the event of a collision causing the
inertia switch activation, the
domelights turn on automatically for
approx. 15 minutes. If one or more doors are opened, the
front domelights and rear side interior
lights will turn on for approx. 3
minutes. If the door is closed before
this time, the lights will dim and
subsequently switch off after about 10
seconds.
Upon removing the key from the
ignition switch and activating the
centralized door locking system with
the remote control buttons, the
domelights and the rear side interior
lights turn on for about 10 seconds.
Cargo Light To illuminate the cargo area there is a
light inside the trunk, at the top. This
light turn on when trunk lid is opened
and turn off when it is closed.
If trunk lid is left open for a long time,
lights will turn off after a few minutes
to save battery charge. Hazard Warning Flashers Press the indicated button on the
central console to turn on the hazard
warning flashers. The operation is
independent from the key position in
the ignition switch.
Press the button again to turn them
off.
When these lights are on, the turn
signals, the related arrow indicator on
the instrument cluster and the button
itself will flash.
NOTE:
When the hazard warning flashers are
activated, the turn signals control is
disabled.
Door Courtesy Light
Each door panel is fitted on the lower
side with a courtesy light to illuminateUnderstanding the Vehicle
3
88
Page 100 of 296
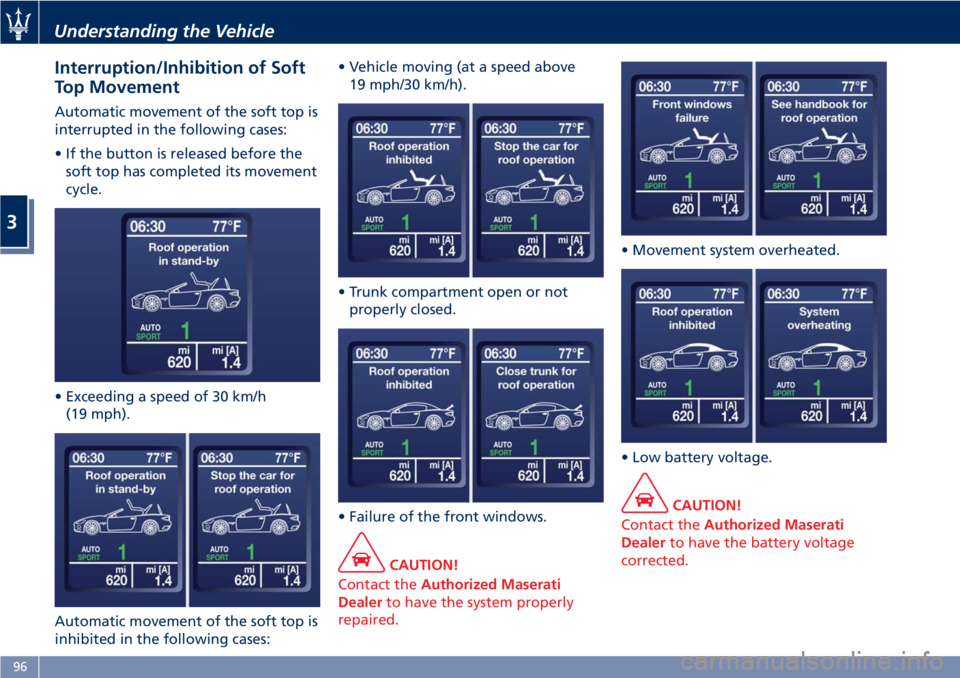
Interruption/Inhibition of Soft
Top Movement Automatic movement of the soft top is
interrupted in the following cases:
• If the button is released before the
soft top has completed its movement
cycle.
• Exceeding a speed of 30 km/h
(19 mph).
Automatic movement of the soft top is
inhibited in the following cases: • Vehicle moving (at a speed above
19 mph/30 km/h).
• Trunk compartment open or not
properly closed.
• Failure of the front windows.
CAUTION!
Contact the Authorized Maserati
Dealer to have the system properly
repaired. • Movement system overheated.
•
Low battery voltage.
CAUTION!
Contact the Authorized Maserati
Dealer to have the battery voltage
corrected.Understanding the Vehicle
3
96
Page 102 of 296
NOTE:
The soft top failure temporarily
disables, for approx. 10 minutes, the
power windows’ operation. After this
time, the power windows will resume
normal functioning.
Soft Top Manual Closing
Operation In case of need, the soft top may be
closed manually.
WARNING!
• Manual operation of the soft top for
emergency closing requires the
presence of two persons in order to
prevent personal injury or damage
to the car.
• When moving the soft top by hand,
take the greatest care as its movable
parts could squeeze or trap objects
or parts of your body.
CAUTION!
The emergency procedure described
below must be used to close the soft
top if it is not possible for you to
contact the Authorized Maserati
Dealer immediately and you cannot
keep the soft top open. If the failure occurs when the opening
procedure
is already in progress, do
not attempt to complete the
procedure - close back the soft top
manually according to the following
instructions. After depressurizing the
hydraulic circuit by turning the key in
the ignition switch to STOP (OFF)
position, perform the emergency
procedure starting from the point at
which the opening stage jammed.
WARNING!
After depressurizing the system, the
soft top will move freely. Therefore, if
it is not in a balanced position, it will
close or open as a consequence of its
weight. Take the greatest care to
avoid being squeezed or trapped by
its levers and mechanisms.
Before Starting
NOTE:
• During
emergency closing, the side
windows must be lowered.
•
To move the soft top manually, you
must depressurize the hydraulic system
by turning the key in the ignition
switch to
STOP (OFF) position and
waiting approx. 10 minutes. • To avoid unintentional activations,
we recommend that you remove the
key from the ignition switch. Take
the flat-head screwdriver and the
wrench to lock/unlock the soft top
hinges out of the tool kit located in
the trunk compartment (see "Tool
Kit" in section "In an Emergency").
Soft Top Closing
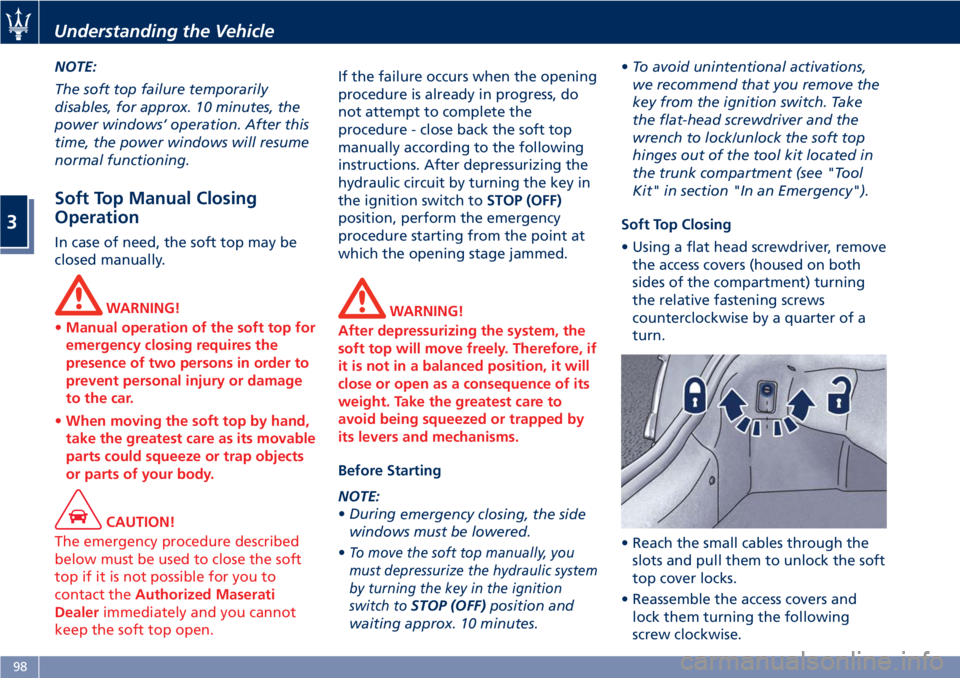
• Using a flat head screwdriver, remove
the access covers (housed on both
sides of the compartment) turning
the relative fastening screws
counterclockwise by a quarter of a
turn.
• Reach the small cables through the
slots and pull them to unlock the soft
top cover locks.
• Reassemble the access covers and
lock them turning the following
screw clockwise.Understanding the Vehicle
3
98
Page 104 of 296
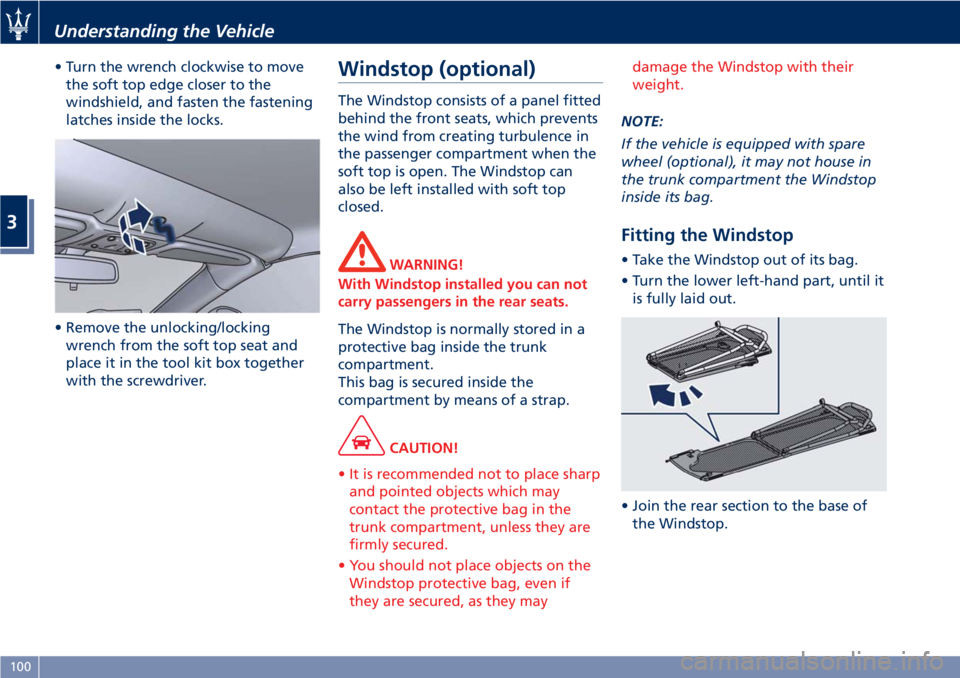
• Turn the wrench clockwise to move
the soft top edge closer to the
windshield, and fasten the fastening
latches inside the locks.
• Remove the unlocking/locking
wrench from the soft top seat and
place it in the tool kit box together
with the screwdriver. Windstop (optional) The Windstop consists of a panel fitted
behind the front seats, which prevents
the wind from creating turbulence in
the passenger compartment when the
soft top is open. The Windstop can
also be left installed with soft top
closed.
WARNING!
With Windstop installed you can not
carry passengers in the rear seats.
The Windstop is normally stored in a
protective
bag inside the trunk
compartment.
This bag is secured inside the
compartment by means of a strap.
CAUTION!
• It is recommended not to place sharp
and pointed objects which may
contact the protective bag in the
trunk compartment, unless they are
firmly secured.
• You should not place objects on the
Windstop protective bag, even if
they are secured, as they may damage the Windstop with their
weight.
NOTE:
If
the vehicle is equipped with spare
wheel (optional), it may not house in
the trunk compartment the Windstop
inside its bag.
Fitting the Windstop • Take the Windstop out of its bag.
• Turn the lower left-hand part, until it
is fully laid out.
• Join the rear section to the base of
the Windstop.Understanding the Vehicle
3
100