2019 MASERATI GRANTURISMO CONVERTIBLE open hood
[x] Cancel search: open hoodPage 25 of 296
2 – Before Starting Keys .................................................. 22
Immobilizer System ...................................... 24
Vehicle Security Alarm .................................... 26
Requiring and Setting Additional Key ........................ 28
Doors ................................................. 30
Power Windows ......................................... 33
Open and Close the Trunk Lid .............................. 35
Trunk Safety ........................................... 37
Open and Close the Hood ................................. 37
Occupants Restraint Systems ............................... 38
Supplemental Restraint System - Air bags ..................... 46
Active Roll Bars .......................................... 53
Child Restraint Systems ................................... 54
Transporting Pets ........................................ 59
Park Assist ............................................. 60
Rear Parking Camera ..................................... 63
Safety Tips ............................................. 65
21
Page 41 of 296
Trunk Safety WARNING!
Do not allow children to have access
to the trunk. Always close the trunk
lid when your vehicle is unattended.
Once in the trunk, young children may
not be able to escape. If trapped in
the trunk, children can die from
suffocation or heat stroke.
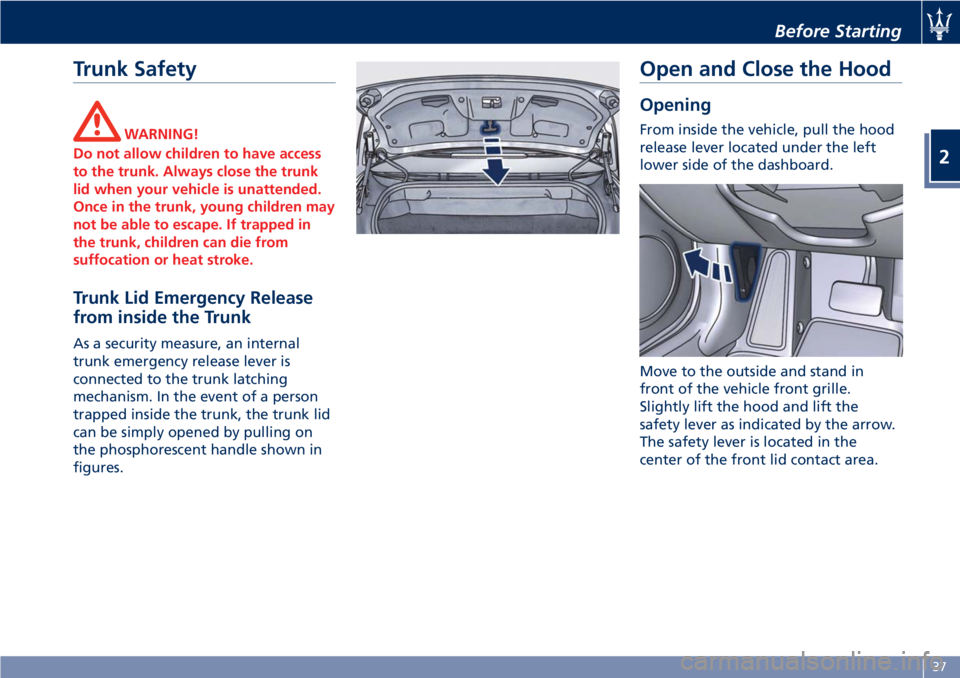
Trunk Lid Emergency Release
from inside the Trunk As a security measure, an internal
trunk emergency release lever is
connected to the trunk latching
mechanism. In the event of a person
trapped inside the trunk, the trunk lid
can be simply opened by pulling on
the phosphorescent handle shown in
figures. Open and Close the Hood Opening From inside the vehicle, pull the hood
release lever located under the left
lower side of the dashboard.
Move to the outside and stand in
front of the vehicle front grille.
Slightly lift the hood and lift the
safety lever as indicated by the arrow.
The safety lever is located in the
center of the front lid contact area.Before Starting
2
37
Page 42 of 296
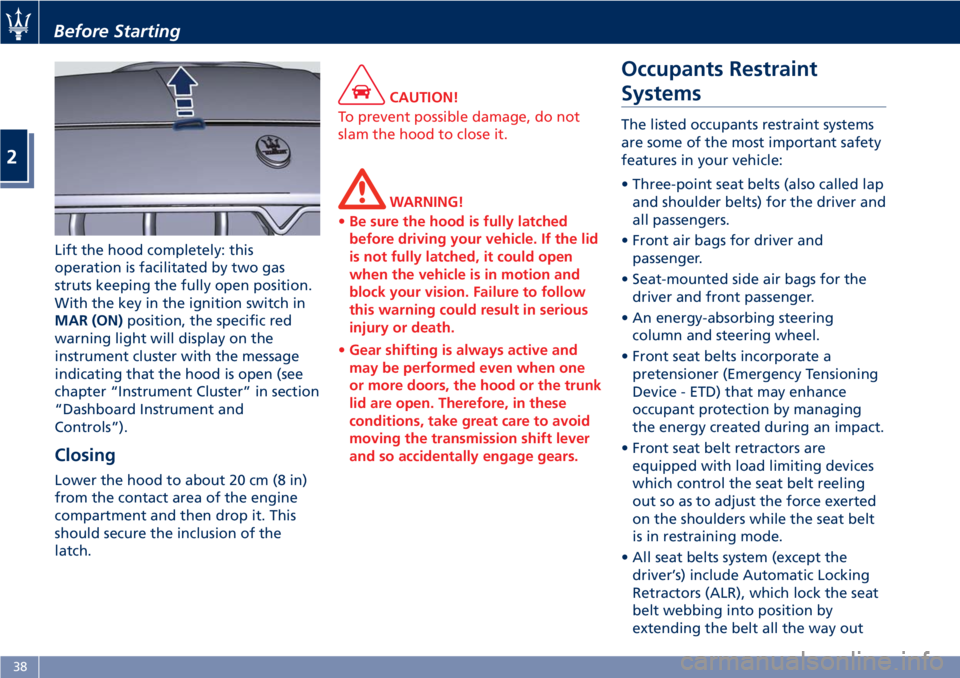
Lift the hood completely: this
operation is facilitated by two gas
struts keeping the fully open position.
With the key in the ignition switch in
MAR (ON) position, the specific red
warning light will display on the
instrument cluster with the message
indicating that the hood is open (see
chapter “Instrument Cluster” in section
“Dashboard Instrument and
Controls”).
Closing Lower the hood to about 20 cm (8 in)
from the contact area of the engine
compartment and then drop it. This
should secure the inclusion of the
latch. CAUTION!
To prevent possible damage, do not
slam the hood to close it.
WARNING!
• Be sure the hood is fully latched
before driving your vehicle. If the lid
is not fully latched, it could open
when the vehicle is in motion and
block your vision. Failure to follow
this warning could result in serious
injury or death.
• Gear shifting is always active and
may be performed even when one
or more doors, the hood or the trunk
lid are open. Therefore, in these
conditions, take great care to avoid
moving the transmission shift lever
and so accidentally engage gears. Occupants Restraint
Systems The listed occupants restraint systems
are some of the most important safety
features in your vehicle:
• Three-point seat belts (also called lap
and shoulder belts) for the driver and
all passengers.
• Front air bags for driver and
passenger.
• Seat-mounted side air bags for the
driver and front passenger.
• An energy-absorbing steering
column and steering wheel.
• Front seat belts incorporate a
pretensioner (Emergency Tensioning
Device - ETD) that may enhance
occupant protection by managing
the energy created during an impact.
• Front seat belt retractors are
equipped with load limiting devices
which control the seat belt reeling
out so as to adjust the force exerted
on the shoulders while the seat belt
is in restraining mode.
• All seat belts system (except the
driver’s) include Automatic Locking
Retractors (ALR), which lock the seat
belt webbing into position by
extending the belt all the way outBefore Starting
2
38
Page 75 of 296

1 Adjustable side air vents.
2 Hood lid opening lever.
3 Headlight and fog light switch.
4 "Mode" and adjust "+" and
"–" buttons.
5 Front parking sensors
disabling/enabling.
6 Trunk lid opening button.
7 Fuel tank door opening button
(see "Refueling" in section
"Driving" for operation).
8 Multifunction lever (Cruise
Control, turn signals, headlight
washer and headlight
selection).
9 Lower gearshift paddle
"DOWN".
10 Instrument cluster.
11 Steering wheel height and
depth adjustment lever.
12 Upper air vent.
13 Sun radiation sensor.
14 Horn control.
15 Multimedia controls repeated
on the steering wheel.
16 Windshield/headlight
wiper/washer control lever. 17 Upper gearshift paddle "UP".
18 Ignition switch.
19 Clock.
20 Central adjustable air vents.
21 MTC+ display.
22 Glove compartment.
23 Side window vents.
Front Dome Console
Components
1 Reading lights control button.
2 Central light control button.
3 Reading lights.
4 Central light. 5 Anti-lift and anti-intrusion
alarm system deactivation
button.
6 Paired phone hands-free
microphone.Understanding the Vehicle
3
71
Page 189 of 296
exhaust, do not idle the engine except
as necessary, service your vehicle in a
well-ventilated area and wear gloves
or wash your hands frequently when
servicing your vehicle. For more
information go to:
www.P65Warnings.ca.gov/passenger-
vehicle
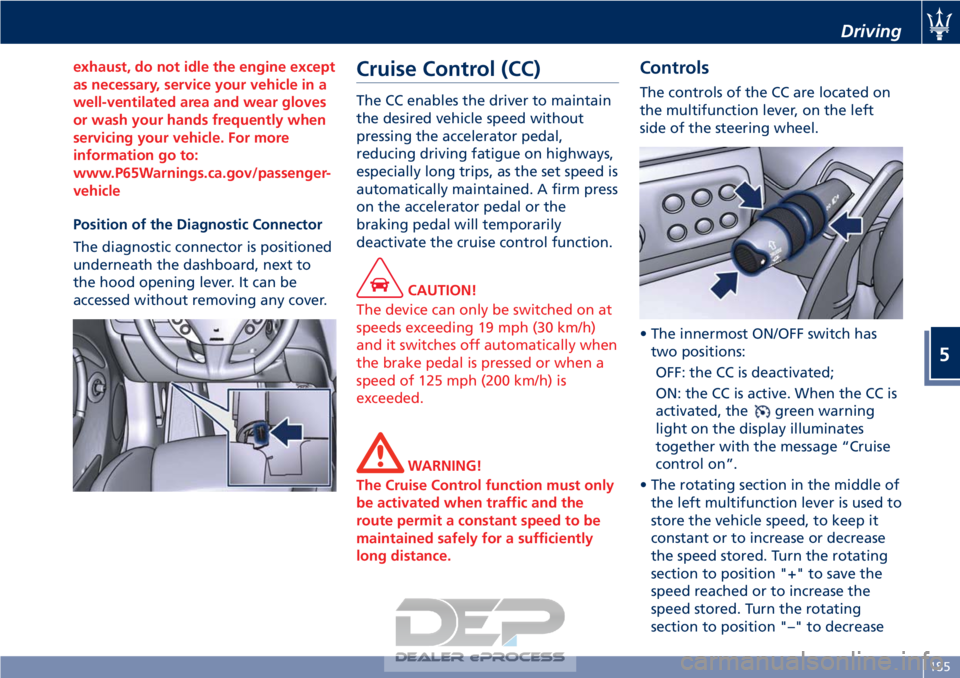
Position of the Diagnostic Connector
The
diagnostic connector is positioned
underneath the dashboard, next to
the hood opening lever. It can be
accessed without removing any cover.
Cruise Control (CC)
The CC enables the driver to maintain
the desired vehicle speed without
pressing the accelerator pedal,
reducing driving fatigue on highways,
especially long trips, as the set speed is
automatically maintained. A firm press
on the accelerator pedal or the
braking pedal will temporarily
deactivate the cruise control function.
CAUTION!
The device can only be switched on at
speeds exceeding 19 mph (30 km/h)
and it switches off automatically when
the brake pedal is pressed or when a
speed of 125 mph (200 km/h) is
exceeded.
WARNING!
The Cruise Control function must only
be activated when traffic and the
route permit a constant speed to be
maintained safely for a sufficiently
long distance.
Controls
The controls of the CC are located on
the multifunction lever, on the left
side of the steering wheel.
• The innermost ON/OFF switch has two positions:
OFF: the CC is deactivated;
ON: the CC is active. When the CC is
activated, the
green warning
light on the display illuminates
together with the message “Cruise
control on”.
• The rotating section in the middle of the left multifunction lever is used to
store the vehicle speed, to keep it
constant or to increase or decrease
the speed stored. Turn the rotating
section to position "+" to save the
speed reached or to increase the
speed stored. Turn the rotating
section to position "–" to decrease
Driving
5
185
Page 218 of 296

Engine Overheating
To reduce potentially overheating of
the engine in city traffic, while
stationary, place the transmission in N
(Neutral), but do not increase the
engine idle speed.
NOTE:
There are steps that you can take to
slow down an impending overheat
condition:
•If your air conditioner (A/C) is on,
turn it off. The A/C system adds heat
to the engine cooling system and
turning the A/C off can help remove
this heat.
• You can also turn the temperature
control to maximum heat, the mode
control to floor and the blower
control to high. This allows the
heater core to act as a supplement to
the radiator and aids in removing
heat from the engine cooling system.
CAUTION!
Driving with a hot cooling system
could damage the engine. If the
temperature gauge is positioned on
the red zone (refer to “Instrument
Cluster” in section “Dashboard Instruments and Controls”), pull over
and stop the vehicle. Idle the vehicle
with the air conditioner turned off
until the temperature gauge drops
back into the normal range. If the
temperature gauge remains on the red
zone turn the engine off immediately
and contact the
Authorized Maserati
Dealer.
WARNING!
You or others can be badly burned by
hot engine coolant (antifreeze) or
steam from your radiator. If you see or
hear steam coming from under the
hood, do not open it until the radiator
has had time to cool.
Never try to open a coolant bottle
pressure cap (refer to “Maintenance
Procedures” in section “Maintenance
and Care”) when the radiator is
overheated.
In case of a Punctured Tire
The vehicle can be equipped with a
tire repair kit or with a compact spare
wheel.
Using Tire Repair Kit
Small punctures up to 1⁄4” (6 mm) in
the tire tread can be sealed using the
tire repair kit, fitted beneath the floor
panel of the trunk compartment.
The kit comes in a bag and consists of
two parts:
• an electric compressor with pressure gage, hose to be connected to the
punctured tire and power cable;
• a gas cylinder containing sealant.
In an Emergency
6
214
Page 243 of 296
Maintenance Procedures
The following pages contain the
“required” maintenance standards
determined by Maserati engineers.
Besides those maintenance items
specified in the “Scheduled Service
Plan”, there are other components
which may require service or
replacement in the future.
To perform most of the services, it is
necessary to open the hood (see
“Open and Close the Hood” in section
“Before Starting”).
The following images show the
position of all components involved in
the maintenance service.
CAUTION!
• Failure to properly maintain your vehicle or perform repairs and
service when necessary could result
in more costly repairs, damage to
other components or negatively
impact vehicle performance.
Immediately have potential
malfunctions examined by an
Authorized Maserati Dealer or a
qualified repair center.
• Your vehicle has been equipped with improved fluids that protect the
performance and durability of your vehicle and also allow extended
maintenance intervals. Do not use
chemical flushes for washing as the
chemicals can damage your engine,
transmission, power steering or air
conditioning. Such damages are not
covered by the New Vehicle Limited
Warranty. If a flush is needed
because of component malfunction,
use only a specific product for the
flushing procedure.
Maintenance and Care
7
239
Page 267 of 296
Periodically remove any leaves and
insects that may build up and obstruct
the inlet of external air in the air
conditioning system through the grille
present underneath the rear part of
the hood.
To access the grille, lift the hood as
described in “Open and Close the
Hood” in section “Before Starting”.
A/C Air Filter Replacement
This filter performs mechanic/
electrostatic air filtering, provided
that windows and doors are perfectly
closed.
Have your filter replaced at least once
a year at anAuthorized Maserati
Dealer, preferably at the beginning of
the summer period.
If the vehicle is mainly used in the city
traffic, on highways or dusty roads, we
recommend that you replace the
filters more frequently than prescribed
in the "Scheduled Service Plan" of this
section.
CAUTION!
Failure to replace the filter may
considerably reduce the air
conditioning and heating system
efficiency.
WARNING!
California Proposition 65
Operating, servicing and maintaining
a passenger vehicle or off-road vehicle
can expose you to chemicals including
such as, engine exhaust, carbon
monoxide, phthalates and lead, that
which are know to the State of
California to cause cancer and birth
defects or other reproductive harm. To
minimize exposure, avoid breathing
exhaust, do not idle the engine except
as necessary, service your vehicle in a
well-ventilated area and wear gloves
or wash your hands frequently when
servicing your vehicle. For more
information go to:
www.P65Warnings.ca.gov/passenger-
vehicle
Wheels Maintenance
Tires Maintenance
CAUTION!
To obtain the best performances and
the longest mileage from the tires,
take the following precautions during
the first 310 mi (500 km):
• do not drive at the vehicle’s maximum speed;
• drive at low speed on curves;
• avoid sudden steering;
• avoid sudden braking;
• avoid sudden acceleration;
• do not drive at high speeds for too long.
The tires inflation pressure must
correspond
to the prescribed values
(see the chapter “Tire Inflation
Pressure” in section “Features and
Specifications”) and should be
checked only when the tires have
cooled down. In fact, the pressure
increases as the tire temperature
progressively increases.
Never reduce the pressure if tires are
hot (see “Tires – General Information”
chapter in section “Driving”).
Maintenance and Care
7
263