2019 MASERATI GRANTURISMO CONVERTIBLE start stop button
[x] Cancel search: start stop buttonPage 27 of 296
• Never leave children alone in a
vehicle, or with access to an
unlocked vehicle.
• Allowing children to be in a vehicle
unattended is dangerous for a
number of reasons. A child or others
could be seriously or fatally injured.
Children should be warned not to
touch the parking brake switch,
brake pedal or the shift lever.
• Do not leave the key in or near the
vehicle, and do not leave the key in
the ignition switch in the ACC or
MAR (ON) position. A child could
operate power windows, other
controls, or move the vehicle.
• Do not leave children or animals
inside parked vehicles in hot
weather. Interior heat build-up may
cause serious injury or death.
• An unlocked car is an invitation to
thieves. Always remove the key
from vehicle, cycle the ignition
switch to STOP (OFF) and lock all
doors when leaving the vehicle
unattended.
• In the event of tampering with the
starter switch (e.g. attempted theft),
have it checked by an Authorized
Maserati Dealer before restarting
the vehicle. The key can be removed from the
ignition
switch only when the
transmission shift lever is in position P
(Park).
If the transmission shift lever is shifted
to P (Park) after turning off the
engine, the key can only be removed
within 30 seconds from turning it to
STOP (OFF) position.
If you do not remove the key within
30 seconds, you will need to turn it
back to MAR (ON) and then to STOP
(OFF) position to have a further 30
seconds within which to remove the
key.
In the event that the key unlocking
system fails or if it is not possible to
shift the transmission shift lever to P
(Park) position, to remove the key
from the ignition switch you must turn
it to STOP (OFF) position, then:
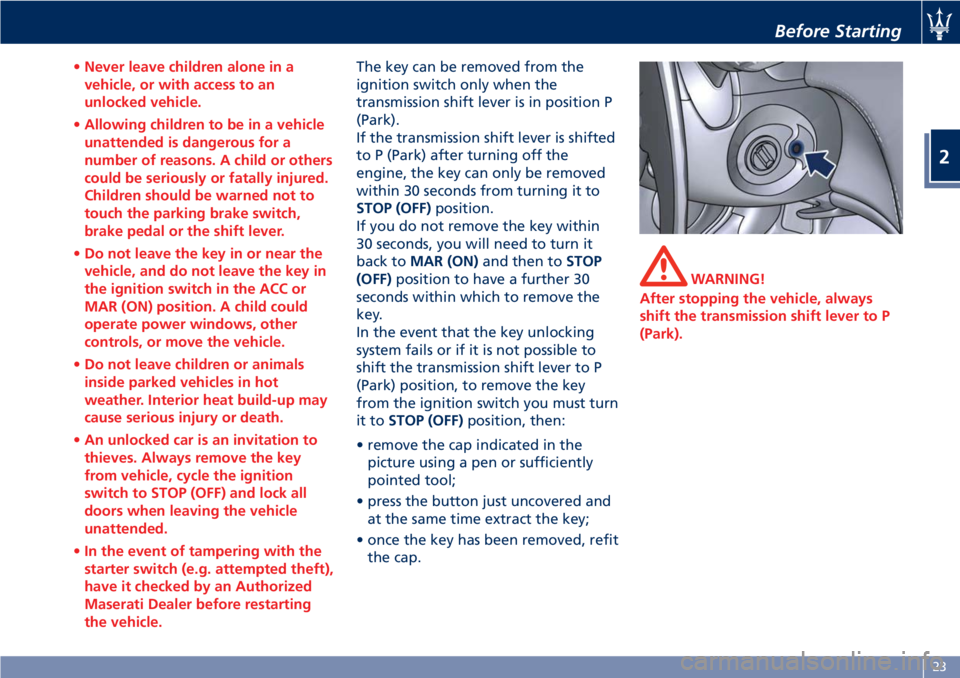
• remove the cap indicated in the
picture using a pen or sufficiently
pointed tool;
• press the button just uncovered and
at the same time extract the key;
• once the key has been removed, refit
the cap. WARNING!
After stopping the vehicle, always
shift the transmission shift lever to P
(Park).Before Starting
2
23
Page 31 of 296

Alarm System Deactivation Press the lock button on the key to
activate the security alarm system.
• The turn signals flash twice.
• The system emits a double beep.
• The red LEDs on the front door
panels turn off.
• The centralized door locking system
is activated and the doors are
unlocked.
The security alarm system is off and it
is therefore possible to get into the
vehicle and start the engine.
Pressing the
unlock button twice
unlocks the doors and also switches on
the low beams for 30 seconds.
NOTE:
The security alarm system is not
deactivated when the key is turned in
the locks. Getting into the Vehicle with
Alarm On When the battery on the radio control
case is dead, to access the vehicle you
must insert the key in the lock on one
of the two front doors and turn it
clockwise to unlock it.
The alarm will sound but you will have
to continue with the normal starting
procedure. The alarm will turn off.
Anti-intrusion and Anti-lift
Protection The anti-intrusion/anti-lift alarm
device may be deactivated by pressing
the button, on the dome console,
when the key in the ignition switch is
in MAR (ON) position or within 1
minute from turning the engine off
(key in the STOP (OFF) position).
Deactivation is signaled by the LED on
the button flashing for 3 seconds. CAUTION!
Anti-intrusion and anti-lift protections
override is memorized until the alarm
is next activated: therefore, if these
protections are overridden but the
alarm is not activated immediately, the
override will remain memorized until
the next time it is activated, regardless
of turning the vehicle on/off.
Security Alarm Memory If the CODE warning light appears
on the display when the vehicle is
started, accompanied by the message
“Break-in attempt detected” this
means that an intrusion has been
attempted during your absence.
The security alarm system memory is
reset when you turn the ignition key.Before Starting
2
27
Page 39 of 296
Reset Auto-Up/Down Should the auto-up/down feature stop
working, the window probably needs
to be reset.
To reset auto-up/down, pull the
window switch up to close the
window completely and push the
window switch down to open the
window completely.
If You have to Disconnect the
Battery Before disconnecting the battery,
lower the side windows by at least 1-2
in (4-5 cm) to avoid damaging the soft
top strip when opening and closing
the door.
When the battery is connected, this
operation is performed automatically
when the door is opened and closed.
The windows must remain lowered
until the charged battery is
reconnected. If the battery is
completely discharged when the
windows are fully raised, only open
the door if absolutely necessary, with
the utmost care; do not close the door
again until it is possible to lower the
window. Open and Close the Trunk
Lid Opening The trunk compartment lid can be
opened from inside or outside the
vehicle.
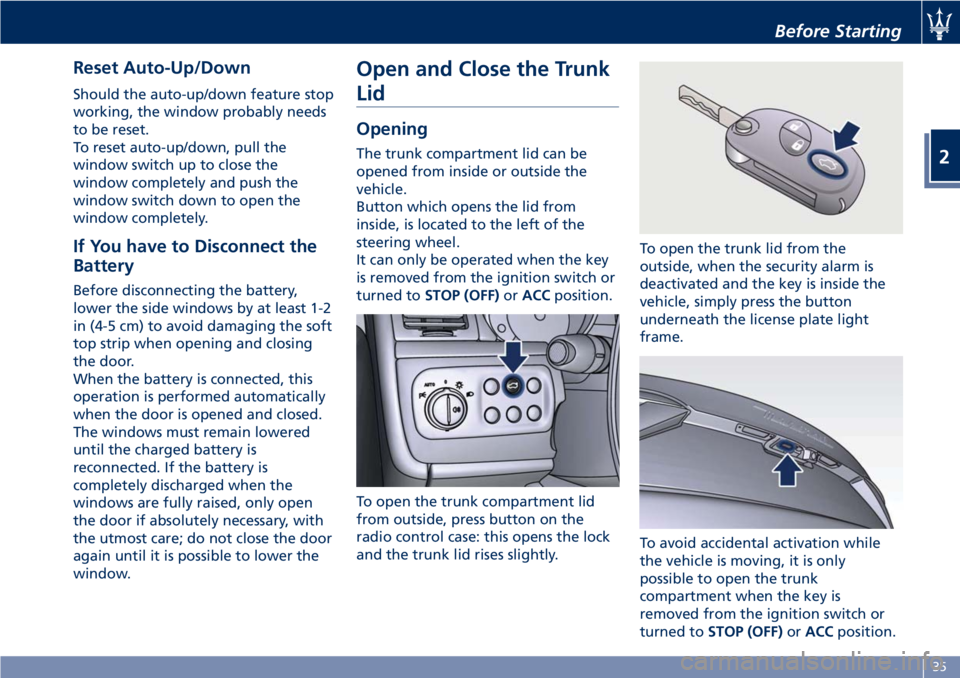
Button which opens the lid from
inside, is located to the left of the
steering wheel.
It can only be operated when the key
is removed from the ignition switch or
turned to STOP (OFF) or ACC position.
To open the trunk compartment lid
from outside, press button on the
radio control case: this opens the lock
and the trunk lid rises slightly. To open the trunk lid from the
outside, when the security alarm is
deactivated and the key is inside the
vehicle, simply press the button
underneath the license plate light
frame.
To avoid accidental activation while
the vehicle is moving, it is only
possible to open the trunk
compartment when the key is
removed from the ignition switch or
turned to STOP (OFF) or ACC position.Before Starting
2
35
Page 65 of 296

the rear ones for approx. 10 seconds
or until a speed of approx. 6 mph
(10 km/h) is exceeded, and the front
ones until a speed of approx. 6 mph
(10 km/h) is exceeded. When driving at
a speed equal to or lower than 6 mph
(10 km/h), as soon as the system
detects an obstacle, the front sensor
detection areas are displayed, and the
acoustic signals start to be emitted. If
no obstacle is detected for 10 seconds,
the displayed information disappears.
Front sensors can be temporarily
disabled by pressing
button in the
control panel next to the steering
wheel. The system will emit an
acoustic signal, and the button LED
will turn off. If
button is pressed
again, the acoustic signal and the LED
coming on will warn the driver that
sensors are now active again. System with Disabled Stop &
Go Feature With the "Stop & Go" feature disabled
through the MTC+, rear sensor
enabling/disabling logic is kept
unchanged. As for front sensors, the
“Stop & Go” function signal status will
not be changed if the
button in
the control panel next to the steering
wheel is pressed and front sensors will
be active and displayed on the
instrument cluster until speed will be
equal to or lower than 6 mph
(10 km/h).
Once this speed limit is exceeded, if
vehicle slows down below 6 mph
(10 km/h), sensors will not be enabled.
To enable them again, press
button. NOTE:
Front sensors are enabled only when
button LED is illuminated. In
addition, any pressing of
button
when vehicle speed is above 6 mph
(10 km/h) will be ignored by the
system.
Obstacle Signalling The acoustic signals are emitted by
two buzzers, one under the dashboard
and one in proximity of the luggage
shelf.
When the obstacle is located at a
distance of less than 14 in (35 cm)
from the bumper, the beep is
continuous. The warning beep stops
immediately if the distance between
the vehicle and the obstacle increases.
The tone cycle is constant if the
distance measured by the central
sensors remains unaltered. If this
occurs with the lateral sensors, the
signal stops after approximately 7
seconds, to prevent for example
continuous beeps in the event of
maneuvers alongside walls.
The distance from the obstacles can
also be graphically shown on the
instrument cluster display by means of
an image that shows the vehicle
surrounded by explanatory symbols ofBefore Starting
2
61
Page 82 of 296
To recall one of the stored positions
with the door open, press the relative
button “1”, “2” or “3” briefly.
To recall a stored position with the
door closed, press the corresponding
button until hearing a tone that
confirms the seat has stopped.
NOTE:
• To stop the seat, press one of the
buttons - “1”, “2” or “3” -, or one of
the adjustment controls.
• Malfunctioning of the seat control
unit is indicated by a sequence of 5
tones emitted when the key in the
ignition switch is turned to STOP
(OFF) position. Contact an
Authorized Maserati Dealer to have
the malfunction corrected.
Each system is independent of the
others and can be operated separately
using specific buttons for each seat.
System Initialization Procedure
Following any power cut-out (e.g.
after using the battery master switch
or dead battery), check the seats to
ensure that they are operating
properly when the power supply is
available.
Perform the following procedures on
both seats in the event of a
malfunction. The key in the ignition switch must be
in STOP (OFF) position and the door on
the side of the seat concerned closed.
Open the door and begin the
following procedure within 5 seconds,
then complete it within 10 seconds:
• forward - STOP;
• backward - STOP;
• forward - STOP;
• backward - STOP;
• tilt the seatback fully forward and
wait until the seat performs two
complete travels (forward and
backward);
• move the seatback to its normal
upright position.
NOTE:
If you need to disconnect the battery,
wait at least 30 seconds from the last
seat movement. If you disconnect the
battery before, you will have to run
the initialization procedure.
Seatback Facilitated Tilt
This function only active when the
door is open, moves the seat forward
automatically when the seatback is
reclined forward to facilitate access to
the rear seat or exiting the vehicle. The
seat returns to their original position
when the seatback is tilted back again. Rear Seats Rear seats can fit two passengers.
Seats and seat belts are parts of the
occupant restraint system of the
vehicle.
WARNING!
Be sure everyone in your vehicle is in a
seat and using a seat belt properly.
NOTE:
See
chapter “Occupants Restraint
Systems” in section “Before Starting”
for seat belt positioning.
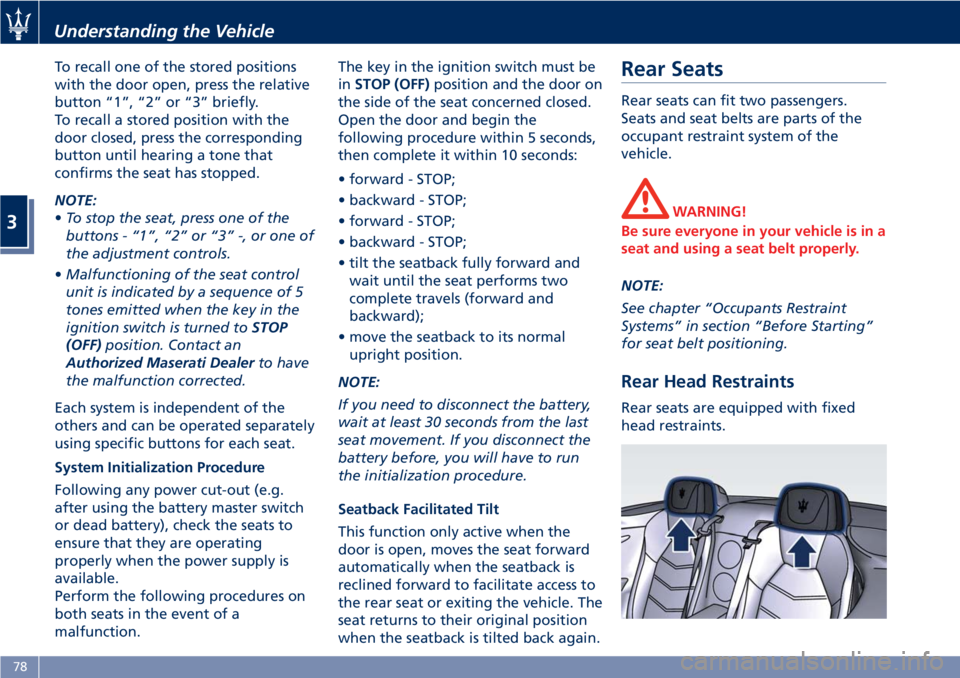
Rear Head Restraints Rear seats are equipped with fixed
head restraints.Understanding the Vehicle
3
78
Page 96 of 296
Soft Top NOTE:
By soft top “opening” we
mean folding the soft top
into the rear luggage
compartment.
By soft top “closing” we
mean the opposite.
Precautions Before and during the soft top
operation observe the following
precautions.
WARNING!
• Before opening or closing the soft
top, always check that no one is in
the way, as impact with the soft top
may cause injury. Also check that no
objects stand in the way of the soft
top, as impact may cause damage to
both the soft top and the object.
• The movement of the soft top with
the engine running must be
performed outdoor. Exhaust gases
contain carbon monoxide which is
strongly toxic and potentially lethal. • In case of hazard, release the soft
top button, which stops its
movement.
• Keep your hands away from the soft
top levers, the soft top compartment
and the upper edge of the
windshield.
• Before operating the soft top, make
sure that no passengers are sitting in
the rear seats.
• Never operate or act on a soft top
that is performing an automatic
movement cycle.
CAUTION!
• Do not open the soft top when it is
wet, as the damp that would form in
the soft top housing might cause
permanent damage to the structure
or stains or mold in the canvas.
Should it need to be opened, do not
leave it sitting in the housing for
more than a day.
• Open the soft top when it is dirty, as
both the canvas and the rear window
might be damaged when it is folded.
• Do not open the soft top if there is
ice or snow on it. Should it need to
be opened, remove the snow or ice and do not use sharp or pointed
objects.
• Do not place objects on the soft top
as they might fall and cause damage
and injury when it is moved.
• Do not place any objects in the soft
top housing.
• Do not fasten roof-racks or similar on
the soft top.
• When closing the soft top, never
start driving before the soft top has
completed the closing cycle and has
locked on the windshield frame.
• Only open or close the soft top when
the vehicle is stationary, otherwise it
might not fully open or close. For
example, if you start moving the soft
top when you are standing at a
traffic light and you start driving
before the soft top has completed its
opening or closing cycle, you can
complete the operation by driving
slowly (do not exceed 19 mph -
30 km/h) and holding the soft top
movement switch pushed until the
process has been completed.
• If you are driving at high speeds,
vacuum might be created in the
passenger compartment and the soft
top might start “wobbling”; to solveUnderstanding the Vehicle
3
92
Page 113 of 296
WARNING!
Vehicle exhaust contains carbon
monoxide, a dangerous gas. Do not
run your vehicle in the garage while
programming the transceiver. Exhaust
gas can cause serious injury or death.
Customer Service If you have problems with training the
HomeLink Universal Transceiver, or
would like information on home
products that can be operated by the
transmitter, call (800) 355-3515. On the
Internet, go to www.Homelink.com.
Safety Precautions Always refer to the operating
instructions and safety information
that came with your garage door
opener or other equipment you
intend to operate with the HomeLink
Universal Transceiver. If you do not
have this information, you should
contact the manufacturer of the
equipment.
While training or using HomeLink,
make sure you have a clear view of
the garage door or gate, and that no
one will be injured by its movement. General Information While programming HomeLink ®
,itis
advisable to disconnect the drive
motor of the gate/door to be remote
controlled, since the numerous driving
pulses launched for this operation
might damage it.
If the battery fails or is disconnected,
the stored settings are not deleted.
If the gate/door was manufactured
prior to April 1982 (not equipped with
safety systems or automatic stop in the
event of an obstacle in the range of
action), the gate/door cannot be
controlled by HomeLink ®
.
If you have questions, call (800)
355-3515.
WARNING!
California Proposition 65
Operating, servicing and maintaining
a passenger vehicle or off-road vehicle
can expose you to chemicals including
such as, engine exhaust, carbon
monoxide, phthalates and lead, that
which are know to the State of
California to cause cancer and birth
defects or other reproductive harm. To
minimize exposure, avoid breathing
exhaust, do not idle the engine except
as necessary, service your vehicle in a well-ventilated area and wear gloves
or wash your hands frequently when
servicing your vehicle. For more
information go to:
www.P65Warnings.ca.gov/passenger-
vehicle
Programming • Press and hold buttons "1" and "3".
• After about 20 seconds, the LED
starts flashing.
• Release the buttons.
• Hold the remote control for the
device to be controlled close to the
HomeLink ®
control panel (0-30 cm/
0-12 in).
• Simultaneously press and hold the
button on the hand-held remote
control and one of the three
HomeLink ®
buttons "1", "2" or "3".
• Successful programming is signaled
by the LED flashing faster.
• Release the buttons.
To program the other buttons, repeat
the operations skipping the first three
steps.Understanding the Vehicle
3
109
Page 119 of 296
Calibration Selection The driver can select, in relation to
road surface conditions, vehicle speed,
driving style and comfort, one of the
two calibration levels provided by the
system: normal or sports-style.
• Normal calibration , active when
SPORT drive mode is disabled
("SPORT" button not pressed), favors
comfort and higher driving stability
with low and average grip
conditions.
• Sport-style calibration , active when
SPORT drive mode is enabled
("SPORT" button pressed) , favors
wheel drive and permits a
dynamic-style driving with optimal
road holding.
Whenever the engine is started, the
system automatically activates
NORMAL drive mode, even if SPORT
drive mode was selected before the
engine was last turned off.
The sport-style calibration can be
selected only with the key in the
ignition switch in MAR (ON) position
and it is enabled by pressing button
"SPORT", even while driving.
When SPORT drive mode is activated,
the word “SPORT” on the instrument
cluster display and the LED on the
button illuminate. WARNING!
SPORT drive mode should not be
activated if the road surface is rough
or slippery.
The electronic suspension control
system
works in combination with the
ESC system.
When the suspension is set to normal
calibration, stability is increased under
medium and low grip conditions,
while when it is set to sport-style
calibration, the ESC system optimizes a
sportier driving.
WARNING!
In low- and medium-grip conditions
(e.g., rain, snow, ice, sand, etc.) it is
advisable not to use SPORT drive
mode, even with the ESC system
enabled.
Malfunction Indicators If one or more electric components in
the system prove to be malfunctioning
while driving, the ECU illuminates the
amber warning light accompanied
by the message “Check suspensions”
on the display. In addition, the ECU
calibrates the shock absorbers to a preset value, thus ensuring a safe
vehicle set up.
Should the malfunction involve one
shock absorber only, this will no
longer be controlled by the ECU and
will therefore remain set as it was
when the fault occurred. It is
therefore possible for one of the four
shock absorbers to work with a fixed
calibration, different from that of the
other ones.
In any case, safe and secure vehicle
driving is always ensured at low
speeds.
CAUTION!
In the event of a malfunction in the
suspension control electronic system,
which will be indicated by the
illumination of the amber warning
light on the display while driving,
keep a moderate speed and have the
vehicle checked as soon as possible by
an Authorized Maserati Dealer .
If a malfunction occurs while driving,
and
this is signaled by the illumination
of the
amber warning light on the
display, it is advisable to stop the
vehicle as soon as possible, turn the
key in the ignition switch to STOP
(OFF) position and then restart the
engine.Understanding the Vehicle
3
115