2019 MASERATI GRANTURISMO CONVERTIBLE lock
[x] Cancel search: lockPage 35 of 296

In the event of an emergency (vehicle
dead battery or electric system failure)
to open the doors, with the locks
released, press the rear button inside
each handle. Otherwise, if the doors
are locked, you must release them by
turning the key in the lock to open
them, then press the rear button.
In this case, being a conventional
mechanism, hold the rear button
pressed down longer. On the door panels, in a position
which is visible from the outside, there
is a dual-color (green/red) LED E which
indicates the status of the locks
(locked/unlocked). The red LEDs
illuminate for 3 seconds after the locks
are engaged and the green LEDs for
the same amount of time when they
are unlocked.
NOTE:
The door LEDs remain illuminated for
approximately 3 seconds and
therefore, in normal conditions, they
are off.
When the security alarm system is
turned on and the doors are locked,
the LEDs on the doors flash.
The radio control device allows you to
operate the centralized opening of all
the doors or of the driver’s door only,
depending on the Maserati Touch Control Plus (MTC+) settings (see
"MTC+ Settings" in section
"Dashboard Instrument and
Controls").
If one or more doors are not properly
closed when locking the doors from
the outside, they will not be locked,
while if the trunk compartment is not
properly closed, the doors will in any
case be locked.
In both cases, the malfunction will be
indicated by the turn signals flashing
for a few seconds.
NOTE:
• The interior door locking/unlocking,
trunk compartment lid opening and
fuel tank door opening buttons are
disabled when the doors are locked
from the outside.
• In the event that the inertia switch
activates, the doors are electrically
unlocked and the vehicle can be
accessed by pressing the rear button
inside each handle.Before Starting
2
31
Page 36 of 296

Opening from the Inside To open the door, even if the lock is
engaged, pull the internal handle.
There are two buttons in front of the
transmission lever which operate the
door locking and unlocking functions:
: door locking;
: door unlocking. NOTE:
By pulling the internal handle on the
driver’s door, all the locks can be
released at the same time or just the
driver’s door, depending on the MTC+
settings (see "MTC+ Settings" in
section "Dashboard Instrument and
Controls").
Door Open Warning Lights If the doors and the engine/luggage
compartment lids are not closed
properly, this is signaled by the
illumination of relative symbols on the
instrument panel display, accompanied
by the messages “Door open” or
“Doors open” shown in the picture.
Door Lock ECU Initialization
Every time the battery is connected or
a fuse replaced, you must perform the
system initialization procedure to ensure proper system operation. To
perform this procedure, lock and then
unlock the doors using the buttons
and on the radio control device.
For more details, see "Maintenance-
Free Battery" in section "Maintenance
and Care".
Door Open Indicator Light Each door is provided with a reflector
fitted on the rear side of the door
panel that makes it visible when
illuminated by the headlights of a
vehicle.
Signal Upon exceeding a speed of 3 mph
(5 km/h), if one or more doors/lid are
open or not properly closed, a warning
signal will be activated.
Door Courtesy Light Each door panel is fitted with a
courtesy light, on the lower part of the
door framework, to illuminate the
area where passengers enter/exit the
vehicle.Before Starting
2
32
Page 37 of 296
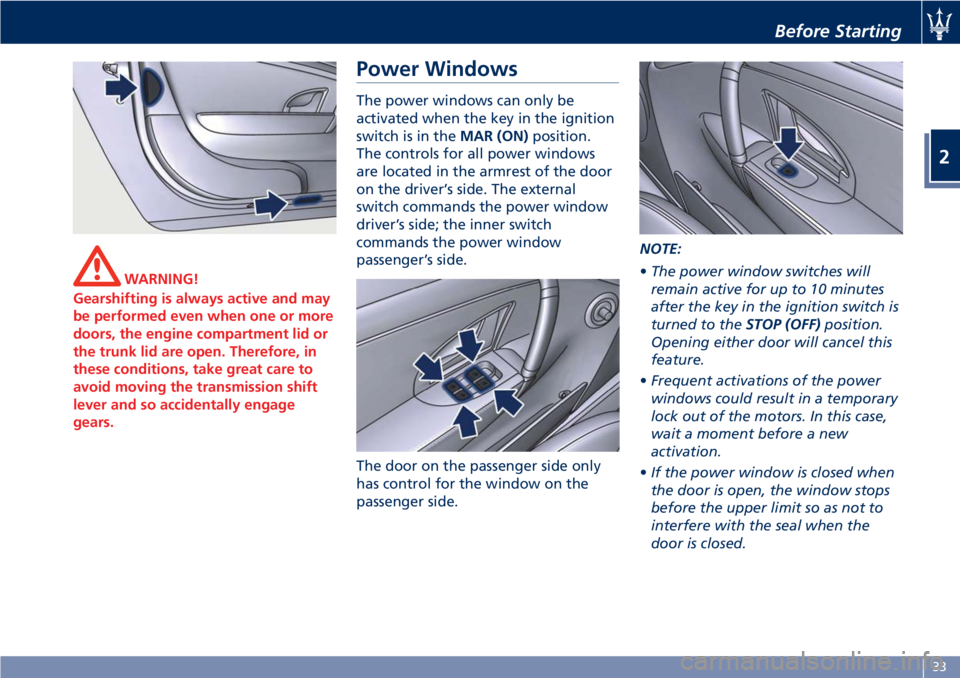
WARNING!
Gearshifting is always active and may
be performed even when one or more
doors, the engine compartment lid or
the trunk lid are open. Therefore, in
these conditions, take great care to
avoid moving the transmission shift
lever and so accidentally engage
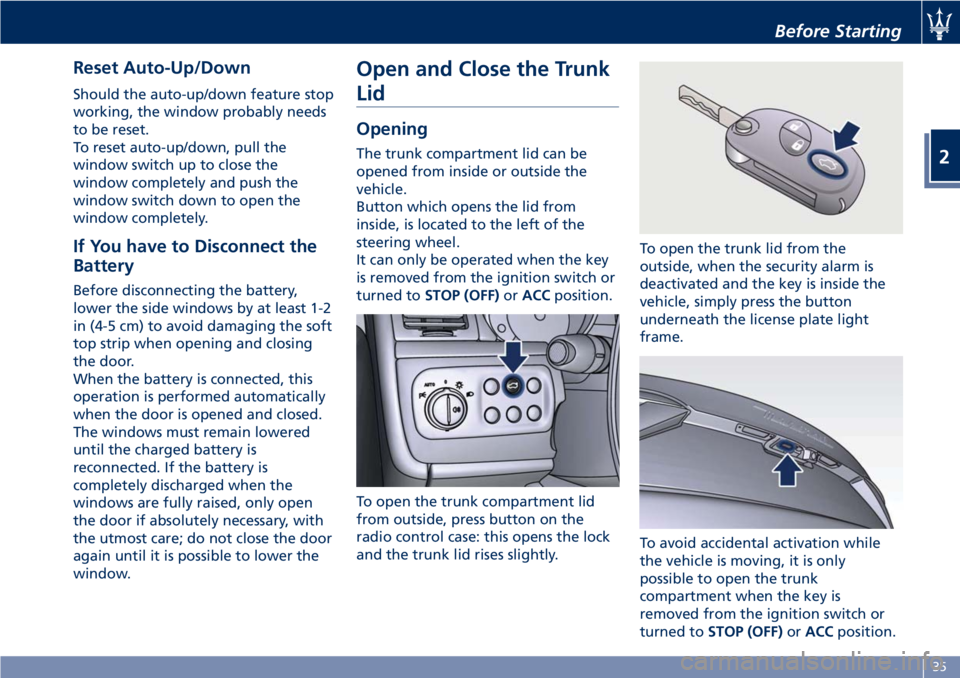
gears. Power Windows The power windows can only be
activated when the key in the ignition
switch is in the MAR (ON) position.
The controls for all power windows
are located in the armrest of the door
on the driver’s side. The external
switch commands the power window
driver’s side; the inner switch
commands the power window
passenger’s side.
The door on the passenger side only
has control for the window on the
passenger side. NOTE:
• The power window switches will
remain active for up to 10 minutes
after the key in the ignition switch is
turned to the STOP (OFF) position.
Opening either door will cancel this
feature.
• Frequent activations of the power
windows could result in a temporary
lock out of the motors. In this case,
wait a moment before a new
activation.
• If the power window is closed when
the door is open, the window stops
before the upper limit so as not to
interfere with the seal when the
door is closed.Before Starting
2
33
Page 39 of 296
Reset Auto-Up/Down Should the auto-up/down feature stop
working, the window probably needs
to be reset.
To reset auto-up/down, pull the
window switch up to close the
window completely and push the
window switch down to open the
window completely.
If You have to Disconnect the
Battery Before disconnecting the battery,
lower the side windows by at least 1-2
in (4-5 cm) to avoid damaging the soft
top strip when opening and closing
the door.
When the battery is connected, this
operation is performed automatically
when the door is opened and closed.
The windows must remain lowered
until the charged battery is
reconnected. If the battery is
completely discharged when the
windows are fully raised, only open
the door if absolutely necessary, with
the utmost care; do not close the door
again until it is possible to lower the
window. Open and Close the Trunk
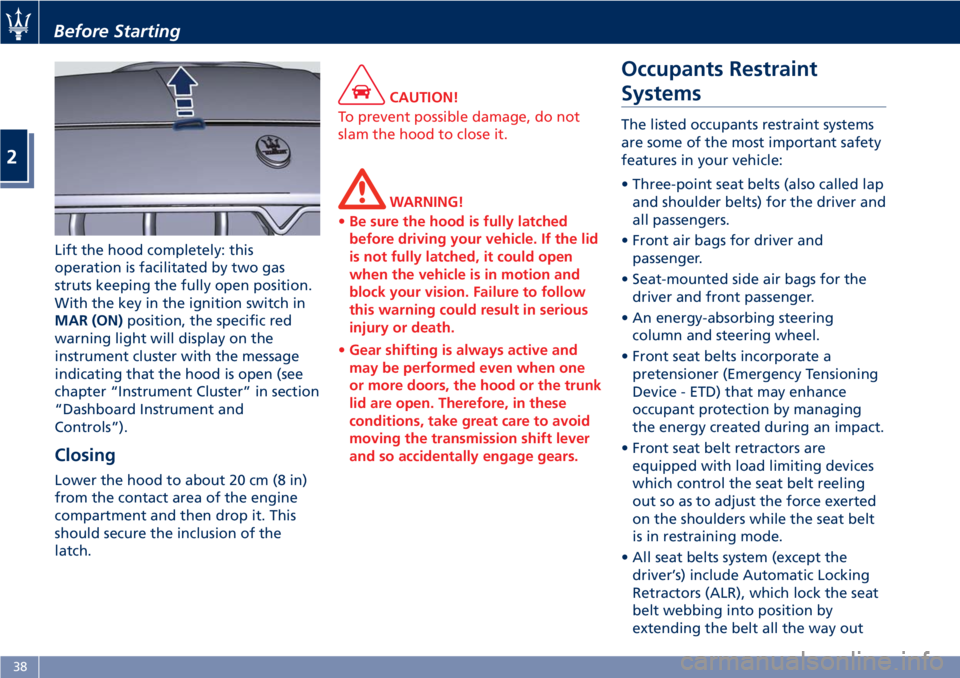
Lid Opening The trunk compartment lid can be
opened from inside or outside the
vehicle.
Button which opens the lid from
inside, is located to the left of the
steering wheel.
It can only be operated when the key
is removed from the ignition switch or
turned to STOP (OFF) or ACC position.
To open the trunk compartment lid
from outside, press button on the
radio control case: this opens the lock
and the trunk lid rises slightly. To open the trunk lid from the
outside, when the security alarm is
deactivated and the key is inside the
vehicle, simply press the button
underneath the license plate light
frame.
To avoid accidental activation while
the vehicle is moving, it is only
possible to open the trunk
compartment when the key is
removed from the ignition switch or
turned to STOP (OFF) or ACC position.Before Starting
2
35
Page 40 of 296

Two gas struts facilitate the lid
opening. The struts are calibrated to
ensure they function correctly with the
weights specified by the manufacturer.
The arbitrary addition of objects
(spoiler, luggage rack etc.) may impair
the lid’s correct operation and safety.
WARNING!
When using the trunk compartment,
never exceed the maximum loads
allowed (see “Technical Data" in
section "Features and Specifications”).
Also check that the objects contained
in the luggage compartment are
arranged properly.
The trunk compartment is illuminated
by
a light that comes on automatically
when the lid is opened; switching off is
timed.
If the trunk compartment lid is left
open, the light switches off after a few
minutes. To turn it on again, close the
lid and then reopen it.
NOTE:
The soft top automatic movement is
disabled when the trunk compartment
is open. Closing To close the trunk lid grasp one of the
handles as indicated on the inner
covering and lower the lid.
Then press gently on the outside of
the lid, in correspondence of the lock,
until hearing it click in place.
Emergency Opening If necessary, the trunk compartment lid
can be opened by pulling the small
cable, located underneath the left rear
seat. Once you have located the cable and
pulled it out from the seat, pull it
forward to open the trunk
compartment lid.
Independent Trunk Lid
Unlocking To allow the user to hold only the
trunk lid unlocked compared to the
doors condition, there is a dedicated
feature which can be activated by
MTC+ in “Doors & Locks” menu (see
"MTC+ Settings" in section
"Dashboard Instruments and
Controls".Before Starting
2
36
Page 42 of 296
Lift the hood completely: this
operation is facilitated by two gas
struts keeping the fully open position.
With the key in the ignition switch in
MAR (ON) position, the specific red
warning light will display on the
instrument cluster with the message
indicating that the hood is open (see
chapter “Instrument Cluster” in section
“Dashboard Instrument and
Controls”).
Closing Lower the hood to about 20 cm (8 in)
from the contact area of the engine
compartment and then drop it. This
should secure the inclusion of the
latch. CAUTION!
To prevent possible damage, do not
slam the hood to close it.
WARNING!
• Be sure the hood is fully latched
before driving your vehicle. If the lid
is not fully latched, it could open
when the vehicle is in motion and
block your vision. Failure to follow
this warning could result in serious
injury or death.
• Gear shifting is always active and
may be performed even when one
or more doors, the hood or the trunk
lid are open. Therefore, in these
conditions, take great care to avoid
moving the transmission shift lever
and so accidentally engage gears. Occupants Restraint
Systems The listed occupants restraint systems
are some of the most important safety
features in your vehicle:
• Three-point seat belts (also called lap
and shoulder belts) for the driver and
all passengers.
• Front air bags for driver and
passenger.
• Seat-mounted side air bags for the
driver and front passenger.
• An energy-absorbing steering
column and steering wheel.
• Front seat belts incorporate a
pretensioner (Emergency Tensioning
Device - ETD) that may enhance
occupant protection by managing
the energy created during an impact.
• Front seat belt retractors are
equipped with load limiting devices
which control the seat belt reeling
out so as to adjust the force exerted
on the shoulders while the seat belt
is in restraining mode.
• All seat belts system (except the
driver’s) include Automatic Locking
Retractors (ALR), which lock the seat
belt webbing into position by
extending the belt all the way outBefore Starting
2
38
Page 44 of 296
• Do not lean against the door or
window. Your vehicle has
seat-mounted side air bag and, if
deployment occurs, they will inflate
forcefully into the space between
you and the door.
• If the air bag system in this vehicle
needs to be modified to
accommodate a disabled person,
contact an Authorized Maserati
Dealer .
WARNING!
In an accident, all occupants can suffer
much greater injuries if not properly
buckled up. You can strike the interior
of your vehicle or other occupants or
you can be thrown out of the vehicle.
Always be sure you and others in your
vehicle are buckled up properly.
Buckle up even though you are an
excellent driver, even on short trips.
Someone on the road may be a poor
driver and cause an accident that
includes you. This can happen far
away from home or on your own
street.
Statistics report that seat belts save
lives
and help reduce the seriousness
of injuries in an accident. Some of the
worst injuries happen when people are thrown from the vehicle. Seat belts
reduce the possibility of ejection and
the risk of injury caused by striking the
inside of the vehicle.
Everyone in a motor vehicle should be
belted at all times.
Three-Point Seat Belts All seating positions in your vehicle are
equipped with combination lap and
shoulder belts.
The belt retractor is designed to lock
during very sudden stops or impacts.
This feature allows the shoulder part
of the belt to move freely with you
under normal conditions, conforming
to the body of the occupants.
However, in an accident, the belt will
lock and reduce your risk of striking
the inside of the vehicle or being
thrown out.
The driver is responsible for respecting,
and ensuring that all the other
occupants of the car also observe the
local regulations concerning the use of
seat belts. Always fasten the seat belts
before starting the vehicle.
Seat belts are designed to be used by
persons whose physical characteristics
(age, height, weight) are provided for
by established legislation in each
country. Anyone who does comply
with these provisions may not travel in the front passenger seat. This also
applies to children. Their heads are
proportionally heavier and larger than
those of adults, while their bones and
muscles are relatively undeveloped. To
help protect them in case of a collision,
they must use special restraint or
safety systems, even in the rear seat
area.
WARNING!
• It is forbidden and dangerous to ride
in a cargo area. In an accident,
people riding in these areas are more
likely to be seriously injured or
killed.
• Do not allow any person to ride in
any area of your vehicle that is not
equipped with seats and seat belts.
• Be sure all passengers are in a seat
and using a seat belt properly.
• Wearing your belt improperly could
make your injuries in an accident
much worse. You might suffer
internal injuries, or you could even
slide out of part of the belt. Follow
these instructions to wear your seat
belt properly and to keep your
passengers safe, too.Before Starting
2
40
Page 46 of 296
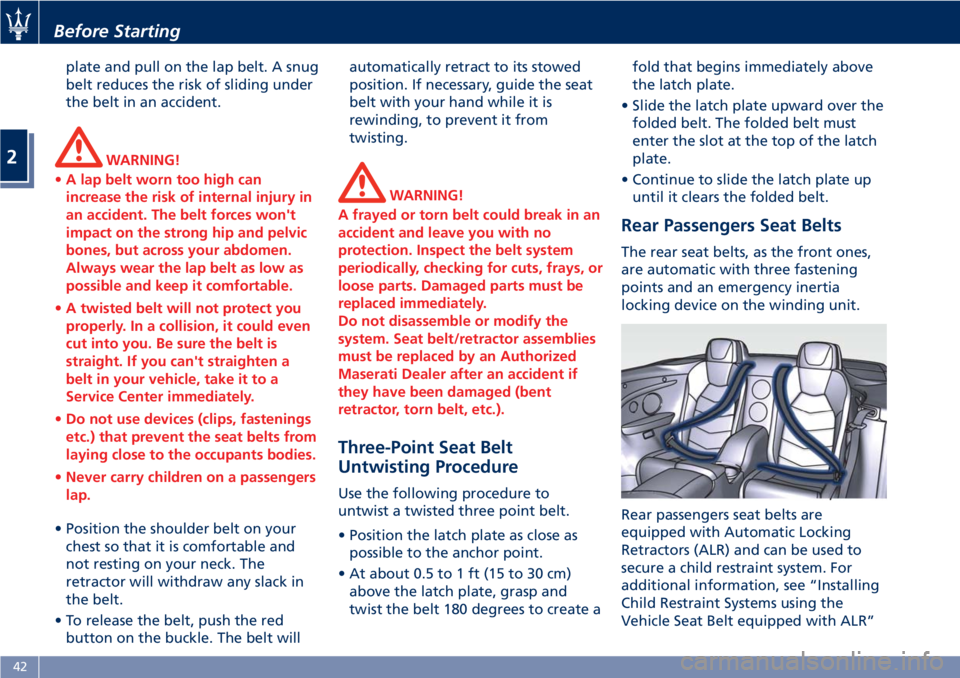
plate and pull on the lap belt. A snug
belt reduces the risk of sliding under
the belt in an accident.
WARNING!
• A lap belt worn too high can
increase the risk of internal injury in
an accident. The belt forces won't
impact on the strong hip and pelvic
bones, but across your abdomen.
Always wear the lap belt as low as
possible and keep it comfortable.
• A twisted belt will not protect you
properly. In a collision, it could even
cut into you. Be sure the belt is
straight. If you can't straighten a
belt in your vehicle, take it to a
Service Center immediately.
• Do not use devices (clips, fastenings
etc.) that prevent the seat belts from
laying close to the occupants bodies.
• Never carry children on a passengers
lap.
• Position the shoulder belt on your
chest
so that it is comfortable and
not resting on your neck. The
retractor will withdraw any slack in
the belt.
• To release the belt, push the red
button on the buckle. The belt will automatically retract to its stowed
position. If necessary, guide the seat
belt with your hand while it is
rewinding, to prevent it from
twisting.
WARNING!
A frayed or torn belt could break in an
accident and leave you with no
protection. Inspect the belt system
periodically, checking for cuts, frays, or
loose parts. Damaged parts must be
replaced immediately.
Do not disassemble or modify the
system. Seat belt/retractor assemblies
must be replaced by an Authorized
Maserati Dealer after an accident if
they have been damaged (bent
retractor, torn belt, etc.).
Three-Point Seat Belt
Untwisting Procedure Use the following procedure to
untwist a twisted three point belt.
• Position the latch plate as close as
possible to the anchor point.
• At about 0.5 to 1 ft (15 to 30 cm)
above the latch plate, grasp and
twist the belt 180 degrees to create a fold that begins immediately above
the latch plate.
• Slide the latch plate upward over the
folded belt. The folded belt must
enter the slot at the top of the latch
plate.
• Continue to slide the latch plate up
until it clears the folded belt.
Rear Passengers Seat Belts The rear seat belts, as the front ones,
are automatic with three fastening
points and an emergency inertia
locking device on the winding unit.
Rear passengers seat belts are
equipped with Automatic Locking
Retractors (ALR) and can be used to
secure a child restraint system. For
additional information, see “Installing
Child Restraint Systems using the
Vehicle Seat Belt equipped with ALR”Before Starting
2
42