2019 Hyundai Tucson fuel cap
[x] Cancel search: fuel capPage 6 of 685
F6
Introduction
NOTICE indicates a situation
which, if not avoided, could result
in vehicle damage.
Petrol engine
Unleaded
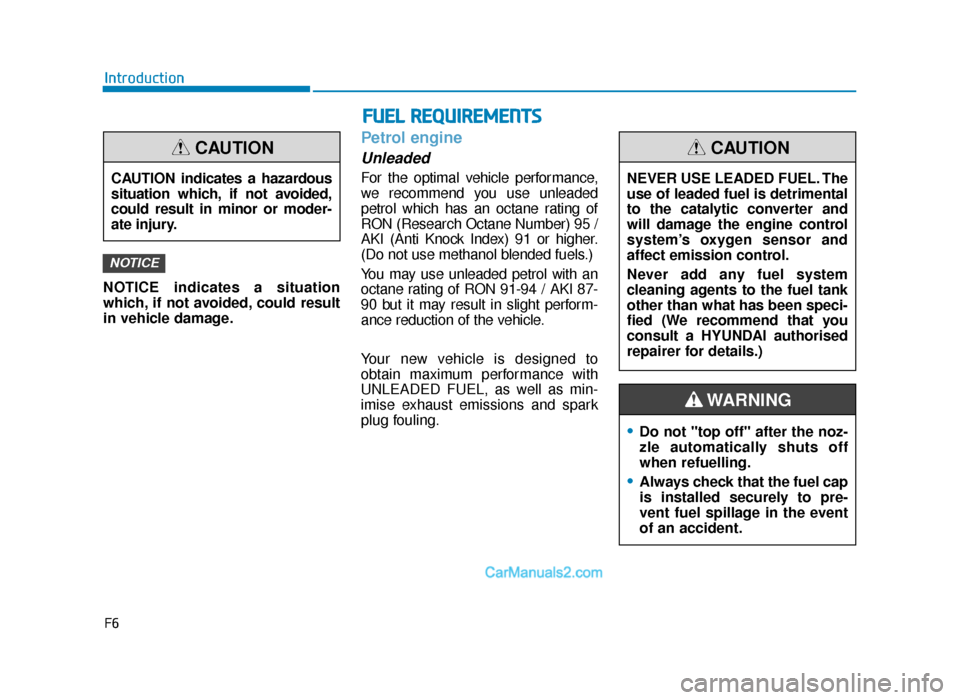
For the optimal vehicle performance,
we recommend you use unleaded
petrol which has an octane rating of
RON (Research Octane Number) 95 /
AKI (Anti Knock Index) 91 or higher.
(Do not use methanol blended fuels.)
You may use unleaded petrol with an
octane rating of RON 91-94 / AKI 87-
90 but it may result in slight perform-
ance reduction of the vehicle.
Your new vehicle is designed to
obtain maximum performance with
UNLEADED FUEL, as well as min-
imise exhaust emissions and spark
plug fouling.
NOTICE
CAUTION indicates a hazardous
situation which, if not avoided,
could result in minor or moder-
ate injury.
CAUTION
•Do not "top off" after the noz-
zle automatically shuts off
when refuelling.
•Always check that the fuel cap
is installed securely to pre-
vent fuel spillage in the event
of an accident.
WARNING
NEVER USE LEADED FUEL. The
use of leaded fuel is detrimental
to the catalytic converter and
will damage the engine control
system’s oxygen sensor and
affect emission control.
Never add any fuel system
cleaning agents to the fuel tank
other than what has been speci-
fied (We recommend that you
consult a HYUNDAI authorised
repairer for details.)
CAUTION
FUEL REQUIREMENTS
TLe UK foreword---.qxp 6/19/2018 4:55 PM Page 6
Page 20 of 685
1-8
Your vehicle at a glance
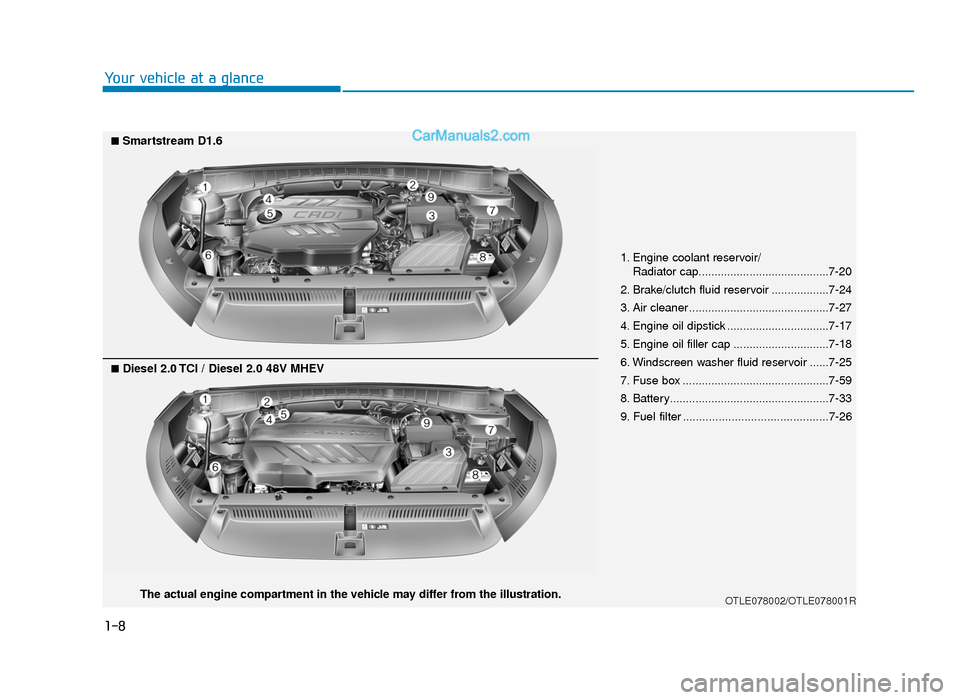
1. Engine coolant reservoir/Radiator cap.........................................7-20
2. Brake/clutch fluid reservoir ..................7-24
3. Air cleaner ............................................7-27
4. Engine oil dipstick ................................7-17
5. Engine oil filler cap ..............................7-18
6. Windscreen washer fluid reservoir ......7-25
7. Fuse box ..............................................7-59
8. Battery..................................................7-33
9. Fuel filter .............................................7-26
OTLE078002/OTLE078001R
■Smartstream D1.6
■Diesel 2.0 TCI / Diesel 2.0 48V MHEV
The actual engine compartment in the vehicle may differ from the illustration.
TLe UK 1.qxp 5/10/2018 11:28 AM Page 8
Page 136 of 685
3-44
Fuel filler door
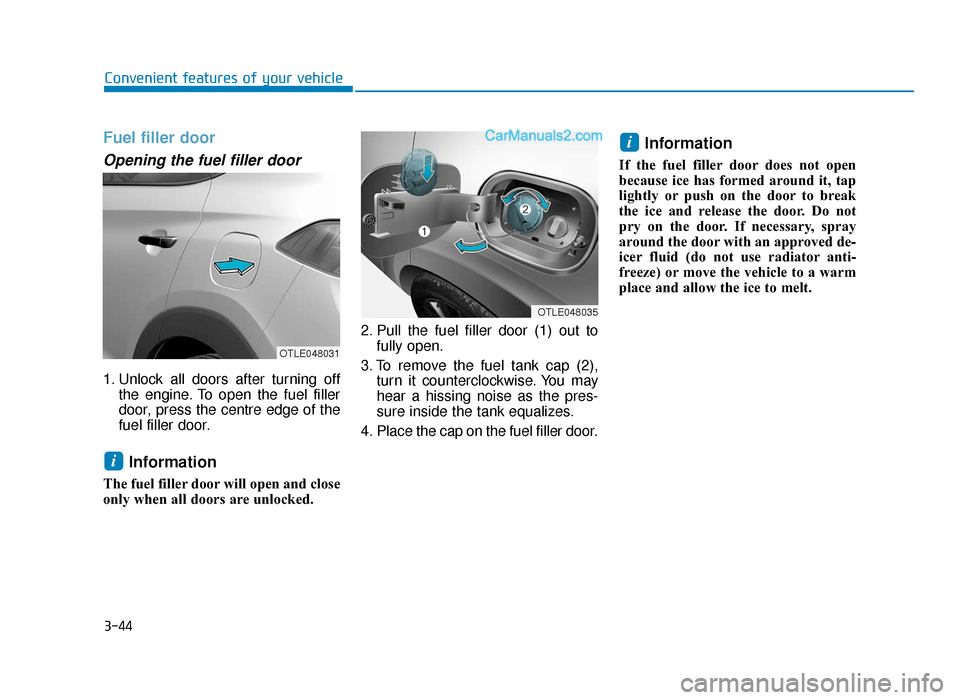
Opening the fuel filler door
1. Unlock all doors after turning offthe engine. To open the fuel filler
door, press the centre edge of the
fuel filler door.
Information
The fuel filler door will open and close
only when all doors are unlocked. 2. Pull the fuel filler door (1) out to
fully open.
3. To remove the fuel tank cap (2), turn it counterclockwise. You may
hear a hissing noise as the pres-
sure inside the tank equalizes.
4. Place the cap on the fuel filler door.
Information
If the fuel filler door does not open
because ice has formed around it, tap
lightly or push on the door to break
the ice and release the door. Do not
pry on the door. If necessary, spray
around the door with an approved de-
icer fluid (do not use radiator anti-
freeze) or move the vehicle to a warm
place and allow the ice to melt.
i
i
Convenient features of your vehicle
OTLE048031
OTLE048035
TLe UK 3a(~109).qxp 6/12/2018 2:24 PM Page 44
Page 137 of 685
3-45
Convenient features of your vehicle
Closing the fuel filler door
1. To install the fuel tank cap, turn itclockwise until it “clicks” one time.
2. To close the fuel filler door, press the edge of the fuel filler door.
Make sure it is securely closed.
3
Petrol is highly flammable and
explosive. Failure to follow
these guidelines may result in
SERIOUS INJURY or DEATH:
•Read and follow all warnings
posted at the gas station.
• Before refuelling, note the
location of the Emergency
Petrol Shut-Off, if available, at
the gas station.
• Before touching the fuel noz-
zle, you should eliminate the
potential build-up of static
electricity by touching a metal
part of the vehicle, a safe dis-
tance away from the fuel filler
neck, nozzle, or other gas
source, with your bare hand.
(Continued)
WARNING
(Continued)
•Do not use mobile phones
whilst refuelling. Electric cur-
rent and/or electronic interfer-
ence from mobile phones can
potentially ignite fuel vapours
and cause a fire.
• Do not get back into a vehicle
once you have begun refu-
elling. You can generate a
build-up of static electricity by
touching, rubbing or sliding
against any item or fabric
capable of producing static
electricity. Static electricity
discharge can ignite fuel
vapours causing a fire. If you
must re-enter the vehicle, you
should once again eliminate
potentially dangerous static
electricity discharge by touch-
ing a metal part of the vehicle,
away from the fuel filler neck,
nozzle or other petrol source,
with your bare hand.
(Continued)(Continued)
•
When refuelling, always move
the shift lever to the P (Park)
position (for automatic
transaxle/
dual clutch trans-
mission) or first gear or R
(Reverse, for manual
transaxle), set the parking
brake, and place the ignition
switch to the LOCK/OFF posi-
tion. Sparks produced by elec-
trical components related to
the engine can ignite fuel
vapours causing a fire.
• When using an approved
portable fuel container, be
sure to place the container on
the ground prior to refuelling.
Static electricity discharge
from the container can ignite
fuel vapours causing a fire.
Once refuelling has begun,
contact between your bare
hand and the vehicle should
be maintained until the filling
is complete.
(Continued)
TLe UK 3a(~109).qxp 6/12/2018 2:24 PM Page 45
Page 138 of 685
3-46
Information
Make sure to refuel your vehicle
according to the "Fuel Requirements"
suggested in the Introduction chapter.
• Do not spill fuel on the exteriorsurfaces of the vehicle. Any type
of fuel spilled on painted sur-
faces may damage the paint.
• If the fuel filler cap requires replacement, use only a genuine
HYUNDAI cap or the equivalent
specified for your vehicle. An
incorrect fuel filler cap can
result in a serious malfunction
of the fuel system or emission
control system.
NOTICE
i
Convenient features of your vehicle
(Continued)
•If pressurized fuel sprays out,
it can cover your clothes or
skin and thus subject you to
the risk of fire and burns.
Always remove the fuel cap
carefully and slowly. If the cap
is venting fuel or if you hear a
hissing sound, wait until the
condition stops before com-
pletely removing the cap.
• Always check that the fuel cap
is installed securely to pre-
vent fuel spillage in the event
of an accident.
(Continued)
•Use only approved portable
plastic fuel containers
designed to carry and store
petrol.
• Do not use matches or a
lighter and do not smoke or
leave a lit cigarette in your
vehicle whilst at a gas station,
especially during refuelling.
• Do not over-fill or top-off your
vehicle tank, which can cause
petrol spillage.
• If a fire breaks out during refu-
elling, leave the vicinity of the
vehicle, and immediately con-
tact the manager of the gas
station and then contact the
local fire department. Follow
any safety instructions they
provide.
(Continued)
TLe UK 3a(~109).qxp 6/12/2018 2:24 PM Page 46
Page 156 of 685
3-64
Convenient features of your vehicle
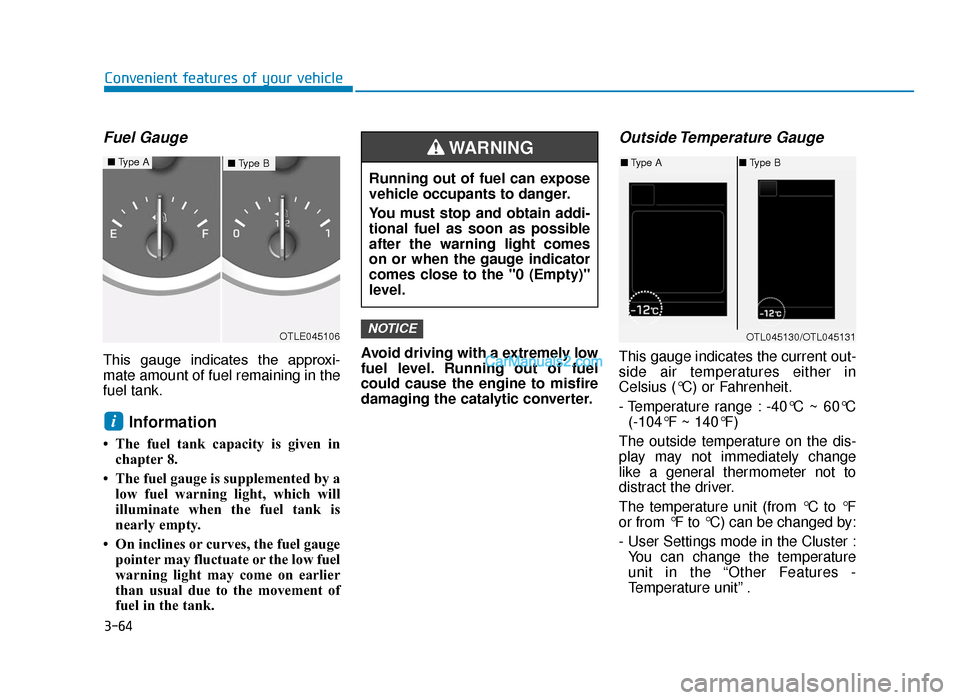
Fuel Gauge
This gauge indicates the approxi-
mate amount of fuel remaining in the
fuel tank.
Information
• The fuel tank capacity is given inchapter 8.
• The fuel gauge is supplemented by a low fuel warning light, which will
illuminate when the fuel tank is
nearly empty.
• On inclines or curves, the fuel gauge pointer may fluctuate or the low fuel
warning light may come on earlier
than usual due to the movement of
fuel in the tank. Avoid driving with a extremely low
fuel level. Running out of fuel
could cause the engine to misfire
damaging the catalytic converter.
Outside Temperature Gauge
This gauge indicates the current out-
side air temperatures either in
Celsius (°C) or Fahrenheit.
- Temperature range : -40°C ~ 60°C
(-104°F ~ 140°F)
The outside temperature on the dis-
play may not immediately change
like a general thermometer not to
distract the driver.
The temperature unit (from °C to °F
or from °F to °C) can be changed by:
- User Settings mode in the Cluster : You can change the temperature
unit in the “Other Features -
Temperature unit” .
NOTICE
i
OTLE045106
Running out of fuel can expose
vehicle occupants to danger.
You must stop and obtain addi-
tional fuel as soon as possible
after the warning light comes
on or when the gauge indicator
comes close to the "0 (Empty)"
level.
WARNING
OTL045130/OTL045131
■ Type A ■Type B■Type B■Type A
TLe UK 3a(~109).qxp 6/12/2018 2:25 PM Page 64
Page 191 of 685
3-99
Convenient features of your vehicle
3
Engine Oil LevelWarning Light (if equipped)
The engine oil level warning light illumi-
nates when the engine oil level should be
checked.
If the warning light comes on, check the
engine oil level as soon as possible and
add engine oil as required.
Slowly pour the recommended oil little by
little into a funnel. (Oil refill capacity :
approximately 0.6 ~ 1.0 l)
Use only the specified engine oil. (Refer
to "Recommended lubricants and capac-
ities" in chapter 8.)
Do not overfill the engine oil. Make sure
the oil level is not above F (Full) mark on
the dipstick.
Information
• If you travel approximately 30 ~ 60 miles (50 km ~100 km) after the
engine warms up, after adding the
engine oil, the warning light will go
off.
(Continued)(Continued)
• Cycle the ignition from OFF to ON 3
times within 10 seconds, the warning
light will go off immediately. However,
when you turn off the warning light
without adding the engine oil, the light
will come on again after travelling
approximately 30 ~ 60 miles (50 km
~100 km) after the engine warms up.
If the light comes on continuously
after adding the engine oil and trav-
elling approximately 30 ~ 60 miles
(50~100 km) after the engine warms
up, we recommend that the system
be checked by a HYUNDAI autho-
rised repairer.
Even if this light doesn't come on
after the engine has started, the
engine oil should be checked and
supplied periodically.
Low Fuel Level Warning Light
This warning light illuminates:
When the fuel tank is nearly empty.
Add fuel as soon as possible.
Driving with the Low Fuel Level
warning light on or with the fuel
level below “0” can cause the
engine to misfire and damage the
catalytic converter (if equipped).
NOTICE
NOTICE
i
TLe UK 3a(~109).qxp 6/12/2018 2:28 PM Page 99
Page 550 of 685
7
Maintenance
7
Maintenance
Engine compartment .............................................7-3
Maintenance services ...........................................7-6
Owner's responsibility ......................................................7-6
Owner maintenance precautions ..................................7-6
Owner maintenance ...............................................7-8
Owner maintenance schedule ........................................7-9
Scheduled maintenance services ......................7-11
Explanation of scheduled maintenance items .7-12
Engine oil ..............................................................7-15
Checking the engine oil level (Petrol Engine)..........7-15
Checking the engine oil level (Diesel Engine)..........7-17
Checking the engine oil and filter ..............................7-18
Engine coolant......................................................7-20
Checking the engine coolant level..............................7-20
Changing the engine coolant .......................................7-23
Brake/clutch fluid ................................................7-24
Checking the brake/clutch fluid level ........................7-24
Washer fluid .........................................................7-25
Checking the washer fluid level ..................................7-25
Parking brake .......................................................7-25
Checking the parking brake .........................................7-25
Fuel filter (For Diesel) ........................................7-26
Draining water from fuel filter ....................................7-26
Fuel filter cartridge replacement ................................7-26
Air cleaner ............................................................7-27
Filter replacement ...........................................................7-27
Climate control air filter .....................................7-29
Filter inspection ...............................................................7-29
Filter replacement ...........................................................7-29
Wiper blades .........................................................7-30
Blade inspection ..............................................................7-30
Blade replacement ..........................................................7-30
Battery...................................................................7-33
For best battery service................................................7-33
Battery capacity label ....................................................7-35
Battery recharging .........................................................7-35
Reset items .......................................................................7\
-36
Tyres and wheels .................................................7-37
Tyre care ........................................................................\
...7-37
Recommended cold tyre inflation pressures ...........7-37
Checking tyre inflation pressure.................................7-39
Tyre rotation ....................................................................7-40\
Wheel alignment and tyre balance.............................7-41
Tyre replacement ............................................................7-41
Wheel replacement ........................................................7-43
Tyre traction .....................................................................7-4\
3
Tyre maintenance ...........................................................7-43
Tyre sidewall labelling ....................................................7-43
Low aspect ratio tyre.....................................................7-48
7
TLe UK 7.qxp 5/10/2018 1:31 PM Page 1