2019 Hyundai Tucson torque
[x] Cancel search: torquePage 356 of 685
5-32
Driving your vehicle• The dual clutch transmission givesthe driving feel of a manual
transaxle, yet provides the ease of
a fully automatic transaxle. Unlike
a traditional automatic transaxle,
the gear shifting can be felt (and
heard) on the dual clutch transmis-
sion
- Think of it as an automaticallyshifting manual transaxle.
- Shift into Drive range and get fully automatic shifting, similar to a
conventional automatic transaxle. • Dual clutch transmission adopts
dry-type dual clutch, which is dif-
ferent from torque converter of
automatic transaxle, and shows
better acceleration performance
during driving. But, initial launch
might be little bit slower than
Automatic Transaxle.
• Gear shifts are sometimes more noticeable than a conventional
automatic transmission and a light
vibration during launching can be
felt as the transmission speed is
matched with the engine speed.
This is a normal condition of the
dual clutch transmission.
• The dry-type clutch transfers torque and provides a direct driv-
ing feeling which may feel different
from a conventional automatic
transaxle with a torque converter.
This may be more noticeable when
starting from a stop or low vehicle
speed.
• When rapidly accelerating at low vehicle speed, engine could rev at
high rpm depending on vehicle
drive condition.
To reduce the risk of serious
injury or death:
•ALWAYS check the surround-
ing areas near your vehicle for
people, especially children,
before shifting a vehicle into
D (Drive) or R (Reverse).
•Before leaving the driver’s
seat, always make sure the
shift lever is in the P (Park)
position, then set the parking
brake, and place the ignition
switch in the LOCK/OFF posi-
tion. Unexpected and sudden
vehicle movement can occur
if these precautions are not
followed.
•Do not use the engine brake
(shifting from a high gear to
lower gear) rapidly on slip-
pery roads. The vehicle may
slip causing an accident.
(Continued)
(Continued)
•To avoid damage to your
transaxle, do not try to accel-
erate in R (Reverse) or any for-
ward gear position with the
brakes on.
•When stopped on slope, do
not hold the vehicle with
accelerator pedal. Use the
service brake or the parking
brake.
WARNING
TLe UK 5.qxp 5/10/2018 12:20 PM Page 32
Page 385 of 685
5-61
Driving your vehicle
5
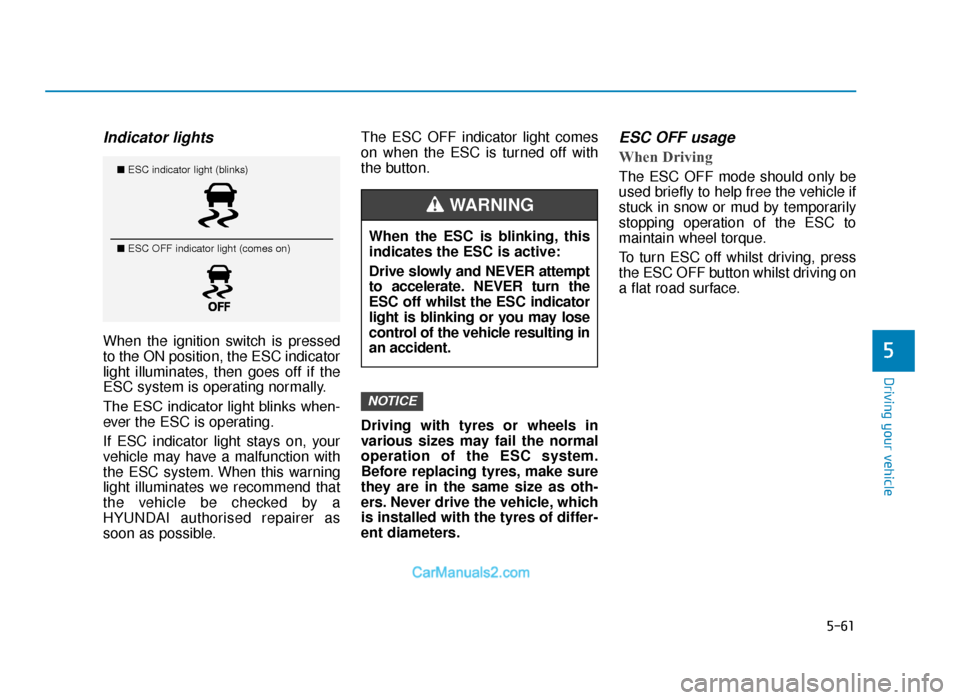
Indicator lights
When the ignition switch is pressed
to the ON position, the ESC indicator
light illuminates, then goes off if the
ESC system is operating normally.
The ESC indicator light blinks when-
ever the ESC is operating.
If ESC indicator light stays on, your
vehicle may have a malfunction with
the ESC system. When this warning
light illuminates we recommend that
the vehicle be checked by a
HYUNDAI authorised repairer as
soon as possible.The ESC OFF indicator light comes
on when the ESC is turned off with
the button.
Driving with tyres or wheels in
various sizes may fail the normal
operation of the ESC system.
Before replacing tyres, make sure
they are in the same size as oth-
ers. Never drive the vehicle, which
is installed with the tyres of differ-
ent diameters.
ESC OFF usage
When Driving
The ESC OFF mode should only be
used briefly to help free the vehicle if
stuck in snow or mud by temporarily
stopping operation of the ESC to
maintain wheel torque.
To turn ESC off whilst driving, press
the ESC OFF button whilst driving on
a flat road surface.
NOTICE
■
ESC indicator light (blinks)
■ ESC OFF indicator light (comes on)
When the ESC is blinking, this
indicates the ESC is active:
Drive slowly and NEVER attempt
to accelerate. NEVER turn the
ESC off whilst the ESC indicator
light is blinking or you may lose
control of the vehicle resulting in
an accident.
WARNING
TLe UK 5.qxp 5/10/2018 12:22 PM Page 61
Page 432 of 685
5-108
Driving your vehicle
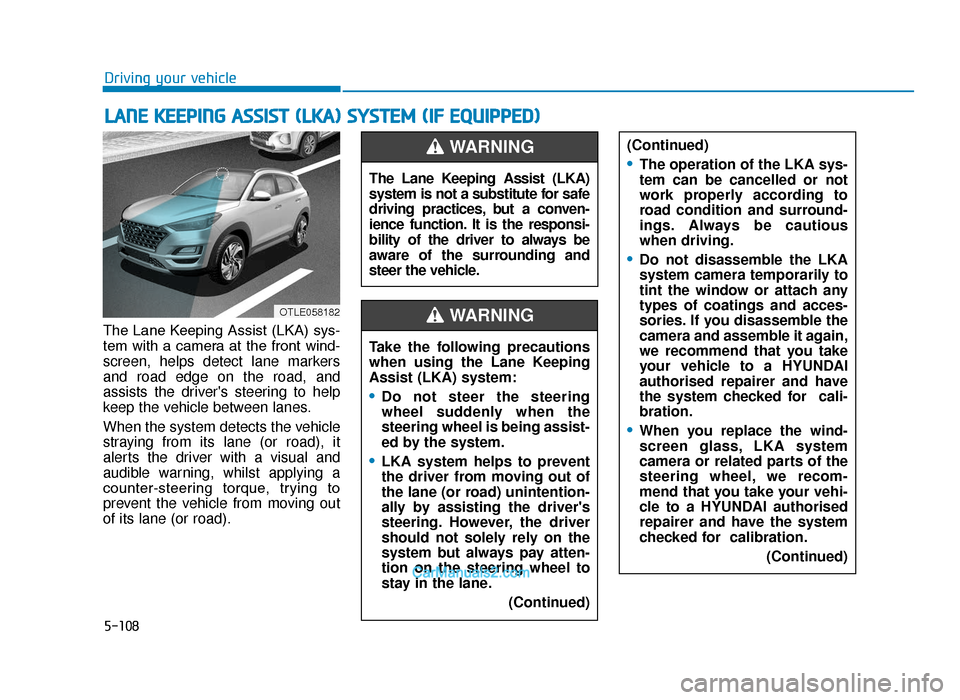
The Lane Keeping Assist (LKA) sys-
tem with a camera at the front wind-
screen, helps detect lane markers
and road edge on the road, and
assists the driver's steering to help
keep the vehicle between lanes.
When the system detects the vehicle
straying from its lane (or road), it
alerts the driver with a visual and
audible warning, whilst applying a
counter-steering torque, trying to
prevent the vehicle from moving out
of its lane (or road).
LANE KEEPING ASSIST (LKA) SYSTEM (IF EQUIPPED)
OTLE058182
The Lane Keeping Assist (LKA)
system is not a substitute for safe
driving practices, but a conven-
ience function. It is the responsi-
bility of the driver to always be
aware of the surrounding and
steer the vehicle.
WARNING
Take the following precautions
when using the Lane Keeping
Assist (LKA) system:
•Do not steer the steering
wheel suddenly when the
steering wheel is being assist-
ed by the system.
•LKA system helps to prevent
the driver from moving out of
the lane (or road) unintention-
ally by assisting the driver's
steering. However, the driver
should not solely rely on the
system but always pay atten-
tion on the steering wheel to
stay in the lane. (Continued)
WARNING
(Continued)
•The operation of the LKA sys-
tem can be cancelled or not
work properly according to
road condition and surround-
ings. Always be cautious
when driving.
•Do not disassemble the LKA
system camera temporarily to
tint the window or attach any
types of coatings and acces-
sories. If you disassemble the
camera and assemble it again,
we recommend that you take
your vehicle to a HYUNDAI
authorised repairer and have
the system checked for cali-
bration.
•When you replace the wind-
screen glass, LKA system
camera or related parts of the
steering wheel, we recom-
mend that you take your vehi-
cle to a HYUNDAI authorised
repairer and have the system
checked for calibration.(Continued)
TLe UK 5.qxp 5/10/2018 12:26 PM Page 108
Page 524 of 685
6-21
What to do in an emergency
6
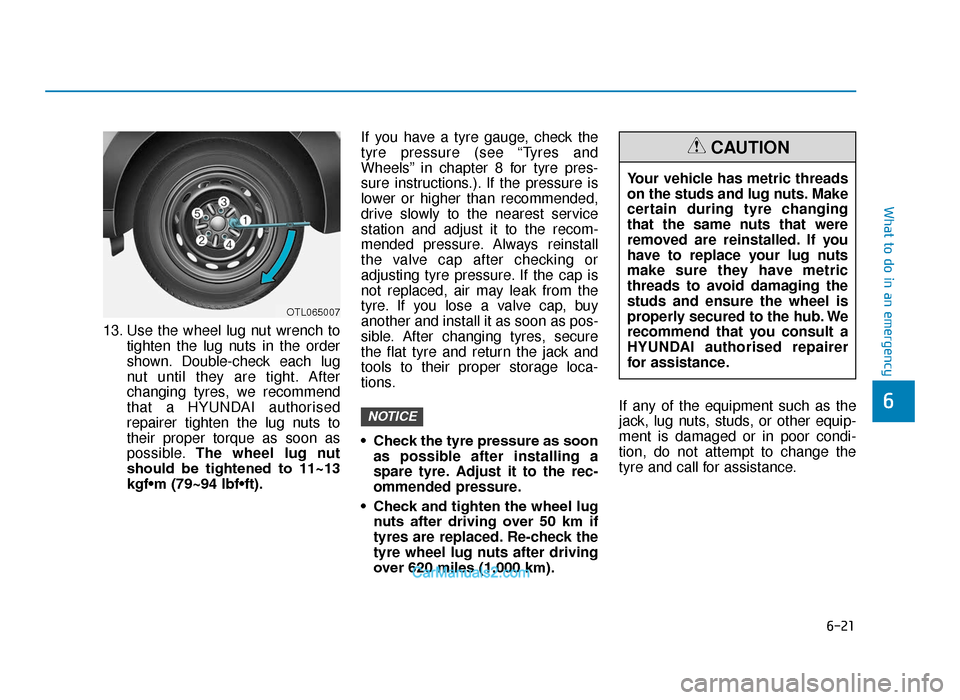
13. Use the wheel lug nut wrench totighten the lug nuts in the order
shown. Double-check each lug
nut until they are tight. After
changing tyres, we recommend
that a HYUNDAI authorised
repairer tighten the lug nuts to
their proper torque as soon as
possible. The wheel lug nut
should be tightened to 11~13
kgf•m (79~94 lbf•ft). If you have a tyre gauge, check the
tyre pressure (see “Tyres and
Wheels” in chapter 8 for tyre pres-
sure instructions.). If the pressure is
lower or higher than recommended,
drive slowly to the nearest service
station and adjust it to the recom-
mended pressure. Always reinstall
the valve cap after checking or
adjusting tyre pressure. If the cap is
not replaced, air may leak from the
tyre. If you lose a valve cap, buy
another and install it as soon as pos-
sible. After changing tyres, secure
the flat tyre and return the jack and
tools to their proper storage loca-
tions.
• Check the tyre pressure as soon
as possible after installing a
spare tyre. Adjust it to the rec-
ommended pressure.
• Check and tighten the wheel lug nuts after driving over 50 km if
tyres are replaced. Re-check the
tyre wheel lug nuts after driving
over 620 miles (1,000 km). If any of the equipment such as the
jack, lug nuts, studs, or other equip-
ment is damaged or in poor condi-
tion, do not attempt to change the
tyre and call for assistance.
NOTICE
OTL065007
Your vehicle has metric threads
on the studs and lug nuts. Make
certain during tyre changing
that the same nuts that were
removed are reinstalled. If you
have to replace your lug nuts
make sure they have metric
threads to avoid damaging the
studs and ensure the wheel is
properly secured to the hub. We
recommend that you consult a
HYUNDAI authorised repairer
for assistance.
CAUTION
TLe UK 6.qxp 5/10/2018 1:21 PM Page 21
Page 525 of 685
6-22
What to do in an emergency
Use of compact spare tyres (if equipped)
Compact spare tyres are designed
for emergency use only. Drive care-
fully on the compact spare tyre and
always follow the safety precautions. When driving with the compact spare
tyre mounted to your vehicle:
• Check the tyre pressure after
installing the compact spare tyre.
The compact spare tyre should be
inflated to 420 kPa (60 psi).
• Do not take this vehicle through an automatic car wash whilst the com-
pact spare tyre is installed.
• Do not use the compact spare tyre on any other vehicle because this
tyre has been designed especially
for your vehicle.
• The compact spare tyre’s tread life is shorter than a regular tyre.
Inspect your compact spare tyre
regularly and replace worn compact
spare tyres with the same size and
design, mounted on the same
wheel.
• Do not use more than one compact spare tyre at a time.
• Do not tow a trailer whilst the com- pact spare tyre is installed. When the original tyre and wheel
are repaired and reinstalled on the
vehicle, the lug nut torque must
be set correctly. The correct lug
nut tightening torque is 11-13
kgf•m
(79-94 lbf•ft).
NOTICE
To prevent compact spare tyre
failure and loss of control pos-
sibly resulting in an accident:
•Use the compact spare tyre
only in an emergency.
•NEVER operate your vehicle
over 50 mph (80 km/h).
•Do not exceed the vehicle’s
maximum load rating or the
load carrying capacity shown
on the sidewall of the com-
pact spare tyre.
•Do not use the compact spare
tyre continuously. Repair or
replace the original tyre as
soon as possible to avoid fail-
ure of the compact spare tyre.
WARNING
TLe UK 6.qxp 5/10/2018 1:21 PM Page 22
Page 563 of 685
7-14
Maintenance
The use of a non-specified fluid
could result in transaxle malfunc-
tion and failure.
Use only specified automatic
transaxle fluid.
(Refer to “Recommended lubri-
cants and capacities” in chapter 8.)
Manual transaxle fluid
(if equipped)
Inspect the manual transaxle fluid
according to the maintenance sched-
ule.
Dual clutch transmission fluid
(if equipped)
Inspect the dual clutch transmission
fluid according to the maintenance
schedule.
Brake hoses and lines
Visually check for proper installation,
chafing, cracks, deterioration and
any leakage. Replace any deteriorat-
ed or damaged parts immediately.
Brake/Clutch fluid (if equipped)
Check brake fluid level in the brake
fluid reservoir. The level should be
between “MIN” and “MAX” marks on
the side of the reservoir. Use only
hydraulic brake fluid conforming to
DOT 3 or DOT 4 specification.
Parking brake
Inspect the parking brake system
including the parking brake lever and
cables.
Brake pads, calipers and
rotors
Check the pads for excessive wear,
discs for run out and wear, and
calipers for fluid leakage.
For more information on checking
the pads or lining wear limit, refer to
the HYUNDAI web site.
( http://ser
vice.hyundai-motor.com)
Suspension mounting bolts
Check the suspension connections
for looseness or damage. Retighten
to the specified torque.
Steering gear box, linkage &
boots/lower arm ball joint
With the vehicle stopped and engine
off, check for excessive free-play in
the steering wheel.
Check the linkage for bends or dam-
age. Check the dust boots and ball
joints for deterioration, cracks, or
damage. Replace any damaged
parts.
Drive shafts and boots
Check the drive shafts, boots and
clamps for cracks, deterioration, or
damage. Replace any damaged
parts and, if necessary, repack the
grease.
Air conditioning refrigerant/
compressor
Check the air conditioning lines and
connections for leakage and dam-
age.
NOTICE
TLe UK 7.qxp 5/10/2018 1:32 PM Page 14
Page 661 of 685
8-5
8
Specifications & Consumer information
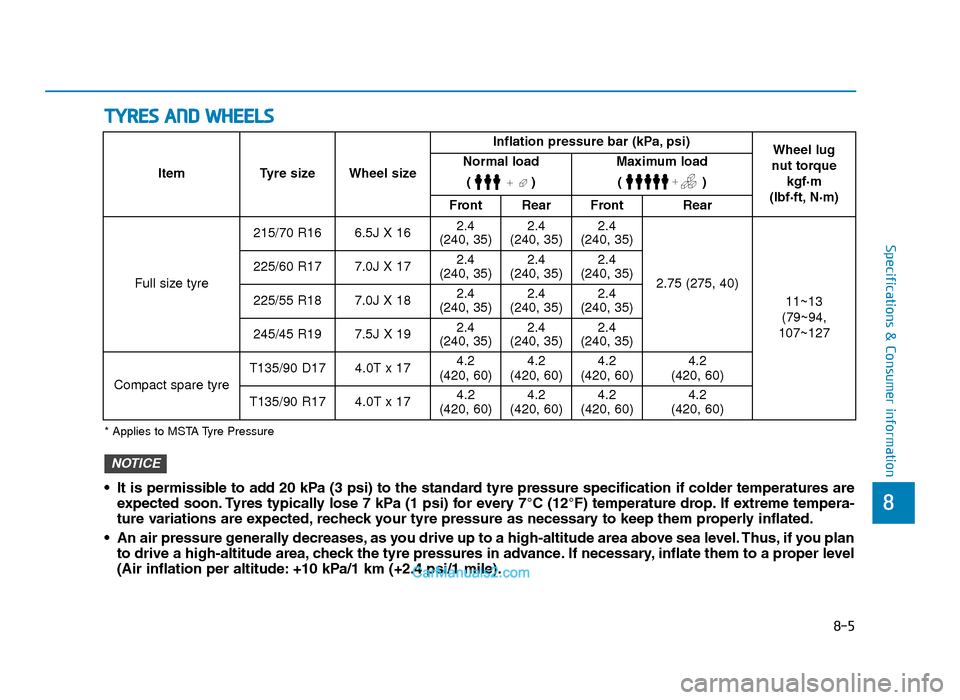
TYRES AND WHEELS
• It is permissible to add 20 kPa (3 psi) to the standard tyre pressure specification if colder temperatures areexpected soon. Tyres typically lose 7 kPa (1 psi) for every 7°C (12°F) temperature drop. If extreme tempera-
ture variations are expected, recheck your tyre pressure as necessary to keep them properly inflated.
• An air pressure generally decreases, as you drive up to a high-altitude area above sea level. Thus, if you plan to drive a high-altitude area, check the tyre pressures in advance. If necessary, inflate them to a proper level
(Air inflation per altitude: +10 kPa/1 km (+2.4 psi/1 mile).
NOTICE
* Applies to MSTA Tyre Pressure
Item Tyre size Wheel size Inflation pressure bar (kPa, psi)
Wheel lug
nut torque kgf·m
(lbf·ft, N·m)
Normal load
()Maximum load()
Front Rear Front Rear
Full size tyre 215/70 R16 6.5J X 16
2.4
(240, 35) 2.4
(240, 35) 2.4
(240, 35)
2.75 (275, 40) 11~13
(79~94,
107~127
225/60 R17 7.0J X 17
2.4
(240, 35) 2.4
(240, 35) 2.4
(240, 35)
225/55 R18 7.0J X 18 2.4
(240, 35) 2.4
(240, 35) 2.4
(240, 35)
245/45 R19 7.5J X 19 2.4
(240, 35) 2.4
(240, 35) 2.4
(240, 35)
Compact spare tyre T135/90 D17 4.0T x 17
4.2
(420, 60) 4.2
(420, 60) 4.2
(420, 60) 4.2
(420, 60)
T135/90 R17 4.0T x 17 4.2
(420, 60) 4.2
(420, 60) 4.2
(420, 60) 4.2
(420, 60)
TLe UK 8.qxp 6/12/2018 3:17 PM Page 5