2019 Hyundai Santa Fe fog light
[x] Cancel search: fog lightPage 482 of 682
5-153
Driving your vehicle
5
• There is not enough distance
between you and the vehicle in
front to be able to detect the lane
marker (or road edge) or the vehi-
cle ahead is driving on the lane
marker (or road edge).
• Road surface is not evenness.
• Driving on a steep grade, over a
hill, or when driving on a curved
road.
• The adverse road conditions cause
excessive vehicle vibrations whilst
driving.
• The surrounding of the inside rear
view mirror temperature is high
due to direct sunlight, etc.
When front visibility is poor
• The windscreen or the LKA cam-
era lens is blocked with dirt or
debris.
• The windscreen glass is fogged
up; a clear view of the road is
obstructed.
• Placing objects on the dashboard,
etc.
• The sensor cannot detect the lane
(or road edge) because of fog,
heavy rain or snow.LKA system function change
The driver can change LKA to the
Lane Departure Warning (LDW) sys-
tem or change the LKA system mode
from the LCD display. Go to the
"User Settings →Driver assistance
→Lane safety → LKA (Lane keeping
assist)/LDW (Lane departure warn-
ing)/Off".
The system is automatically set to
Lane Keeping Assist(LKA) if a func-
tion is not selected.
Lane Keeping Assist (LKA)
This mode guides the driver to help
keep the vehicle within the lanes. It
rarely controls the steering wheel,
when the vehicle drives well inside
the lanes. However, it starts to con-
trol the steering wheel, when the
vehicle is about to deviate out of the
lane.
Lane Departure Warning (LDW)
LDW system alerts the driver with a
visual warning and a warning alarm
when the system detects the vehicle
departing the lane. The steering
wheel will not be controlled.
Off
If you select "Off", the LKA system is
deactivated.
Page 508 of 682
5-179
Driving your vehicle
5
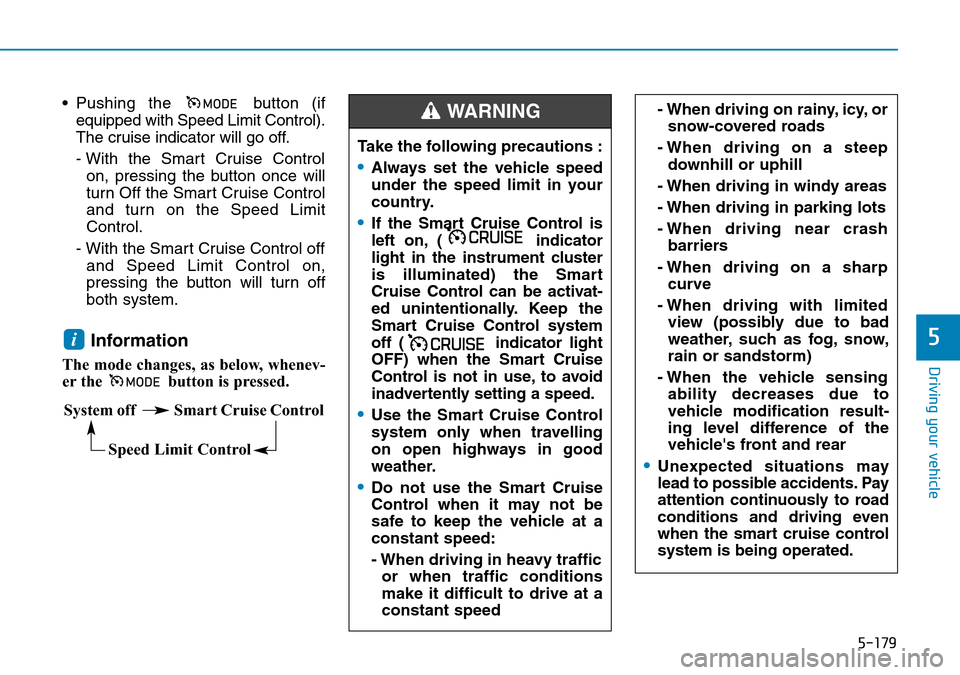
• Pushing the button (if
equipped with Speed Limit Control).
The cruise indicator will go off.
- With the Smart Cruise Control
on, pressing the button once will
turn Off the Smart Cruise Control
and turn on the Speed Limit
Control.
- With the Smart Cruise Control off
and Speed Limit Control on,
pressing the button will turn off
both system.
Information
The mode changes, as below, whenev-
er the button is pressed.
i
System off Smart Cruise Control
Speed Limit Control
- When driving on rainy, icy, or
snow-covered roads
- When driving on a steep
downhill or uphill
- When driving in windy areas
- When driving in parking lots
- When driving near crash
barriers
- When driving on a sharp
curve
- When driving with limited
view (possibly due to bad
weather, such as fog, snow,
rain or sandstorm)
- When the vehicle sensing
ability decreases due to
vehicle modification result-
ing level difference of the
vehicle's front and rear
•Unexpected situations may
lead to possible accidents. Pay
attention continuously to road
conditions and driving even
when the smart cruise control
system is being operated.
Take the following precautions :
•Always set the vehicle speed
under the speed limit in your
country.
•If the Smart Cruise Control is
left on, ( indicator
light in the instrument cluster
is illuminated) the Smart
Cruise Control can be activat-
ed unintentionally. Keep the
Smart Cruise Control system
off ( indicator light
OFF) when the Smart Cruise
Control is not in use, to avoid
inadvertently setting a speed.
•Use the Smart Cruise Control
system only when travelling
on open highways in good
weather.
•Do not use the Smart Cruise
Control when it may not be
safe to keep the vehicle at a
constant speed:
- When driving in heavy traffic
or when traffic conditions
make it difficult to drive at a
constant speed
WARNING
Page 577 of 682

7
Fuses ......................................................................7-42
Instrument panel fuse replacement ...........................7-43
Engine compartment panel fuse replacement.........7-44
Fuse/Relay panel description ......................................7-45
Light bulbs.............................................................7-59
Headlamp, position lamp, turn signal lamp
and daytime running light bulb replacement ...........7-60
Front fog lamp .................................................................7-63
Headlamp and front fog lamp aiming ........................7-64
Side repeater lamp replacement .................................7-69
Rear combination lamp bulb replacement ................7-69
High mounted stop lamp replacement .......................7-71
License plate light bulb replacement .........................7-72
Interior light bulb replacement ....................................7-72
Appearance care ..................................................7-74
Exterior care ....................................................................7-74
Interior care......................................................................7-78
Emission control system .....................................7-81
Crankcase emission control system ...........................7-81
Evaporative emission control system.........................7-81
Exhaust emission control system ...............................7-82
Selective Catalytic Reduction .......................................7-85
Urea gauge .......................................................................7-85
Malfunction with the SCR system ..............................7-87
Clearing the vehicle-restarting restriction ...............7-88
Adding the urea solution ...............................................7-89
Storing the urea solution ..............................................7-92
Urea solution purity........................................................7-92
Page 635 of 682
7-60
Maintenance
Information - Headlamp
desiccant
(if equipped)
This vehicle is equipped with desic-
cant to reduce fogging inside the head-
lamp due to moisture.
The desiccant is consumable and its
performance may change based on the
used period or environment.
If fogging inside the headlamp due to
moisture continues for a long time, we
recommend that you consult a
HYUNDAI authorised repairer.
Headlamp, position lamp, turn
signal lamp and daytime run-
ning light bulb replacement
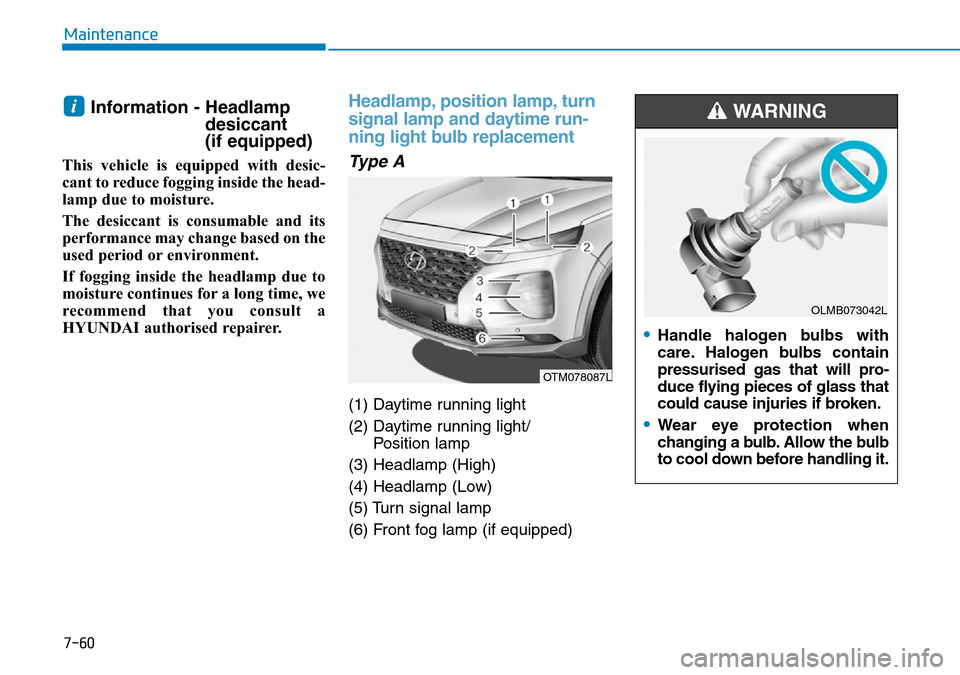
Type A
(1) Daytime running light
(2) Daytime running light/
Position lamp
(3) Headlamp (High)
(4) Headlamp (Low)
(5) Turn signal lamp
(6) Front fog lamp (if equipped)
i
OTM078087L
•Handle halogen bulbs with
care. Halogen bulbs contain
pressurised gas that will pro-
duce flying pieces of glass that
could cause injuries if broken.
•Wear eye protection when
changing a bulb. Allow the bulb
to cool down before handling it.
WARNING
OLMB073042L
Page 637 of 682
7-62
Maintenance
7-62
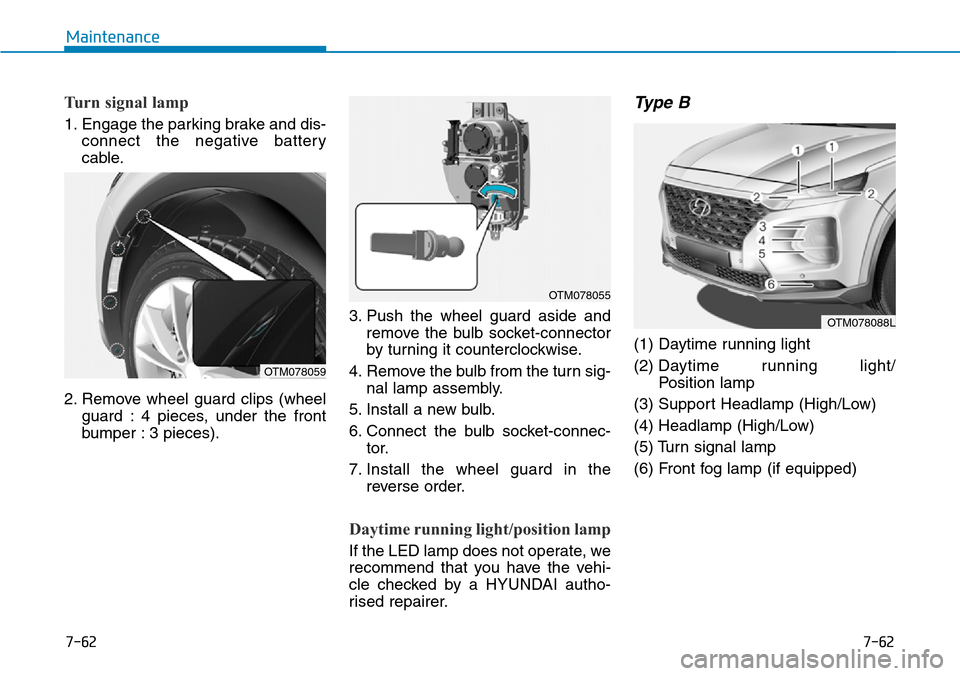
Turn signal lamp
1. Engage the parking brake and dis-
connect the negative battery
cable.
2. Remove wheel guard clips (wheel
guard : 4 pieces, under the front
bumper : 3 pieces).3. Push the wheel guard aside and
remove the bulb socket-connector
by turning it counterclockwise.
4. Remove the bulb from the turn sig-
nal lamp assembly.
5. Install a new bulb.
6. Connect the bulb socket-connec-
tor.
7. Install the wheel guard in the
reverse order.
Daytime running light/position lamp
If the LED lamp does not operate, we
recommend that you have the vehi-
cle checked by a HYUNDAI autho-
rised repairer.
Type B
(1) Daytime running light
(2) Daytime running light/
Position lamp
(3) Support Headlamp (High/Low)
(4) Headlamp (High/Low)
(5) Turn signal lamp
(6) Front fog lamp (if equipped)
OTM078088L
OTM078059
OTM078055
Page 655 of 682
7-80
Maintenance
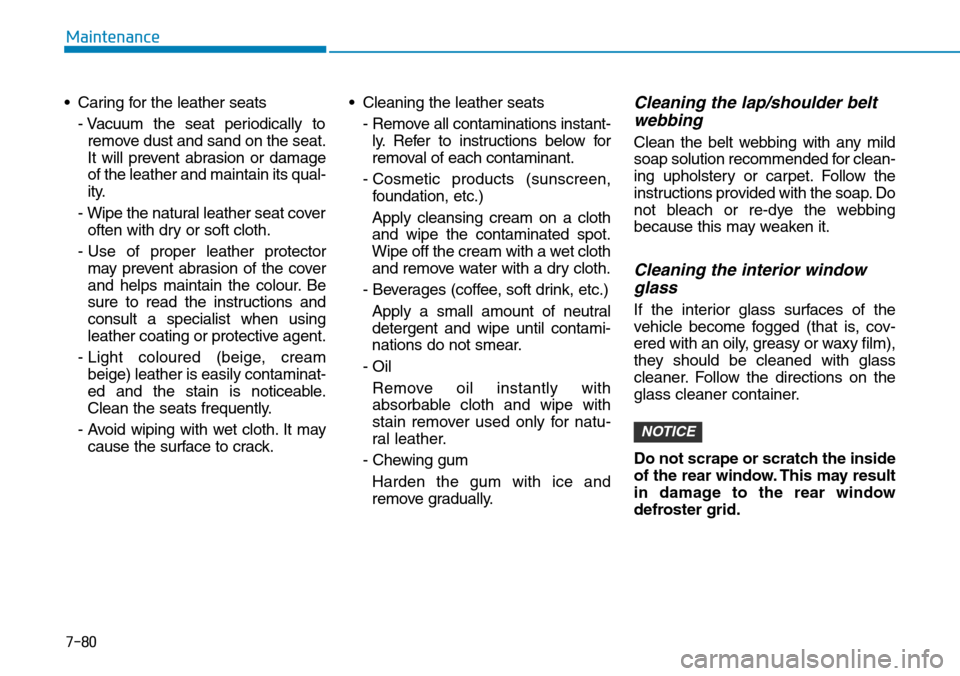
• Caring for the leather seats
- Vacuum the seat periodically to
remove dust and sand on the seat.
It will prevent abrasion or damage
of the leather and maintain its qual-
ity.
- Wipe the natural leather seat cover
often with dry or soft cloth.
- Use of proper leather protector
may prevent abrasion of the cover
and helps maintain the colour. Be
sure to read the instructions and
consult a specialist when using
leather coating or protective agent.
- Light coloured (beige, cream
beige) leather is easily contaminat-
ed and the stain is noticeable.
Clean the seats frequently.
- Avoid wiping with wet cloth. It may
cause the surface to crack.• Cleaning the leather seats
- Remove all contaminations instant-
ly. Refer to instructions below for
removal of each contaminant.
- Cosmetic products (sunscreen,
foundation, etc.)
Apply cleansing cream on a cloth
and wipe the contaminated spot.
Wipe off the cream with a wet cloth
and remove water with a dry cloth.
- Beverages (coffee, soft drink, etc.)
Apply a small amount of neutral
detergent and wipe until contami-
nations do not smear.
- Oil
Remove oil instantly with
absorbable cloth and wipe with
stain remover used only for natu-
ral leather.
- Chewing gum
Harden the gum with ice and
remove gradually.
Cleaning the lap/shoulder belt
webbing
Clean the belt webbing with any mild
soap solution recommended for clean-
ing upholstery or carpet. Follow the
instructions provided with the soap. Do
not bleach or re-dye the webbing
because this may weaken it.
Cleaning the interior window
glass
If the interior glass surfaces of the
vehicle become fogged (that is, cov-
ered with an oily, greasy or waxy film),
they should be cleaned with glass
cleaner. Follow the directions on the
glass cleaner container.
Do not scrape or scratch the inside
of the rear window. This may result
in damage to the rear window
defroster grid.
NOTICE
Page 672 of 682
8
Specifications & Consumer information
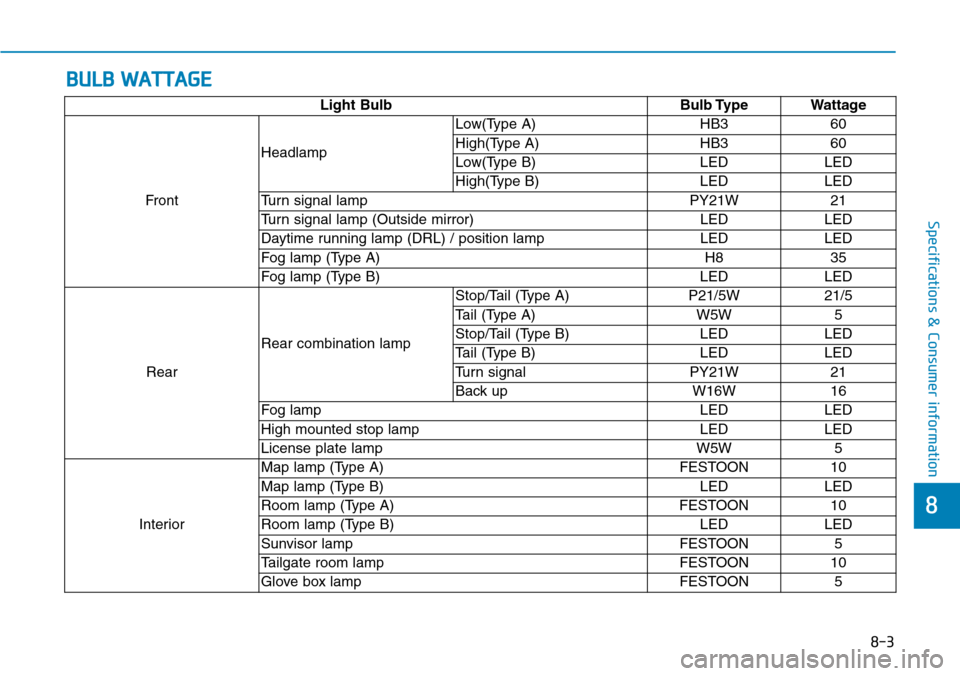
BULB WATTAGE
8-3 Light Bulb Bulb Type Wattage
FrontHeadlampLow(Type A) HB3 60
High(Type A) HB3 60
Low(Type B) LED LED
High(Type B) LED LED
Turn signal lamp PY21W 21
Turn signal lamp (Outside mirror) LED LED
Daytime running lamp (DRL) / position lamp LED LED
Fog lamp (Type A) H8 35
Fog lamp (Type B) LED LED
RearRear combination lampStop/Tail (Type A) P21/5W 21/5
Tail (Type A) W5W 5
Stop/Tail (Type B) LED LED
Tail (Type B) LED LED
Turn signal PY21W 21
Back up W16W 16
Fog lamp LED LED
High mounted stop lamp LED LED
License plate lamp W5W 5
InteriorMap lamp (Type A) FESTOON 10
Map lamp (Type B) LED LED
Room lamp (Type A) FESTOON 10
Room lamp (Type B) LED LED
Sunvisor lamp FESTOON 5
Tailgate room lamp FESTOON 10
Glove box lamp FESTOON 5