2019 Hyundai Kona ECU
[x] Cancel search: ECUPage 220 of 526
3-138
Convenient features of your vehicle
Floor mat anchor(s)
(if equipped)
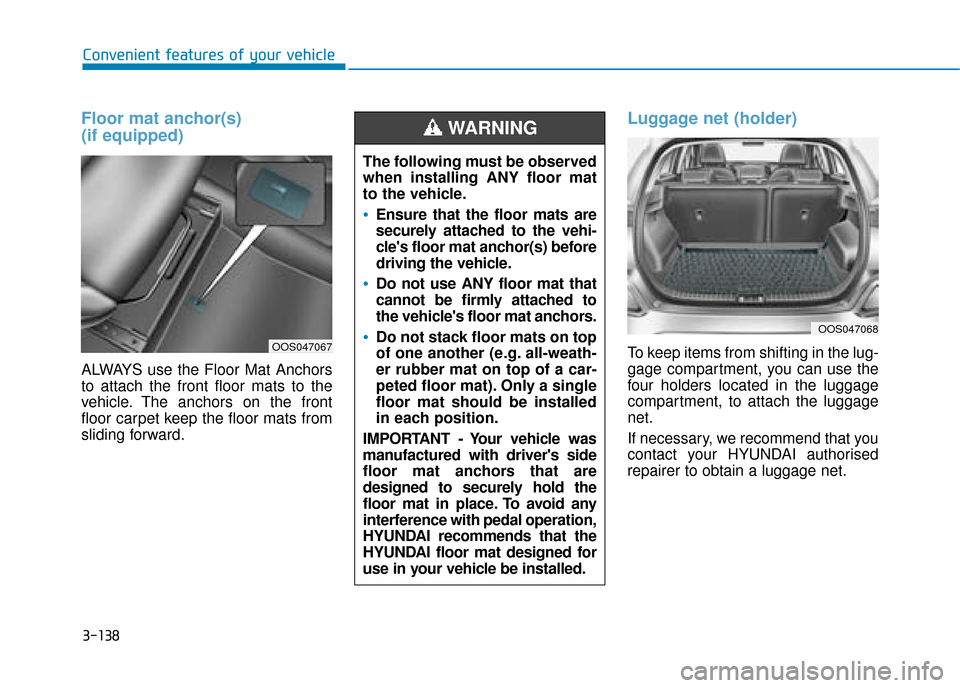
ALWAYS use the Floor Mat Anchors
to attach the front floor mats to the
vehicle. The anchors on the front
floor carpet keep the floor mats from
sliding forward.
Luggage net (holder)
To keep items from shifting in the lug-
gage compartment, you can use the
four holders located in the luggage
compartment, to attach the luggage
net.
If necessary, we recommend that you
contact your HYUNDAI authorised
repairer to obtain a luggage
net.
The following must be observed
when installing ANY floor mat
to the vehicle.
Ensure that the floor mats are
securely attached to the vehi-
cle's floor mat anchor(s) before
driving the vehicle.
Do not use ANY floor mat that
cannot be firmly attached to
the vehicle's floor mat anchors.
Do not stack floor mats on top
of one another (e.g. all-weath-
er rubber mat on top of a car-
peted floor mat). Only a single
floor mat should be installed
in each position.
IMPORTANT - Your vehicle was
manufactured with driver's side
floor mat anchors that are
designed to securely hold the
floor mat in place. To avoid any
interference with pedal operation,
HYUNDAI recommends that the
HYUNDAI floor mat designed for
use in your vehicle be installed.
WARNING
OOS047068
OOS047067
Page 222 of 526
3-140
Roof rack (if equipped)
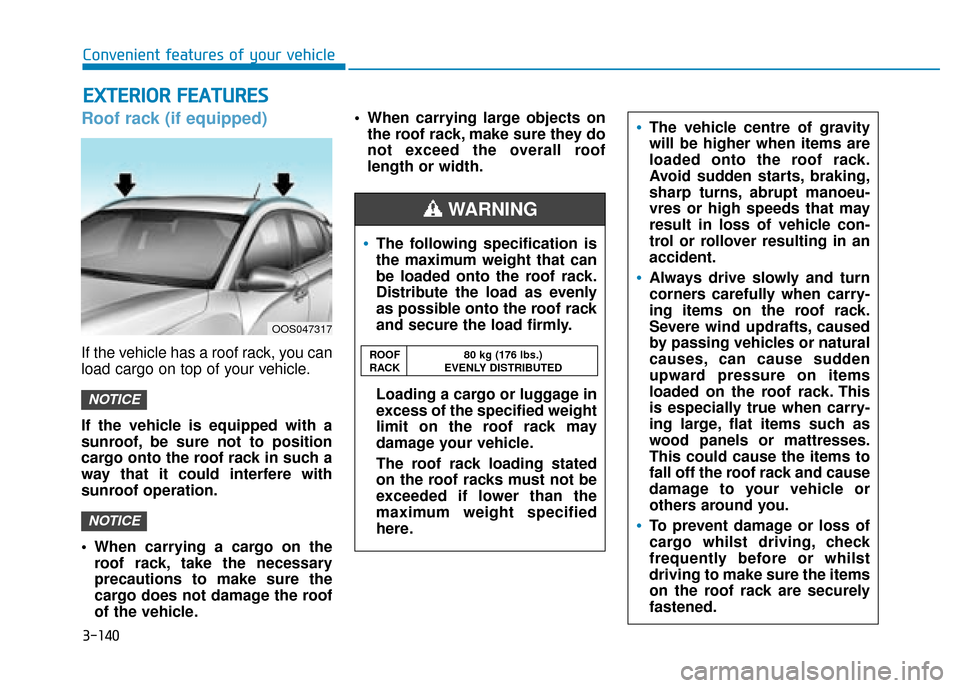
If the vehicle has a roof rack, you can
load cargo on top of your vehicle.
If the vehicle is equipped with a
sunroof, be sure not to position
cargo onto the roof rack in such a
way that it could interfere with
sunroof operation.
When carrying a cargo on theroof rack, take the necessary
precautions to make sure the
cargo does not damage the roof
of the vehicle. When carrying large objects on
the roof rack, make sure they do
not exceed the overall roof
length or width.
NOTICE
NOTICE
E EX
X T
TE
ER
R I
IO
O R
R
F
F E
E A
A T
TU
U R
RE
ES
S
Convenient features of your vehicle
OOS047317
The following specification is
the maximum weight that can
be loaded onto the roof rack.
Distribute the load as evenly
as possible onto the roof rack
and secure the load firmly.
Loading a cargo or luggage in
excess of the specified weight
limit on the roof rack may
damage your vehicle.
The roof rack loading stated
on the roof racks must not be
exceeded if lower than the
maximum weight specified
here.
The vehicle centre of gravity
will be higher when items are
loaded onto the roof rack.
Avoid sudden starts, braking,
sharp turns, abrupt manoeu-
vres or high speeds that may
result in loss of vehicle con-
trol or rollover resulting in an
accident.
Always drive slowly and turn
corners carefully when carry-
ing items on the roof rack.
Severe wind updrafts, caused
by passing vehicles or natural
causes, can cause sudden
upward pressure on items
loaded on the roof rack. This
is especially true when carry-
ing large, flat items such as
wood panels or mattresses.
This could cause the items to
fall off the roof rack and cause
damage to your vehicle or
others around you.
To prevent damage or loss of
cargo whilst driving, check
frequently before or whilst
driving to make sure the items
on the roof rack are securely
fastened.
WARNING
ROOF 80 kg (176 lbs.)
RACK EVENLY DISTRIBUTED
Page 259 of 526
5-4
Driving your vehicle
Before entering the vehicle
• Be sure all windows, outside mir-ror(s), and outside lights are clean
and unobstructed.
Remove frost, snow, or ice.
Visually check the tyres for uneven wear and damage.
Check under the vehicle for any sign of leaks.
Be sure there are no obstacles behind you if you intend to back up.
Before starting
Make sure the bonnet, the tailgate,and the doors are securely closed
and locked.
Adjust the position of the seat and steering wheel.
Adjust the inside and outside rearview mirrors.
Verify all the lights work.
Fasten your seat belt. Check that all passengers have fastened their
seat belt.
Check the gauges and indicators in the instrument panel and the mes-
sages on the instrument display
when the ignition switch is in the
ON position.
Check that any items you are car- rying are stored properly or fas-
tened down securely.
B BE
EF
FO
O R
RE
E
D
D R
RI
IV
V I
IN
N G
G
To reduce the risk of SERIOUS
INJURY or DEATH, take the fol-
lowing precautions:
•ALWAYS wear your seat belt.
All passengers must be prop-
erly belted whenever the vehi-
cle is moving. For more infor-
mation, refer to "Seat Belts" in
chapter 2.
Always drive defensively.
Assume other drivers or pedes-
trians may be careless and
make mistakes.
Stay focused on the task of
driving. Driver distraction can
cause accidents.
Leave plenty of space between
you and the vehicle in front of
you.
WARNING
Page 284 of 526
5-29
Driving your vehicle
5
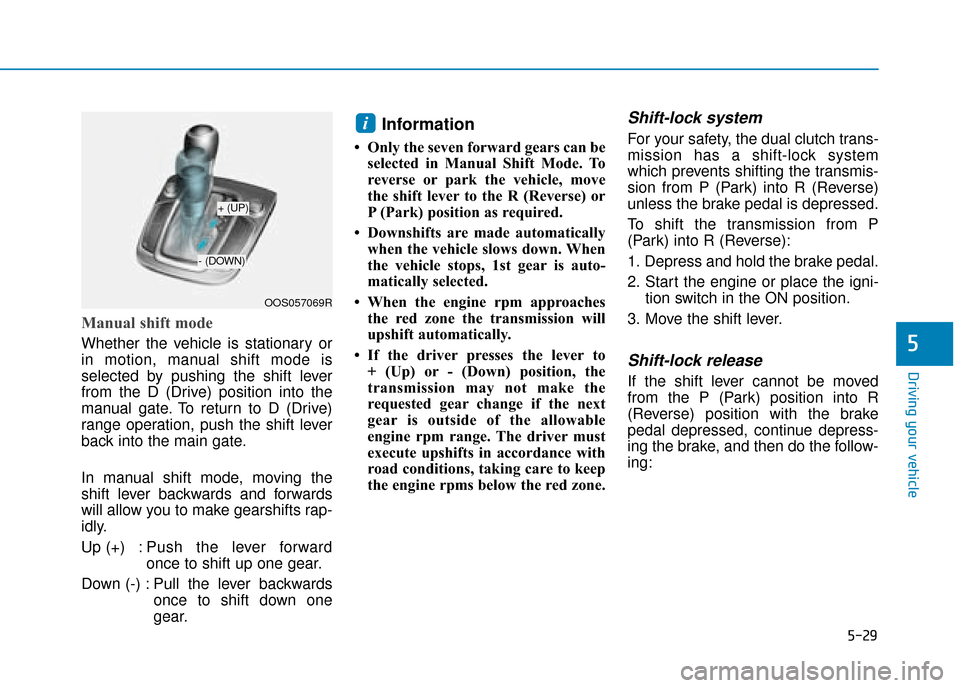
Manual shift mode
Whether the vehicle is stationary or
in motion, manual shift mode is
selected by pushing the shift lever
from the D (Drive) position into the
manual gate. To return to D (Drive)
range operation, push the shift lever
back into the main gate.
In manual shift mode, moving the
shift lever backwards and forwards
will allow you to make gearshifts rap-
idly.
Up (+) : Push the lever forwardonce to shift up one gear.
Down (-) : Pull the lever backwards once to shift down one
gear.
Information
• Only the seven forward gears can beselected in Manual Shift Mode. To
reverse or park the vehicle, move
the shift lever to the R (Reverse) or
P (Park) position as required.
• Downshifts are made automatically when the vehicle slows down. When
the vehicle stops, 1st gear is auto-
matically selected.
• When the engine rpm approaches the red zone the transmission will
upshift automatically.
• If the driver presses the lever to + (Up) or - (Down) position, the
transmission may not make the
requested gear change if the next
gear is outside of the allowable
engine rpm range. The driver must
execute upshifts in accordance with
road conditions, taking care to keep
the engine rpms below the red zone.
Shift-lock system
For your safety, the dual clutch trans-
mission has a shift-lock system
which prevents shifting the transmis-
sion from P (Park) into R (Reverse)
unless the brake pedal is depressed.
To shift the transmission from P
(Park) into R (Reverse):
1. Depress and hold the brake pedal.
2. Start the engine or place the igni- tion switch in the ON position.
3. Move the shift lever.
Shift-lock release
If the shift lever cannot be moved
from the P (Park) position into R
(Reverse) position with the brake
pedal depressed, continue depress-
ing the brake, and then do the follow-
ing:
i
OOS057069R
+ (UP)
- (DOWN)
Page 329 of 526
5-74
Driving your vehicle
The FCA warning message may appear along with the illumination
of the ESC (Electronic Stability
Control) warning light.
The FCA is only a supplemen-
tal system for the driver's con-
venience. The driver should
hold the responsibility to con-
trol the vehicle operation. Do
not solely depend on the FCA
system. Rather, maintain a
safe braking distance, and, if
necessary, depress the brake
pedal to reduce the driving
speed.
In certain instances and
under certain driving condi-
tions, the FCA system may
activate unintentionally. This
initial warning message
appears on the LCD display
with a warning chime.
Also, in certain instances the
front radar sensor or camera
recognition system may not
detect the vehicle or pedestri-
an ahead. The FCA system
may not activate and the
warning message will not be
displayed.
Even if there is any problem
with the brake control func-
tion of the FCA system, the
vehicle's basic braking per-
formance will operate normal-
ly. However, brake control
function for avoiding collision
will not activate.
If the vehicle in front stops
suddenly, you may have less
control of the brake system.
Therefore, always keep a safe
distance between your vehicle
and the vehicle in front of you.
The FCA system may activate
during braking and the vehi-
cle may stop suddenly shift-
ing loose objects toward the
passengers. Always keep
loose objects secured.
WARNING
The FCA system may not acti-
vate if the driver applies the
brake pedal to avoid a colli-
sion.
The brake control may be
insufficient, possibly causing
a collision, if a vehicle in front
abruptly stops. Always pay
extreme caution.
Occupants may get injured, if
the vehicle abruptly stops by
the activated FCA system. Pay
extreme caution.
The FCA system operates
only to detect vehicles or
pedestrians in front of the
vehicle.
Page 368 of 526
5-113
Driving your vehicle
5
Driving with a trailer
Towing a trailer requires a certain
amount of experience. Before setting
out for the open road, you must get
to know your trailer. Acquaint your-
self with the feel of handling and
braking with the added weight of the
trailer. And always keep in mind that
the vehicle you are driving is now
longer and not nearly as responsive
as your vehicle is by itself.
Before you start, check the trailer
towbar and platform, safety chains,
electrical connector(s), lights, tyres
and brakes.
During your trip, occasionally check
to be sure that the load is secure,
and that the lights and trailer brakes
are still working.
Distance
Stay at least twice as far behind the
vehicle ahead as you would when
driving your vehicle without a trailer.
This can help you avoid situations
that require heavy braking and sud-
den turns.
Passing
You will need more passing distance
up ahead when you’re towing a trail-
er. And, because of the increased
vehicle length, you’ll need to go
much farther beyond the passed
vehicle before you can return to your
lane.
Backing up
Hold the bottom of the steering
wheel with one hand. Then, to move
the trailer to the left, move your hand
to the left. To move the trailer to the
right, move your hand to the right.
Always back up slowly and, if possi-
ble, have someone guide you.
Making turns
When you’re turning with a trailer,
make wider turns than normal. Do this
so your trailer won’t strike soft shoul-
ders, kerbs, road signs, trees, or other
objects. Avoid jerky or sudden
maneuvers. Signal well in advance.
Turn signals
When you tow a trailer, your vehicle
has to have a different turn signal
flasher and extra wiring. The green
arrows on your instrument panel will
flash whenever you signal a turn or
lane change. Properly connected,
the trailer lights will also flash to alert
other drivers you’re about to turn,
change lanes, or stop.
When towing a trailer, the green
arrows on your instrument panel will
flash for turns even if the bulbs on
the trailer are burned out. Thus, you
may think drivers behind you are
seeing your signals when, in fact,
they are not. It’s important to check
occasionally to be sure the trailer
bulbs are still working. You must also
check the lights every time you dis-
connect and then reconnect the
wires.
Page 396 of 526
6-24
What to do in an emergency
If you have a tyre gauge, check the
tyre pressure (see "Tyres and
Wheels" in chapter 8 for tyre pres-
sure instructions.). If the pressure is
lower or higher than recommended,
drive slowly to the nearest service
station and adjust it to the recom-
mended pressure. Always reinstall
the valve cap after checking or
adjusting tyre pressure. If the cap is
not replaced, air may leak from the
tyre. If you lose a valve cap, buy
another and install it as soon as pos-
sible. After changing tyres, put the
flat tyre in its place and return the
jack and tools to their proper storage
locations.
Check the tyre pressure as soon as possible after installing a
spare tyre. Adjust it to the rec-
ommended pressure.
Check and tighten the wheel lug nuts after driving over 30 mph
(50 km) if tyres are replaced. Re-
check the tyre wheel lug nuts
after driving over 620 mph (1,000
km). If any of the equipment such as the
jack, lug nuts, studs, or other equip-
ment is damaged or in poor condi-
tion, do not attempt to change the
tyre and call for assistance.
Use of compact spare tyres
(if equipped)
Compact spare tyres are designed
for emergency use only. Drive care-
fully on the compact spare tyre and
always follow the safety precautions.
NOTICE
Your vehicle has metric threads
on the studs and lug nuts. Make
certain during tyre changing
that the same nuts that were
removed are reinstalled. If you
have to replace your lug nuts
make sure they have metric
threads to avoid damaging the
studs and ensure the wheel is
properly secured to the hub. We
recommend that you consult a
HYUNDAI authorised repairer
for assistance.
CAUTION
To prevent compact spare tyre
failure and loss of control pos-
sibly resulting in an accident:
Use the compact spare tyre
only in an emergency.
NEVER operate your vehicle
over 50 mph (80 km/h).
Do not exceed the vehicle’s
maximum load rating or the
load carrying capacity shown
on the sidewall of the com-
pact spare tyre.
Do not use the compact spare
tyre continuously. Repair or
replace the original tyre as
soon as possible to avoid fail-
ure of the compact spare tyre.
WARNING
Page 404 of 526
6-32
What to do in an emergency
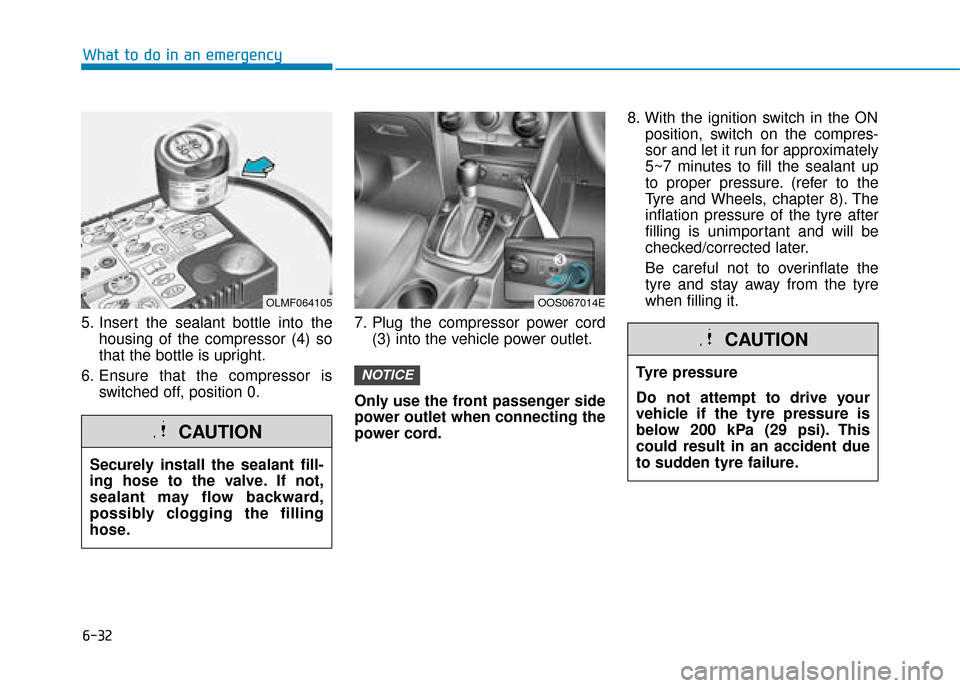
5. Insert the sealant bottle into the housing of the compressor (4) so
that the bottle is upright.
6. Ensure that the compressor is switched off, position 0. 7. Plug the compressor power cord
(3) into the vehicle power outlet.
Only use the front passenger side
power outlet when connecting the
power cord. 8. With the ignition switch in the ON
position, switch on the compres-
sor and let it run for approximately
5~7 minutes to fill the sealant up
to proper pressure. (refer to the
Tyre and Wheels, chapter 8). The
inflation pressure of the tyre after
filling is unimportant and will be
checked/corrected later.
Be careful not to overinflate the
tyre and stay away from the tyre
when filling it.
NOTICE
OLMF064105
Securely install the sealant fill-
ing hose to the valve. If not,
sealant may flow backward,
possibly clogging the filling
hose.
CAUTION
OOS067014E
Tyre pressure
Do not attempt to drive your
vehicle if the tyre pressure is
below 200 kPa (29 psi). This
could result in an accident due
to sudden tyre failure.
CAUTION