2019 Hyundai Kona ECU
[x] Cancel search: ECUPage 60 of 526
2-42
Safety system of your vehicle
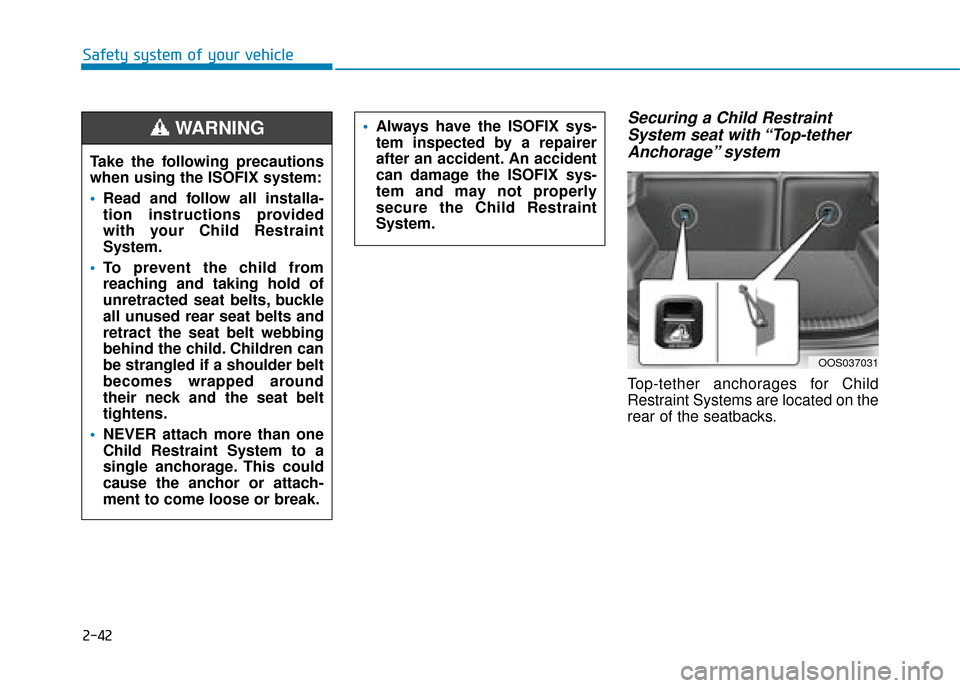
Securing a Child RestraintSystem seat with “Top-tetherAnchorage” system
Top-tether anchorages for Child
Restraint Systems are located on the
rear of the seatbacks.
OOS037031
Take the following precautions
when using the ISOFIX system:
Read and follow all installa-
tion instructions provided
with your Child Restraint
System.
To prevent the child from
reaching and taking hold of
unretracted seat belts, buckle
all unused rear seat belts and
retract the seat belt webbing
behind the child. Children can
be strangled if a shoulder belt
becomes wrapped around
their neck and the seat belt
tightens.
NEVER attach more than one
Child Restraint System to a
single anchorage. This could
cause the anchor or attach-
ment to come loose or break.
WARNING Always have the ISOFIX sys-
tem inspected by a repairer
after an accident. An accident
can damage the ISOFIX sys-
tem and may not properly
secure the Child Restraint
System.
Page 61 of 526
2-43
Safety system of your vehicle
2
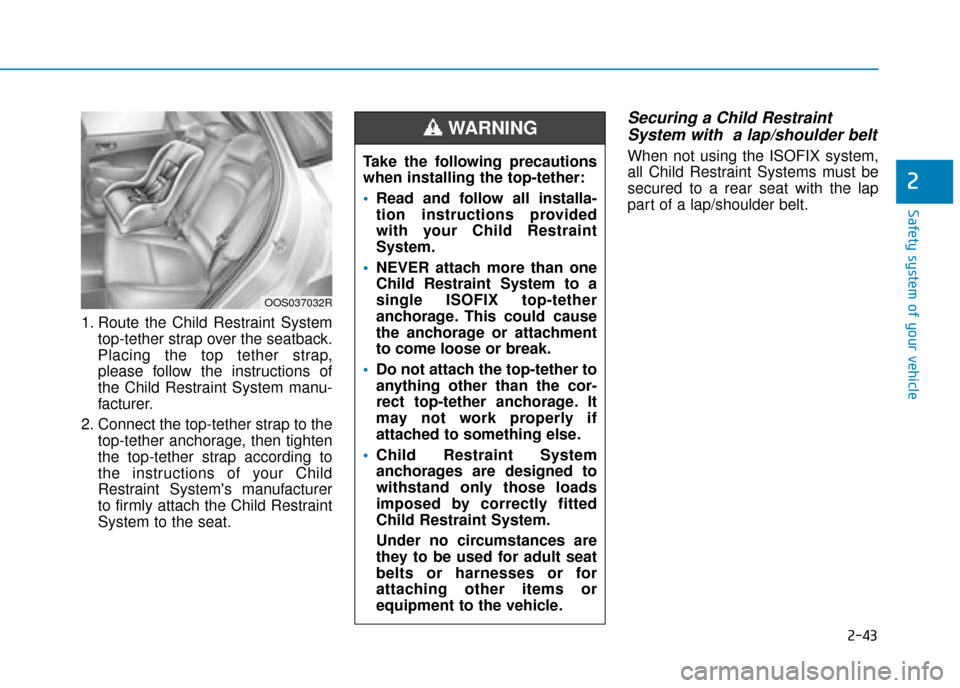
1. Route the Child Restraint Systemtop-tether strap over the seatback.
Placing the top tether strap,
please follow the instructions of
the Child Restraint System manu-
facturer.
2. Connect the top-tether strap to the top-tether anchorage, then tighten
the top-tether strap according to
the instructions of your Child
Restraint System's manufacturer
to firmly attach the Child Restraint
System to the seat.
Securing a Child RestraintSystem with a lap/shoulder belt
When not using the ISOFIX system,
all Child Restraint Systems must be
secured to a rear seat with the lap
part of a lap/shoulder belt.
OOS037032R
Take the following precautions
when installing the top-tether:
Read and follow all installa-
tion instructions provided
with your Child Restraint
System.
NEVER attach more than one
Child Restraint System to a
single ISOFIX top-tether
anchorage. This could cause
the anchorage or attachment
to come loose or break.
Do not attach the top-tether to
anything other than the cor-
rect top-tether anchorage. It
may not work properly if
attached to something else.
Child Restraint System
anchorages are designed to
withstand only those loads
imposed by correctly fitted
Child Restraint System.
Under no circumstances are
they to be used for adult seat
belts or harnesses or for
attaching other items or
equipment to the vehicle.
WARNING
Page 71 of 526
2-53
Safety system of your vehicle
2
How does the air bags system
operate?
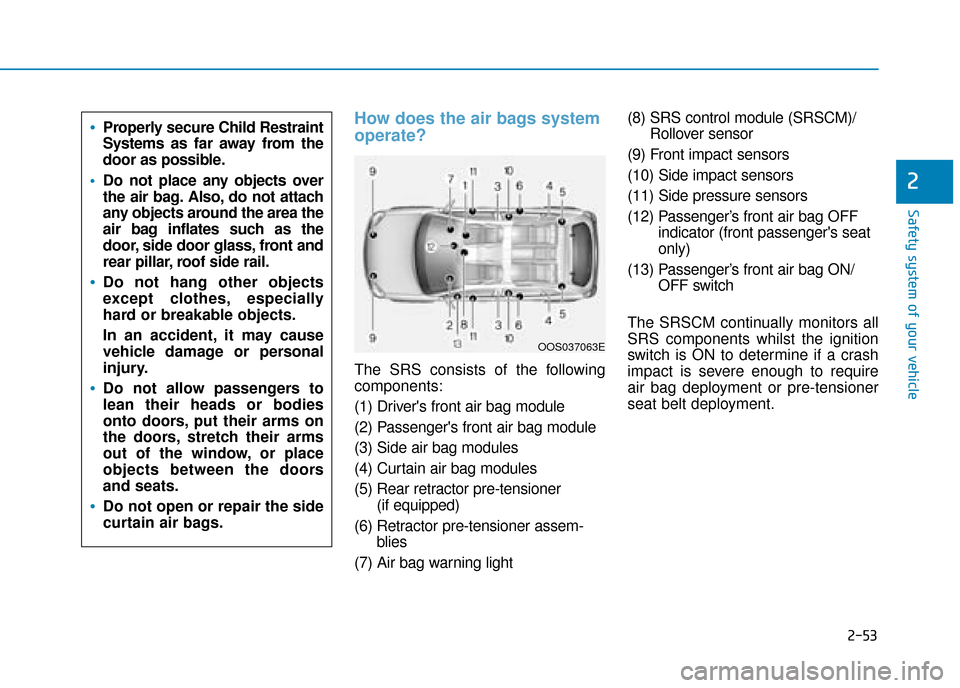
The SRS consists of the following
components:
(1) Driver's front air bag module
(2) Passenger's front air bag module
(3) Side air bag modules
(4) Curtain air bag modules
(5) Rear retractor pre-tensioner (if equipped)
(6) Retractor pre-tensioner assem- blies
(7) Air bag warning light (8) SRS control module (SRSCM)/
Rollover sensor
(9) Front impact sensors
(10) Side impact sensors
(11) Side pressure sensors
(12) Passenger’s front air bag OFF indicator (front passenger's seat
only)
(13) Passenger’s front air bag ON/ OFF switch
The SRSCM continually monitors all
SRS components whilst the ignition
switch is ON to determine if a crash
impact is severe enough to require
air bag deployment or pre-tensioner
seat belt deployment.
OOS037063E
Properly secure Child Restraint
Systems as far away from the
door as possible.
Do not place any objects over
the air bag. Also, do not attach
any objects around the area the
air bag inflates such as the
door, side door glass, front and
rear pillar, roof side rail.
Do not hang other objects
except clothes, especially
hard or breakable objects.
In an accident, it may cause
vehicle damage or personal
injury.
Do not allow passengers to
lean their heads or bodies
onto doors, put their arms on
the doors, stretch their arms
out of the window, or place
objects between the doors
and seats.
Do not open or repair the side
curtain air bags.
Page 93 of 526
![Hyundai Kona 2019 Owners Manual - RHD (UK, Australia) 3-11
Convenient features of your vehicle
3
Operating door locks from
outside the vehicle
Mechanical key
[A] : Unlock, [B] : Lock
Turn the key toward the rear of the
vehicle to unlock and toward the f Hyundai Kona 2019 Owners Manual - RHD (UK, Australia) 3-11
Convenient features of your vehicle
3
Operating door locks from
outside the vehicle
Mechanical key
[A] : Unlock, [B] : Lock
Turn the key toward the rear of the
vehicle to unlock and toward the f](/manual-img/35/16225/w960_16225-92.png)
3-11
Convenient features of your vehicle
3
Operating door locks from
outside the vehicle
Mechanical key
[A] : Unlock, [B] : Lock
Turn the key toward the rear of the
vehicle to unlock and toward the front
of the vehicle to lock.
If you lock/unlock the driver's door with
a key, a driver’s door will lock/unlock
automatically.
Once the doors are unlocked, they
may be opened by pulling the door
handle.
When closing the door, push the
door by hand. Make sure that doors
are closed securely.
Remote key
To lock the doors, press the Door
Lock button (1) on the remote key.
To unlock the doors, press the Door
Unlock button (2) on the remote key.
Once the doors are unlocked, they
may be opened by pulling the door
handle.
When closing the door, push the
door by hand. Make sure that doors
are closed securely.
Smart key
To lock the doors, press the button on
the outside door handle whilst carry-
ing the smart key with you or press
the door lock button on the smart key.
D DO
O O
OR
R
L
L O
O C
CK
K S
S
OPDE046413
OOS047002R
■ Remote key■Smart key
OOS047001/H
OPDE046004
Page 94 of 526
3-12
Convenient features of your vehicle
To unlock the doors, press the button
on the outside door handle whilst
carrying the smart key with you or
press the door unlock button on the
smart key.
Once the doors are unlocked, they
may be opened by pulling the door
handle.
When closing the door, push the
door by hand. Make sure that doors
are closed securely.
Information
• In cold and wet climates, door lock and door mechanisms may not work
properly due to freezing conditions.
• If the door is locked/unlocked multi- ple times in rapid succession with
either the vehicle key or door lock
switch, the system may stop operat-
ing temporarily in order to protect
the circuit and prevent damage to
system components.
Operating door locks from
inside the vehicle
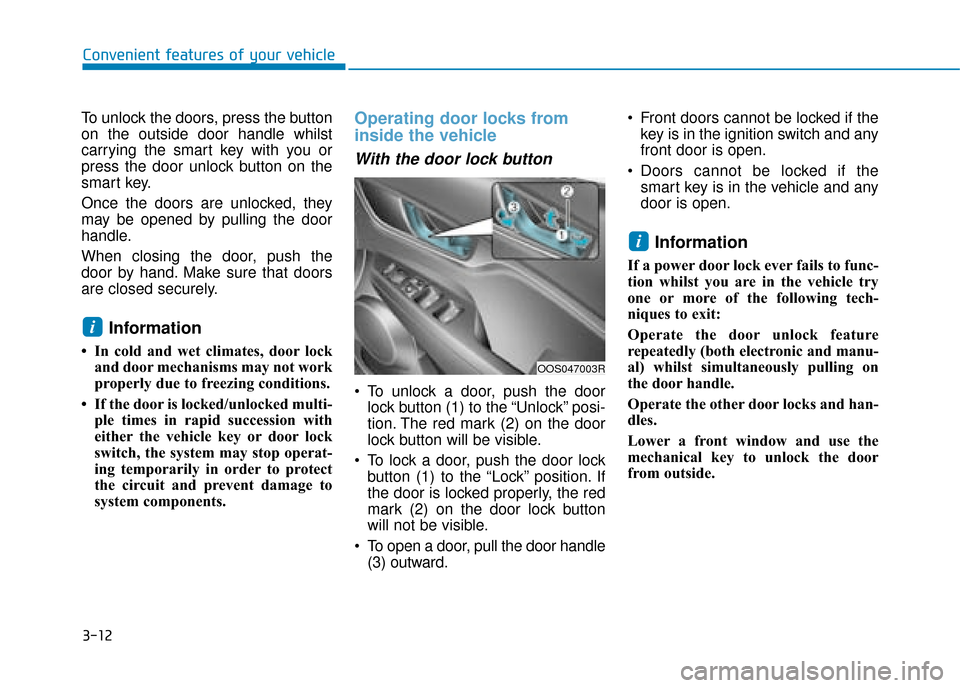
With the door lock button
To unlock a door, push the doorlock button (1) to the “Unlock” posi-
tion. The red mark (2) on the door
lock button will be visible.
To lock a door, push the door lock button (1) to the “Lock” position. If
the door is locked properly, the red
mark (2) on the door lock button
will not be visible.
To open a door, pull the door handle (3) outward. Front doors cannot be locked if the
key is in the ignition switch and any
front door is open.
Doors cannot be locked if the smart key is in the vehicle and any
door is open.
Information
If a power door lock ever fails to func-
tion whilst you are in the vehicle try
one or more of the following tech-
niques to exit:
Operate the door unlock feature
repeatedly (both electronic and manu-
al) whilst simultaneously pulling on
the door handle.
Operate the other door locks and han-
dles.
Lower a front window and use the
mechanical key to unlock the door
from outside.
i
i
OOS047003R
Page 96 of 526
3-14
Convenient features of your vehicle
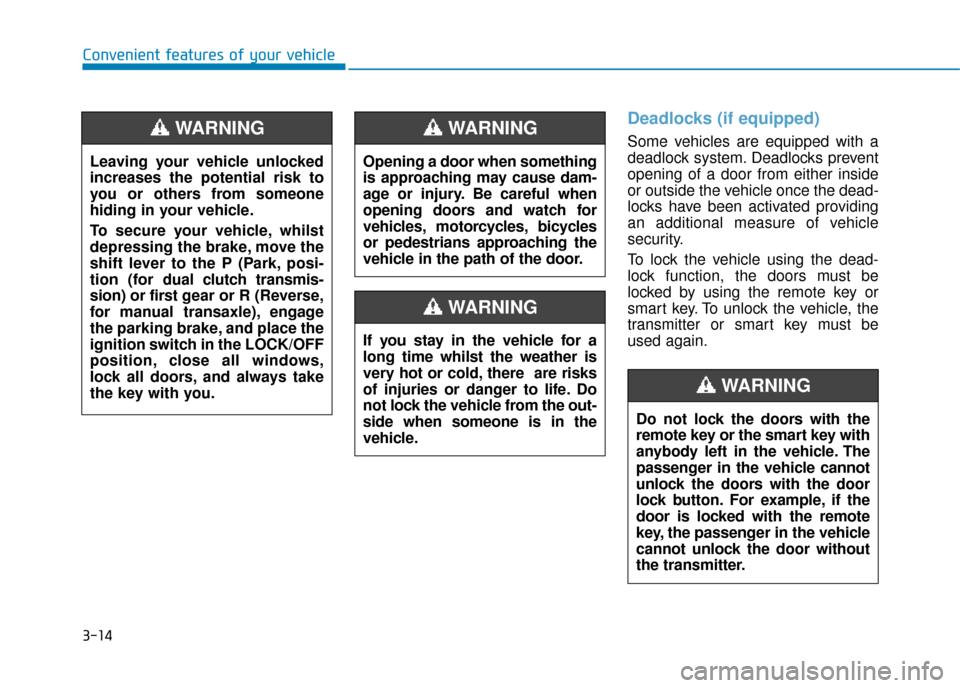
Deadlocks (if equipped)
Some vehicles are equipped with a
deadlock system. Deadlocks prevent
opening of a door from either inside
or outside the vehicle once the dead-
locks have been activated providing
an additional measure of vehicle
security.
To lock the vehicle using the dead-
lock function, the doors must be
locked by using the remote key or
smart key. To unlock the vehicle, the
transmitter or smart key must be
used again.Do not lock the doors with the
remote key or the smart key with
anybody left in the vehicle. The
passenger in the vehicle cannot
unlock the doors with the door
lock button. For example, if the
door is locked with the remote
key, the passenger in the vehicle
cannot unlock the door without
the transmitter.
WARNING
Leaving your vehicle unlocked
increases the potential risk to
you or others from someone
hiding in your vehicle.
To secure your vehicle, whilst
depressing the brake, move the
shift lever to the P (Park, posi-
tion (for dual clutch transmis-
sion) or first g ear or R (Reverse,
for manual transaxle), engage
the parking brake, and place the
ignition switch in the LOCK/OFF
position, close all windows,
lock all doors, and always take
the key with you.
WARNING
Opening a door when something
is approaching may cause dam-
age or injury. Be careful when
opening doors and watch for
vehicles, motorcycles, bicycles
or pedestrians approaching the
vehicle in the path of the door.
WARNING
If you stay in the vehicle for a
long time whilst the weather is
very hot or cold, there are risks
of injuries or danger to life. Do
not lock the vehicle from the out-
side when someone is in the
vehicle.
WARNING
Page 98 of 526
3-16
Convenient features of your vehicle
This system helps to protect your
vehicle and valuables. The horn will
sound and the hazard warning lights
will blink continuously if any of the
following occur:
- A door is opened without using the remote key or smart key.
- The tailgate is opened without using the remote key or smart key.
- The engine bonnet is opened.
The alarm continues for 30 seconds,
then the system resets. To turn off
the alarm, unlock the doors with the
remote key or smart key.
The Theft Alarm System automati-
cally sets 30 seconds after you lock
the doors and the tailgate. For the
system to activate, you must lock the
doors and the tailgate from outside
the vehicle with the remote key or
smart key or by pressing the button
on the outside of the door handles
with the smart key in your posses-
sion.
The hazard warning lights will blink
and the chime will sound once to
indicate the system is armed. Once the security system is set, open-
ing any door, the tailgate, or the bon-
net without using the remote key or
smart key will cause the alarm to acti-
vate.
The Theft Alarm System will not set if
the bonnet, the tailgate, or any door
is not fully closed. If the system will
not set, check the bonnet, the tail-
gate, or the doors are fully closed.
Do not attempt to alter this system or
add other devices to it.
Information
• Do not lock the doors until all pas-
sengers have left the vehicle. If the
remaining passenger leaves the
vehicle when the system is armed,
the alarm will be activated.
• If the vehicle is not disarmed with the remote key or smart key, open
the doors by using the mechanical
key and place the ignition switch in
the ON position (for remote key) or
start the engine (for smart key) and
wait for 30 seconds.
• When the system is disarmed but a door or tailgate is not opened within 30
seconds, the system will be rearmed.
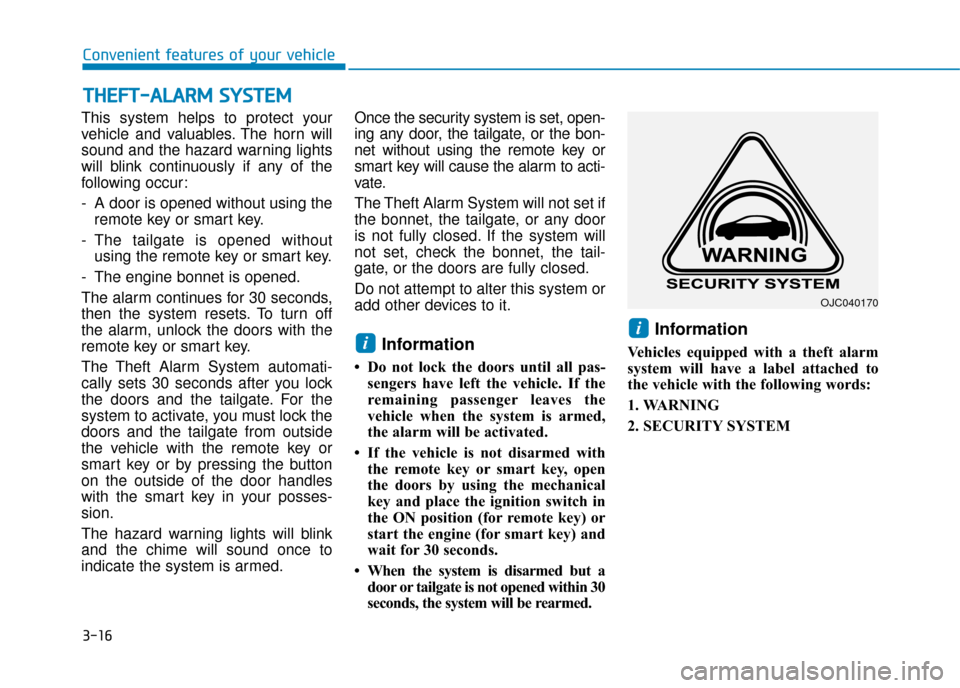
Information
Vehicles equipped with a theft alarm
system will have a label attached to
the vehicle with the following words:
1. WARNING
2. SECURITY SYSTEM
ii
T TH
H E
EF
FT
T -
-A
A L
LA
A R
RM
M
S
S Y
Y S
ST
T E
EM
M
OJC040170
Page 112 of 526
3-30
Convenient features of your vehicle
Resetting the sunroof
The sunroof may need to be reset if
the following conditions occur:
- The battery is discharged or dis- connected or the sunroof fuse has
been replaced or disconnected
- The sunroof control lever is not operating correctly
To reset the sunroof, perform the fol-
lowing steps:
1. Place the ignition switch to the ON position or start the engine. It is
recommended to reset the sunroof
whilst the engine is running.
2. Push the control lever forward. The sunroof will close completely or tilt
depending on the condition of the
sunroof.
3. Release the control lever when the sunroof stops moving.
4. Push the control lever forward for about 10 seconds.
- When the sunroof is in the closed position :
The glass will tilt and slightly move up and down. - When the sunroof is in the tilt
position:
The glass will slightly move up and down.
Do not release the lever until the
operation is completed.
If you release the lever during opera-
tion, try again from step 2.
5. Within 3 seconds, push the control lever forward until the sunroof
operates as follows:
Tilt down → Slide Open → Slide
Close.
Do not release the lever until the
operation is completed.
If you release the lever during opera-
tion, try again from step 2.
6. Release the sunroof control lever after all operation has completed.
(The sunroof system has been
reset.)
Information
• If the sunroof does not reset whenthe vehicle battery is disconnected
or discharged, or related fuse is
blown, the sunroof may not operate
normally.
• For more detailed information, we recommend that you contact a
HYUNDAI authorised repairer.
Sunroof open warning
(if equipped)
If the driver turns off the enginewhen the sunroof is not fully
closed, the warning chime will
sound for approximately 3 seconds
and sunroof open warning will
appear on the LCD display.
If the driver turns off the engine and opens the door when the sun-
roof is not fully closed, the open
sunroof warning will appear on the
LCD display until the door is closed
or the sunroof is fully closed.
Close the sunroof securely when
leaving your vehicle.
i