2019 DODGE GRAND CARAVAN instrument cluster
[x] Cancel search: instrument clusterPage 254 of 490

Transmission Limp Home Mode
Transmission function is monitored electronically for ab-
normal conditions. If a condition is detected that could
result in transmission damage, Transmission Limp Home
Mode is activated. In this mode, the transmission remains
in third gear regardless of which forward gear is selected.
PARK, REVERSE, and NEUTRAL will continue to operate.
The Malfunction Indicator Light (MIL) may be illuminated.
Limp Home Mode allows the vehicle to be driven to an
authorized dealer for service without damaging the trans-
mission.
In the event of a momentary problem, the transmission can
be reset to regain all forward gears by performing the
following steps:
1. Stop the vehicle.
2. Shift the transmission into PARK.
3. Turn the ignition OFF.
4. Wait approximately 10 seconds.
5. Restart the engine.
6. Shift into the desired gear range. If the problem is nolonger detected, the transmission will return to normal
operation. NOTE:
Even if the transmission can be reset, we recom-
mend that you visit an authorized dealer at your earliest
possible convenience. An authorized dealer has diagnostic
equipment to assess the condition of your transmission.
If the transmission cannot be reset, authorized dealer
service is required.
Electronic Range Select (ERS) Operation
The Electronic Range Select (ERS) shift control allows the
driver to limit the highest available gear when the trans-
mission is in DRIVE. For example, if you set the transmis-
sion gear limit to 4 (fourth gear), the transmission will not
shift above fourth gear (except to prevent engine over-
speed), but will shift through the lower gears normally.
You can switch between DRIVE and ERS mode at any
vehicle speed. When the gear selector is in the DRIVE
position, the transmission will operate automatically, shift-
ing between all available gears. Tapping the gear selector to
the left (-) will activate ERS mode, display the current gear
in the instrument cluster, and set that gear as the top
available gear. Once in ERS mode, tapping the gear selector
to the left (-) or right (+) will change the top available gear.
252 STARTING AND OPERATING
Page 258 of 490
WARNING!
Speed Control can be dangerous where the system
cannot maintain a constant speed. Your vehicle could
go too fast for the conditions, and you could lose
control and have an accident. Do not use Speed Control
in heavy traffic or on roads that are winding, icy,
snow-covered or slippery.
To Activate
Push the ON/OFF button. The Cruise Indicator Light in
the instrument cluster display will illuminate. To turn the
system off, push the ON/OFF button a second time. The
Cruise Indicator Light will turn off. The system should be
turned off when not in use.
WARNING!
Leaving the Speed Control system on when not in use
is dangerous. You could accidentally set the system or
cause it to go faster than you want. You could lose
control and have an accident. Always leave the system
off when you are not using it.
To Set A Desired Speed
Turn the Speed Control on. When the vehicle has reached
the desired speed, push the SET (-) button and release.
Release the accelerator and the vehicle will operate at the
selected speed.
NOTE:The vehicle should be traveling at a steady speed
and on level ground before pushing the SET (-) button.
To Vary The Speed Setting
To Increase Speed
When the Speed Control is set, you can increase speed by
pushing the RES (+) button.
The driver ’s preferred units can be selected through the
instrument panel settings if equipped. Refer to “Getting To
Know Your Instrument Panel” for more information. The
speed decrement shown is dependant on the chosen speed
unit of U.S. (mph) or Metric (km/h):
U.S. Speed (mph)
• Pushing the RES (+) button once will result ina1mph
increase in set speed. Each subsequent tap of the button
results in an increase of 1 mph.
256 STARTING AND OPERATING
Page 261 of 490
ParkSense Sensors
The four ParkSense sensors, located in the rear fascia/
bumper, monitor the area behind the vehicle that is within
the sensors’ field of view. The sensors can detect obstacles
from approximately 12 inches (30 cm) up to 79 inches (200
cm) from the rear fascia/bumper in the horizontal direc-
tion, depending on the location, type and orientation of the
obstacle.
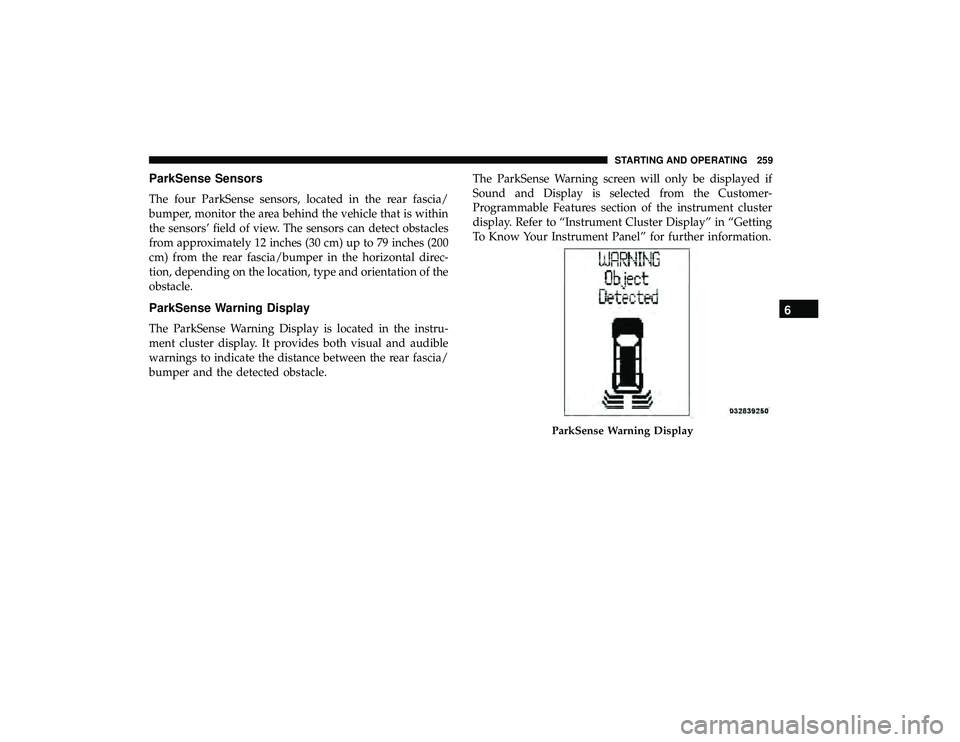
ParkSense Warning Display
The ParkSense Warning Display is located in the instru-
ment cluster display. It provides both visual and audible
warnings to indicate the distance between the rear fascia/
bumper and the detected obstacle.The ParkSense Warning screen will only be displayed if
Sound and Display is selected from the Customer-
Programmable Features section of the instrument cluster
display. Refer to “Instrument Cluster Display” in “Getting
To Know Your Instrument Panel” for further information.
ParkSense Warning Display
6
STARTING AND OPERATING 259
Page 263 of 490
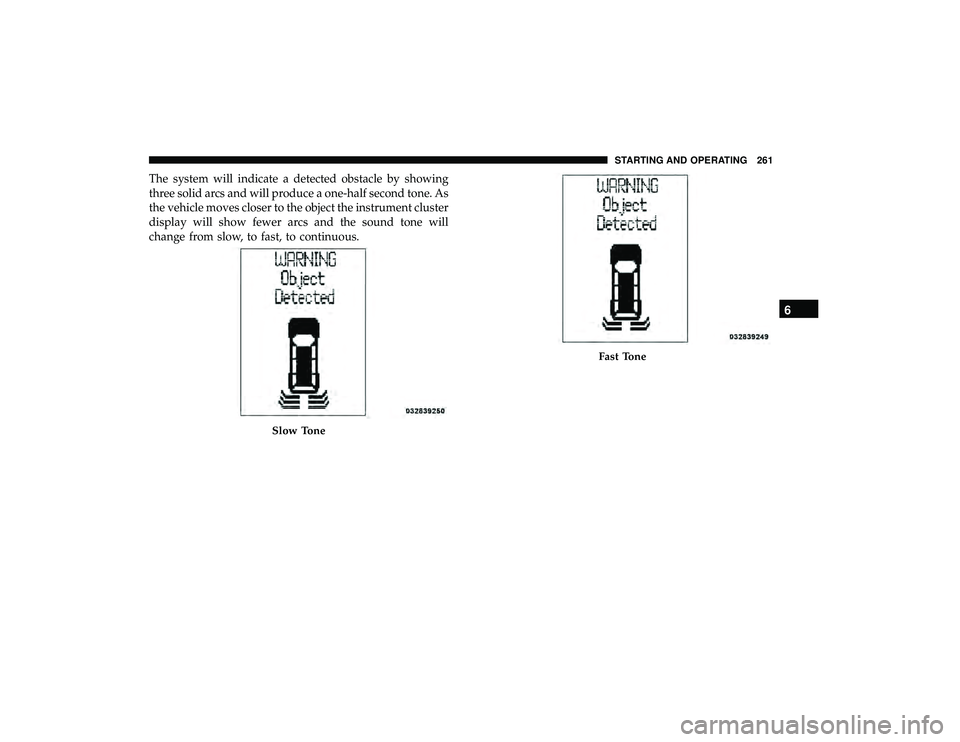
The system will indicate a detected obstacle by showing
three solid arcs and will produce a one-half second tone. As
the vehicle moves closer to the object the instrument cluster
display will show fewer arcs and the sound tone will
change from slow, to fast, to continuous.
Slow Tone
Fast Tone
6
STARTING AND OPERATING 261
Page 264 of 490
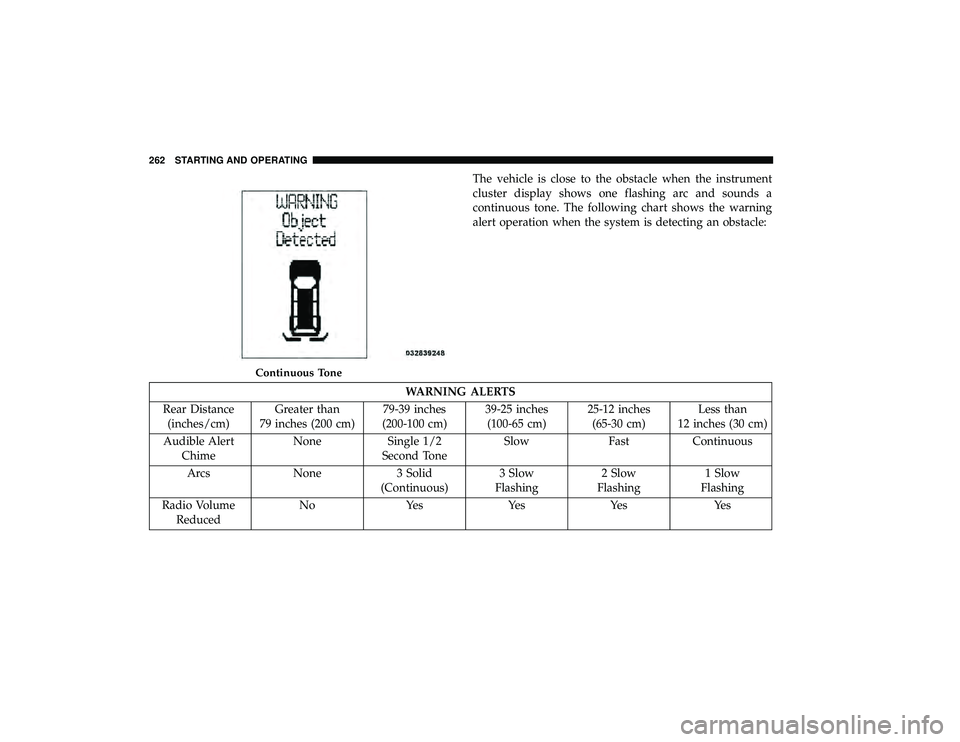
The vehicle is close to the obstacle when the instrument
cluster display shows one flashing arc and sounds a
continuous tone. The following chart shows the warning
alert operation when the system is detecting an obstacle:
WARNING ALERTS
Rear Distance (inches/cm) Greater than
79 inches (200 cm) 79-39 inches
(200-100 cm) 39-25 inches
(100-65 cm) 25-12 inches
(65-30 cm) Less than
12 inches (30 cm)
Audible Alert Chime None Single 1/2
Second Tone Slow Fast Continuous
Arcs None 3 Solid (Continuous)3 Slow
Flashing 2 Slow
Flashing 1 Slow
Flashing
Radio Volume Reduced No Yes Yes Yes Yes
Continuous Tone
262 STARTING AND OPERATING
Page 265 of 490
NOTE:ParkSense will reduce the radio volume, if on,
when the system is sounding an audio tone.
Enabling/Disabling ParkSense
ParkSense can be enabled and disabled through the
Customer-Programmable Features section of the instru-
ment cluster display. The available choices are: OFF, Sound
Only, or Sound and Display.
When ParkSense is disabled, the instrument cluster will
display the “PARK ASSIST SYSTEM OFF” message for
approximately five seconds. When the gear selector is
moved to REVERSE and the system is disabled, the instru-
ment cluster display will display the “PARK ASSIST SYS-
TEM OFF” message for as long as the vehicle is in
REVERSE.
Refer to “Instrument Cluster Display” in “Getting To Know
Your Instrument Panel” for further information.
Service The ParkSense Rear Park Assist System
During vehicle start up, when the ParkSense Rear Park
Assist System has detected a faulted condition, the instru-
ment cluster will actuate a single chime, once per ignition
cycle, and it will display the “SERVICE PARK ASSIST
SYSTEM” message. When the gear selector is moved to
REVERSE and the system has detected a faulted condition, the instrument cluster display will display the “SERVICE
PARK ASSIST SYSTEM” message for as long as the vehicle
is in REVERSE. Under this condition, ParkSense will not
operate.
Refer to “Instrument Cluster Display” in “Getting To Know
Your Instrument Panel” for further information.
If “SERVICE PARK ASSIST SYSTEM” appears in the in-
strument cluster display after making sure the rear fascia/
bumper is free from snow, ice, mud, dirt and debris, see
your authorized dealer.
Cleaning The ParkSense System
Clean the ParkSense sensors with water, car wash soap and
a soft cloth. Do not use rough or hard cloths. Do not scratch
or poke the sensors. Otherwise, you could damage the
sensors.
ParkSense System Usage Precautions
NOTE:
•
Ensure that the rear bumper is free of snow, ice, mud,
dirt and debris to keep the ParkSense system operating
properly.
• Jackhammers, large trucks, and other vibrations could
affect the performance of ParkSense.
6
STARTING AND OPERATING 263
Page 266 of 490
•When you turn ParkSense off, the instrument cluster
will display “PARKSENSE OFF.” Furthermore, once you
turn ParkSense off, it remains off until you turn it on
again, even if you cycle the ignition.
• When you move the gear selector to the REVERSE
position and ParkSense is turned off, the instrument
cluster display will display “PARKSENSE OFF” mes-
sage for as long as the vehicle is in REVERSE.
• ParkSense, when on, will reduce the volume of the radio
when it is sounding a tone.
•
Clean the ParkSense sensors regularly, taking care not to
scratch or damage them. The sensors must not be covered
with ice, snow, slush, mud, dirt or debris. Failure to do so
can result in the system not working properly. The
ParkSense system might not detect an obstacle behind the
fascia/bumper, or it could provide a false indication that
an obstacle is behind the fascia/bumper.
• Use the ParkSense switch to turn the ParkSense system
off if objects such as bicycle carriers, trailer hitches, etc.
are placed within 12 inches (30 cm) from the rear
fascia/bumper. Failure to do so can result in the system
misinterpreting a close object as a sensor problem,
causing the “PARKSENSE UNAVAILABLE SERVICE REQUIRED” message to be displayed in the instrument
cluster display.
WARNING!
•
Drivers must be careful when backing up even when
using ParkSense. Always check carefully behind
your vehicle, look behind you, and be sure to check
for pedestrians, animals, other vehicles, obstructions,
and blind spots before backing up. You are respon-
sible for safety and must continue to pay attention to
your surroundings. Failure to do so can result in
serious injury or death.
• Before using ParkSense, it is strongly recommended
that the ball mount and hitch ball assembly is
disconnected from the vehicle when the vehicle is
not used for towing. Failure to do so can result in
injury or damage to vehicles or obstacles because the
hitch ball will be much closer to the obstacle than the
rear fascia when the loudspeaker sounds the con-
tinuous tone. Also, the sensors could detect the ball
mount and hitch ball assembly, depending on its size
and shape, giving a false indication that an obstacle
is behind the vehicle.
264 STARTING AND OPERATING
Page 270 of 490

NOTE:
•When the fuel nozzle “clicks” or shuts off, the fuel tank
is full.
• Tighten the fuel filler cap until you hear a “clicking”
sound. This is an indication that the fuel filler cap is
properly tightened.
• If the gas cap is not tightened properly, the MIL may
come on. Be sure the gas cap is tightened every time the
vehicle is refueled.
Loose Fuel Filler Cap Message
If the vehicle diagnostic system determines that the fuel
filler cap is loose, improperly installed, or damaged, a
”gASCAP” message will display in the odometer or a
“Check Gascap” message will display in the instrument
cluster. If this occurs, tighten the fuel filler cap properly
and press the Trip Odometer button to turn off the mes-
sage. If the problem continues, the message will appear the
next time the vehicle is started.
A loose, improperly installed, or damaged fuel filler cap
may also turn on the MIL.
VEHICLE LOADING
Certification Label
As required by National Highway Traffic Safety Adminis-
tration regulations, your vehicle has a certification label
affixed to the driver’s side door or pillar.
This label contains the month and year of manufacture,
Gross Vehicle Weight Rating (GVWR), Gross Axle Weight
Rating (GAWR) front and rear, and Vehicle Identification
Number (VIN). A Month-Day-Hour (MDH) number is
included on this label and indicates the Month, Day and
Hour of manufacture. The bar code that appears on the
bottom of the label is your VIN.
Gross Vehicle Weight Rating (GVWR)
The GVWR is the total permissible weight of your vehicle
including driver, passengers, vehicle, options and cargo.
The label also specifies maximum capacities of front and
rear axle systems (GAWR). Total load must be limited so
GVWR and front and rear GAWR are not exceeded.
Payload
The payload of a vehicle is defined as the allowable load
weight a truck can carry, including the weight of the driver,
all passengers, options and cargo.
268 STARTING AND OPERATING