2019 DODGE GRAND CARAVAN warning
[x] Cancel search: warningPage 58 of 490

•Push the heated steering wheel buttona second time
to turn the heating element off.
NOTE: The engine must be running for the heated steering
wheel to operate.
Vehicles Equipped With Remote Start
On models that are equipped with remote start, the heated
steering wheel can be programed to come on during a
remote start. Refer to “Instrument Cluster Display” in
“Getting To Know Your Instrument Panel” for further
information.
WARNING!
• Persons who are unable to feel pain to the skin
because of advanced age, chronic illness, diabetes,
spinal cord injury, medication, alcohol use, exhaus-
tion, or other physical conditions must exercise care
when using the steering wheel heater. It may cause
burns even at low temperatures, especially if used
for long periods.
• Do not place anything on the steering wheel that
insulates against heat, such as a blanket or steering
wheel covers of any type and material. This may
cause the steering wheel heater to overheat.
MIRRORS
Automatic Dimming Mirror — If Equipped
The mirror head can be adjusted up, down, left, and right
for various drivers. The mirror should be adjusted to center
on the view through the rear window.
This mirror automatically adjusts for headlight glare from
vehicles behind you.
NOTE: The Automatic Dimming feature is disabled when
the vehicle is in REVERSE to improve rear view viewing.
The Automatic Dimming feature can be turned on or off
through the touchscreen.
• Press the mirror dimmer button once to turn the feature
on.
• Press the mirror dimmer button a second time to turn
the feature off.
56 GETTING TO KNOW YOUR VEHICLE
Page 60 of 490
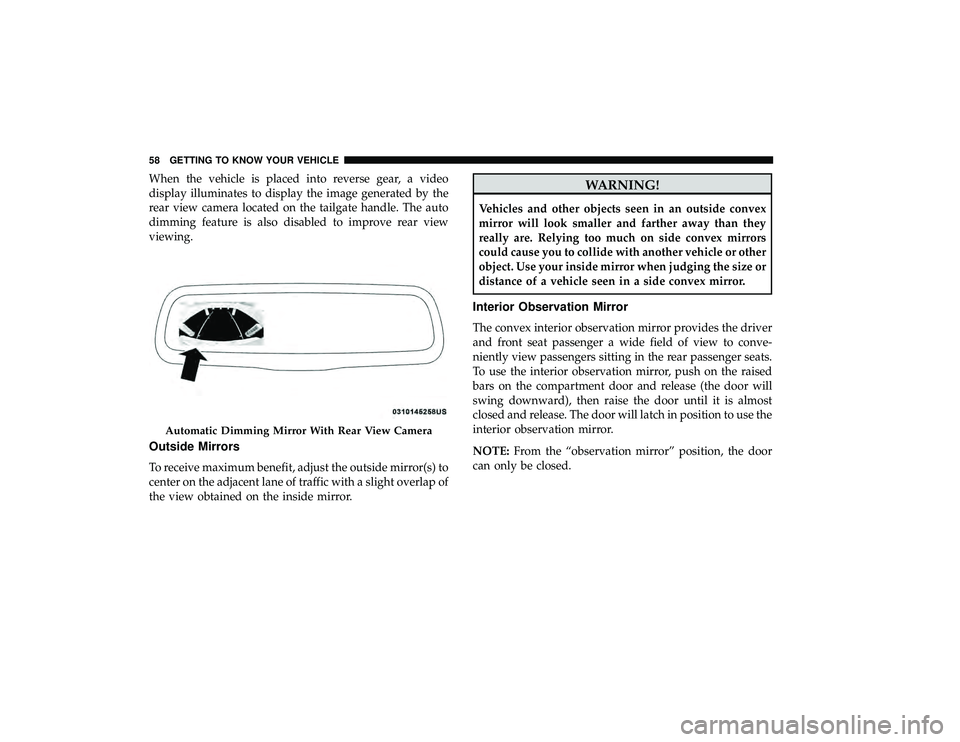
When the vehicle is placed into reverse gear, a video
display illuminates to display the image generated by the
rear view camera located on the tailgate handle. The auto
dimming feature is also disabled to improve rear view
viewing.
Outside Mirrors
To receive maximum benefit, adjust the outside mirror(s) to
center on the adjacent lane of traffic with a slight overlap of
the view obtained on the inside mirror.
WARNING!
Vehicles and other objects seen in an outside convex
mirror will look smaller and farther away than they
really are. Relying too much on side convex mirrors
could cause you to collide with another vehicle or other
object. Use your inside mirror when judging the size or
distance of a vehicle seen in a side convex mirror.
Interior Observation Mirror
The convex interior observation mirror provides the driver
and front seat passenger a wide field of view to conve-
niently view passengers sitting in the rear passenger seats.
To use the interior observation mirror, push on the raised
bars on the compartment door and release (the door will
swing downward), then raise the door until it is almost
closed and release. The door will latch in position to use the
interior observation mirror.
NOTE:From the “observation mirror” position, the door
can only be closed.
Automatic Dimming Mirror With Rear View Camera
58 GETTING TO KNOW YOUR VEHICLE
Page 66 of 490

Turn Signal Warning
If the vehicle electronics sense that the vehicle has traveled
at over 18 mph (29 km/h) for about 1 mile (1.6 km) with the
turn signals on, a chime will sound to alert the driver.
Lane Change Assist
Tap the lever up or down once, without moving beyond
the detent, and the turn signal (right or left) will flash three
times then automatically turn off.
Battery Protection
This feature provides battery protection to avoid wearing
down the battery if the headlights or parking lights are left
on for extended periods of time when the ignition is in the
OFF position. After eight minutes of the ignition being in
the OFF position and the headlight switch in any position
other than OFF or AUTO, the lights will turn off automati-
cally until the next cycle of the ignition or headlight switch.
The battery protection feature will be disabled if the
ignition is placed in any position other than OFF during the
eight minute delay.
INTERIOR LIGHTS
Courtesy/Interior Lighting
At the forward end of the overhead console are two
courtesy lights (standard dome light has two buttons).
These interior lights are turned on when a door or the
liftgate is opened, the remote keyless entry key fob is
activated, or when the dimmer control is moved to the
extreme top.
The interior lights will automatically turn off in approxi-
mately 10 minutes for the first activation and 90 seconds
every activation thereafter until the engine is started, if one
of the following occur:
•A door, sliding door or the liftgate is left open.
• Any overhead reading light is left on.
NOTE: The ignition must be cycled to the OFF position for
this feature to operate.
The courtesy lights also function as reading lights. Push in
on each lens to turn these lights on while inside the vehicle.
Push a second time to turn each light off. You may adjust
the direction of these lights by pushing the outside ring,
which is identified with four directional arrows (LED
lamps only).
64 GETTING TO KNOW YOUR VEHICLE
Page 69 of 490
NOTE:Always remove any buildup of snow that prevents
the windshield wiper blades from returning to the off
position. If the windshield wiper switch is turned off and
the blades cannot return to the off position, damage to the
wiper motor may occur.
WARNING!
Sudden loss of visibility through the windshield could
lead to a collision. You might not see other vehicles or
other obstacles. To avoid sudden icing of the wind-
shield during freezing weather, warm the windshield
with the defroster before and during windshield
washer use.
Windshield Wiper Operation
Rotate the end of the lever upward, to the first detent past
the intermittent settings for low-speed wiper operation.
Rotate the end of the lever upward to the second detent
past the intermittent settings for high-speed wiper opera-
tion.
Intermittent Wiper System
Use the intermittent wiper when weather conditions make
a single wiping cycle with a variable pause between cycles
desirable. Rotate the end of the multifunction lever to the first detent position, and then turn the end of the lever to
select the desired delay interval. There are five delay
settings, which allow you to regulate the wipe interval
from a minimum of one cycle every second to a maximum
of approximately 36 seconds between cycles. The delay
intervals will double in duration when the vehicle speed is
10 mph (16 km/h) or less.
Windshield Washers
To use the windshield washer, push on the end of the lever
to the second detent and hold while spray is desired. If the
lever is pushed while on the intermittent setting, the
wipers will turn on and operate for several wipe cycles
after the lever is released, and then resume the intermittent
interval previously selected. If the lever is pushed while
the wipers are in the off position, the wipers will operate
several wipe cycles, then turn off.
Mist Feature
Push the end of the multifunction lever inward (toward the
steering column) to the first detent and release for a single
wiping cycle.
3
GETTING TO KNOW YOUR VEHICLE 67
Page 93 of 490
WARNING!
There is no anti-pinch protection when the window is
almost closed. To avoid personal injury be sure to clear
your arms, hands, fingers and all objects from the
window path before closing.
Auto Up Reset — If Equipped
To reactivate the Auto Up feature, perform the following
steps after vehicle power is restored:
1. Pull the window control up to close the window com- pletely and continue to hold the control up for an
additional two seconds after the window is closed.
2. Push the window control down firmly to the second detent to open the window completely and continue to
hold the control down for an additional two seconds
after the window is fully open.
Sliding Side Door Power Window Control — If
Equipped
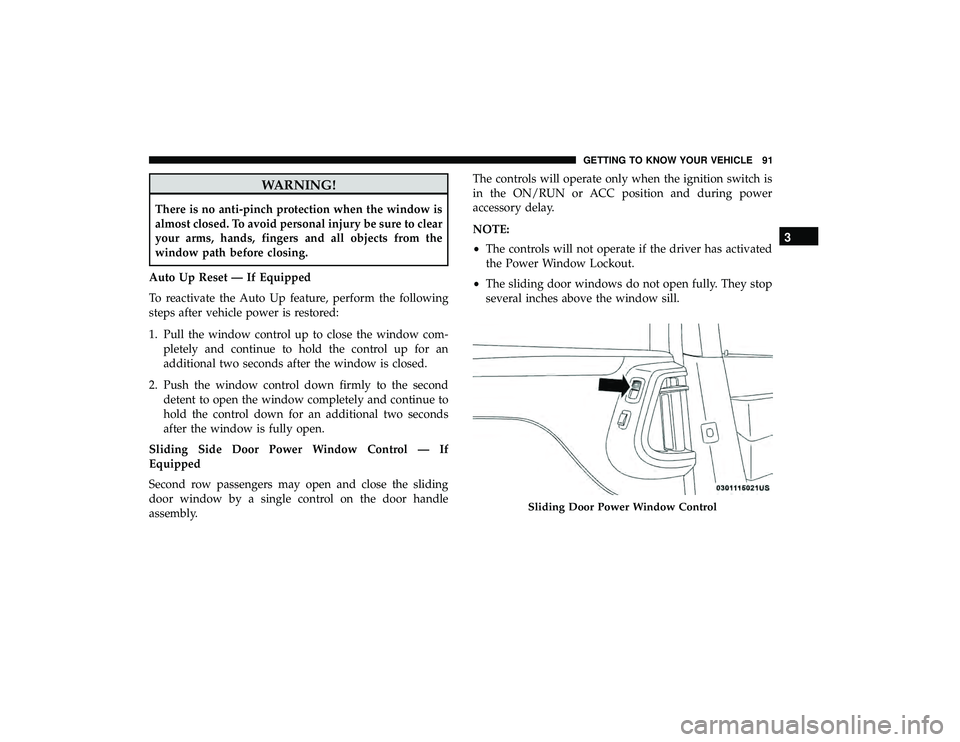
Second row passengers may open and close the sliding
door window by a single control on the door handle
assembly. The controls will operate only when the ignition switch is
in the ON/RUN or ACC position and during power
accessory delay.
NOTE:
•
The controls will not operate if the driver has activated
the Power Window Lockout.
• The sliding door windows do not open fully. They stop
several inches above the window sill.
Sliding Door Power Window Control
3
GETTING TO KNOW YOUR VEHICLE 91
Page 95 of 490
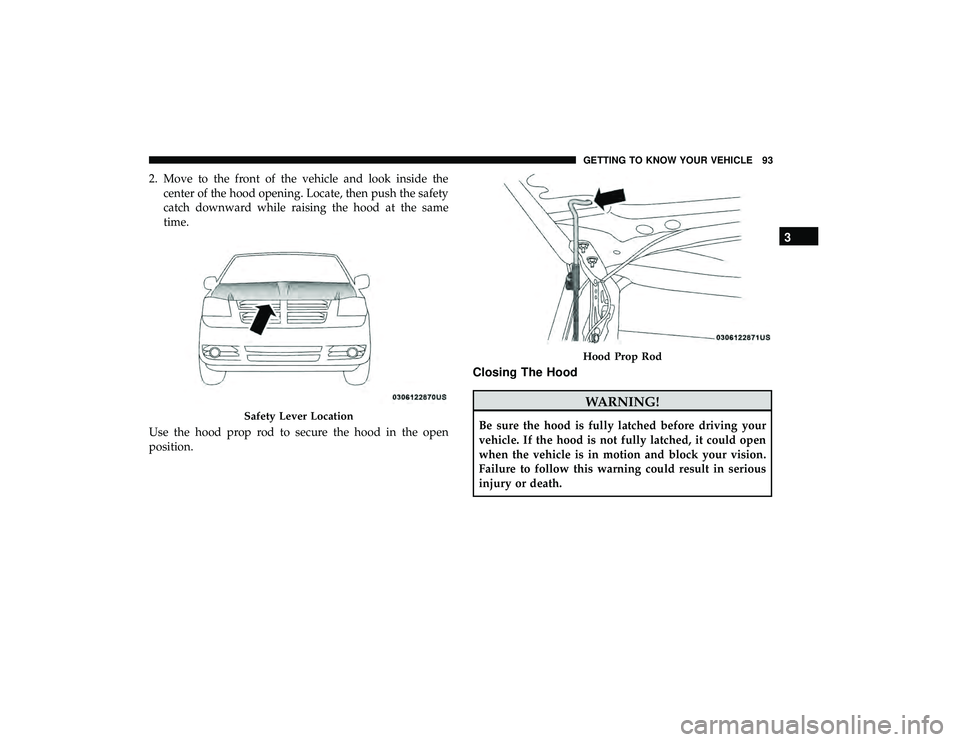
2. Move to the front of the vehicle and look inside thecenter of the hood opening. Locate, then push the safety
catch downward while raising the hood at the same
time.
Use the hood prop rod to secure the hood in the open
position.
Closing The Hood
WARNING!
Be sure the hood is fully latched before driving your
vehicle. If the hood is not fully latched, it could open
when the vehicle is in motion and block your vision.
Failure to follow this warning could result in serious
injury or death.Safety Lever Location
Hood Prop Rod
3
GETTING TO KNOW YOUR VEHICLE 93
Page 97 of 490
WARNING!
•Driving with the liftgate open can allow poisonous
exhaust gases into your vehicle. You and your pas-
sengers could be injured by these fumes. Keep the
liftgate closed when you are operating the vehicle.
• If you are required to drive with the liftgate open,
make sure that all windows are closed, and the
climate control blower switch is set at high speed. Do
not use the recirculation mode.
Power Liftgate — If Equipped
The power liftgate may be opened or closed in several
ways:
• Overhead console liftgate button
• Key fob
• Outside handle (opens liftgate only)
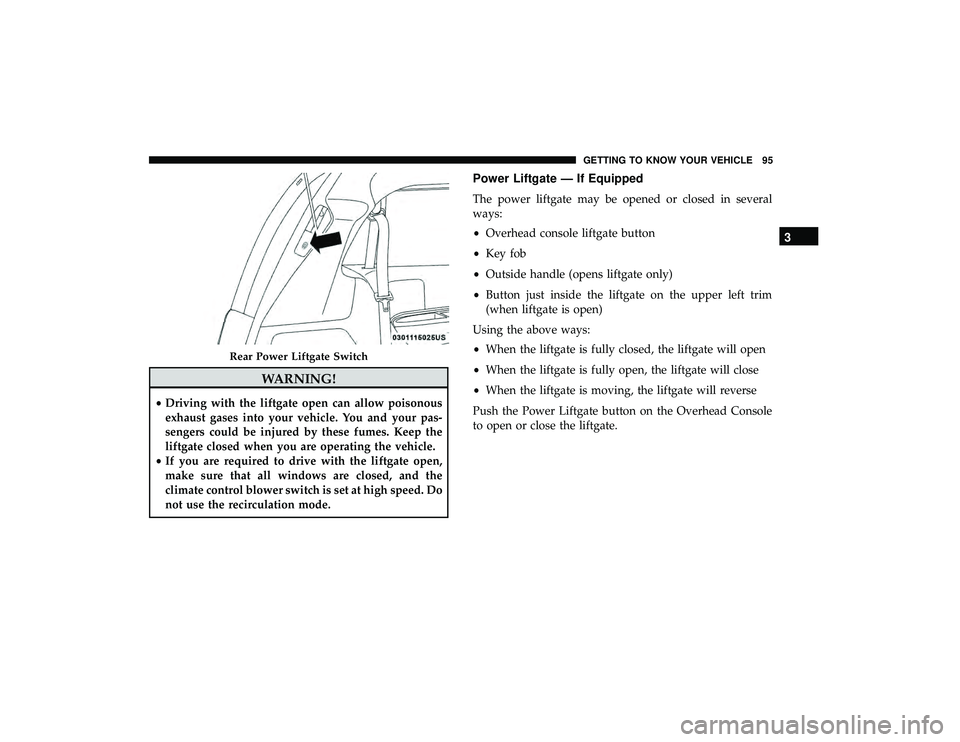
• Button just inside the liftgate on the upper left trim
(when liftgate is open)
Using the above ways:
• When the liftgate is fully closed, the liftgate will open
• When the liftgate is fully open, the liftgate will close
• When the liftgate is moving, the liftgate will reverse
Push the Power Liftgate button on the Overhead Console
to open or close the liftgate.
Rear Power Liftgate Switch
3
GETTING TO KNOW YOUR VEHICLE 95
Page 105 of 490
NOTE:All channels will be erased. Individual channels
cannot be erased.
The HomeLink Universal Transceiver is disabled when the
Vehicle Security Alarm is active.
Troubleshooting Tips
If you are having trouble programming HomeLink, here
are some of the most common solutions:
• Replace the battery in the Garage Door Opener hand-
held transmitter.
• Push the LEARN button on the Garage Door Opener to
complete the training for a Rolling Code.
• Did you unplug the device for programming and re-
member to plug it back in?
If you have any problems, or require assistance, please call
toll-free 1-800-355-3515 or, on the Internet at
HomeLink.com for information or assistance.
WARNING!
• Vehicle exhaust contains carbon monoxide, a danger-
ous gas. Do not run your vehicle in the garage while
programming the transceiver. Exhaust gas can cause
serious injury or death.
• Your motorized door or gate will open and close
while you are programming the universal trans-
ceiver. Do not program the transceiver if people, pets
or other objects are in the path of the door or gate.
Only use this transceiver with a garage door opener
that has a “stop and reverse” feature as required by
Federal safety standards. This includes most garage
door opener models manufactured after 1982. Do not
use a garage door opener without these safety fea-
tures. Call toll-free 1-800-355-3515 or, on the Internet
at HomeLink.com for safety information or assis-
tance.
3
GETTING TO KNOW YOUR VEHICLE 103