Page 107 of 490
To open the upper compartment, push in the release button
located on the left side of the upper door. The door will
automatically open.
To close the compartment door, push downward on the
door’s surface to latch the door closed.
To open the lower compartment, pull the release handle.NOTE:
The lower compartment is equipped with a lock
that is a part of the compartment handle.
Center Console Features
There are two consoles available: Basic and Super.
WARNING!
Do not operate this vehicle with a console compart-
ment lid in the open position. Driving with the console
compartment lid open may result in injury in a colli-
sion.
Upper Compartment Release Button
Lower Compartment Release Handle
3
GETTING TO KNOW YOUR VEHICLE 105
Page 108 of 490
Basic Console
The Basic Console consists of the following features:
•The Basic Console profile allows vehicle occupants to
easily pass through the first row to the second.
• Four cupholders accept up to extra large size beverage
cups or 20 oz (0.6 L) plastic bottles. Cupholders are
dishwasher safe for cleaning.
• The cupholders are removable to access a large storage
bin.
• The Basic Console is removable from the vehicle for
additional floor space by removing the anchor cup plug
and clip at the console base, sliding the console base
forward while lifting slightly to clear the rear load floor
hook. To reinstall the Basic Console:
1. Position the console at a slight angle (front slightly
higher than the rear).
2. Slide the console rearward into the floor bracket/hook.
3. Align the console until the front anchor cup plug hole is centered on the winch hole.
4. Reinstall the clip first and then while pushing down- ward on the console with slight pressure, reinstall the
cover plug.
5. Pull up on the console to be sure it is firmly latched.
WARNING!
In an accident, serious injury could result if the remov-
able floor console is not properly installed. Always be
sure the removable floor console is fully latched.
106 GETTING TO KNOW YOUR VEHICLE
Page 111 of 490
Rear Overhead Console — If Equipped
The rear overhead storage system is available.
An additional LED at the front of the rear console shines
down on the front foot-well area while in courtesy mode,
for added convenience.Front Door Storage
Both interior front door panels have multiple pockets for
storage.
WARNING!
If containers of hot liquid are placed in the bottle
holder, they can spill when the door is closed, burning
the occupants. Be careful when closing the doors to
avoid injury.
Rear Overhead Console Features
1 — LCD Screen5 — Storage
2 — Rear HVAC 6 — Storage
3 — Interior Lights 7 — Interior Lights
4 — Storage 8 — Halo Lighting
3
GETTING TO KNOW YOUR VEHICLE 109
Page 113 of 490
WARNING!
In a collision, serious injury could result if the seat
storage bin covers are not properly latched.
•Do not drive the vehicle with the storage bin covers
open.
• Keep the storage bin covers closed and latched while
the vehicle is in motion.
• Do not operate the storage bin covers while the
vehicle is in motion.
• Do not use a storage bin latch as a tie down.
CAUTION!
The storage bin cover must lay flat and be locked to
avoid damage from contact with the front seat tracks,
which have minimal clearance to the cover. If the
storage bin cover is left in the open position, front seat
adjustment may damage the cover.
Storage Bin Safety Warning
Carefully follow these warnings to help prevent personal
injury or damage to your vehicle:
WARNING!
•Always close the storage bin covers when your
vehicle is unattended.
• Do not allow children to have access to the second
row seat storage bins. Once in the storage bin, young
children may not be able to escape. If trapped in the
storage bin, children can die from suffocation or heat
stroke.
• In a collision, serious injury could result if the seat
storage bin covers are not properly latched.
(Continued)
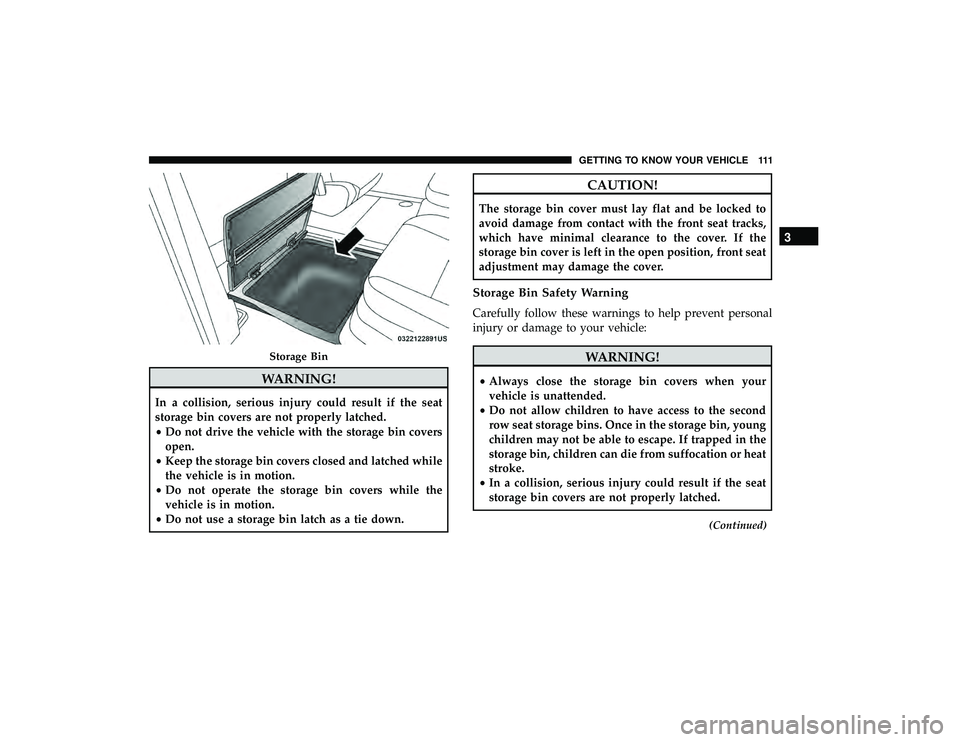
Storage Bin
3
GETTING TO KNOW YOUR VEHICLE 111
Page 114 of 490
WARNING!(Continued)
•Do not drive the vehicle with the storage bin covers
open. Keep the storage bin covers closed and latched
while the vehicle is in motion.
• Do not operate the storage bin covers while the
vehicle is in motion.
• Do not use a storage bin latch as a tie down.
CAUTION!
The storage bin cover must lay flat and be locked to
avoid damage from contact with the front seat tracks,
which have minimal clearance to the cover. If the
storage bin cover is left in the open position, front seat
adjustment may damage the cover.
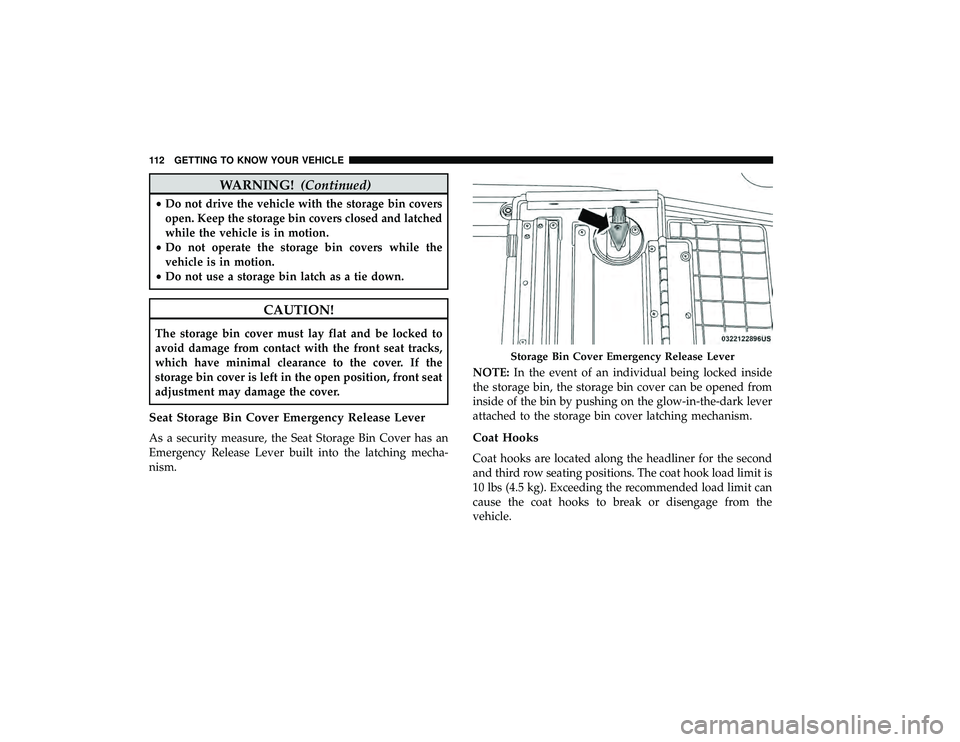
Seat Storage Bin Cover Emergency Release Lever
As a security measure, the Seat Storage Bin Cover has an
Emergency Release Lever built into the latching mecha-
nism. NOTE:
In the event of an individual being locked inside
the storage bin, the storage bin cover can be opened from
inside of the bin by pushing on the glow-in-the-dark lever
attached to the storage bin cover latching mechanism.Coat Hooks
Coat hooks are located along the headliner for the second
and third row seating positions. The coat hook load limit is
10 lbs (4.5 kg). Exceeding the recommended load limit can
cause the coat hooks to break or disengage from the
vehicle.
Storage Bin Cover Emergency Release Lever
112 GETTING TO KNOW YOUR VEHICLE
Page 116 of 490
For rear passengers two cupholders are located in the
pull-out drawer, located in the back of the Super Console.
Pull the drawer out to the first position to use the cuphold-
ers.
Interior Bottle Holders
There are four bottle holders located in the interior. One
bottle holder is molded into each front interior door trim
panels, and one bottle holder is molded into each side
sliding interior door trim panel. Each holder accommo-
dates up to a 20 oz (0.6 L) plastic bottle.
WARNING!
If containers of hot liquid are placed in the bottle
holder, they can spill when the door is closed, burning
the occupants. Be careful when closing the doors to
avoid injury.
Two outboard mesh pockets are on intermediate seating.
The mesh pockets are flexible enough to hold juice boxes,
toys, games or MP3 players, etc.
Rear Cupholders
Interior Bottle Holder
114 GETTING TO KNOW YOUR VEHICLE
Page 120 of 490
WARNING!
To avoid serious injury or death:
•Only devices designed for use in this type of outlet
should be inserted into any 12 Volt outlet.
• Do not touch with wet hands.
• Close the lid when not in use and while driving the
vehicle.
• If this outlet is mishandled, it may cause an electric
shock and failure.
CAUTION!
• Many accessories that can be plugged in draw power
from the vehicle’s battery, even when not in use (i.e.,
cellular phones, etc.). Eventually, if plugged in long
enough, the vehicle’s battery will discharge suffi-
ciently to degrade battery life and/or prevent the
engine from starting.
• Accessories that draw higher power (i.e., coolers,
vacuum cleaners, lights, etc.), will degrade the bat-
tery even more quickly. Only use these intermit-
tently and with greater caution.
(Continued)
CAUTION! (Continued)
•After the use of high power draw accessories, or long
periods of the vehicle not being started (with acces-
sories still plugged in), the vehicle must be driven a
sufficient length of time to allow the alternator to
recharge the vehicle’s battery.
• Power outlets are designed for accessory plugs only.
Do not hang any type of accessory or accessory
bracket from the plug. Improper use of the power
outlet can cause damage.
118 GETTING TO KNOW YOUR VEHICLE
Page 121 of 490
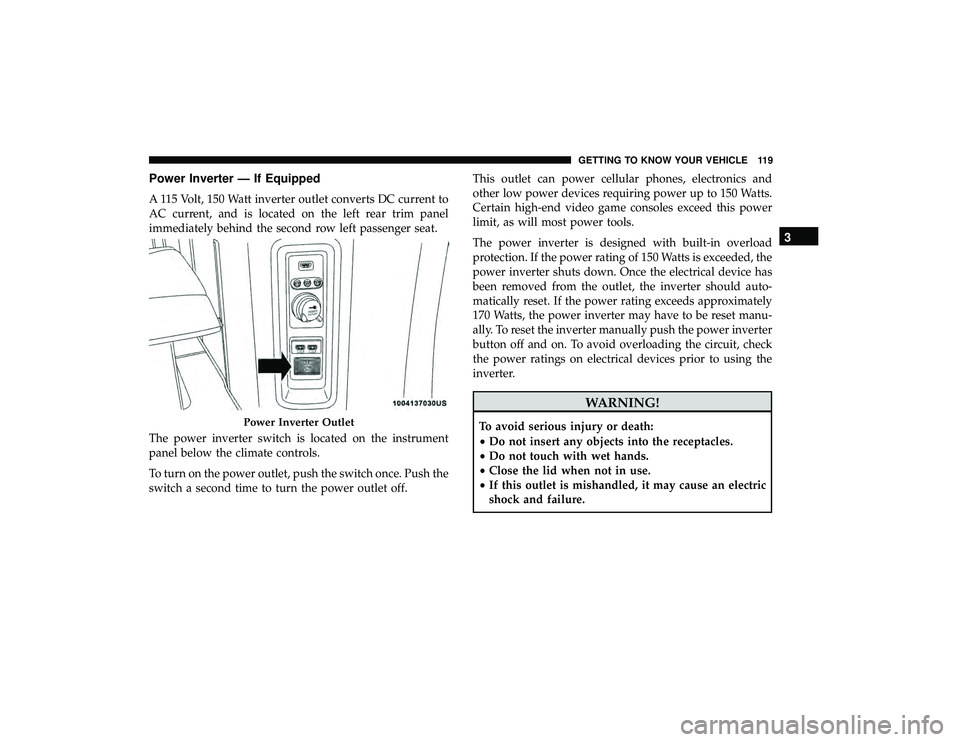
Power Inverter — If Equipped
A 115 Volt, 150 Watt inverter outlet converts DC current to
AC current, and is located on the left rear trim panel
immediately behind the second row left passenger seat.
The power inverter switch is located on the instrument
panel below the climate controls.
To turn on the power outlet, push the switch once. Push the
switch a second time to turn the power outlet off.This outlet can power cellular phones, electronics and
other low power devices requiring power up to 150 Watts.
Certain high-end video game consoles exceed this power
limit, as will most power tools.
The power inverter is designed with built-in overload
protection. If the power rating of 150 Watts is exceeded, the
power inverter shuts down. Once the electrical device has
been removed from the outlet, the inverter should auto-
matically reset. If the power rating exceeds approximately
170 Watts, the power inverter may have to be reset manu-
ally. To reset the inverter manually push the power inverter
button off and on. To avoid overloading the circuit, check
the power ratings on electrical devices prior to using the
inverter.
WARNING!
To avoid serious injury or death:
•
Do not insert any objects into the receptacles.
• Do not touch with wet hands.
• Close the lid when not in use.
• If this outlet is mishandled, it may cause an electric
shock and failure.Power Inverter Outlet
3
GETTING TO KNOW YOUR VEHICLE 119