2018 VOLVO V90 CROSS COUNTRY warning
[x] Cancel search: warningPage 245 of 662
KEY, LOCKS AND ALARM
* Option/accessory.243
secure when handing over the vehicle to e.g. a young driver, parking attendant or workshop. Thesettings for a Red Key cannot be changed by itsuser; a regular remote key is needed to changesettings.
Related information
•
Red Key
* settings (p. 243)
• Remote key (p. 233)
Red Key
* settings
The holder of a regular remote key can adjust settings for a Red Key. Certain driver supportfunctions are always active.
1. Tap Settings in the center display's Top
view.
2. Tap
SystemDriver ProfilesRed Key.
> The following settings can be made:
•
Set Time Gap For Adaptive Cruise Control
•Reduced Maximum Volume
•Max Speed Limit
•Speed Limit Warning
Adaptive Cruise Control *:
•Default setting: Longest interval
Reduced maximum volume (On/Off):
•Default setting: On
Speed Limiter (On/Off):
•Setting interval: 50-250 km/h (30-160 mph)
• The default setting is 120 km/h (75 mph)
• Increments: 1 km/h (1 mph)
The following symbol and message will be shown in the instrument panel
Red key Speed limitation cannot
be exceeded.
Speed reminder (On/Off):
• Setting interval: 0-250 km/h (0-160 mph)
• Default setting: 50, 70 and 90 km/h (30, 45 and 55 mph)
• Increments: 1 km/h (1 mph)
• Maximum number of simultaneous remind-ers: 6
Driver support functionsThe following driver support functions will alwaysbe active for a Red Key user:
• Blind Spot Information (BLIS)
*
• Lane Keeping Aid (LKA)
*
• Distance Alert
*
• City Safety
• Driver Alert Control (DAC)
*
• Road Sign Information
*
Related information
•Red Key - restricted remote key
* (p. 242)
Page 252 of 662
KEY, LOCKS AND ALARM
* Option/accessory.
250
Keyless unlock settings *
Several different sequences are available for keyless unlocking.
1. Tap Settings in the center display's Top
view.
2. Tap
My CarLockingKeyless Unlock
3. Select alternative: •
All Doors
- unlocks all doors at the same time.
•
Single Door
- unlocks the selected door.
Related information
• Keyless locking and unlocking
* (p. 248)
• Keyless and touch-sensitive surfaces
*
(p. 247)
Keyless tailgate unlock *
The tailgate can be opened using the remote key. The key only needs to be within range, e.g.in a pocket or bag.
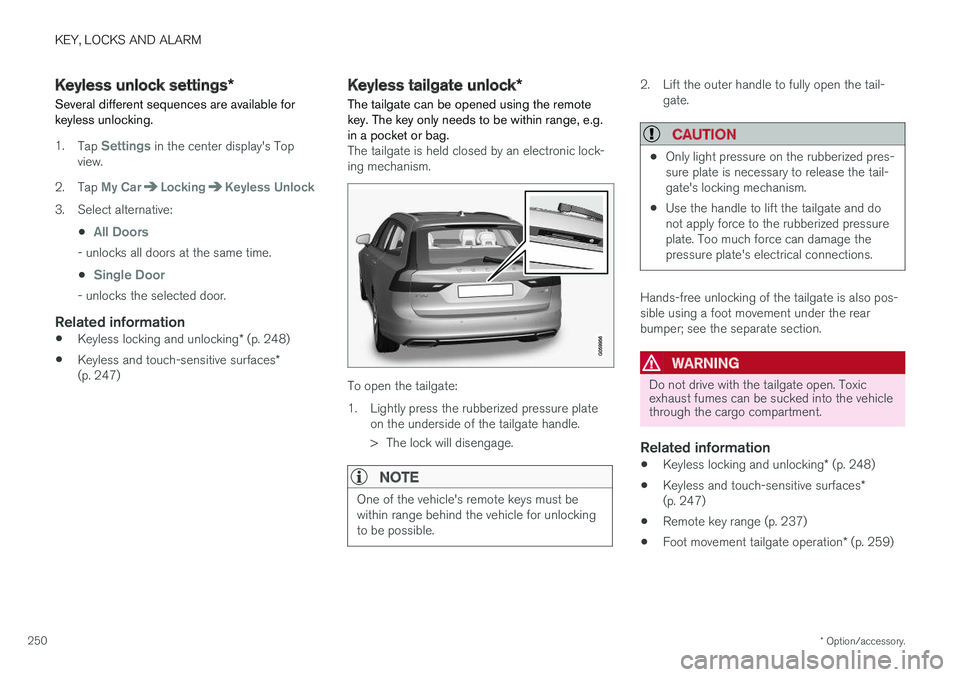
The tailgate is held closed by an electronic lock- ing mechanism.
To open the tailgate:
1. Lightly press the rubberized pressure plate on the underside of the tailgate handle.
> The lock will disengage.
NOTE
One of the vehicle's remote keys must be within range behind the vehicle for unlockingto be possible.
2. Lift the outer handle to fully open the tail-gate.
CAUTION
•Only light pressure on the rubberized pres- sure plate is necessary to release the tail-gate's locking mechanism.
• Use the handle to lift the tailgate and donot apply force to the rubberized pressureplate. Too much force can damage thepressure plate's electrical connections.
Hands-free unlocking of the tailgate is also pos- sible using a foot movement under the rearbumper; see the separate section.
WARNING
Do not drive with the tailgate open. Toxic exhaust fumes can be sucked into the vehiclethrough the cargo compartment.
Related information
•
Keyless locking and unlocking
* (p. 248)
• Keyless and touch-sensitive surfaces
*
(p. 247)
• Remote key range (p. 237)
• Foot movement tailgate operation
* (p. 259)
Page 253 of 662
KEY, LOCKS AND ALARM
}}
* Option/accessory.251
Antenna locations for the start andlock system
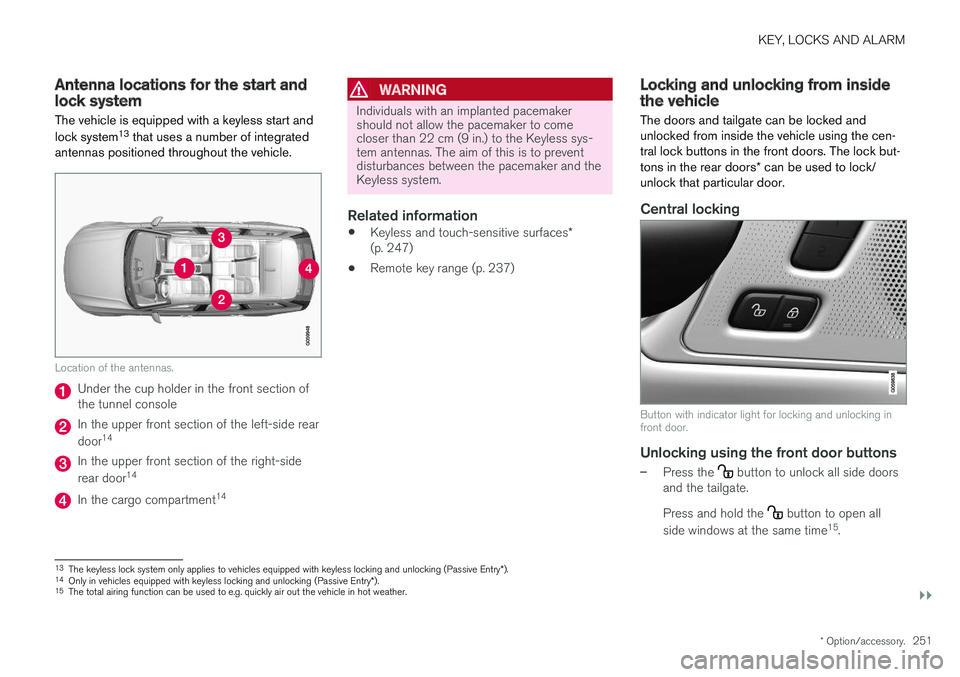
The vehicle is equipped with a keyless start and lock system 13
that uses a number of integrated
antennas positioned throughout the vehicle.
Location of the antennas.
Under the cup holder in the front section of the tunnel console
In the upper front section of the left-side rear door 14
In the upper front section of the right-side rear door 14
In the cargo compartment 14
WARNING
Individuals with an implanted pacemaker should not allow the pacemaker to comecloser than 22 cm (9 in.) to the Keyless sys-tem antennas. The aim of this is to preventdisturbances between the pacemaker and theKeyless system.
Related information
•
Keyless and touch-sensitive surfaces
*
(p. 247)
• Remote key range (p. 237)
Locking and unlocking from insidethe vehicle
The doors and tailgate can be locked and unlocked from inside the vehicle using the cen-tral lock buttons in the front doors. The lock but- tons in the rear doors * can be used to lock/
unlock that particular door.
Central locking
Button with indicator light for locking and unlocking in front door.
Unlocking using the front door buttons
–Press the button to unlock all side doors
and the tailgate. Press and hold the
button to open all
side windows at the same time 15
.
13 The keyless lock system only applies to vehicles equipped with keyless locking and unlocking (Passive Entry *).
14 Only in vehicles equipped with keyless locking and unlocking (Passive Entry *).
15 The total airing function can be used to e.g. quickly air out the vehicle in hot weather.
Page 259 of 662
KEY, LOCKS AND ALARM
}}
* Option/accessory.257
Closing and locking 17
the power
tailgate
–Press the button on the lower edge of
the tailgate to close and simultaneously lock the tailgate and doors (all doors must beclosed in order to lock).
> The tailgate closes automatically - the tail-
gate and doors lock, and the alarm * is
activated.
NOTE
• One of the vehicle's remote keys must be within range for locking and unlocking tobe possible.
• When the keyless locking or closing
* func-
tions are used, three audible signals willsound if the key is not detected closeenough to the tailgate.
CAUTION
When operating the tailgate manually, open and close it slowly. If you encounter resis-tance, do not use force. This could lead todamage and loss of function.
Interrupting opening or closingInterrupt opening or closing by doing one of the following:
• Press the button on the dashboard.
• Press the button on the remote key.
• Press the close button on the underside ofthe tailgate.
• Press the rubberized pressure plate on theunderside of the tailgate's outer handle.
• Using a foot movement
*.
Tailgate movement is interrupted and stops. Thetrunk lid can then be opened or closed manually.
Pinch protectionIf anything obstructs the tailgate with enoughforce to prevent it from opening or closing, pinchprotection will be activated.
• When opening - the tailgate will stop movingand an audible signal will sound.
• When closing - the tailgate will stop, a longaudible signal will sound and the tailgate willreturn to the programmed maximum openingposition.
WARNING
Be aware of the risk of serious injury when operating the tailgate. Before opening/clos-ing, make sure that no one is in the path ofthe tailgate who could be injured by its move-ment. Always operate the tailgate with caution.
Preloaded springs
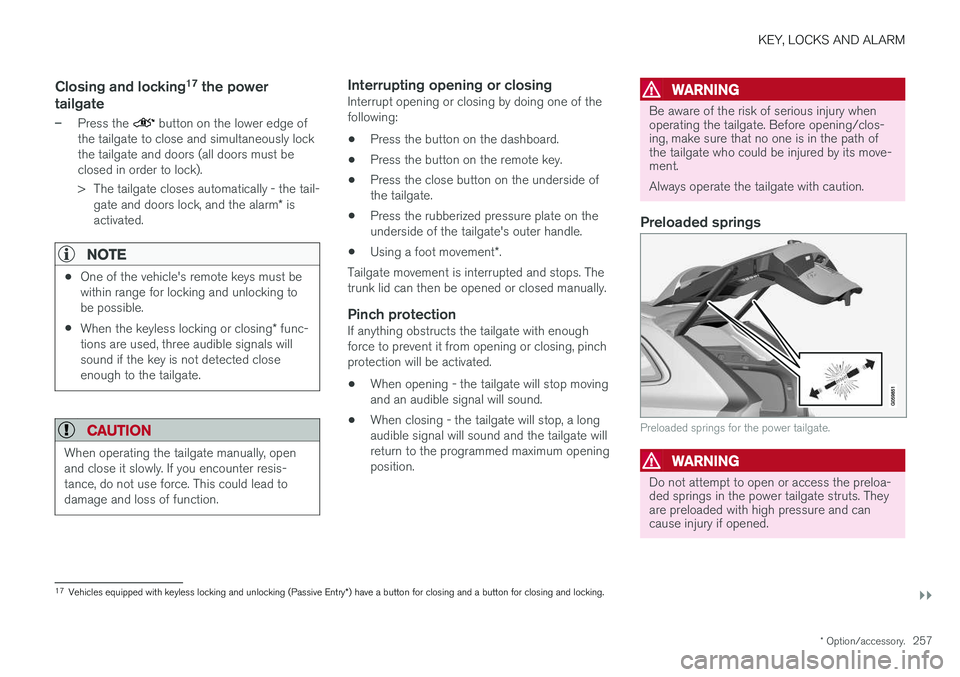
Preloaded springs for the power tailgate.
WARNING
Do not attempt to open or access the preloa- ded springs in the power tailgate struts. Theyare preloaded with high pressure and cancause injury if opened.
17
Vehicles equipped with keyless locking and unlocking (Passive Entry *) have a button for closing and a button for closing and locking.
Page 268 of 662

DRIVER SUPPORT
* Option/accessory.
266
Driver support systems
The vehicle is equipped with a number of driver support systems that can provide the driver withactive or passive assistance in various situations.
The system can, for example, help the driver maintain a set speed or a set time interval to thevehicle ahead, help prevent a collision by warningthe driver and applying the brakes, or assist thedriver while parking. Some of the systems are standard and others are options. This also varies from market to market.
Related information
• Speed-dependent steering wheel resistance(p. 266)
• Electronic Stability Control (p. 268)
• Stability system Roll Stability Control(p. 267)
• Rear Collision Warning (p. 341)
• Speed limiter (p. 272)
• Cruise control (p. 280)
• Distance Alert
* (p. 285)
• Adaptive Cruise Control
* (p. 289)
• Pilot Assist (p. 305)
• Radar sensor (p. 320)
• Camera (p. 325)
• City Safety
™ (p. 329)
• BLIS
* (p. 342) •
Cross Traffic Alert
* (p. 347)
• Road Sign Information
* (p. 351)
• Driver Alert Control (p. 356)
• Lane Keeping Aid (p. 358)
• Steering assistance at risk of collision(p. 366)
• Park Assist
* (p. 375)
• Park Assist Camera
* (p. 380)
• Park Assist Pilot
* (p. 389)
Speed-dependent steering wheelresistance
Speed-dependent power steering increases the steering wheel resistance in pace with the vehi-cle's speed to give the driver an enhanced feel-ing of control and stability.
Steering may feel stiffer on highways. When parking and at low speeds, it will be easier tomove the steering wheel.
NOTE
In some situations, the power steering may become too hot and require temporary cool-ing – during such time the power steering willwork at reduced output and the steeringwheel may feel more difficult to move. In parallel with the temporarily reduced steer- ing assistance, the driver display shows amessage as well as a STEERING WHEELsymbol.
Page 269 of 662
DRIVER SUPPORT
* Option/accessory.267
WARNING
While the power steering is working at reduced power, the driver support functionswith steering assistance are not available. In such a situation, the driver display shows the
Power steering failure or Power
Steering Assist Temporarily Reduced
message, combined with a STEERING WHEEL symbol.
Changing the level of steering wheel resistance *
To change the level of steering wheel resistance, see the description of the INDIVIDUAL optionunder "Available drive modes" in the "Drivemodes" section. On models not equipped with drive mode con- trols and the INDIVIDUAL option, steering wheelresistance can instead be set in the center dis-play's Top view under:
SettingsMy CarDrive ModesSteering force
Steering wheel resistance settings cannot be accessed when turning at speeds above10 km/h (6 mph).
Related information
•Drive modes
* (p. 419)
• Pilot Assist (p. 305) •
Lane Keeping Aid (p. 358)
• Steering assistance at risk of collision(p. 366)
• Park Assist Pilot
* (p. 389)
Stability system Roll StabilityControl
The Roll Stability Control (RSC 1
) system helps
minimize the risk of a rollover in the event of e.g. a sudden evasive maneuver or if the vehiclebegins to skid.
The RSC system monitors the lateral angle at which the vehicle is leaning and registers anychanges. Using this information, the system cal-culates the likelihood of a rollover. If there is animminent risk of a rollover, Electronic StabilityControl is activated, engine torque is reduced andbrakes are applied to one or more of the wheelsuntil the vehicle has regained stability.
WARNING
The vehicle
Page 270 of 662
DRIVER SUPPORT
* Option/accessory.
268
Electronic Stability Control
The Electronic Stability Control (ESC 2
) function
helps the driver avoid skidding and improves the vehicle's directional stability.
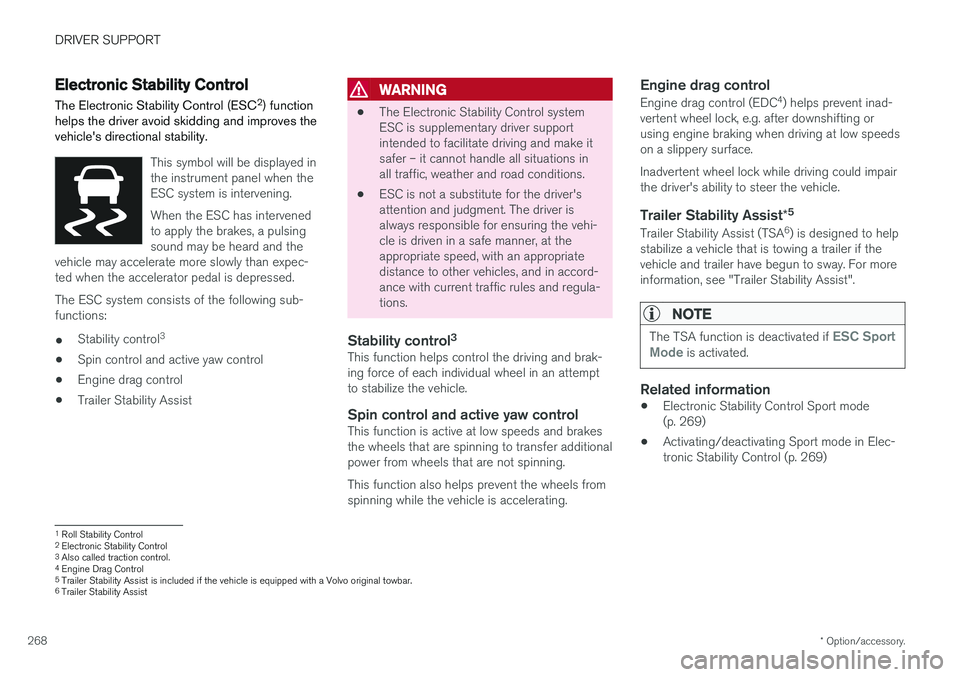
This symbol will be displayed in the instrument panel when theESC system is intervening. When the ESC has intervened to apply the brakes, a pulsingsound may be heard and the
vehicle may accelerate more slowly than expec-ted when the accelerator pedal is depressed.
The ESC system consists of the following sub- functions: • Stability control 3
• Spin control and active yaw control
• Engine drag control
• Trailer Stability Assist
WARNING
•The Electronic Stability Control system ESC is supplementary driver supportintended to facilitate driving and make itsafer – it cannot handle all situations inall traffic, weather and road conditions.
• ESC is not a substitute for the driver'sattention and judgment. The driver isalways responsible for ensuring the vehi-cle is driven in a safe manner, at theappropriate speed, with an appropriatedistance to other vehicles, and in accord-ance with current traffic rules and regula-tions.
Stability control 3This function helps control the driving and brak-ing force of each individual wheel in an attemptto stabilize the vehicle.
Spin control and active yaw controlThis function is active at low speeds and brakesthe wheels that are spinning to transfer additionalpower from wheels that are not spinning. This function also helps prevent the wheels from spinning while the vehicle is accelerating.
Engine drag control
Engine drag control (EDC
4
) helps prevent inad-
vertent wheel lock, e.g. after downshifting orusing engine braking when driving at low speedson a slippery surface. Inadvertent wheel lock while driving could impair the driver's ability to steer the vehicle.
Trailer Stability Assist *5
Trailer Stability Assist (TSA
6
) is designed to help
stabilize a vehicle that is towing a trailer if thevehicle and trailer have begun to sway. For moreinformation, see "Trailer Stability Assist".
NOTE
The TSA function is deactivated if ESC Sport
Mode is activated.
Related information
• Electronic Stability Control Sport mode (p. 269)
• Activating/deactivating Sport mode in Elec-tronic Stability Control (p. 269)
1
Roll Stability Control
2 Electronic Stability Control
3 Also called traction control.
4 Engine Drag Control
5Trailer Stability Assist is included if the vehicle is equipped with a Volvo original towbar.6
Trailer Stability Assist
Page 274 of 662
DRIVER SUPPORT
272
Speed limiterA Speed Limiter (SL 11
) could be described as a
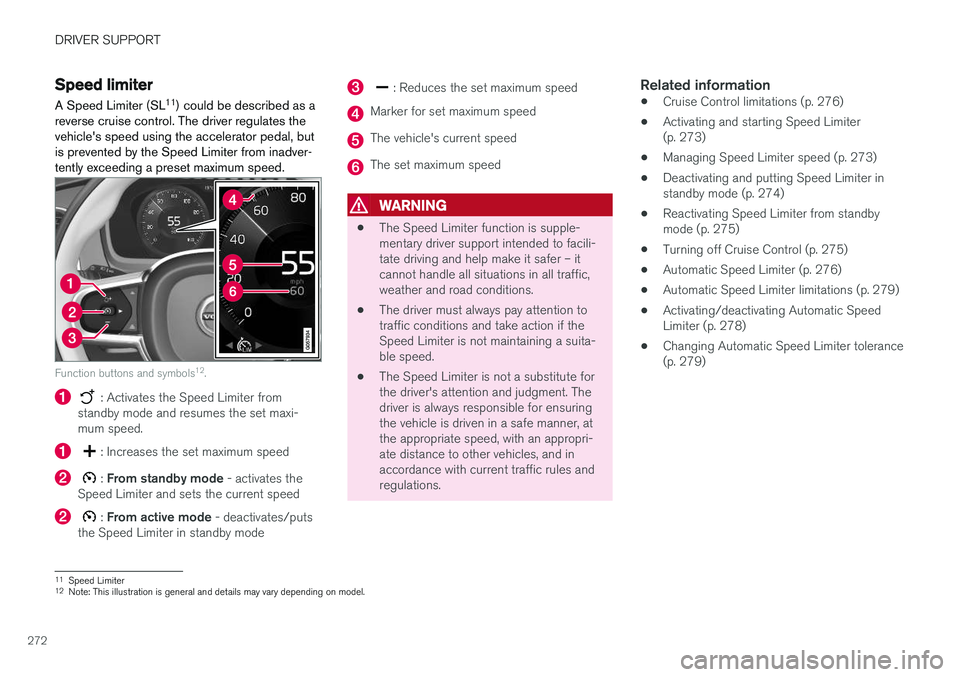
reverse cruise control. The driver regulates the vehicle's speed using the accelerator pedal, butis prevented by the Speed Limiter from inadver-tently exceeding a preset maximum speed.
Function buttons and symbols 12
.
: Activates the Speed Limiter from
standby mode and resumes the set maxi- mum speed.
: Increases the set maximum speed
: From standby mode - activates the
Speed Limiter and sets the current speed
: From active mode - deactivates/puts
the Speed Limiter in standby mode
: Reduces the set maximum speed
Marker for set maximum speed
The vehicle's current speed
The set maximum speed
WARNING
• The Speed Limiter function is supple- mentary driver support intended to facili-tate driving and help make it safer – itcannot handle all situations in all traffic,weather and road conditions.
• The driver must always pay attention totraffic conditions and take action if theSpeed Limiter is not maintaining a suita-ble speed.
• The Speed Limiter is not a substitute forthe driver's attention and judgment. Thedriver is always responsible for ensuringthe vehicle is driven in a safe manner, atthe appropriate speed, with an appropri-ate distance to other vehicles, and inaccordance with current traffic rules andregulations.
Related information
•Cruise Control limitations (p. 276)
• Activating and starting Speed Limiter(p. 273)
• Managing Speed Limiter speed (p. 273)
• Deactivating and putting Speed Limiter instandby mode (p. 274)
• Reactivating Speed Limiter from standbymode (p. 275)
• Turning off Cruise Control (p. 275)
• Automatic Speed Limiter (p. 276)
• Automatic Speed Limiter limitations (p. 279)
• Activating/deactivating Automatic SpeedLimiter (p. 278)
• Changing Automatic Speed Limiter tolerance(p. 279)
11
Speed Limiter
12 Note: This illustration is general and details may vary depending on model.