2018 VOLVO V90 CROSS COUNTRY glove box
[x] Cancel search: glove boxPage 15 of 662

13
MAINTENANCE AND SERVICE
Volvo's service program572
Data transfer between vehicle and workshop over Wi-Fi 574
Download Center 575
Handling system updates via Down-load Center 575
Vehicle status 576
Scheduling service and repairs 576
Sending vehicle information to theworkshop 578
Hoisting the vehicle 579
Opening and closing the hood 581
Climate control system service 582
Replacing a windshield with head-up display * 582
Engine compartment overview 583
Engine oil 583
Checking and filling engine oil 584
Refilling coolant 586
Replacing bulbs 587
Removing the plastic cover to replace bulbs 588
Location of exterior lights 589
Replacing the low beam headlight bulbs 590
Replacing the high beam headlight bulbs 590
Replacing daytime running lights/ front parking light bulbs591
Replacing front turn signal bulbs 592
Replacing backup lights 593
Replacing the rear fog light bulb 593
Bulb specifications 594
Start battery 595
Support battery 598
Battery symbols 599
Fuses and fuseboxes 600
Replacing fuses 601
Fuses in the engine compartment 602
Fuses under the glove compartment 605
Fuses in the cargo compartment 608
Cleaning the interior 612
Cleaning the center display 612
Cleaning the head-up display *
613
Cleaning fabric upholstery and ceil-ing liner 614
Cleaning the seat belt 614
Cleaning floor mats and inlay mats 614
Cleaning leather upholstery 615
Cleaning the leather steering wheel 616
Cleaning interior plastic, metal andwood surfaces 617
Cleaning the exterior
617
Polishing and waxing 618
Hand washing 618
Automatic car washes 620
High-pressure washing 621
Cleaning the wiper blades 621
Cleaning exterior plastic, rubber and trim components 622
Cleaning rims 623
Corrosion protection 623
Paintwork 624
Touching up minor paint damage 624
Color codes 625
Changing rear window wipers 626
Replacing windshield wiper blades 627
Windshield wipers in the service position 628
Filling washer fluid 629
Page 167 of 662
LIGHTING
}}
* Option/accessory.165
Interior Lighting
The interior is equipped with several different types of lighting to improve the experience. Thisincludes reading lamps, glove box lighting andground lighting.
All lighting in the passenger compartment can be turned on and off manually within 5 minutesafter:
• the engine has been switched off and the ignition is in mode
0.
• the vehicle is unlocked but the engine has not been started.
Front ceiling lighting
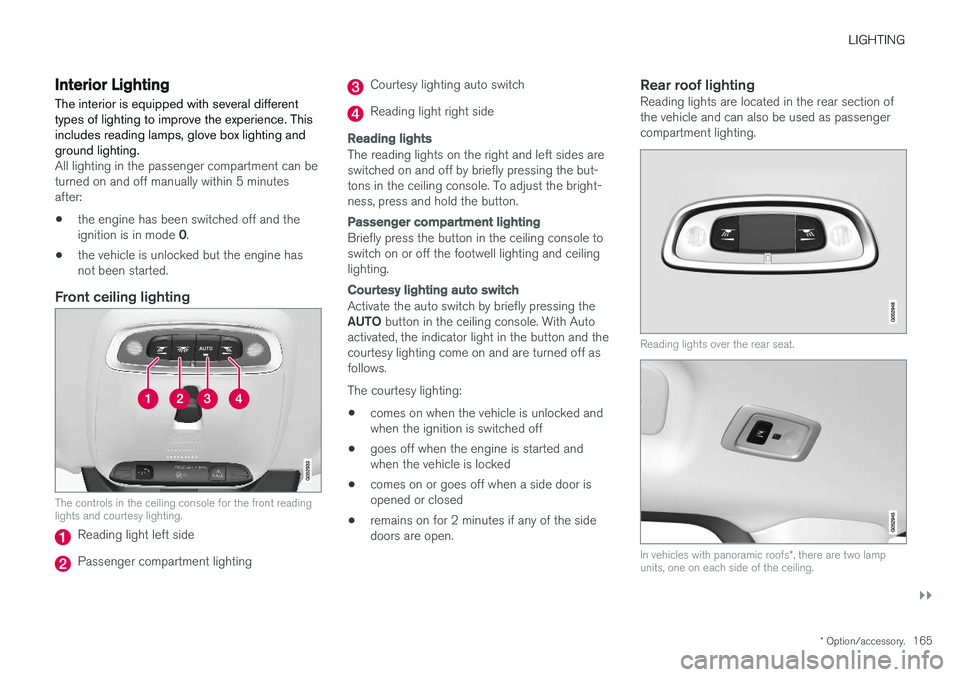
The controls in the ceiling console for the front reading lights and courtesy lighting.
Reading light left side
Passenger compartment lighting
Courtesy lighting auto switch
Reading light right side
Reading lights
The reading lights on the right and left sides are switched on and off by briefly pressing the but-tons in the ceiling console. To adjust the bright-ness, press and hold the button.
Passenger compartment lighting
Briefly press the button in the ceiling console to switch on or off the footwell lighting and ceilinglighting.
Courtesy lighting auto switch
Activate the auto switch by briefly pressing the AUTO
button in the ceiling console. With Auto
activated, the indicator light in the button and the courtesy lighting come on and are turned off asfollows. The courtesy lighting: • comes on when the vehicle is unlocked and when the ignition is switched off
• goes off when the engine is started andwhen the vehicle is locked
• comes on or goes off when a side door isopened or closed
• remains on for 2 minutes if any of the sidedoors are open.
Rear roof lightingReading lights are located in the rear section ofthe vehicle and can also be used as passengercompartment lighting.
Reading lights over the rear seat.
In vehicles with panoramic roofs
*, there are two lamp
units, one on each side of the ceiling.
Page 561 of 662
LOADING, STORAGE AND PASSENGER COMPARTMENT
}}
* Option/accessory.559
WARNING
•Only use accessories that are not dam- aged or malfunctioning. The accessoriesmust be designed for 120 V and 60 Hz,with plugs intended for the outlet. Theaccessories must be CE marked, ULmarked or have an equivalent safetymarking.
• New let outlets, plugs or accessoriescome into contact with water or anotherfluid. Do not touch or use the outlet if itappears damaged or has been in contactwith water or another fluid.
• Do not connect power strips, adapters orextension cords to the outlet has thiscould cause the outlet's safety functionsto malfunction.
• The outlet is equipped with a pet guard.Make sure that no one picks at or dam-ages the outlet in such a way that theguard is disabled. Children should not beleft unsupervised in the vehicle when theoutlet is active.
Failure to follow the above could lead to severe or fatal electrical shocks.
Related information
• Electrical outlets (p. 556)
• Passenger compartment interior (p. 554)
Using the glove compartment
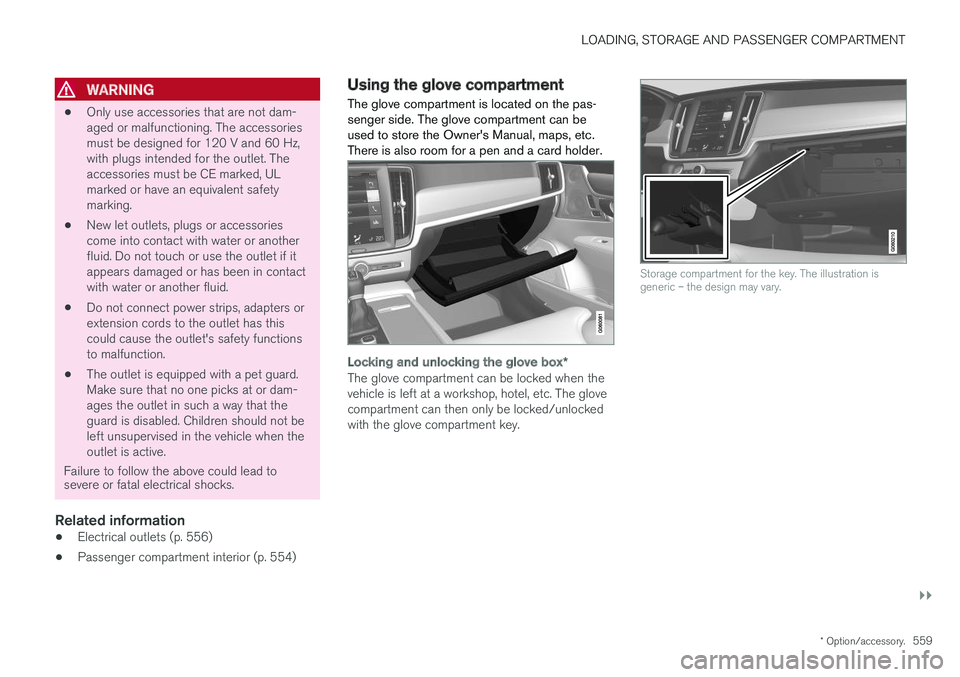
The glove compartment is located on the pas- senger side. The glove compartment can beused to store the Owner's Manual, maps, etc.There is also room for a pen and a card holder.
Locking and unlocking the glove box *
The glove compartment can be locked when the vehicle is left at a workshop, hotel, etc. The glovecompartment can then only be locked/unlockedwith the glove compartment key.
Storage compartment for the key. The illustration is generic – the design may vary.
Page 562 of 662
||
LOADING, STORAGE AND PASSENGER COMPARTMENT
* Option/accessory.
560
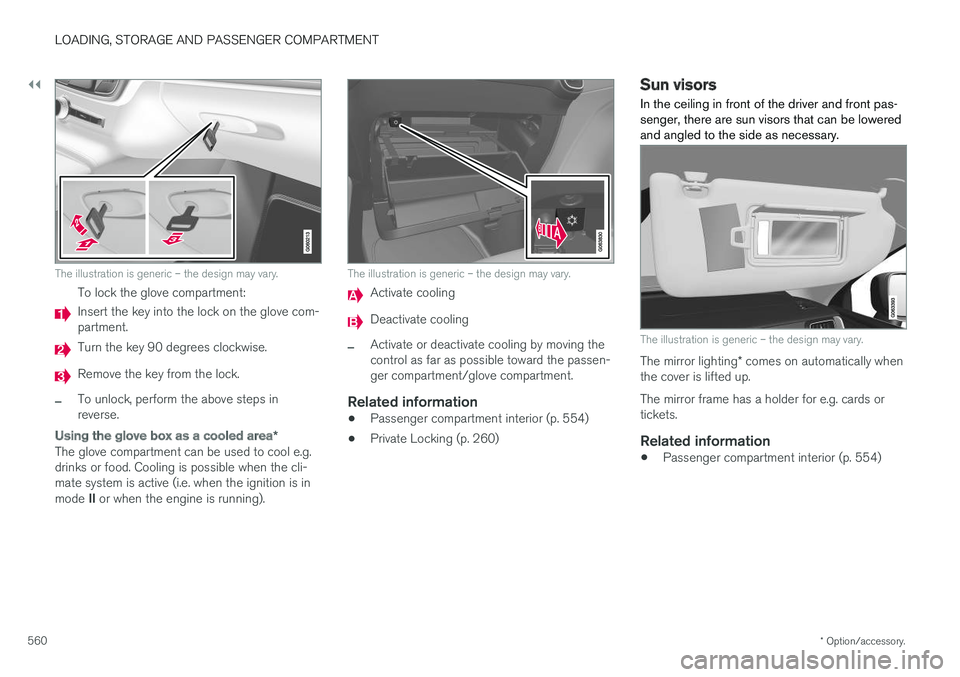
The illustration is generic – the design may vary.
To lock the glove compartment:
Insert the key into the lock on the glove com- partment.
Turn the key 90 degrees clockwise.
Remove the key from the lock.
–To unlock, perform the above steps in reverse.
Using the glove box as a cooled area *
The glove compartment can be used to cool e.g. drinks or food. Cooling is possible when the cli-mate system is active (i.e. when the ignition is in mode II or when the engine is running).
The illustration is generic – the design may vary.
Activate cooling
Deactivate cooling
–Activate or deactivate cooling by moving the control as far as possible toward the passen-ger compartment/glove compartment.
Related information
• Passenger compartment interior (p. 554)
• Private Locking (p. 260)
Sun visors In the ceiling in front of the driver and front pas- senger, there are sun visors that can be loweredand angled to the side as necessary.
The illustration is generic – the design may vary.
The mirror lighting
* comes on automatically when
the cover is lifted up. The mirror frame has a holder for e.g. cards or tickets.
Related information
• Passenger compartment interior (p. 554)
Page 602 of 662

||
MAINTENANCE AND SERVICE
600
Avoid smoking, open
flames, and/or sparks.
Risk of explosion.
Recycle properly.
NOTE
A used start battery or backup battery con- tains lead and must be recycled in an environ-mentally responsible manner.
Related information
• Start battery (p. 595)
• Support battery (p. 598)
Fuses and fuseboxes
All electrical functions and components are pro- tected by a number of fuses in order to protectthe vehicle's electrical system from damage byshort circuiting or overloading.
WARNING
Never use a foreign object or a fuse with a higher amperage than that specified toreplace a fuse. This could cause significantdamage to the electrical system and possiblylead to a fire.
If any electrical component or function is not responding, the component may have blown afuse due to temporary overload. If the same fuseblows repeatedly, there may be a problem withthe component. Volvo recommends contacting anauthorized Volvo workshop to have the compo-nent checked.
Location of fuseboxes
The illustration is generic - appearance may vary accord- ing to vehicle model.
Engine compartment
Under the glove compartment
Trunk/cargo compartment
Related information
• Replacing fuses (p. 601)
• Fuses in the cargo compartment (p. 608)
• Fuses in the engine compartment (p. 602)
• Fuses under the glove compartment (p. 605)
Page 603 of 662
MAINTENANCE AND SERVICE
601
Replacing fuses All electrical functions and components are pro- tected by a number of fuses in order to protectthe vehicle's electrical system from damage byshort circuiting or overloading.
1. Refer to the fuse diagram to locate the fuse.
2. Pull out the fuse and examine it from theside to determine if the curved metal wire in the fuse is intact.
3. If the wire is broken, replace the fuse with a new fuse of the same color and amperage.
WARNING
Never use a foreign object or a fuse with a higher amperage than that specified toreplace a fuse. This could cause significantdamage to the electrical system and possiblylead to a fire.
WARNING
Contact an authorized Volvo workshop for assistance replacing fuses not listed in theOwner's Manual. If performed incorrectly, sig-nificant damage can be caused to the electri-cal system.
Related information
• Fuses and fuseboxes (p. 600)
• Fuses in the cargo compartment (p. 608) •
Fuses in the engine compartment (p. 602)
• Fuses under the glove compartment (p. 605)
Page 651 of 662
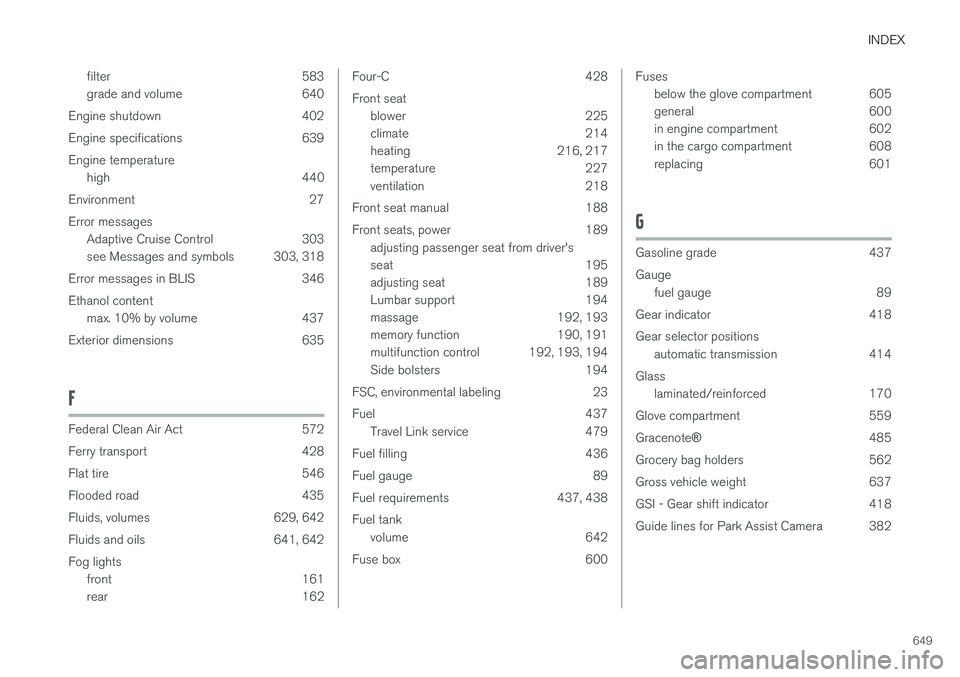
INDEX
649
filter 583
grade and volume 640
Engine shutdown 402
Engine specifications 639Engine temperature high 440
Environment 27Error messages Adaptive Cruise Control 303
see Messages and symbols 303, 318
Error messages in BLIS 346 Ethanol content max. 10% by volume 437
Exterior dimensions 635
F
Federal Clean Air Act 572
Ferry transport 428
Flat tire 546
Flooded road 435
Fluids, volumes 629, 642
Fluids and oils 641, 642 Fog lights front 161
rear 162
Four-C 428 Front seatblower 225
climate 214
heating 216, 217
temperature 227
ventilation 218
Front seat manual 188
Front seats, power 189 adjusting passenger seat from driver's
seat 195
adjusting seat 189
Lumbar support 194
massage 192, 193
memory function 190, 191
multifunction control 192, 193, 194
Side bolsters 194
FSC, environmental labeling 23
Fuel 437 Travel Link service 479
Fuel filling 436
Fuel gauge 89
Fuel requirements 437, 438 Fuel tank volume 642
Fuse box 600Fuses below the glove compartment 605
general 600
in engine compartment 602
in the cargo compartment 608
replacing 601
G
Gasoline grade 437 Gaugefuel gauge 89
Gear indicator 418Gear selector positions automatic transmission 414
Glass laminated/reinforced 170
Glove compartment 559 Gracenote ®
485
Grocery bag holders 562
Gross vehicle weight 637
GSI - Gear shift indicator 418
Guide lines for Park Assist Camera 382