Page 62 of 672
621-1. For safe use
Ty p e A
Widen the gap between the seat cushion and seatback slightly.
Latch the hooks of the lower
straps onto the LATCH
anchors. If the child restraint
has a top tether strap, the top
tether strap should be latched
onto the top tether strap anchor.
For owners in Canada:
The symbol on a child restraint
system indicates the presence of a
lower connector system.
Ty p e B
Widen the gap between the seat cushion and seatback slightly.
Latch the buckles onto the
LATCH anchors. If the child
restraint has a top tether strap,
the top tether strap should be
latched onto the top tether strap
anchor.
For owners in Canada:
The symbol on a child restraint
system indicates the presence of a
lower connector system.
Installation with LATCH system (Double Cab models)
1
Canada only
O
N
Canada only
O
Page 63 of 672
631-1. For safe use
1
For safety and security
Ty p e A
Widen the gap between the seat cushion and seatback slightly.
Latch the hooks of the lower
straps onto the LATCH
anchors. If the child restraint
has a top tether strap, the top
tether strap should be latched
onto the top tether strap anchor.
For owners in Canada:
The symbol on a child restraint
system indicates the presence of a
lower connector system.
Ty p e B
Widen the gap between the seat cushion and seatback slightly.
Latch the buckles onto the
LATCH anchors. If the child
restraint has a top tether strap,
the top tether strap should be
latched onto the top tether strap
anchor.
For owners in Canada:
The symbol on a child restraint
system indicates the presence of a
lower connector system.
Installation with LATCH system (CrewMax models)
1
Canada only
O
N
Canada only
O
Page 73 of 672

731-1. For safe use
1
For safety and security
■Laws and regulations pertaining to anchorages
The LATCH system conforms to FMVSS225 or CMVSS210.2.
Child restraint systems conforming to FMVSS213 or CMVSS213 spec ifica-
tions can be used.
This vehicle is designed to conform to the SAE J1819.
WARNING
■ When installing a booster seat
To prevent the belt from going into ALR lock mode, do not fully extend the
shoulder belt. ALR mode causes the belt to tighten only. This could cause
injury or discomfort to the child. ( P. 34)
■ When installing a child restraint system
Follow the directions given in the child restraint system insta llation manual
and fix the child restraint system securely in place.
If the child restraint system is not correctly fixed in place, the child or other
passengers may be seriously injured or even killed in the event of a sudden
braking or an accident.
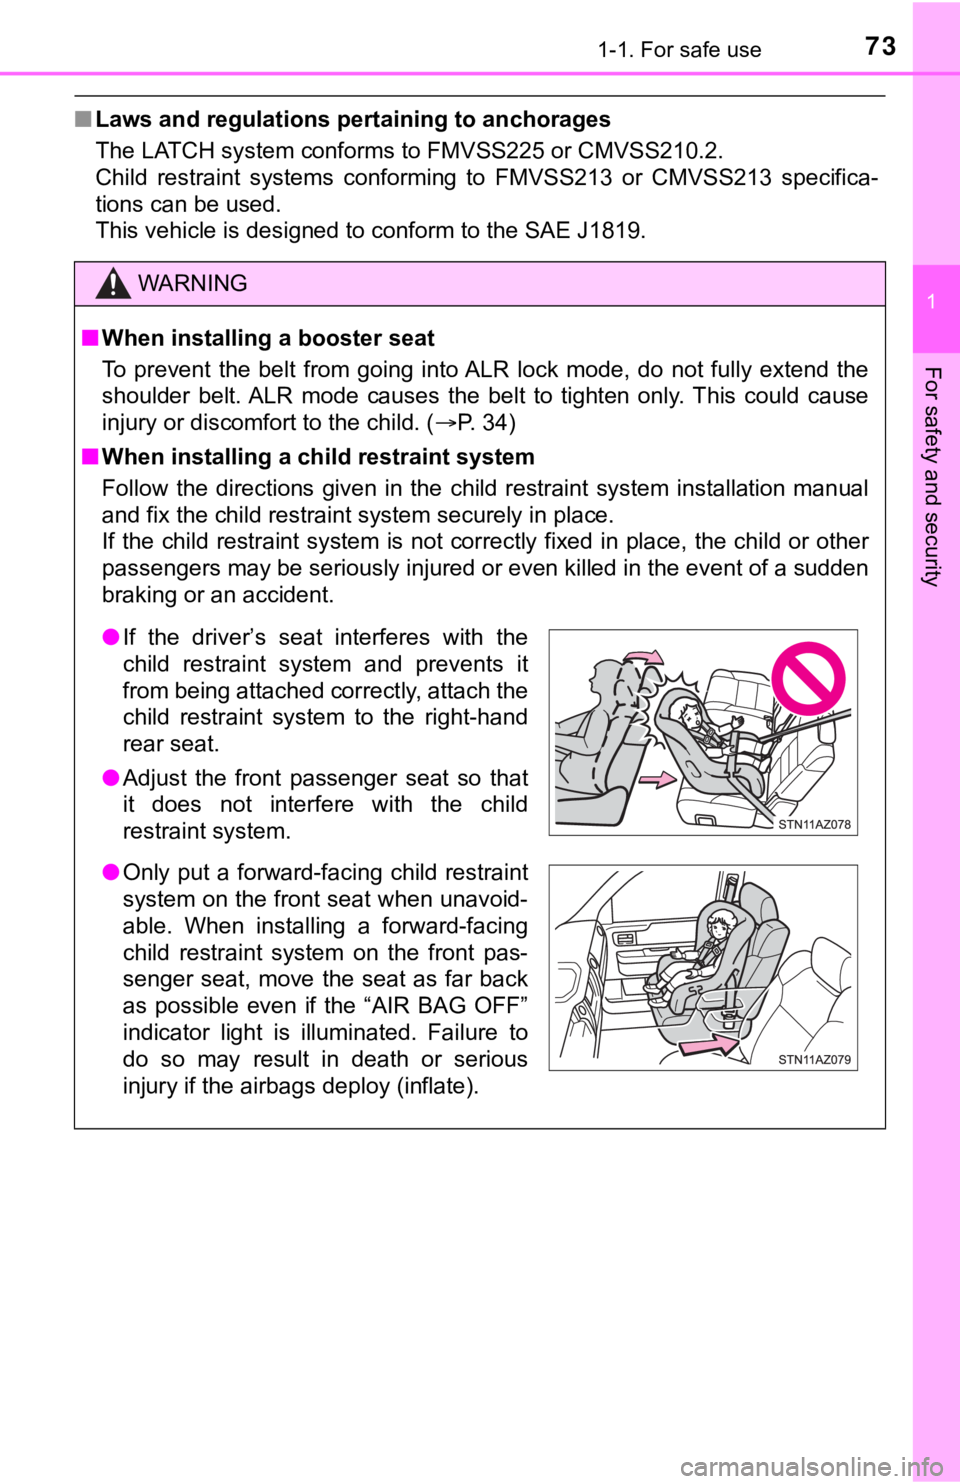
● If the driver’s seat interferes with the
child restraint system and prevents it
from being attached correctly, attach the
child restraint system to the right-hand
rear seat.
● Adjust the front passenger seat so that
it does not interfere with the child
restraint system.
● Only put a forward-facing child restraint
system on the front seat when unavoid-
able. When installing a forward-facing
child restraint system on the front pas-
senger seat, move the seat as far back
as possible even if the “AIR BAG OFF”
indicator light is illuminated. Failure to
do so may result in death or serious
injury if the airbags deploy (inflate).
Page 75 of 672

751-1. For safe use
1
For safety and security
Exhaust gas precautions
Harmful substance to the human body is included in exhaust
gases if inhale.
WARNING
Exhaust gases include harmful carbon monoxide (CO), which is colorless and
odorless. Observe the following precautions.
Failure to do so may cause exhaust gases to enter the vehicle a nd may lead
to an accident caused by light-headedness, or may lead to death or a serious
health hazard.
■ Important points while driving
● Double Cab and CrewMax models: Keep the back window closed.
● Double Cab and CrewMax models: If you smell exhaust gases in th e vehi-
cle even when the back window is closed, open the windows and h ave the
vehicle inspected at your Toyota dealer as soon as possible.
● Toyota does not recommend occupying the rear cargo area when it is fitted
with a slide-in camper, camper shell or other type cover while the engine is
running. This caution applies to both driving and stopped or pa rked situa-
tions with the engine running. Particular care should be taken to prevent
exhaust gases from entering camper bodies, trailers or other enclosures
on or around your vehicle. If exhaust fumes are detected, open all win-
dows and thoroughly ventilate the area.
■ When parking
● If the vehicle is in a poorly ventilated area or a closed area, such as a
garage, stop the engine.
● Do not leave the vehicle with the engine on for a long time.
If such a situation cannot be avoided, park the vehicle in an o pen space
and ensure that exhaust fumes do not enter the vehicle interior .
● Do not leave the engine running in an area with snow build-up, or where it
is snowing. If snowbanks build up around the vehicle while the engine is
running, exhaust gases may collect and enter the vehicle.
■ Exhaust pipe
The exhaust system needs to be checked periodically. If there is a hole or
crack caused by corrosion, damage to a joint or abnormal exhaust noise, be
sure to have the vehicle inspected and repaired by your Toyota dealer.
Page 76 of 672

761-2. Theft deterrent system
Engine immobilizer system
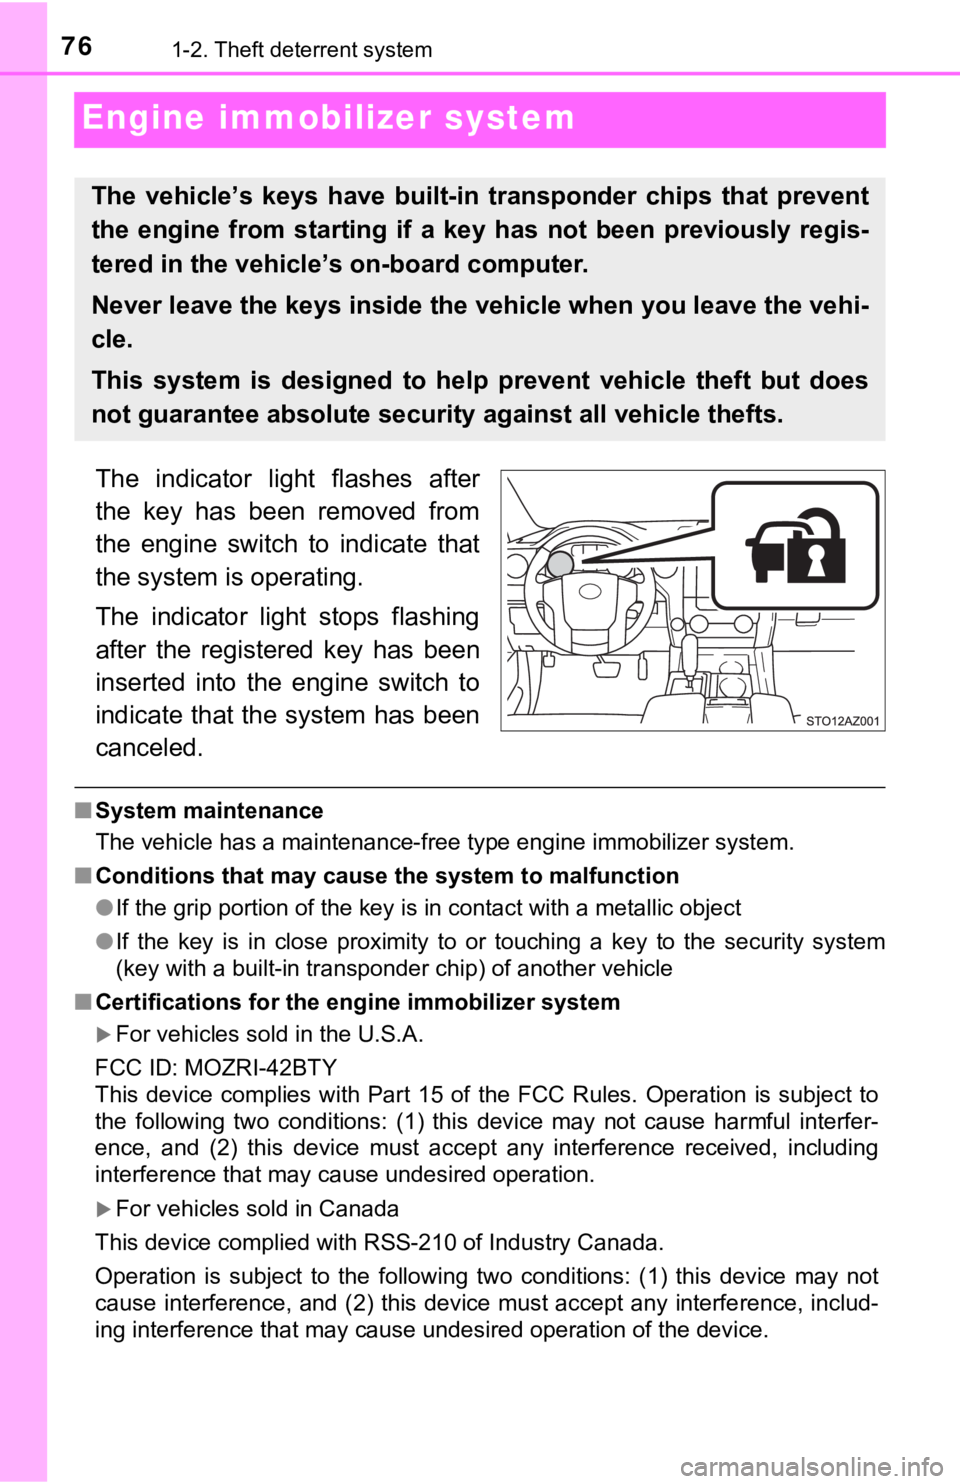
The indicator light flashes after
the key has been removed from
the engine switch to indicate that
the system is operating.
The indicator light stops flashing
after the registered key has been
inserted into the engine switch to
indicate that the system has been
canceled.
■System maintenance
The vehicle has a maintenance-free type engine immobilizer syst em.
■ Conditions that may cause the system to malfunction
●If the grip portion of the key is in contact with a metallic ob ject
● If the key is in close proximity to or touching a key to the security system
(key with a built-in transponder chip) of another vehicle
■ Certifications for the engine immobilizer system
For vehicles sold in the U.S.A.
FCC ID: MOZRI-42BTY
This device complies with Part 15 of the FCC Rules. Operation i s subject to
the following two conditions: (1) this device may not cause har mful interfer-
ence, and (2) this device must accept any interference received, including
interference that may cause undesired operation.
For vehicles sold in Canada
This device complied with RSS-210 of Industry Canada.
Operation is subject to the following two conditions: (1) this device may not
cause interference, and (2) this device must accept any interfe rence, includ-
ing interference that may cause undesired operation of the devi ce.
The vehicle’s keys have built-in transponder chips that prevent
the engine from starting if a key has not been previously regis -
tered in the vehicle’s on-board computer.
Never leave the keys inside the vehicle when you leave the vehi-
cle.
This system is designed to help prevent vehicle theft but does
not guarantee absolute security against all vehicle thefts.
Page 85 of 672
851-2. Theft deterrent system
1
For safety and security
Alar m
The alarm uses light and sound to give an alert when an intrusion is
detected.
The alarm is triggered in the following situations when the ala rm is
set:
● A locked door is unlocked or opened in any way other than using a
key or wireless remote control. (The doors will lock again automati-
cally.)
● The hood is opened.
● Vehicles with the glass breaka ge sensor: The side windows are
tapped or broken.
Close the doors and hood, and
lock all the doors. The system will
be set automatically after 30 sec-
onds.
The indicator light changes from
being on to flashing when the sys-
tem is set.
Do one of the following to d eactivate or stop the alarms:
● Unlock the doors.
● Turn the engine switch to the “ACC” or “ON” position, or start the
engine. (The alarm will be deact ivated or stopped after a few sec-
onds.)
: If equipped
The alarm
Setting the alarm system
Deactivating or stopping the alarm
Page 89 of 672
89
Instrument cluster2
2. Instrument clusterWarning lights and indicators .......................... 90
Gauges and meters ............ 95
Multi-information display ... 100
Fuel consumption information ...................... 107
Page 90 of 672
902. Instrument cluster
Warning lights and indicators
The warning lights and indicators on the instrument cluster and
center panel inform the driver of the status of the vehicle’s vari-
ous systems.
For the purpose of explanation, t he following illustration dis-
plays all warning lights a nd indicators illuminated.