2018 PEUGEOT 5008 oil pressure
[x] Cancel search: oil pressurePage 9 of 364

7
Limit the causes of excess
consumption
Spread loads throughout the vehicle; place
the heaviest items in the bottom of the boot,
as close as possible to the rear seats.
Limit the loads carried in the vehicle and
reduce wind resistance (roof bars, roof rack,
bicycle carrier, trailer, etc.). Preferably, use a
roof box.
Remove roof bars and roof racks after use.
At the end of winter, remove snow tyres and
refit your summer tyres.
Observe the recommendations
on maintenance
Check the tyre pressures regularly, when cold,
referring to the label in the door aperture,
driver's side.
Carry out this check in particular:
-
b
efore a long journey,
-
a
t each change of season,
-
a
fter a long period out of use.
Do not forget the spare wheel and the tyres on
any trailer or caravan. Have your vehicle ser viced regularly (engine
oil, oil filter, air filter, cabin filter, etc.) and
obser ve the schedule of operations in the
manufacturer's service schedule.
When filling the tank, do not continue after the
3
rd cut-off of the nozzle to avoid over flow.
At the wheel of your new vehicle, it is only
after the first 1,900
miles (3,000 kilometres)
that you will see the fuel consumption settle
down to a
consistent average.
With a
BlueHDi Diesel engine, if the SCR
system is faulty, your vehicle becomes
polluting. As soon as possible, visit
a
PEUGEOT dealer or a qualified workshop
to make your vehicle's level of nitrogen oxides
emissions compliant to the standard.
.
Eco-driving
Page 14 of 364
12
Warning/indicator lampStateCause Action/Observations
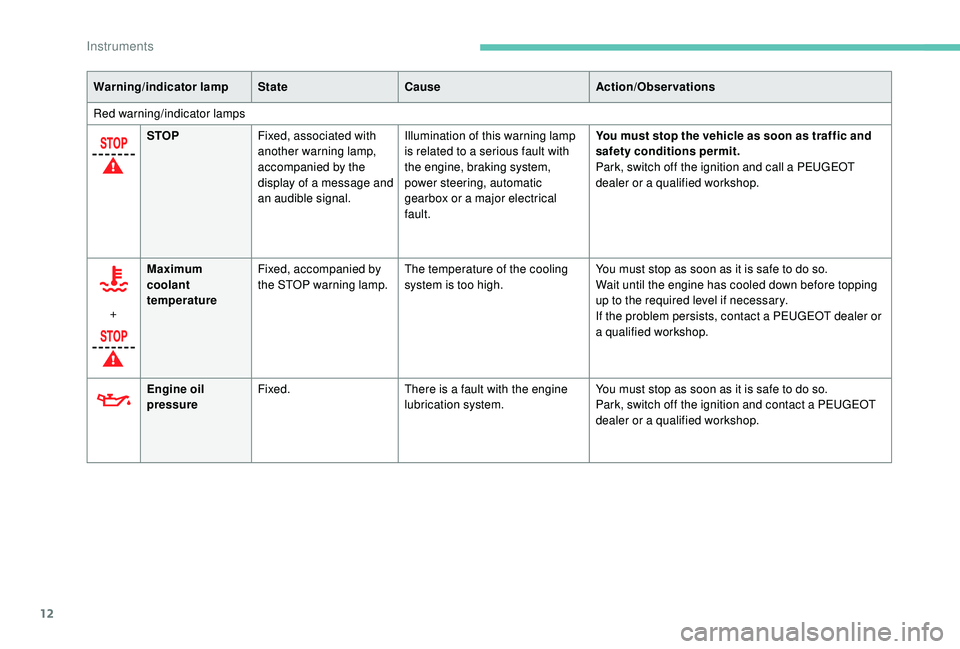
Red warning/indicator lamps STOP Fixed, associated with
another warning lamp,
accompanied by the
display of a
message and
an audible signal. Illumination of this warning lamp
is related to a
serious fault with
the engine, braking system,
power steering, automatic
gearbox or a
major electrical
fault. You must stop the vehicle as soon as traffic and
safety conditions permit.
Park, switch off the ignition and call a
PEUGEOT
dealer or a
qualified workshop.
+ Maximum
coolant
temperature
Fixed, accompanied by
the STOP warning lamp.
The temperature of the cooling
system is too high. You must stop as soon as it is safe to do so.
Wait until the engine has cooled down before topping
up to the required level if necessary.
If the problem persists, contact a
PEUGEOT dealer or
a qualified workshop.
Engine oil
pressure Fixed.
There is a
fault with the engine
lubrication system. You must stop as soon as it is safe to do so.
Park, switch off the ignition and contact a
PEUGEOT
dealer or a
qualified workshop.
Instruments
Page 233 of 364
231
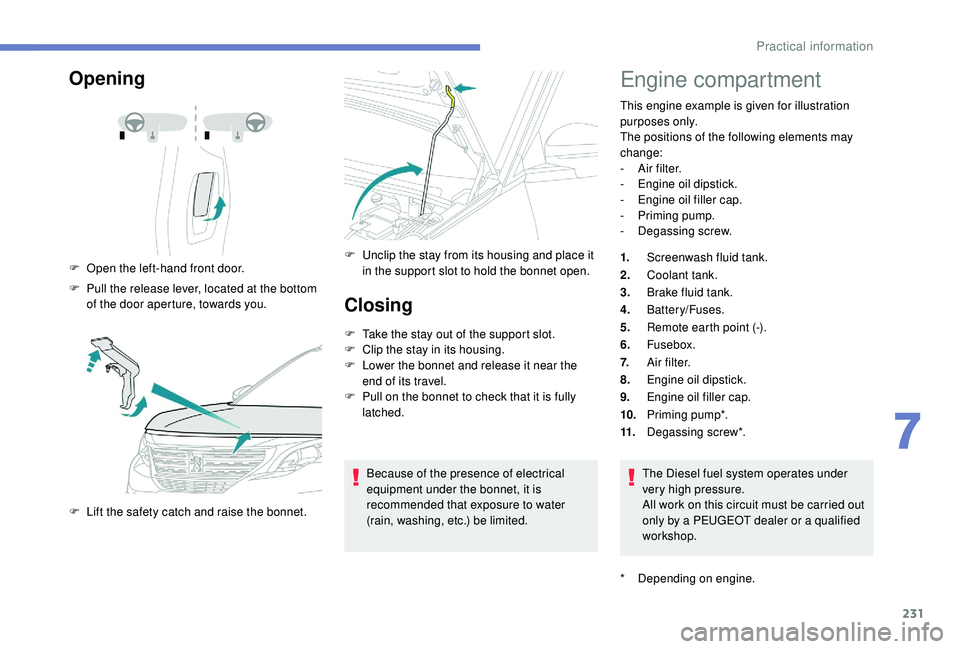
Opening
F Open the left-hand front door.
F
P
ull the release lever, located at the bottom
of the door aperture, towards you.
F
L
ift the safety catch and raise the bonnet. F
U nclip the stay from its housing and place it
in the support slot to hold the bonnet open.
Closing
F Take the stay out of the support slot.
F C lip the stay in its housing.
F
L
ower the bonnet and release it near the
end of its travel.
F
P
ull on the bonnet to check that it is fully
latched.
Because of the presence of electrical
equipment under the bonnet, it is
recommended that exposure to water
(rain, washing, etc.) be limited.
Engine compartment
This engine example is given for illustration
purposes only.
The positions of the following elements may
change:
-
A
ir filter.
-
E
ngine oil dipstick.
-
E
ngine oil filler cap.
-
P
riming pump.
-
D
egassing screw.
1. Screenwash fluid tank.
2. Coolant tank.
3. Brake fluid tank.
4. Battery/Fuses.
5. Remote earth point (-).
6. Fusebox.
7. A i r f i l t e r.
8. Engine oil dipstick.
9. Engine oil filler cap.
10. Priming pump*.
11. Degassing screw*.
The Diesel fuel system operates under
very high pressure.
All work on this circuit must be carried out
only by a
PEUGEOT dealer or a qualified
workshop.
*
D
epending on engine.
7
Practical information
Page 236 of 364
234
Engine oil change
In order to maintain the reliability of the engine
and emissions control system, never use
additives in the engine oil.
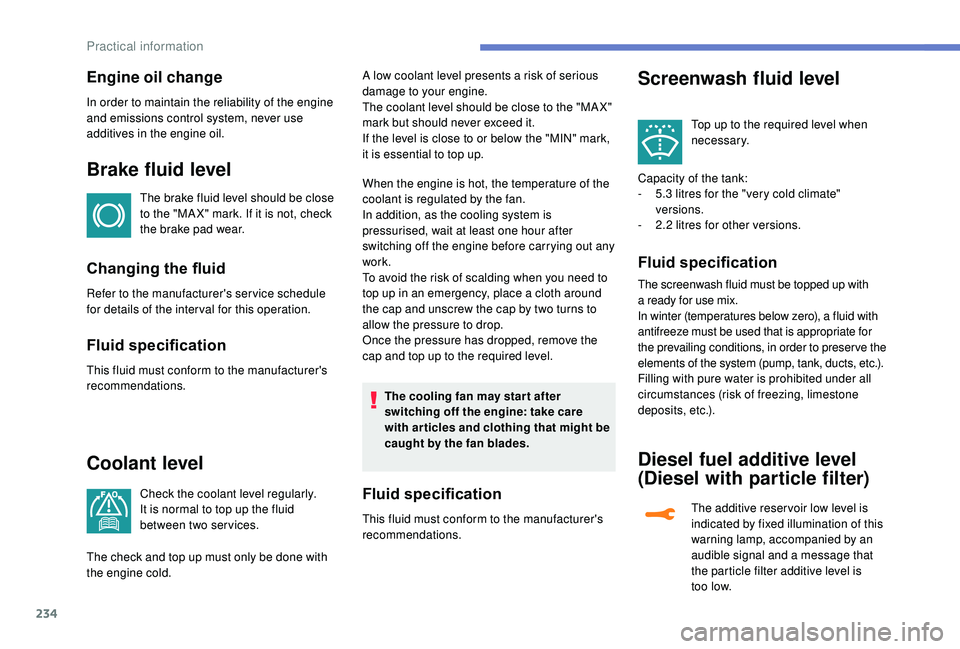
Brake fluid level
The brake fluid level should be close
to the "MA X" mark. If it is not, check
the brake pad wear.
Changing the fluid
Refer to the manufacturer's service schedule
for details of the inter val for this operation.
Fluid specification
This fluid must conform to the manufacturer's
recommendations.
Coolant level
Check the coolant level regularly.
It is normal to top up the fluid
between two services.A low coolant level presents a
risk of serious
damage to your engine.
The coolant level should be close to the "MA X"
mark but should never exceed it.
If the level is close to or below the "MIN" mark,
it is essential to top up.
When the engine is hot, the temperature of the
coolant is regulated by the fan.
In addition, as the cooling system is
pressurised, wait at least one hour after
switching off the engine before carrying out any
work.
To avoid the risk of scalding when you need to
top up in an emergency, place a cloth around
the cap and unscrew the cap by two turns to
allow the pressure to drop.
Once the pressure has dropped, remove the
cap and top up to the required level.
The cooling fan may star t after
switching off the engine: take care
with articles and clothing that might be
caught by the fan blades.Fluid specification
This fluid must conform to the manufacturer's
recommendations.
Screenwash fluid level
The check and top up must only be done with
the engine cold. Top up to the required level when
necessary.
Capacity of the tank:
-
5
.3 litres for the "very cold climate"
versions.
-
2
.2 litres for other versions.
Fluid specification
The screenwash fluid must be topped up with
a
ready for use mix.
In winter (temperatures below zero), a fluid with
antifreeze must be used that is appropriate for
the prevailing conditions, in order to preser ve the
elements of the system (pump, tank, ducts, etc.).
Filling with pure water is prohibited under all
circumstances (risk of freezing, limestone
deposits, etc.).
Diesel fuel additive level
(Diesel with particle filter)
The additive reser voir low level is
indicated by fixed illumination of this
warning lamp, accompanied by an
audible signal and a
message that
the particle filter additive level is
too low.
Practical information
Page 238 of 364
236
On a new vehicle, the first particle
f ilter regeneration operations may be
accompanied by a "burning" smell, which
is per fectly normal.
Following prolonged operation of the
vehicle at very low speed or at idle,
you may, in exceptional circumstances,
notice the emission of water vapour at the
exhaust on acceleration. This does not
affect the behaviour of the vehicle or the
environment.
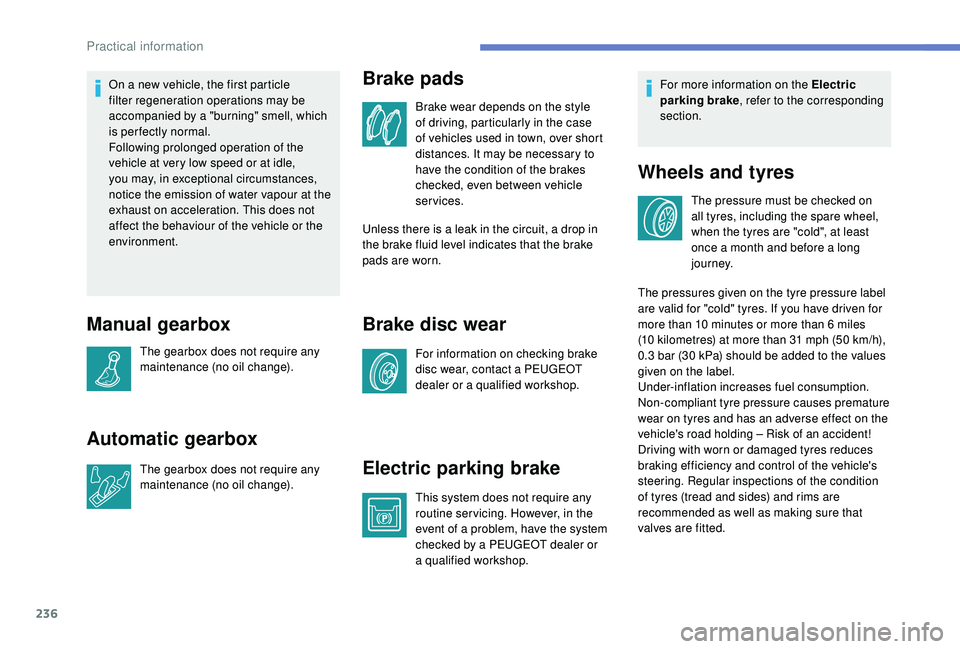
Manual gearbox
The gearbox does not require any
maintenance (no oil change).
Automatic gearbox
The gearbox does not require any
maintenance (no oil change).
Brake pads
Brake wear depends on the style
of driving, particularly in the case
of vehicles used in town, over short
distances. It may be necessary to
have the condition of the brakes
checked, even between vehicle
services.
Unless there is a
leak in the circuit, a drop in
the brake fluid level indicates that the brake
pads are worn.
Brake disc wear
For information on checking brake
disc wear, contact a PEUGEOT
dealer or a
qualified workshop.
Electric parking brake
This system does not require any
routine servicing. However, in the
event of a problem, have the system
checked by a
PEUGEOT dealer or
a
qualified workshop. For more information on the Electric
parking brake
, refer to the corresponding
section.
Wheels and tyres
The pressure must be checked on
all tyres, including the spare wheel,
when the tyres are "cold", at least
once a
month and before a long
j o u r n ey.
The pressures given on the tyre pressure label
are valid for "cold" tyres. If you have driven for
more than 10
minutes or more than 6 miles
(10
kilometres) at more than 31 mph (50 km/h),
0.3
bar (30 kPa) should be added to the values
given on the label.
Under-inflation increases fuel consumption.
Non-compliant tyre pressure causes premature
wear on tyres and has an adverse effect on the
vehicle's road holding – Risk of an accident!
Driving with worn or damaged tyres reduces
braking efficiency and control of the vehicle's
steering. Regular inspections of the condition
of tyres (tread and sides) and rims are
recommended as well as making sure that
valves are fitted.
Practical information
Page 245 of 364
243
Model with storage box
This kit is installed in the storage box, located
in front of the left-hand seat on the second row.
F
O
pen the storage box cover to access the
kit.
For versions with a spare wheel
F First, access the spare wheel.
For more information on the Spare wheel , refer
to the corresponding section.
Temporary puncture
repair kit
Scan the QR code on page 3 to view
e xplanatory videos.
Comprising a
compressor and a sealant
cartridge, it allows the temporary repair of
a
tyre so that you can drive to the nearest
garage.
It is designed to repair most punctures which
could affect the tyre, located on the tyre tread
or shoulder.
The vehicle's electric system allows the
connection of the compressor for long
enough to inflate a
tyre after a puncture
repair.
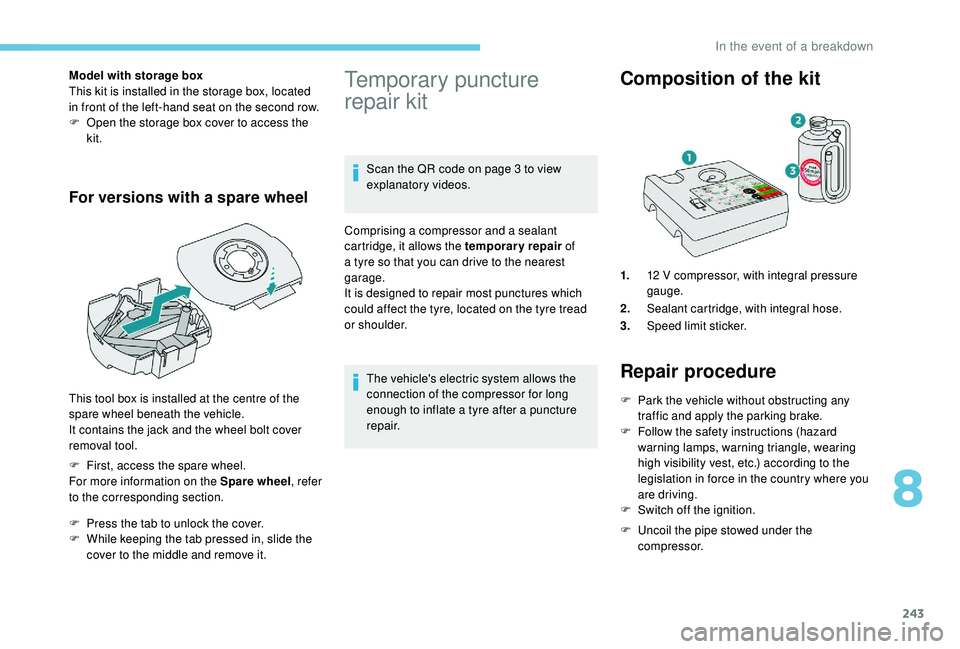
Composition of the kit
1. 12 V compressor, with integral pressure
gauge.
2. Sealant cartridge, with integral hose.
3. Speed limit sticker.
Repair procedure
F Park the vehicle without obstructing any
traffic and apply the parking brake.
F
F
ollow the safety instructions (hazard
warning lamps, warning triangle, wearing
high visibility vest, etc.) according to the
legislation in force in the country where you
are driving.
F
S
witch off the ignition.
F
U
ncoil the pipe stowed under the
compressor.
This tool box is installed at the centre of the
spare wheel beneath the vehicle.
It contains the jack and the wheel bolt cover
removal tool.
F
P
ress the tab to unlock the cover.
F
W
hile keeping the tab pressed in, slide the
cover to the middle and remove it.
8
In the event of a breakdown
Page 246 of 364
244
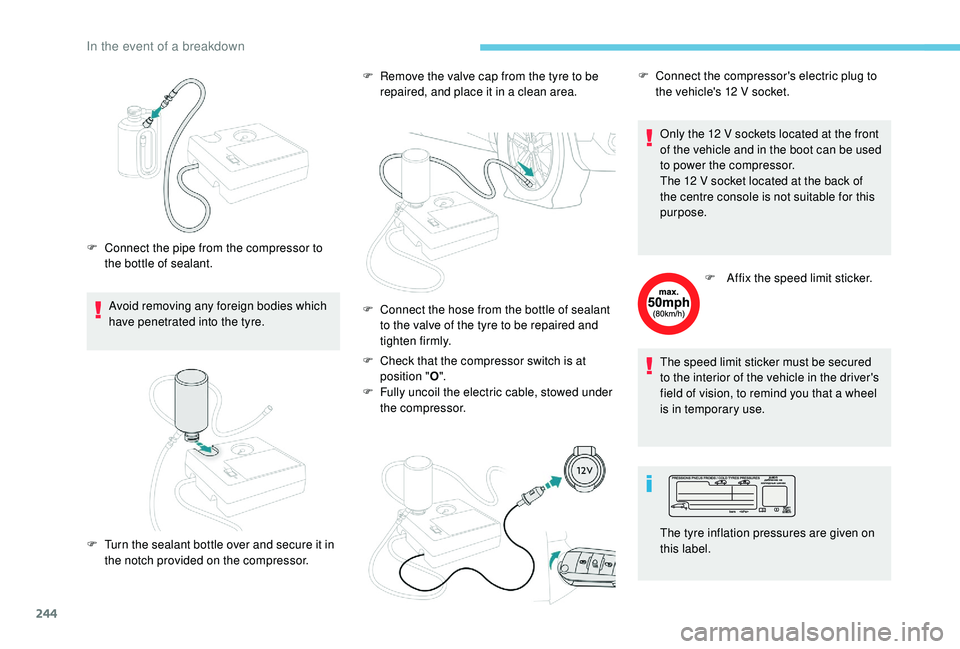
Avoid removing any foreign bodies which
have penetrated into the tyre.
F
C
onnect the pipe from the compressor to
the bottle of sealant. F
R
emove the valve cap from the tyre to be
repaired, and place it in a
clean area.
F
C
heck that the compressor switch is at
position " O".
F
F
ully uncoil the electric cable, stowed under
the compressor. Only the 12
V sockets located at the front
of the vehicle and in the boot can be used
to power the compressor.
The 12 V socket located at the back of
the centre console is not suitable for this
purpose.
F
A
ffix the speed limit sticker.
The speed limit sticker must be secured
to the interior of the vehicle in the driver's
field of vision, to remind you that a
wheel
is in temporary use.
F
T
urn the sealant bottle over and secure it in
the notch provided on the compressor. F
C onnect the hose from the bottle of sealant
to the valve of the tyre to be repaired and
tighten firmly. F
C
onnect the compressor's electric plug to
the vehicle's 12 V socket.
The tyre inflation pressures are given on
this label.
In the event of a breakdown
Page 247 of 364
245
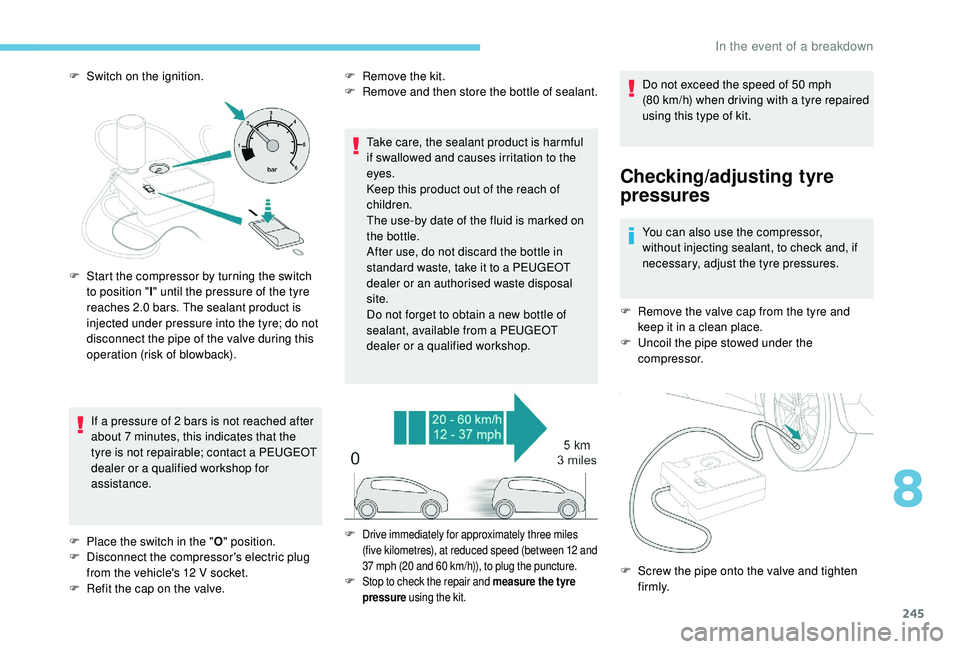
F Switch on the ignition.If a pressure of 2 bars is not reached after
about 7
minutes, this indicates that the
tyre is not repairable; contact a
PEUGEOT
dealer or a
qualified workshop for
assistance. F
R emove the kit.
F R emove and then store the bottle of sealant.
Take care, the sealant product is harmful
if swallowed and causes irritation to the
eyes.
Keep this product out of the reach of
children.
The use-by date of the fluid is marked on
the bottle.
After use, do not discard the bottle in
standard waste, take it to a
PEUGEOT
dealer or an authorised waste disposal
site.
Do not forget to obtain a
new bottle of
sealant, available from a
PEUGEOT
dealer or a
qualified workshop.Do not exceed the speed of 50
mph
(80
km/h) when driving with a tyre repaired
using this type of kit.
Checking/adjusting tyre
pressures
You can also use the compressor,
without injecting sealant, to check and, if
necessary, adjust the tyre pressures.
F
R
emove the valve cap from the tyre and
keep it in a
clean place.
F
U
ncoil the pipe stowed under the
compressor.
F
S
tart the compressor by turning the switch
to position " l" until the pressure of the tyre
reaches 2.0
bars. The sealant product is
injected under pressure into the tyre; do not
disconnect the pipe of the valve during this
operation (risk of blowback).
F
P
lace the switch in the " O" position.
F
D
isconnect the compressor's electric plug
from the vehicle's 12
V socket.
F
R
efit the cap on the valve. F
Drive immediately for approximately three miles
(five kilometres), at reduced speed (between 12 and
37
mph (20 and 60 km/h)), to plug the puncture.
F Stop to check the repair and measure the tyre pressure using the kit.F Screw the pipe onto the valve and tighten
f i r m l y.
8
In the event of a breakdown