2018 Peugeot 308 tow
[x] Cancel search: towPage 5 of 324

3
.
bit.ly/helpPSA
.
Driving recommendations 109
Anti-theft protection 1 10
Starting/Switching off the engine
1
10
Manual parking brake
1
14
Electric parking brake
1
14
Hill start assist
1
17
5-speed manual gearbox
1
18
6-speed manual gearbox
1
18
EAT6 automatic gearbox
1
19
EAT8 automatic gearbox
1
22
Driver Sport Pack
1
26
Gear shift indicator
1
27
Stop & Start
1
28
Memorising speeds
1
30
Speed Limit recognition and
recommendation
131
Speed limiter
1
33
Cruise control
1
35
Adaptive cruise control
1
38
Active Safety Brake with Distance Alert
and Intelligent emergency braking
assistance
1
46
Fatigue detection system
1
49
Active Lane Keeping Assistance
1
50
Blind Spot Detection
1
54
Parking sensors
1
56
Reversing camera
1
58
Visiopark 1
1
58
Park Assist
1
61
Tyre under-inflation detection
1
66Fuel tank
1 70
Diesel misfuel prevention 1 71
Compatibility of fuels
1
72
Snow chains
1
73
Very cold climate screen
1
73
Towing device
1
74
Towing device with quickly detachable
towball (hatchback)
1
75
Towing device with quickly detachable
towball (SW)
1
78
Energy economy mode
1
81
Load reduction mode
1
81
Fitting roof bars
1
82
Bonnet
1
82
Engines
183
Checking levels
1
84
Checks
18 6
AdBlue
® (BlueHDi engines) 1 88
Tool kit
1
93
Temporary puncture repair kit
1
94
Spare wheel
20
1
Changing a bulb
2
05
Changing a fuse
2
11
12
V battery
2
15
To w i n g
2 18
Running out of fuel (Diesel)
2
20Engine technical data and towed loads
2
21
Petrol engines
2
22
Diesel engines
2
27
Dimensions
2
31
Identification markings
2
33
Driving
Practical information
In the event of a breakdown Technical data
Alphabetical index
Access to additional videos
Audio equipment and telematics
Bluetooth audio system
PEUGEOT Connect Radio
PEUGEOT Connect Nav
.
Contents
Page 8 of 324

6
As a passenger, if you avoid connecting your
multimedia devices (film, music, video game,
etc.), you will contribute towards limiting the
consumption of electrical energy, and so of
fuel.
Disconnect your portable devices before
leaving the vehicle.
Eco- driving
Optimise the use of your
gearbox
With a manual gearbox, move off gently
and change up without waiting. When
accelerating, change up early.
With an automatic or electronic gearbox,
favour automatic mode and avoid pressing the
accelerator pedal heavily or suddenly.
The gear shift indicator invites you to engage
the most suitable gear: as soon as the
indication is displayed in the instrument panel,
follow it straight away.
For vehicles fitted with an electronic or
automatic gearbox, this indicator appears only
in manual mode.
Drive smoothly
Maintain a safe distance between vehicles,
use engine braking rather than the
brake pedal, and press the accelerator
progressively. These practices contribute
towards a reduction in fuel consumption and
CO
2 emissions and also help reduce the
background traffic noise.
If your vehicle has cruise control, make use of
the system at speeds above 25
mph (40 km/h)
when the traffic is flowing well.
Control the use of your electrical
equipment
Before moving off, if the passenger
compartment is too warm, ventilate it by opening
the windows and air vents before using the air
conditioning.
Above 31
mph (50 km/h), close the windows and
leave the air vents open.
Consider using equipment that can help keep
the temperature in the passenger compartment
down (sunroof blind, window blinds, etc.).
Switch off the headlamps and foglamps when
the ambient light level does not require their
use.
Avoid running the engine before moving off,
particularly in winter; your vehicle will warm up
much faster while driving.
Unless it has automatic regulation, switch off
the air conditioning as soon as the desired
temperature has been reached.
Switch off the demisting and defrosting controls
when not required, if they are not automatically
controlled.
Switch off the heated seat as soon as possible.
Eco-driving is a range of everyday practices that allow the motorist to optimise their fuel consumption and CO2 emissions.
Eco-driving
Page 42 of 324
40
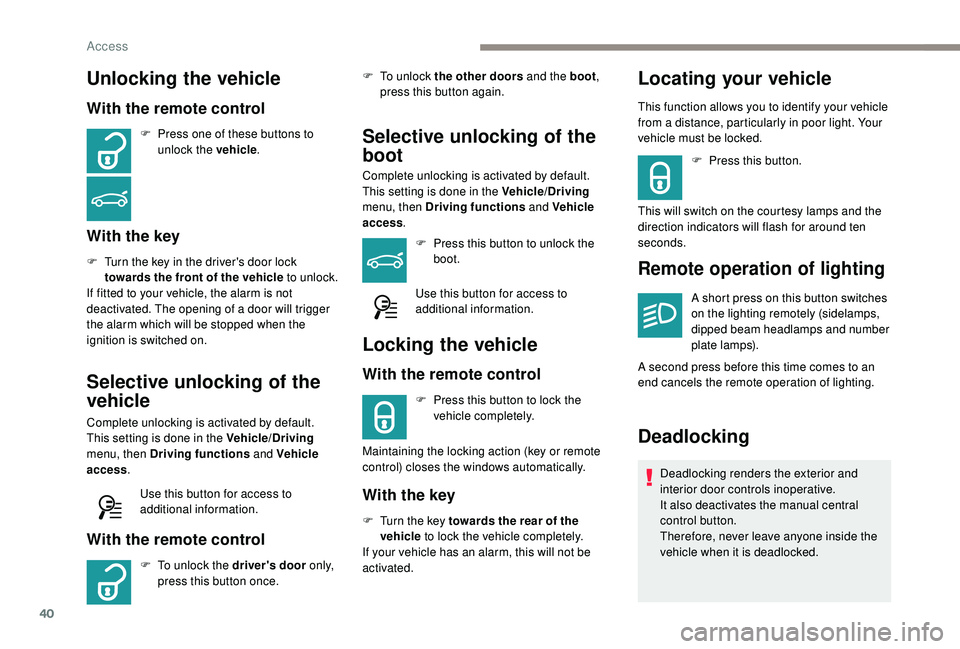
Unlocking the vehicle
With the remote control
F Press one of these buttons to unlock the vehicle .
With the key
F Turn the key in the driver's door lock
towards the front of the vehicle to unlock.
If fitted to your vehicle, the alarm is not
deactivated. The opening of a door will trigger
the alarm which will be stopped when the
ignition is switched on.
Selective unlocking of the
vehicle
Complete unlocking is activated by default.
This setting is done in the Vehicle/Driving
menu, then Driving functions and Vehicle
access .
Use this button for access to
additional information.
With the remote control
F To unlock the driver's door o n l y,
press this button once. F
T
o unlock the other doors and the boot
,
press this button again.
Selective unlocking of the
boot
Complete unlocking is activated by default.
This setting is done in the Vehicle/Driving
menu, then Driving functions and Vehicle
access .
F
P
ress this button to unlock the
boot.
Use this button for access to
additional information.
Locking the vehicle
With the remote control
F Press this button to lock the vehicle completely.
Maintaining the locking action (key or remote
control) closes the windows automatically.
With the key
F Turn the key towards the rear of the vehicle to lock the vehicle completely.
If your vehicle has an alarm, this will not be
activated.
Locating your vehicle
This function allows you to identify your vehicle
from a distance, particularly in poor light. Your
vehicle must be locked.
F
P
ress this button.
This will switch on the courtesy lamps and the
direction indicators will flash for around ten
seconds.
Remote operation of lighting
A short press on this button switches
on the lighting remotely (sidelamps,
dipped beam headlamps and number
plate lamps).
A second press before this time comes to an
end cancels the remote operation of lighting.
Deadlocking
Deadlocking renders the exterior and
interior door controls inoperative.
It also deactivates the manual central
control button.
Therefore, never leave anyone inside the
vehicle when it is deadlocked.
Access
Page 46 of 324

44
Advice
Remote control
The high frequency remote control is a
sensitive system; do not operate it while
it is in your pocket as there is a possibility
that it may unlock the vehicle, without you
being aware of it.
Do not press the buttons of your remote
control out of range and out of sight of
your vehicle. The remote control may stop
working and would have to be reinitialised.
The remote control does not operate when
the key is in the ignition, even when the
ignition is switched off.
Electrical interference
The
K
eyless Entry and Starting electronic
key may not operate if close to certain
electronic devices: telephone, laptop
computer, strong magnetic fields, etc.
Anti-theft protection
Do not make any modifications to the
electronic engine immobiliser system; this
could cause malfunctions.
Do not forget to turn the steering wheel to
engage the steering lock. Locking the vehicle
Driving with the doors locked may render
access by the emergency services to the
interior more difficult in an emergency.
As a safety precaution (with children on
board), remove the key from the ignition or
take the electronic key when you leave the
vehicle, even for a short time.
Lost keys, remote control, electronic
key
Go to a PEUGEOT dealer with the
vehicle's registration document, your
personal identification documents and if
possible, the label bearing the key code.
The PEUGEOT dealer will be able to
retrieve the key code and the transponder
code required to order a new key.
Purchasing a second-hand vehicle
Have the key codes memorised by a
PEUGEOT dealer, to ensure that the keys
in your possession are the only ones
which can start the vehicle.
Back-up procedures
Lost keys, remote control,
electronic key
Visit a PEUGEOT dealer with the vehicle's
registration certificate, your personal
identification documents and if possible, the
label bearing the key code.
The PEUGEOT dealer will be able to retrieve
the key code and the transponder code
required to order a new key
Total unlocking/locking of
the vehicle with the key
Use these procedures in the following cases:
-
r emote control cell battery flat,
-
r
emote control fault,
-
v
ehicle in an area subject to strong
electromagnetic interference.
In the first case, you can also replace the
remote control cell battery.
In the second case, you can also reinitialise the
remote control.
Refer to the corresponding sections.
F
I
nsert the key in the door lock.
F
T
urn the key towards the front of the vehicle
to unlock it, or towards the rear to lock it.
Access
Page 47 of 324
45
Central locking not
functioning
Use these procedures in the following cases:
- c entral locking fault,
-
b
attery disconnected or discharged.
In the event of a malfunction with the
central locking system, the battery must
be disconnected to lock the boot and thus
ensure that the vehicle is locked fully.
Driver's door
F Insert the key in the door lock.
F T urn the key towards the front of the vehicle
to unlock it, or towards the rear to lock it.
If fitted to your vehicle, the alarm is not
activated/deactivated when the vehicle is
locked/unlocked.
Opening a door will trigger the alarm,
which can be stopped by switching the
ignition on.
Passenger doorsF Turn the key towards the rear again within 5 seconds to deadlock the vehicle.
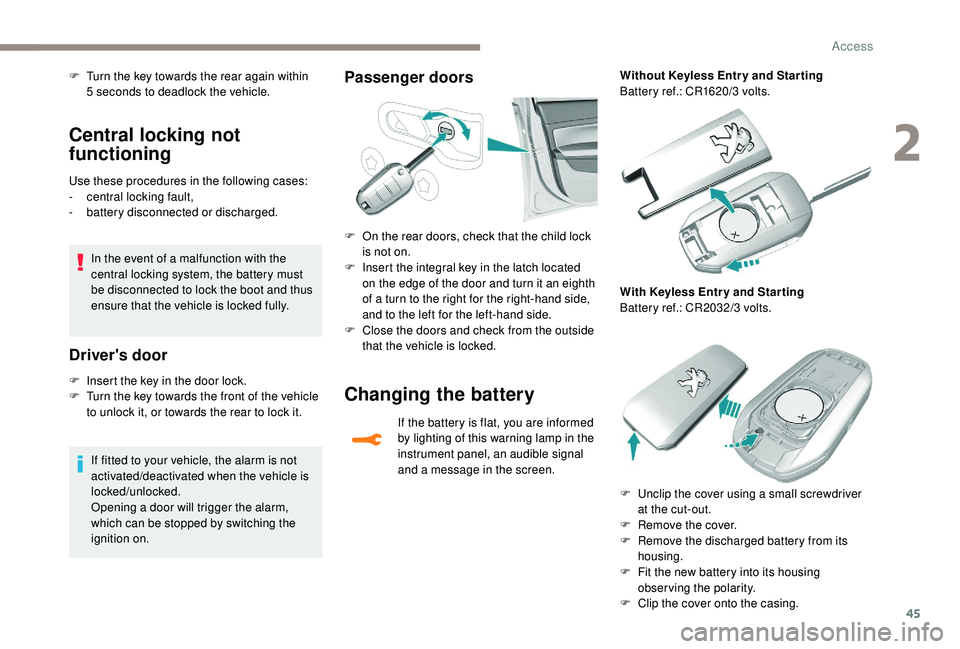
F
O
n the rear doors, check that the child lock
is not on.
F
I
nsert the integral key in the latch located
on the edge of the door and turn it an eighth
of a turn to the right for the right-hand side,
and to the left for the left-hand side.
F
C
lose the doors and check from the outside
that the vehicle is locked.
Changing the battery
If the battery is flat, you are informed
by lighting of this warning lamp in the
instrument panel, an audible signal
and a message in the screen. Without Keyless Entr y and Star ting
Battery ref.: CR1620/3 volts.
With Keyless Entr y and Star ting
Battery ref.: CR2032/3 volts.
F
U
nclip the cover using a small screwdriver
at the cut-out.
F
R
emove the cover.
F
R
emove the discharged battery from its
housing.
F
F
it the new battery into its housing
observing the polarity.
F
C
lip the cover onto the casing.
2
Access
Page 51 of 324
49
Locking the vehicle
with exterior perimeter
monitoring only
* Only cases that apply to GT/GTi vehicles equipped with the anti-tilt alarm only.
Deactivate the interior volumetric monitoring
(and anti-tilt monitoring if your vehicle has it)
to avoid unwanted triggering of the alarm in
certain cases such as:
-
p
assengers on board the vehicle,
-
l
eaving a window partially open,
-
w
ashing your vehicle,
-
c
hanging a wheel*,
-
h
aving your vehicle towed*,
-
t
ransport on a ship or ferry*.
Deactivating the interior
volumetric and anti-tilt
monitoring
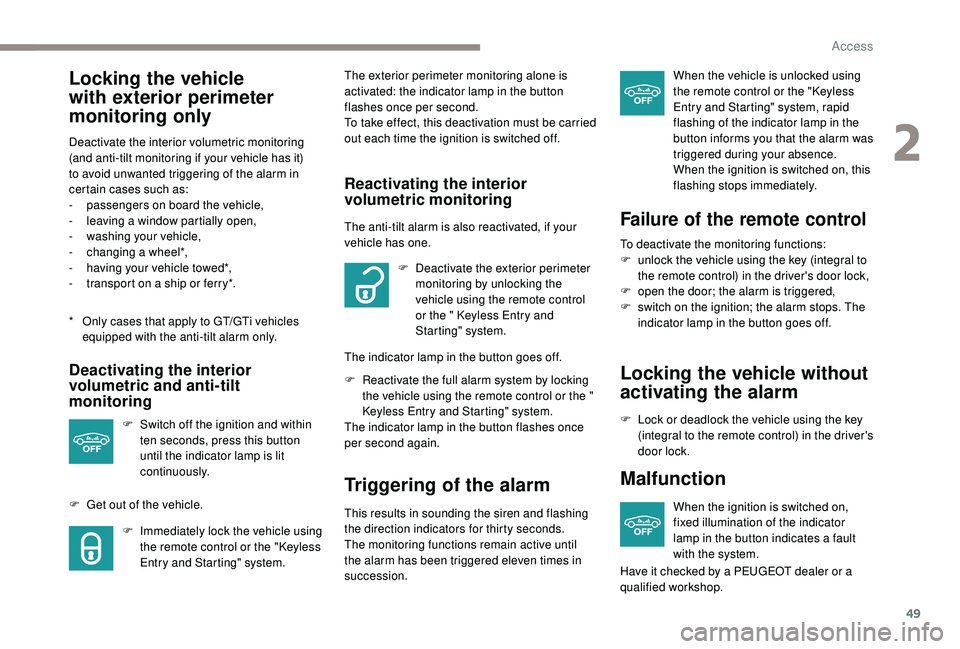
F Switch off the ignition and within
ten seconds, press this button
until the indicator lamp is lit
continuously.
F
G
et out of the vehicle. F
I
mmediately lock the vehicle using
the remote control or the "
K
eyless
Entry and Starting" system. The exterior perimeter monitoring alone is
activated: the indicator lamp in the button
flashes once per second.
To take effect, this deactivation must be carried
out each time the ignition is switched off.
Reactivating the interior
volumetric monitoring
The anti-tilt alarm is also reactivated, if your
vehicle has one.
F
D
eactivate the exterior perimeter
monitoring by unlocking the
vehicle using the remote control
or the
" K
eyless Entry and
Starting" system.
The indicator lamp in the button goes off.
F
R
eactivate the full alarm system by locking
the vehicle using the remote control or the
"
K
eyless Entry and Starting" system.
The indicator lamp in the button flashes once
per second again.
Triggering of the alarm
This results in sounding the siren and flashing
the direction indicators for thirty seconds.
The monitoring functions remain active until
the alarm has been triggered eleven times in
succession. When the vehicle is unlocked using
the remote control or the "
K
eyless
Entry and Starting" system, rapid
flashing of the indicator lamp in the
button informs you that the alarm was
triggered during your absence.
When the ignition is switched on, this
flashing stops immediately.
Failure of the remote control
To deactivate the monitoring functions:
F u nlock the vehicle using the key (integral to
the remote control) in the driver's door lock,
F
o
pen the door; the alarm is triggered,
F
s
witch on the ignition; the alarm stops. The
indicator lamp in the button goes off.
Locking the vehicle without
activating the alarm
F Lock or deadlock the vehicle using the key (integral to the remote control) in the driver's
door lock.
Malfunction
When the ignition is switched on,
fixed illumination of the indicator
lamp in the button indicates a fault
with the system.
Have it checked by a PEUGEOT dealer or a
qualified workshop.
2
Access
Page 53 of 324
51
PEUGEOT i-Cockpit
Before going out on the road and to benefit
from the ergonomic layout of the PEUGEOT
i-Cockpit, adjust in the following order:
-
t
he height of the head restraint,
-
t
he seat backrest angle,
-
t
he seat cushion height,
-
t
he longitudinal position of the seat,
-
t
he depth and then the height of the steering
wheel,
-
t
he rear view mirror and door mirrors.
Once these adjustments have been made,
ensure that from your driving position you can
see the "head-up" instrument panel clearly,
over the reduced diameter steering wheel.
Front head restraints
Height adjustment
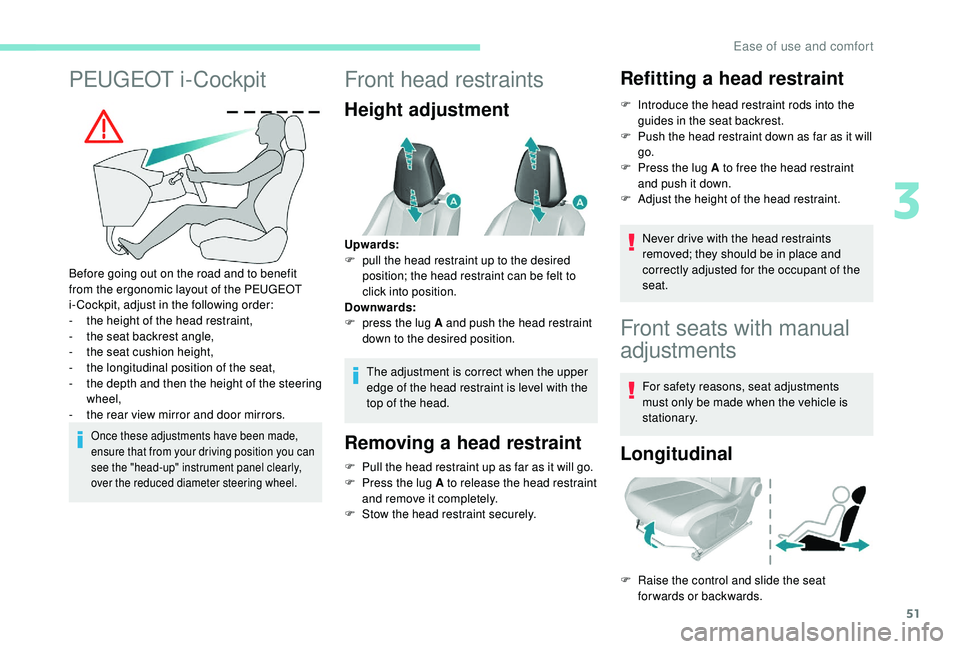
The adjustment is correct when the upper
edge of the head restraint is level with the
top of the head.
Removing a head restraint
F Pull the head restraint up as far as it will go.
F P ress the lug A to release the head restraint
and remove it completely.
F
S
tow the head restraint securely.
Refitting a head restraint
F Introduce the head restraint rods into the guides in the seat backrest.
F
P
ush the head restraint down as far as it will
go.
F
P
ress the lug A to free the head restraint
and push it down.
F
A
djust the height of the head restraint.
Never drive with the head restraints
removed; they should be in place and
correctly adjusted for the occupant of the
seat.
Upwards:
F
p
ull the head restraint up to the desired
position; the head restraint can be felt to
click into position.
Downwards:
F
p
ress the lug A and push the head restraint
down to the desired position.
Front seats with manual
adjustments
For safety reasons, seat adjustments
must only be made when the vehicle is
stationary.
Longitudinal
F Raise the control and slide the seat forwards or backwards.
3
Ease of use and comfort
Page 60 of 324
58
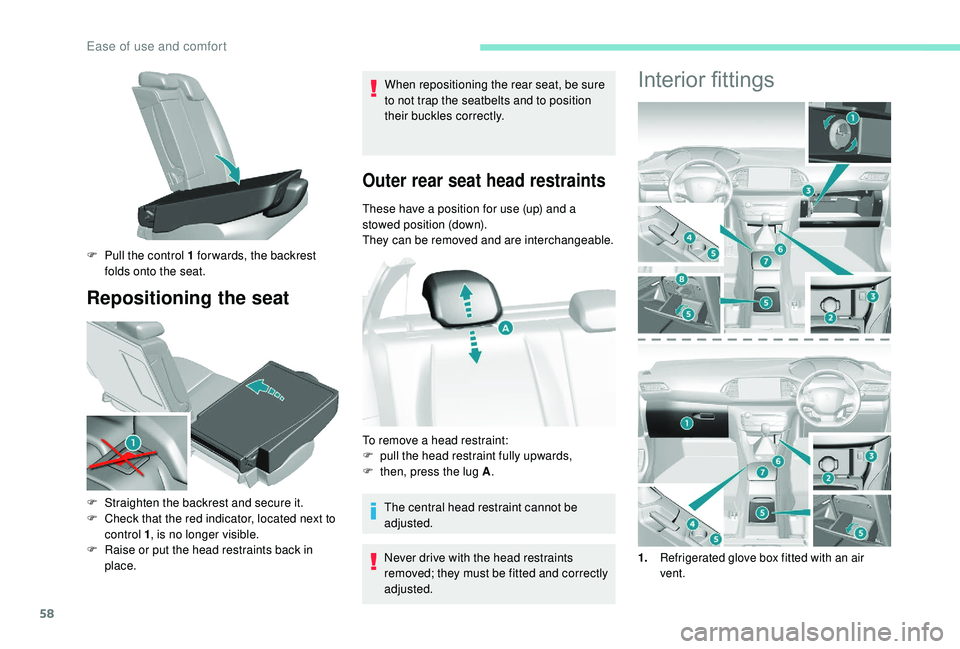
Repositioning the seat
When repositioning the rear seat, be sure
to not trap the seatbelts and to position
their buckles correctly.
Outer rear seat head restraints
These have a position for use (up) and a
stowed position (down).
They can be removed and are interchangeable.
F
P
ull the control 1 for wards, the backrest
folds onto the seat.
F
S
traighten the backrest and secure it.
F
C
heck that the red indicator, located next to
control 1 , is no longer visible.
F
R
aise or put the head restraints back in
place. The central head restraint cannot be
adjusted.
Never drive with the head restraints
removed; they must be fitted and correctly
adjusted.
To remove a head restraint:
F
p
ull the head restraint fully upwards,
F
t
hen, press the lug A .
Interior fittings
1.Refrigerated glove box fitted with an air
vent.
Ease of use and comfort