2018 Peugeot 308 key
[x] Cancel search: keyPage 3 of 324

1
Welcome
The descriptions and illustrations are given as indications only.
Automobiles PEUGEOT reser ves the right to modify the technical data,
equipment and accessories without having to update this edition of the
guide.
In this document you will find all of the instructions and recommendations
on use that will allow you to enjoy your vehicle to the fullest. It is strongly
recommended that you familiarise yourself with it as well as the Warranty
and Maintenance Record which will provide you with information about
warranties, ser vicing and roadside assistance associated with your
vehicle. This document presents the information and recommendations required
for you to be able to explore your vehicle in complete safety. Thank you for choosing a Peugeot 308.
Your vehicle will be fitted with only some of the equipment described in
this document, depending on its trim level, version and the specification
for the country in which it was sold.
If ownership of your vehicle is transferred, please ensure this Handbook
is passed on to the new owner. Key
Safety warning
Additional information
Contributes to the protection of the environment
Left-hand drive vehicle
Right-hand drive vehicle
Location of the equipment /button described with a black zone
Page 4 of 324

2
.
.
Instrument panel 8
W arning and indicator lamps 9
I
ndicators 23
Distance recorders
2
7
Lighting dimmer
2
8
rip computer
2
8
Monochrome screen C
3
0
Touch screen
3
2
Instruments and controls
4
S
etting the time and date
3
8
Remote control and key
3
9
Keyless Entry and Starting
4
1
Locking/unlocking from the inside
4
3
Back-up procedures
4
4
Doors
4
6
Boot
47
Alarm
48
Electric windows
5
0
PEUGEOT i- Cockpit
5
1
Front head restraints
5
1
Front seats
5
1
Steering wheel adjustment
5
5
Mirrors
5
5
Rear seats (hatchback)
5
6
Rear seats (SW)
5
7
Interior fittings
5
8
Boot fittings (hatchback)
6
2
Boot fittings (SW)
6
2
Heating and Ventilation
6
4
Manual air conditioning
6
6
Manual air conditioning (Touch screen)
6
6
Dual-zone automatic air conditioning (Touch screen) 67Recirculation of interior air 69
Front demist – defrost 7 0
Rear screen demist – defrost
7
0
Panoramic roof
7
1
Courtesy lamps
7
2
Footwell lighting
73
I
nterior ambient lighting
73 E
xterior lighting control stalk
7
4
Automatic illumination of headlamps
7
6
Automatic headlamp dipping
7
6
Guide-me-home lighting
7
8
Exterior welcome lighting
7
8
Direction indicators
7
9
Door mirror spotlamps
7
9
Headlamp adjustment
7
9
Wiper control stalk
8
0
Changing a wiper blade
8
2
Automatic windscreen wipers
8
3
General safety recommendations
8
4
Hazard warning lamps
8
4
Emergency or assistance call
8
5
Horn 86
Electronic stability control (ESC)
8
6
Seat belts
9
0
Airbags
92
Child seats
9
5
Child seat at the front
9
6
Deactivating the front passenger airbag
9
9
ISOFIX mountings and child seats
1
02
Child lock 1 07
InstrumentsAccess
Over view
Ease of use and comfort Lighting and visibility
Safety
Eco-driving
Contents
Page 40 of 324

38
With PEUGEOT Connect
Radio
F Select the "Settings" menu.
F
Sel
ect "Date and time ".
F
Sel
ect the " Date" or "Time " tab.
F
C
hoose the display formats.
F
C
hange the date and/or time using the
numeric keypad.
F
C
onfirm with " OK".
The system does not automatically
manage the change between winter and
summer time (depending on country).
With PEUGEOT Connect
Nav
Setting of the time and date is only available if
synchronisation with the GPS is deactivated.
F
P
ress the " OPTIONS " button to go to the
secondary page.
F
Sel
ect "Setting the time- date". F
Sel
ect the "
Date" or "Time " tab.
F
S
et the date and/or time using the numeric
keypad.
Additional settings
You can choose:
- T o change the display format of the date
and time (12h/24h).
-
T
o change the time zone.
-
T
o activate or deactivate synchronisation
with the GPS (UTC).
The system does not automatically
manage the change between winter and
summer time (depending on country).
The change between winter and summer
time is done by changing the time zone.
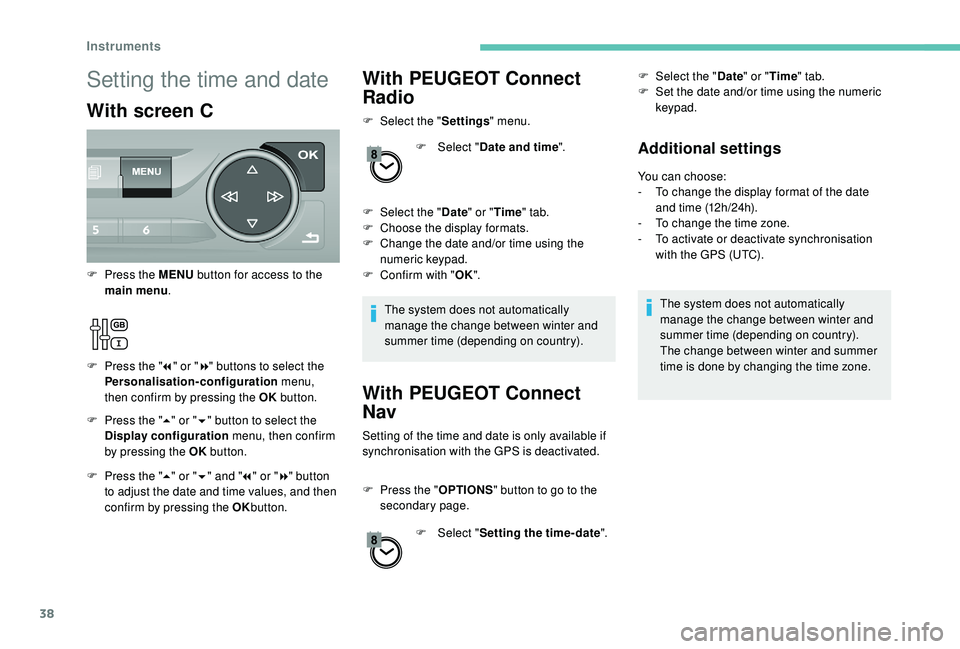
Setting the time and date
With screen C
F Press the " 5" or " 6" button to select the
Display configuration menu, then confirm
by pressing the OK button.
F
P
ress the MENU
button for access to the
main menu .
F
P
ress the "
7" or " 8" buttons to select the
Personalisation-configuration menu,
then confirm by pressing the OK button.
F
P
ress the " 5" or " 6" and " 7" or " 8" button
to adjust the date and time values, and then
confirm by pressing the OK button.
Instruments
Page 41 of 324

39
Remote control and key
Remote control function
The remote control includes a simple key that
allows the central locking or unlocking of the
vehicle using the door lock and starting and
switching off the engine.
Under normal operating conditions, it is
preferable to use the remote control.battery, etc. For more information on the Back-
up procedures
, refer to the corresponding
section.
Integral key
The key built into the remote control can be
used for the following operations (depending
on version):
-
u
nlocking/locking/deadlocking the vehicle.
-
a
ctivation/deactivation of the mechanical
child lock.
-
a
ctivation/deactivation of the front
passenger airbag.
-
b
ack-up door locking.
-
s
witching on the ignition and starting/
switching off the engine.
The remote control can be used for the
following functions, depending on version:
-
u
nlocking/locking/deadlocking the vehicle,
-
r
emote switching on of the lighting,
-
a
ctivation/deactivation of the alarm,
-
l
ocating the vehicle,
-
v
ehicle immobiliser.
Back-up procedures allow the vehicle to be
locked or unlocked in the event of a failure of
the remote control, the central locking, the Without Keyless Entr y and Star ting With Keyless Entr y and Star ting
F
T
o unfold or fold the key, press the button. F
T
o eject the key or put it back in place, pull
and hold the button.
Unlocking/locking is confirmed by rapid
flashing of the direction indicators for
approximately two seconds.
At the same time, depending on your
version, the door mirrors unfold/fold.
If fitted to your vehicle, the alarm is
deactivated when the vehicle is unlocked.
2
Access
Page 42 of 324

40
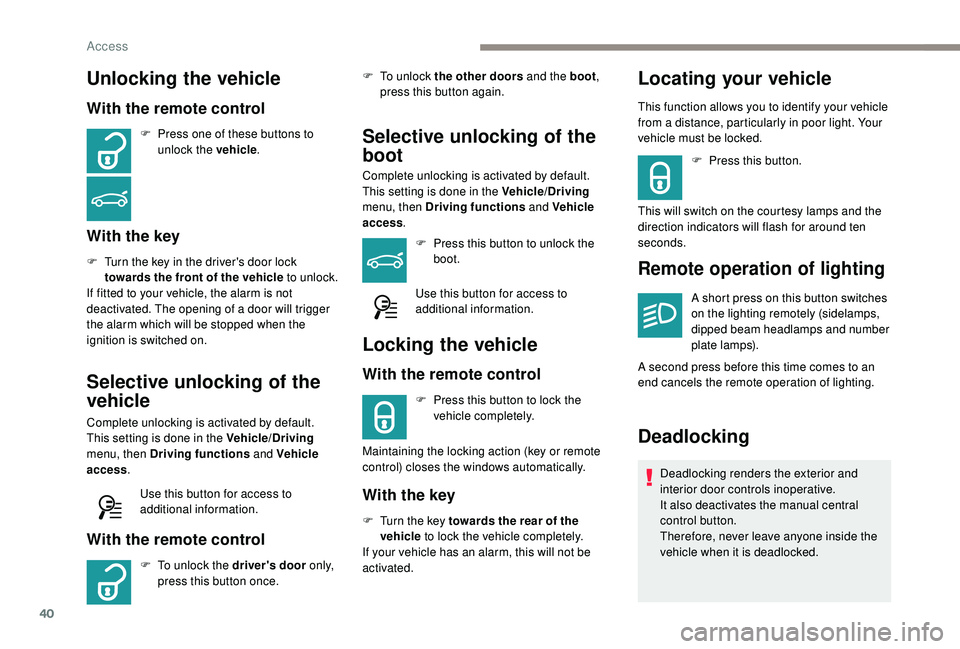
Unlocking the vehicle
With the remote control
F Press one of these buttons to unlock the vehicle .
With the key
F Turn the key in the driver's door lock
towards the front of the vehicle to unlock.
If fitted to your vehicle, the alarm is not
deactivated. The opening of a door will trigger
the alarm which will be stopped when the
ignition is switched on.
Selective unlocking of the
vehicle
Complete unlocking is activated by default.
This setting is done in the Vehicle/Driving
menu, then Driving functions and Vehicle
access .
Use this button for access to
additional information.
With the remote control
F To unlock the driver's door o n l y,
press this button once. F
T
o unlock the other doors and the boot
,
press this button again.
Selective unlocking of the
boot
Complete unlocking is activated by default.
This setting is done in the Vehicle/Driving
menu, then Driving functions and Vehicle
access .
F
P
ress this button to unlock the
boot.
Use this button for access to
additional information.
Locking the vehicle
With the remote control
F Press this button to lock the vehicle completely.
Maintaining the locking action (key or remote
control) closes the windows automatically.
With the key
F Turn the key towards the rear of the vehicle to lock the vehicle completely.
If your vehicle has an alarm, this will not be
activated.
Locating your vehicle
This function allows you to identify your vehicle
from a distance, particularly in poor light. Your
vehicle must be locked.
F
P
ress this button.
This will switch on the courtesy lamps and the
direction indicators will flash for around ten
seconds.
Remote operation of lighting
A short press on this button switches
on the lighting remotely (sidelamps,
dipped beam headlamps and number
plate lamps).
A second press before this time comes to an
end cancels the remote operation of lighting.
Deadlocking
Deadlocking renders the exterior and
interior door controls inoperative.
It also deactivates the manual central
control button.
Therefore, never leave anyone inside the
vehicle when it is deadlocked.
Access
Page 43 of 324

41
With the remote control
F Press this button to lock the vehicle fully.
F
W
ithin five seconds, press this button again
to deadlock the vehicle.
Deadlocking is confirmed by fixed
illumination of the direction indicators for
approximately two seconds.
Depending on your version, the door
mirrors fold at the same time.
With the key
F Turn the key to the rear in the driver's door lock to lock the vehicle completely.
F
T
urn the key to the rear again within five
seconds to deadlock the vehicle.
Keyless Entry and
Starting
Unlocking/locking is confirmed by rapid
flashing of the direction indicators for
approximately two seconds.
At the same time, depending on your
version, the door mirrors unfold/fold.
If fitted to your vehicle, the alarm is
deactivated when the vehicle is unlocked.
Complete unlocking
Selective unlocking
This system allows the unlocking, locking
and starting of the vehicle, while carrying
the electronic key in the recognition zone " A"
around the vehicle. F
W
ith the electronic key on your person
and in recognition zone A , pass your hand
behind the door handle of a front door to
unlock the vehicle, then pull the handle to
open the door.
When selective unlocking of the drivers door is
activated:
F
E
lectronic key in the driver side zone, pass
your hand behind the driver’s door handle
to just unlock the driver’s door, pull on the
handle to open the door.
F
E
lectronic key in the passenger side zone,
pass your hand behind the front passenger
door handle to unlock the whole vehicle, pull
on the handle to open the door.
2
Access
Page 44 of 324

42
When unlocking of the boot only is activated:
F W ith the electronic key in the recognition
zone A , press the boot opening control
to unlock just the tailgate, then raise the
tailgate.
Complete unlocking is activated by default.
This setting is done in the Vehicle/Driving
menu, then Driving functions and Vehicle
access .
Use this button for access to
additional information.
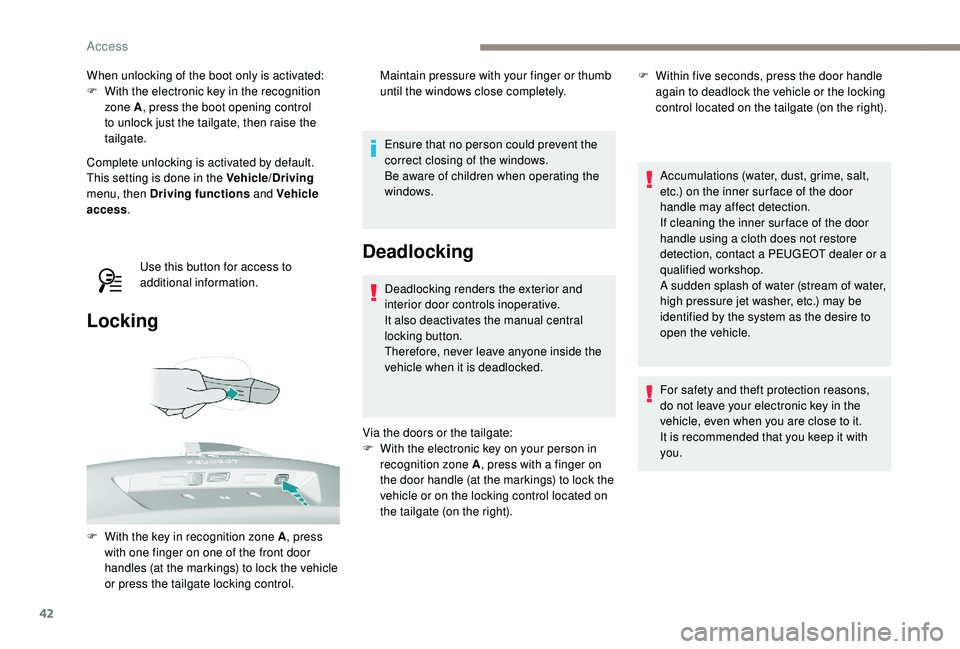
Locking
Ensure that no person could prevent the
correct closing of the windows.
Be aware of children when operating the
windows.
Deadlocking
Deadlocking renders the exterior and
interior door controls inoperative.
It also deactivates the manual central
locking button.
Therefore, never leave anyone inside the
vehicle when it is deadlocked.
Via the doors or the tailgate:
F
W
ith the electronic key on your person in
recognition zone A , press with a finger on
the door handle (at the markings) to lock the
vehicle or on the locking control located on
the tailgate (on the right). Accumulations (water, dust, grime, salt,
etc.) on the inner sur face of the door
handle may affect detection.
If cleaning the inner sur face of the door
handle using a cloth does not restore
detection, contact a PEUGEOT dealer or a
qualified workshop.
A sudden splash of water (stream of water,
high pressure jet washer, etc.) may be
identified by the system as the desire to
open the vehicle.
For safety and theft protection reasons,
do not leave your electronic key in the
vehicle, even when you are close to it.
It is recommended that you keep it with
you.
F
W
ith the key in recognition zone A , press
with one finger on one of the front door
handles (at the markings) to lock the vehicle
or press the tailgate locking control. Maintain pressure with your finger or thumb
until the windows close completely.
F
W
ithin five seconds, press the door handle
again to deadlock the vehicle or the locking
control located on the tailgate (on the right).
Access
Page 45 of 324

43
If one of the doors or the boot is still open
or if the electronic key for the K eyless
Entry and Starting system has been left
inside the vehicle, the central locking does
not take place.
If the vehicle is unlocked inadvertently and
if no action is taken at the doors or boot,
the vehicle will automatically lock itself
again after about 30
seconds.
If fitted to your vehicle, the alarm is not
reactivated.
The automatic folding and unfolding of
the door mirrors can be deactivated by a
PEUGEOT dealer or a qualified workshop.
As a safety measure (children on board),
never leave the vehicle without taking the
electronic key for the
K
eyless Entry and
Starting system with you, even for a short
period.
Be aware of the risk of theft when the
electronic key for the
K
eyless Entry and
Starting system is in one of the defined
zones with the vehicle unlocked. In order to preser ve the battery in the
electronic key and the vehicle's battery,
the "hands-free" functions are put into
long-term standby after 21 days without
use. To restore these functions, press
one of the remote control buttons or start
the engine with the electronic key in the
reader.
For more information on Star ting -
switching off the engine with "
Keyless
Entr y and Star ting ", refer to the
corresponding section.
Locking/unlocking from
the inside
Automatic central locking
of the doors
The doors can lock automatically while driving
(speed above 6 mph [10 km/h]).
To activate or deactivate this
function, press and hold the button
until a message appears in the
screen. After unlocking, if no door is opened
within 30
seconds, the doors lock again
automatically.
F
P
ress the button.
This locks and unlocks the doors and the boot.
If the vehicle is deadlocked or locked with
the remote control or the door handles,
the button is not operational. In this case,
use the key or remote control to unlock.
When carrying large objects with the boot
open, you can press this button to lock
just the doors.
When locking from inside, the door mirrors
do not fold.
2
Access