2018 Peugeot 308 wheel bolts
[x] Cancel search: wheel boltsPage 195 of 324

193
Tool kit
This is a set of tools provided with the vehicle.
Its content depends on your vehicle's
equipment:
-
t
emporary puncture repair kit,
-
spar
e wheel.
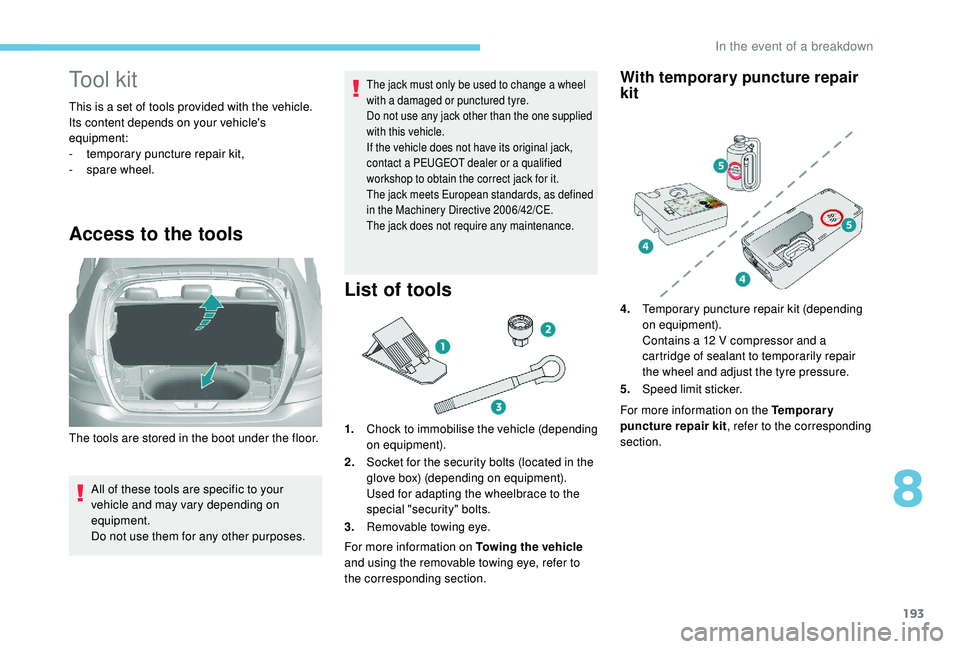
Access to the tools
All of these tools are specific to your
vehicle and may vary depending on
equipment.
Do not use them for any other purposes.
The jack must only be used to change a wheel
with a damaged or punctured tyre.
Do not use any jack other than the one supplied
with this vehicle.
If the vehicle does not have its original jack,
contact a PEUGEOT dealer or a qualified
workshop to obtain the correct jack for it.
The jack meets European standards, as defined
in the Machinery Directive 2006/42/CE.
The jack does not require any maintenance.
List of tools
1.Chock to immobilise the vehicle (depending
on equipment).
2. Socket for the security bolts (located in the
glove box) (depending on equipment).
Used for adapting the wheelbrace to the
special "security" bolts.
3. Removable towing eye.
For more information on Towing the vehicle
and using the removable towing eye, refer to
the corresponding section.
With temporary puncture repair
kit
The tools are stored in the boot under the floor. For more information on the Temporary
puncture repair kit
, refer to the corresponding
section. 4. Temporary puncture repair kit (depending
on equipment).
Contains a 12 V compressor and a
cartridge of sealant to temporarily repair
the wheel and adjust the tyre pressure.
5. Speed limit sticker.
8
In the event of a breakdown
Page 196 of 324

194
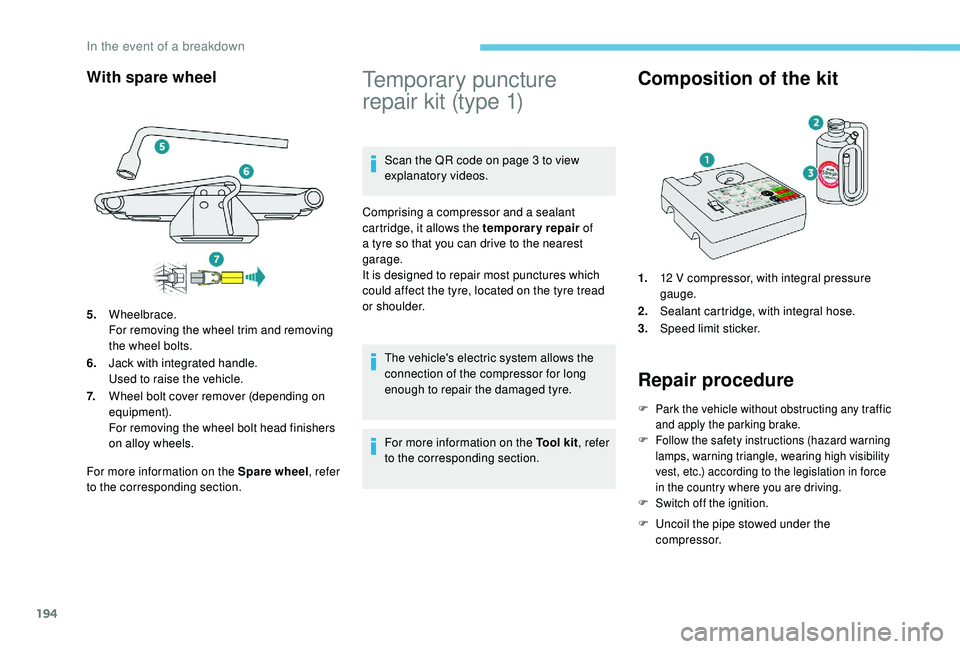
With spare wheel
For more information on the Spare wheel, refer
to the corresponding section.
Temporary puncture
repair kit (type 1)
Scan the QR code on page 3 to view
explanatory videos.
Comprising a compressor and a sealant
cartridge, it allows the temporary repair of
a tyre so that you can drive to the nearest
garage.
It is designed to repair most punctures which
could affect the tyre, located on the tyre tread
or shoulder.
The vehicle's electric system allows the
connection of the compressor for long
enough to repair the damaged tyre.
For more information on the Tool kit , refer
to the corresponding section.
Composition of the kit
1. 12 V compressor, with integral pressure
gauge.
2. Sealant cartridge, with integral hose.
3. Speed limit sticker.
Repair procedure
F Park the vehicle without obstructing any traffic
and apply the parking brake.
F
F
ollow the safety instructions (hazard warning
lamps, warning triangle, wearing high visibility
vest, etc.) according to the legislation in force
in the country where you are driving.
F
S
witch off the ignition.
F Uncoil the pipe stowed under the compressor.
5.
Wheelbrace.
For removing the wheel trim and removing
the wheel bolts.
6. Jack with integrated handle.
Used to raise the vehicle.
7. Wheel bolt cover remover (depending on
equipment).
For removing the wheel bolt head finishers
on alloy wheels.
In the event of a breakdown
Page 205 of 324

203
Do not use:
- t he jack for any other purpose than
lifting the vehicle,
-
a j
ack other than the one supplied by
the manufacturer.
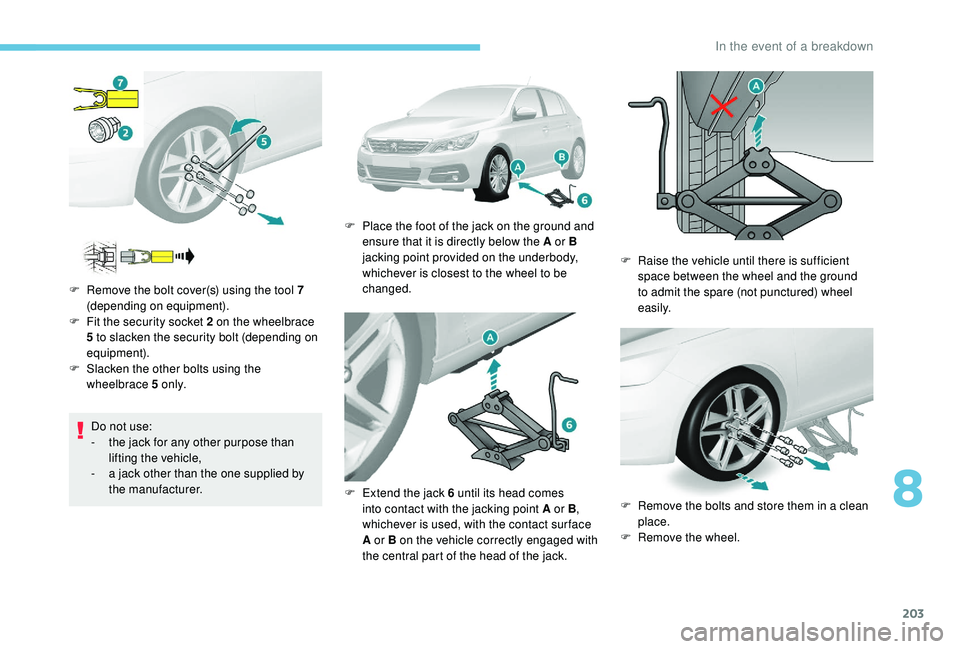
F
R
emove the bolt cover(s) using the tool 7
(depending on equipment).
F
F
it the security socket 2 on the wheelbrace
5 to slacken the security bolt (depending on
equipment).
F
S
lacken the other bolts using the
wheelbrace 5 o n l y. F
P
lace the foot of the jack on the ground and
ensure that it is directly below the A or B
jacking point provided on the underbody,
whichever is closest to the wheel to be
changed.
F
E
xtend the jack 6 until its head comes
into contact with the jacking point A or B ,
whichever is used, with the contact sur face
A or B on the vehicle correctly engaged with
the central part of the head of the jack. F
Ra
ise the vehicle until there is sufficient
space between the wheel and the ground
to admit the spare (not punctured) wheel
easily.
F
R
emove the bolts and store them in a clean
place.
F
R
emove the wheel.
8
In the event of a breakdown
Page 206 of 324

204
Ensure that the jack is stable. If the
ground is slippery or loose, the jack may
slip or collapse – Risk of injury!
Take care to place the jack strictly at the
jacking points A or B under the vehicle,
making sure that the contact point on the
vehicle is centred on the head of the jack.
Other wise, there is a risk of damage to the
vehicle and/or the jack collapsing – Risk
of injury!
Fitting a wheel
Fitting the "space-saver " spare wheel
If your vehicle is fitted with alloy wheels,
when tightening the bolts on fitting, it is
normal to notice that the washers do not
come into contact with the "space-saver"
spare wheel. The wheel is secured by the
conical contact of each bolt. F
P
ut the wheel in place on the hub.
F
S
crew in the bolts by hand to the stop.
F
P
re-tighten the security bolt using the
wheelbrace 5 fitted with the security socket
2 (depending on equipment).
F
P
re-tighten the other bolts using the
wheelbrace 5 o n l y.
F
L
ower the vehicle fully.
F
F
old the jack 6 and detach it.F
T
ighten the security bolt using the
wheelbrace 5 fitted with the security socket
2 (depending on equipment).
F
T
ighten the other bolts using the
wheelbrace 5 o n l y.
F
R
efit the bolt cover(s) (depending on
ve r s i o n).
F
S
tore the tools in the box.
In the event of a breakdown
Page 207 of 324

205
After changing a wheel
To store the punctured wheel in the boot
correctly, first remove the central cover.
When using the "space-saver" type spare
wheel, do not exceed 50 mph (80 km/h).
Have the tightening of the bolts and the
pressure of the spare wheel checked by a
PEUGEOT dealer or a qualified workshop
without delay.
Have the punctured wheel repaired and
replace it on the vehicle as soon as
possible.
If your vehicle has tyre under-inflation
detection, check the tyre pressures and
reinitialise the system.
For more information on Tyre under-
inflation detection , refer to the
corresponding section.
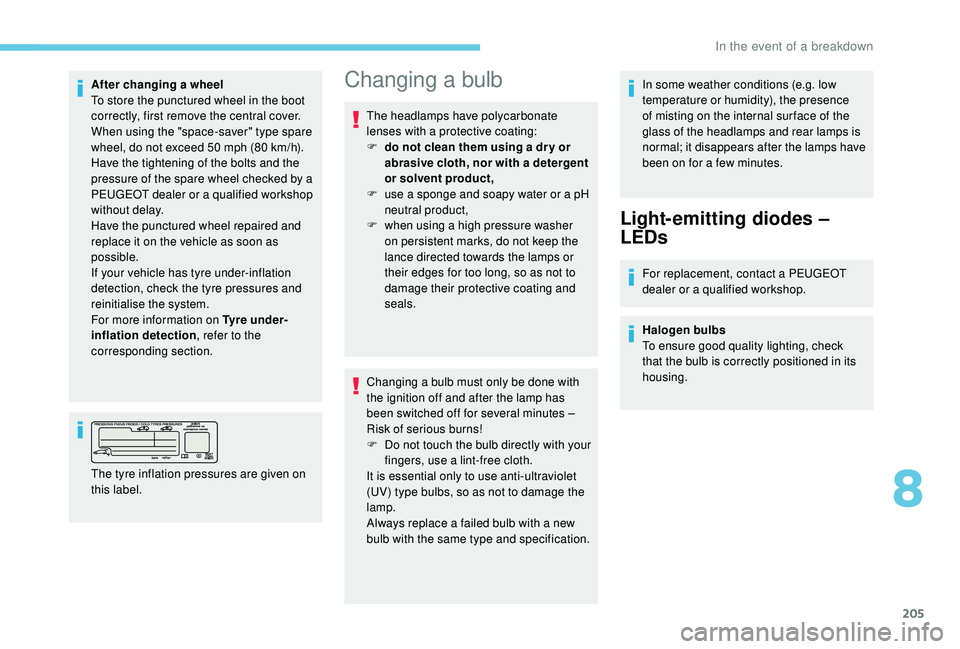
The tyre inflation pressures are given on
this label.Changing a bulb
The headlamps have polycarbonate
lenses with a protective coating:
F
d
o not clean them using a dr y or
abrasive cloth, nor with a detergent
or solvent product,
F
u
se a sponge and soapy water or a pH
neutral product,
F
w
hen using a high pressure washer
on persistent marks, do not keep the
lance directed towards the lamps or
their edges for too long, so as not to
damage their protective coating and
seals.
Changing a bulb must only be done with
the ignition off and after the lamp has
been switched off for several minutes –
Risk of serious burns!
F
D
o not touch the bulb directly with your
fingers, use a lint-free cloth.
It is essential only to use anti-ultraviolet
(UV) type bulbs, so as not to damage the
lamp.
Always replace a failed bulb with a new
bulb with the same type and specification. In some weather conditions (e.g. low
temperature or humidity), the presence
of misting on the internal sur face of the
glass of the headlamps and rear lamps is
normal; it disappears after the lamps have
been on for a few minutes.
Light-emitting diodes –
LEDs
For replacement, contact a PEUGEOT
dealer or a qualified workshop.
Halogen bulbs
To ensure good quality lighting, check
that the bulb is correctly positioned in its
housing.
8
In the event of a breakdown