2018 Peugeot 308 tow
[x] Cancel search: towPage 64 of 324
62
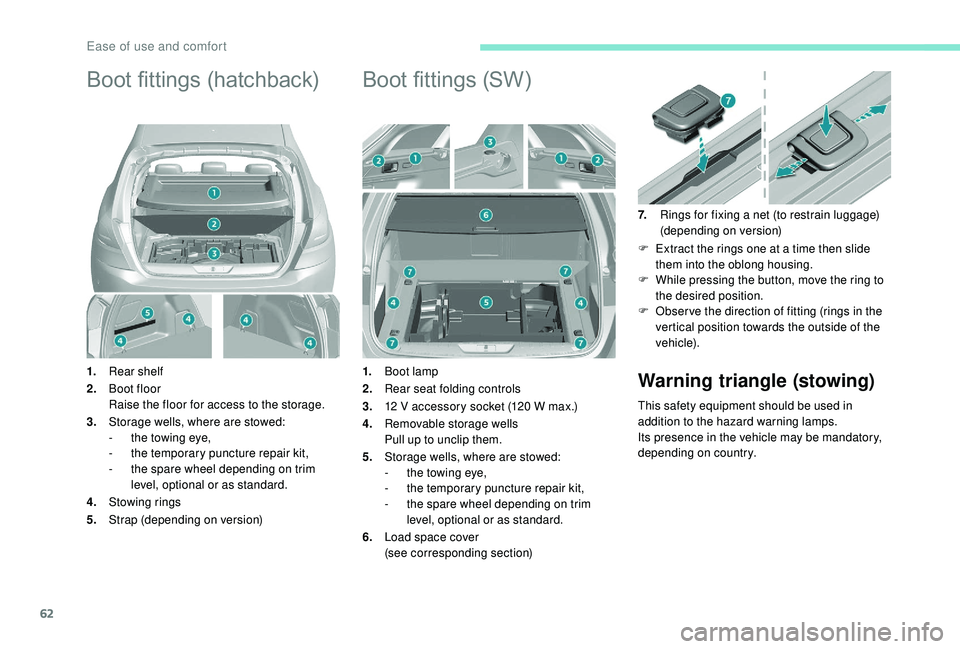
Boot fittings (hatchback)
1.Rear shelf
2. Boot floor
Raise the floor for access to the storage.
3. Storage wells, where are stowed:
-
t
he towing eye,
-
t
he temporary puncture repair kit,
-
t
he spare wheel depending on trim
level, optional or as standard.
4. Stowing rings
5. Strap (depending on version)
Boot fittings (SW)
1.Boot lamp
2. Rear seat folding controls
3. 12 V accessory socket (120 W max.)
4. Removable storage wells
Pull up to unclip them.
5. Storage wells, where are stowed:
-
t
he towing eye,
-
t
he temporary puncture repair kit,
-
t
he spare wheel depending on trim
level, optional or as standard.
6. Load space cover
(see corresponding section) 7.
Rings for fixing a net (to restrain luggage)
(depending on version)
F
E
xtract the rings one at a time then slide
them into the oblong housing.
F
W
hile pressing the button, move the ring to
the desired position.
F
O
bser ve the direction of fitting (rings in the
vertical position towards the outside of the
vehicle).Warning triangle (stowing)
This safety equipment should be used in
addition to the hazard warning lamps.
Its presence in the vehicle may be mandatory,
depending on country.
Ease of use and comfort
Page 65 of 324
63
Load space cover,
blind (SW)
When sharp deceleration occurs, objects
placed on the load space cover can turn
into projectiles.
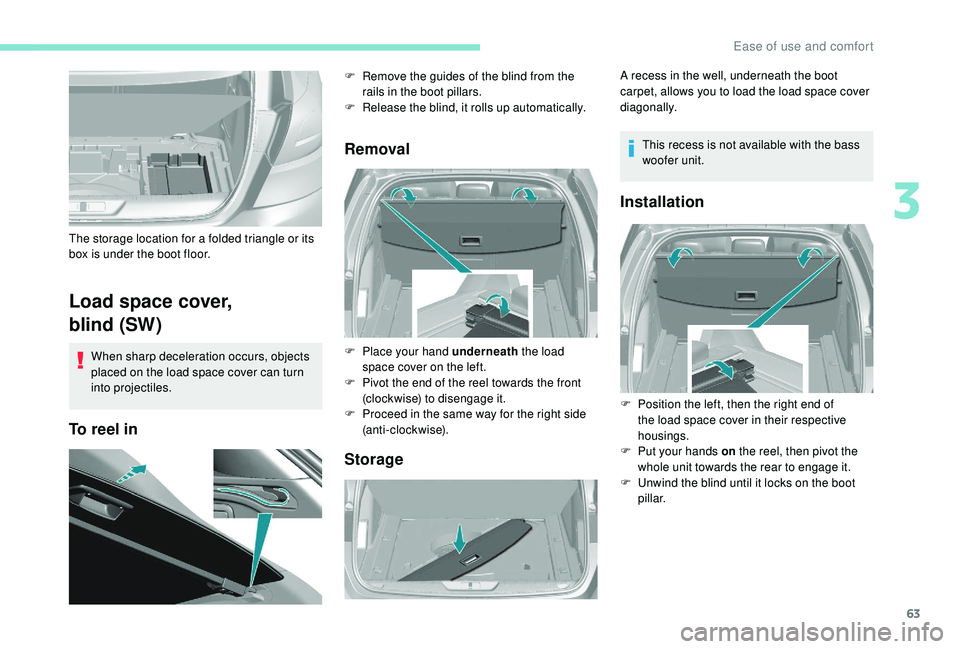
To reel inRemoval
Storage
The storage location for a folded triangle or its
box is under the boot floor. F
R
emove the guides of the blind from the
rails in the boot pillars.
F
R
elease the blind, it rolls up automatically.
F
P
lace your hand underneath the load
space cover on the left.
F
P
ivot the end of the reel towards the front
(clockwise) to disengage it.
F
P
roceed in the same way for the right side
(anti-clockwise). A recess in the well, underneath the boot
carpet, allows you to load the load space cover
diagonally.
This recess is not available with the bass
woofer unit.
Installation
F Position the left, then the right end of the load space cover in their respective
housings.
F
P
ut your hands on the reel, then pivot the
whole unit towards the rear to engage it.
F
U
nwind the blind until it locks on the boot
pillar.
3
Ease of use and comfort
Page 67 of 324

65
2.Front side window demisting-defrosting
vents.
3. Adjustable and closable side air vents.
4. Adjustable and closable central air vents.
5. Air outlets to the front footwells.
6. Air outlets to the rear footwells.Advice
Using the ventilation and air
conditioning system
F
T
o ensure that the air is distributed
evenly, keep the external air intake
grilles at the base of the windscreen,
the nozzles, the vents, the air outlets
and the air extractor in the boot free
from obstructions.
F
D
o not cover the sunshine sensor,
located on the dashboard; this is used
for regulation of the automatic air
conditioning system.
F
O
perate the air conditioning system for
at least 5 to 10
minutes, once or twice
a month to keep it in per fect working
o r d e r.
F
I
f the system does not produce cold air,
switch it off and contact a PEUGEOT
dealer or a qualified workshop.
When towing the maximum load on a
steep gradient in high temperatures,
switching off the air conditioning increases
the available engine power and so
improves the towing ability. If after an extended stop in sunshine, the
interior temperature is very high, first air
the passenger compartment for a few
moments.
Put the air flow control at a setting high
enough to quickly change the air in the
passenger compartment.
The condensation created by the air
conditioning results in a discharge of water
under the vehicle which is per fectly normal.
Servicing the ventilation and air
conditioning system
F
E
nsure that the passenger compartment
filter is in good condition and have the
filter elements replaced regularly.
We recommend the use of a combined
passenger compartment filter. Thanks to
its special active additive, it contributes
to the purification of the air breathed by
the occupants and the cleanliness of the
passenger compartment (reduction of
allergic symptoms, bad odours and greasy
deposits).
F
T
o ensure correct operation of the
air conditioning system, you are also
advised to have it checked regularly
as recommended in the Warranty and
Maintenance Record.
3
Ease of use and comfort
Page 72 of 324
70
F Press this button to activate/deactivate the function.
When the indicator lamp is on, the function is
activated.
Avoid prolonged use of recirculation
of interior air – Risk of misting and
deterioration of air quality!
The system activates automatically when
reverse gear is engaged.
Front demist –
defrost
These markings on the control panel
indicate the control positions for
rapid demisting or defrosting of the
windscreen and side windows.
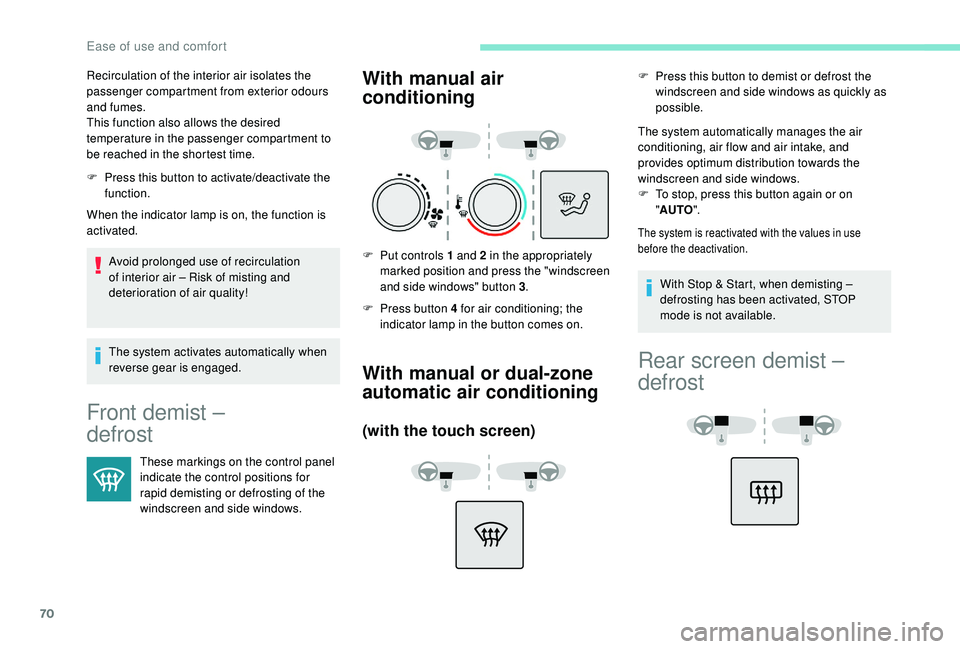
With manual air
conditioning
F Put controls 1 and 2 in the appropriately marked position and press the "windscreen
and side windows" button 3 .
F
P
ress button 4 for air conditioning; the
indicator lamp in the button comes on.
With manual or dual-zone
automatic air conditioning
(with the touch screen)
F Press this button to demist or defrost the windscreen and side windows as quickly as
possible.
The system automatically manages the air
conditioning, air flow and air intake, and
provides optimum distribution towards the
windscreen and side windows.
F
T
o stop, press this button again or on
" AUTO ".
The system is reactivated with the values in use
before the deactivation.
Recirculation of the interior air isolates the
passenger compartment from exterior odours
and fumes.
This function also allows the desired
temperature in the passenger compartment to
be reached in the shortest time.
With Stop & Start, when demisting –
defrosting has been activated, STOP
mode is not available.
Rear screen demist –
defrost
Ease of use and comfort
Page 83 of 324
81
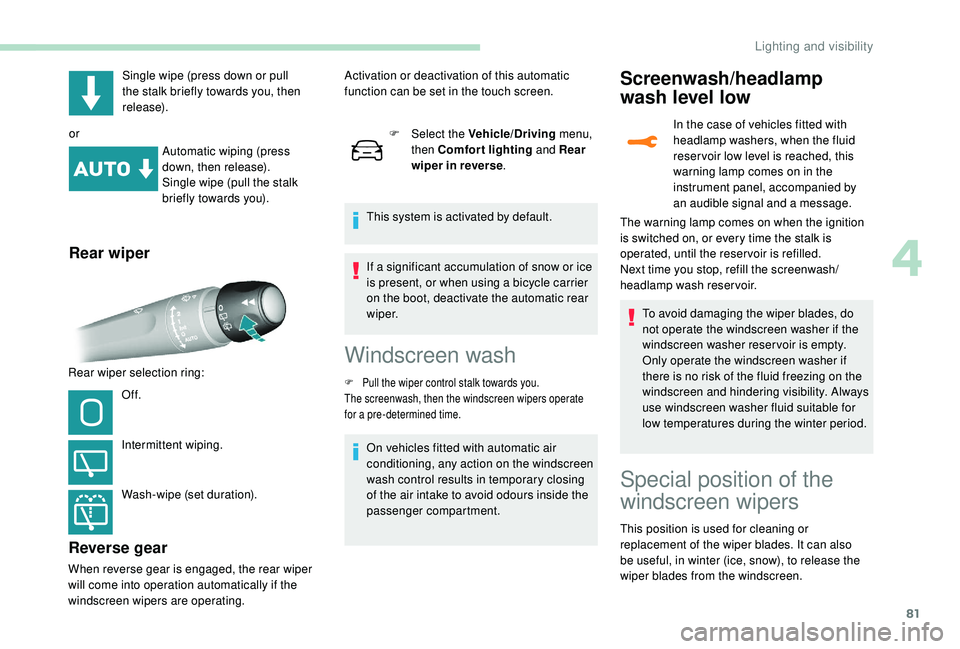
Single wipe (press down or pull
the stalk briefly towards you, then
release).
or Automatic wiping (press
down, then release).
Single wipe (pull the stalk
briefly towards you).
Rear wiper
Rear wiper selection ring:
Of f.
Intermittent wiping.
Wash-wipe (set duration).
Reverse gear
When reverse gear is engaged, the rear wiper
will come into operation automatically if the
windscreen wipers are operating. F
Sel
ect the Vehicle/Driving
menu,
then Comfort lighting and Rear
wiper in reverse .
This system is activated by default.
Activation or deactivation of this automatic
function can be set in the touch screen.
If a significant accumulation of snow or ice
is present, or when using a bicycle carrier
on the boot, deactivate the automatic rear
w i p e r.
Windscreen wash
F Pull the wiper control stalk towards you.
The screenwash, then the windscreen wipers operate
for a pre-determined time.
On vehicles fitted with automatic air
conditioning, any action on the windscreen
wash control results in temporary closing
of the air intake to avoid odours inside the
passenger compartment.
Screenwash/headlamp
wash level low
In the case of vehicles fitted with
headlamp washers, when the fluid
reser voir low level is reached, this
warning lamp comes on in the
instrument panel, accompanied by
an audible signal and a message.
To avoid damaging the wiper blades, do
not operate the windscreen washer if the
windscreen washer reservoir is empty.
Only operate the windscreen washer if
there is no risk of the fluid freezing on the
windscreen and hindering visibility. Always
use windscreen washer fluid suitable for
low temperatures during the winter period.
The warning lamp comes on when the ignition
is switched on, or every time the stalk is
operated, until the reser voir is refilled.
Next time you stop, refill the screenwash/
headlamp wash reservoir.
Special position of the
windscreen wipers
This position is used for cleaning or
replacement of the wiper blades. It can also
be useful, in winter (ice, snow), to release the
wiper blades from the windscreen.
4
Lighting and visibility
Page 89 of 324
87
Definitions
Anti-lock braking system (ABS)
and electronic brake force
distribution (EBFD)
This system improves the stability and
manoeuvrability of your vehicle when braking and
contributes towards improved control on corners, in
particular on poor or slippery road sur faces.
The ABS prevents wheel lock in the event of
emergency braking.
The EBFD manages the braking pressure wheel by
wheel.
Emergency braking assistance
(EBA)
In an emergency, this system permits the
optimum braking pressure to be reached
more quickly, therefore reducing the stopping
distance.
It is triggered in relation to the speed at which
the brake pedal is pressed. The effect of this is
a reduction in the resistance of the pedal and
an increase in braking efficiency.
Anti-slip regulation (ASR)
The ASR system (also known as Traction Control)
optimises traction in order to limit wheel slip by
acting on the brakes of the driving wheels and
on the engine. It also improves the directional
stability of the vehicle on acceleration.
Dynamic stability control (DSC)
If there is a difference between the path
followed by the vehicle and that required by
the driver, the DSC monitors each wheel and
automatically acts on the brake of one or more
wheels and on the engine to return the vehicle
to the required path, within the limits of the laws
of physics.
Trailer stability assist (TSA)
Depending on the version, your vehicle has
a system allowing control of the vehicle to be
retained when towing a trailer, so as to avoid
the risk of snaking.
Intelligent traction control
system
Depending on version, your vehicle has a
system to help driving on snow: intelligent
traction control.
This system detects situations of poor sur face
grip that could make it difficult to move off
or make progress on deep fresh snow or
compacted snow.
In these situations, the intelligent traction
control limits the amount of wheel spin to
provide the best traction and trajectory control
for your vehicle. The use of snow tyres is strongly
recommended on sur faces offering low
levels of grip.
Anti-lock braking system
(ABS) and electronic brake
force distribution (EBD)
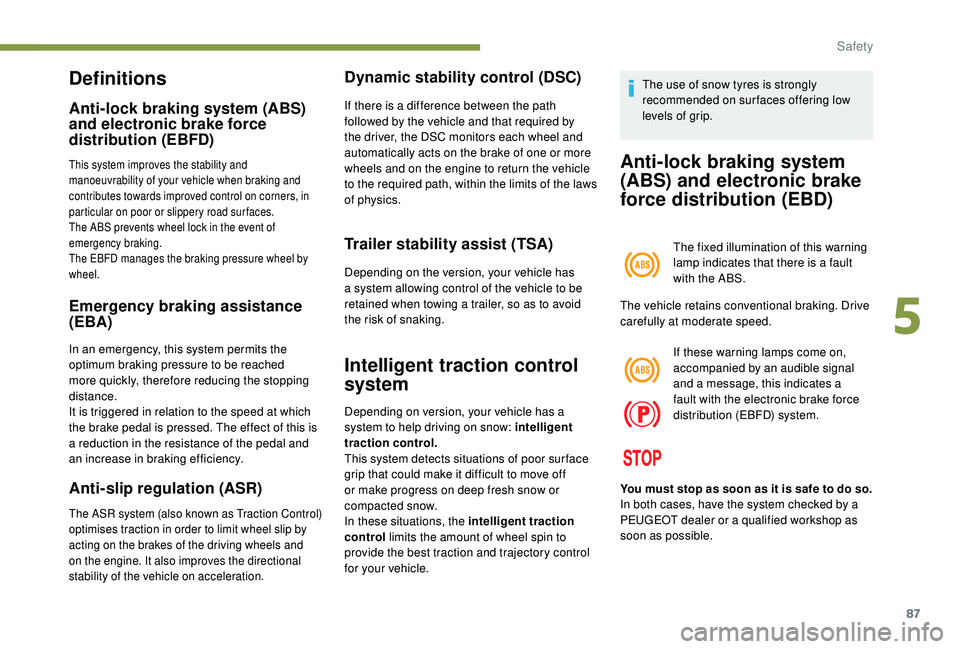
The fixed illumination of this warning
lamp indicates that there is a fault
with the ABS.
The vehicle retains conventional braking. Drive
carefully at moderate speed.
If these warning lamps come on,
accompanied by an audible signal
and a message, this indicates a
fault with the electronic brake force
distribution (EBFD) system.
You must stop as soon as it is safe to do so.
In both cases, have the system checked by a
PEUGEOT dealer or a qualified workshop as
soon as possible.
5
Safety
Page 91 of 324

89
ASR/DSC
These systems offer increased safety
in normal driving, but they should not
encourage the driver to take extra risks or
drive at high speed.
It is in conditions of reduced grip (rain,
snow, ice) that the risk of loss of grip
increases. It is therefore important for your
safety to keep these systems activated in
all conditions, and particularly in difficult
conditions.
The correct operation of these
systems depends on obser vation of
the manufacturer's recommendations
regarding as much the wheels (tyres and
rims), braking and electronic components
as the assembly and repair procedures
used by PEUGEOT dealers.
The use of snow tyres is recommended,
in order to be able to benefit from the
efficiency of these systems in winter
conditions.
In this case, it is essential to equip the
four wheels with tyres approved for your
vehicle.Trailer stability assist (TSA)
When towing, this system reduces the risk of
the vehicle or trailer swaying.
Operation
The system is activated automatically when the
ignition is switched on.
The electronic stability control (ESC) must not
have any faults.
If the system detects oscillations (snaking) in
the movement of the trailer at speeds between
37 and 99 mph (60 and 160 km/h), it acts
on the brakes to stabilise the trailer and, if
necessary, reduces the engine power to slow
down the vehicle.
The correction is signalled by the
flashing of this indicator lamp in the
instrument panel and illumination of
the brake lamps.
For information on the weights and towed
loads, refer to the "Technical data" section or
the registration certificate for your vehicle.
To ensure complete safety while driving with
a To w b a r d e v i c e , refer to the corresponding
section.
Malfunction
Should a fault occur with the system,
this warning lamp comes on in the
instrument panel, accompanied by
the display of a message and an
audible signal.
If you continue to tow a trailer, reduce your
speed and drive carefully!
Contact a PEUGEOT dealer or a qualified
workshop to have the system checked.
The trailer stability assist system
offers increased safety in normal
driving conditions, provided that the
recommendations on towing a trailer are
obser ved. It must not encourage the driver
to take additional risks, such as towing
a trailer in adverse operating conditions
(overloading, failure to obser ve the trailer
nose weight, worn or under-inflated tyres,
faulty braking system, etc.), or to drive at
too high a speed.
In certain cases, the swaying of the trailer
may not be detected by the ESC system,
particularly with a light trailer.
When driving on slippery or poor sur faces,
the system may not be able to prevent
sudden swaying of the trailer.
5
Safety
Page 93 of 324
91
Front and rear seat belt warning
lamp(s)
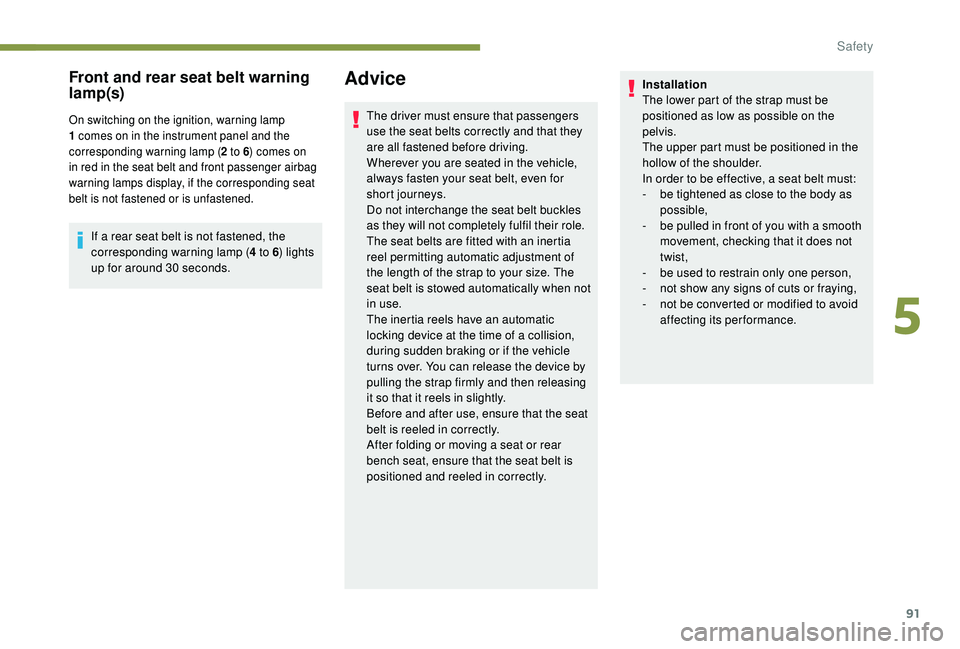
On switching on the ignition, warning lamp
1 comes on in the instrument panel and the
corresponding warning lamp (2 to 6) comes on
in red in the seat belt and front passenger airbag
warning lamps display, if the corresponding seat
belt is not fastened or is unfastened.
If a rear seat belt is not fastened, the
corresponding warning lamp ( 4 to 6) lights
up for around 30
seconds.
Advice
The driver must ensure that passengers
use the seat belts correctly and that they
are all fastened before driving.
Wherever you are seated in the vehicle,
always fasten your seat belt, even for
short journeys.
Do not interchange the seat belt buckles
as they will not completely fulfil their role.
The seat belts are fitted with an inertia
reel permitting automatic adjustment of
the length of the strap to your size. The
seat belt is stowed automatically when not
in use.
The inertia reels have an automatic
locking device at the time of a collision,
during sudden braking or if the vehicle
turns over. You can release the device by
pulling the strap firmly and then releasing
it so that it reels in slightly.
Before and after use, ensure that the seat
belt is reeled in correctly.
After folding or moving a seat or rear
bench seat, ensure that the seat belt is
positioned and reeled in correctly. Installation
The lower part of the strap must be
positioned as low as possible on the
pelvis.
The upper part must be positioned in the
hollow of the shoulder.
In order to be effective, a seat belt must:
-
b
e tightened as close to the body as
possible,
-
b
e pulled in front of you with a smooth
movement, checking that it does not
twist,
-
b
e used to restrain only one person,
-
n
ot show any signs of cuts or fraying,
-
n
ot be converted or modified to avoid
affecting its performance.
5
Safety